You can set up automatic redirects of incoming contacts to redirection groups. You can specify the redirection destination for each group, as well as the percentage of incoming traffic that is allocated to each group.
This guide will walk you through the steps to configure and manage the redirection allocation. Note that any existing queues with a single redirect have been ported over to this new configuration and automatically had their percent allocations set at 100%.
Permissions
To configure automatic deflections, ensure you've granted the All other features permission within the User & Teams settings: Roles and Permissions.
You can enable All other features within the Settings - Queue section on the Roles and Permissions page.
Enable automatic redirection
To enable automatic redirections, follow these steps:
Go to Settings > Queue > IVR > [all queue levels] to access the Automatic Redirection percent allocation configuration. On the Settings for Queue page, locate the Automatic Redirection section.
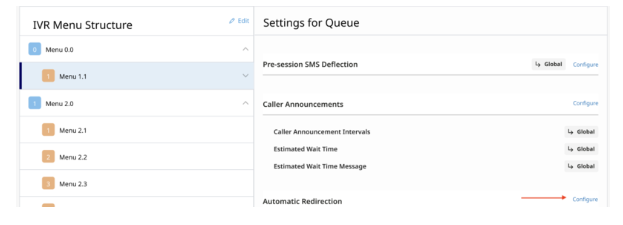
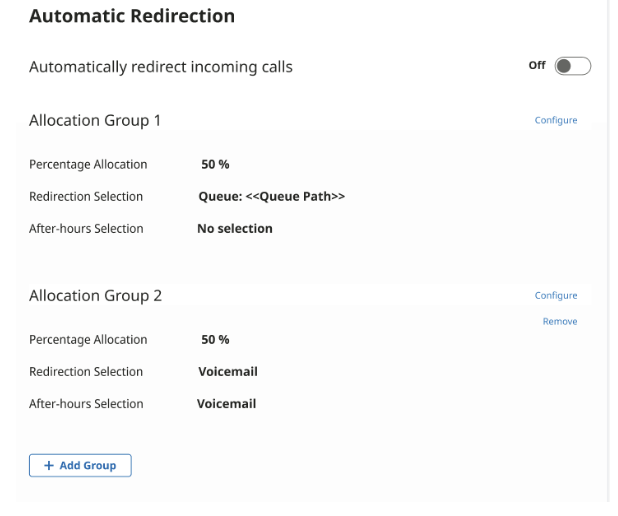
Toggle the switch to enable automatic redirection at the queue level if it's not already enabled. Select Configure.
Set the percent allocation for automatic redirection. Ensure that the total allocation does not exceed 100%. You can add up to 100 redirects.
Create redirection groups
Go to the *Settings for Queue page Automatic Redirection section (navigation above).
Click the Add Group button to create a new redirection group. The default redirection percentage will be 0 for any new group.
Assign a label to the redirection group for identification.
Configure the percentage allocation for the group. The total allocation across all groups must not exceed 100%.
Select the redirection destination for the group (for example: messages, queues, phone numbers, voicemail, outbound SIP transfers).
Configure after hours deflection settings if needed.
Manage redirection groups
Edit Group: click the Configure button to edit the settings for a specific group.
Delete Group: use the Disable button to delete a redirection group if necessary.
Adjust Allocation: update the percentage allocation for each group as needed. The first group will automatically adjust based on changes to other groups.
After hours deflections
If after hours deflection is required, enable the After Hours toggle switch for the redirection group.
Configure custom after hours deflections such as voicemail, alternative queues, or message playback.
Ensure correct percentage levels for after hours deflections based on your business needs.
Saving and back options
After making changes, click the Save button to save your settings.
Use the Back to Settings button to return to queue configurations after saving.
Logging
The percentage_redirection parameter indicates whether a call is routed
through percentage redirection or not.
Example
This JSON snippet represents a scenario where call id 200 was redirected to
Redirection Group 2, which triggered outbound SIP redirection during after
hours.
{
  "id": 200,
  ....
  "automation_redirection": {
    "percent_redirection": true,
    "redirection_group_settings": [
      {
        "group_label": "Redirection Group 2",
        "destination": null,
        "after_hours": true,
        "ah_destination": {
            "type": "SIP",
            "sip_address" : "sip:1-999-123-4567@voip-provider.example.net"
           }
      }
Redirection Types
The redirection type and destination recorded when applicable:
Message
"type": "Message"
Phone
"type": "Phone Number","phone_number" : "+12016441484"
Queue
"type": "Queue",
"queue_id" : 2938,
"queue_lang" : "en"
Voicemail
"type": "Voicemail"
SIP
"type": "SIP",
"sip_address" : "sip:1-999-123-4567@voip-provider.example.net"