This integration enables agents to access the Contact Center AI Platform (CCAI Platform) adapters directly from Kustomer.
Agents can log into Contact Center AI Platform and accept calls and chats from their Kustomer workspace. When agents receive calls through the Contact Center AI Platform adapter, Kustomer automatically creates and logs new customers and conversations. This allows agents to view, search, and report on call and chat data.
The following steps describes how to install and configure Contact Center AI Platform through the Kustomer app directory.
Before you begin
Before you begin, have the subdomains for your organization ready.
App installation and configuration in Kustomer
To install and configure the Kustomer app, follow these steps:
Go to Apps and select Explore Directory.
Search for UJET in the App directory, then select Install.
Enter the subdomain of the UJET URL for your organization.
Select Install.
Create a Kustomer API key in the Kustomer app
To create a Kustomer API key in the Kustomer app, follow these steps:
Go to Settings > Security > API Keys.
Select + Add API Key.
Enter the following:
UJETin the Name field.Select org.admin and org.user in the roles drop-down menu.
Select No expiration in the Expires (in days) drop-down menu.
Select Create, and copy the token.
You won't be able to view this token again after you close this window, so make sure to save it in a secure location. You'll need the token in a later step.
Enter the Kustomer subdomain and access token in developer settings
To add a Kustomer subdomain and access token in developer settings, follow these steps:
In the CCAI Platform portal, click Settings > Developer Settings. If you don't see the Settings menu, click Menu.
Under Agent Platform, select Kustomer.
Enter the Kustomer subdomain.
Paste the API Key. This is the API Key you added in Create a Kustomer API key in the Kustomer app.
Click Save.
External ID Prefix
Enables multiple Contact Center AI Platform instances with one Kustomer instance to avoid external ID conflicts.
For Admins only: Avoid external conflicts in the administrator environment.
Testing the Integration
Before integration testing, you have to force reload the page in your browser to apply and display app settings changes in Kustomer.
To force reload the page:
For Windows: Ctrl + Reload this page: Refresh, or Ctrl + F5.
For macOS: Shift + Reload this page: Refresh.
After the Contact Center AI Platform app is configured, your team can go to Widgets on the navigation bar and select the appropriate voice or chat widget to login and access their Contact Center AI Platform adapters in Kustomer.
Assign an agent to a queue in Kustomer
To assign an agent to a queue in Kustomer, they must be a member of a team. Before you can assign them you need to have an active team.
If you already have an active team, go to Assign an agent with an active team.
If there is no active team, follow these steps to create one:
Click + Add team.
In the modal that appears, enter a Name and Display Name for your new team.
Name: This is the internal full name for your team. In most cases this is the same as the display name, but you might use a different internal team name for reporting or administrator purposes.
Display Name: This is the name of the team that appears to end-users.
Click Create Team.
While editing a team, click the Members tab.
Enter their name or select it from the field.
Click Save Changes.
Go to the Routing Profile tab.
Click the Enable Team Routing toggle to the on position.
In the External Queues field, select UJET.
Click Save Changes.
Assign an agent with an active team
To assign an agent with an active team in the Kustomer app, follow these steps.
Go to Settings > Users > Teams > Team Management
Under Activated, click Edit on the queue that you want to edit. The Edit panel appears.
Go to Routing Profile.
Click the Team Routing toggle to the on position.
In the External Queues field, click UJET.
Click Save Changes.
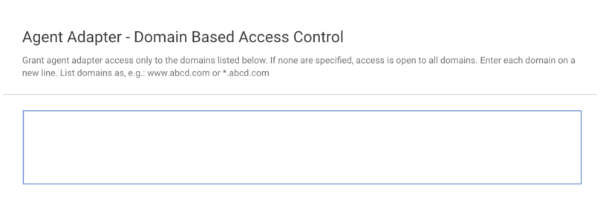
Add domain based access control for the agent adapter
Domain-based access control ensures security while also allowing you to define and control which domains can display the agent adapter.
Add your domains in developer settings
To add domains in developer settings, follow these steps:
In the CCAI Platform portal, click Settings > Developer Settings. If you don't see the Settings menu, click Menu.
Go to Agent Adapter - Domain Based Access Control and enter each domain as a new line. The format is
*.domain—for example,*.mycompany.com.
Specifying a domain
The format for specifying a domain for a Contact Center AI Platform instance can be any
valid domain name, and it can include a wildcard (*) to match an arbitrary
number of subdomains. The wildcard must be placed at the beginning of the
domain, and it will match any subdomains. Additionally, you can specify a
protocol and a port using the following syntax:
<protocol>://<domain>:<port>.
The port can be a wildcard, but the protocol cannot be a wildcard. If a protocol
is specified, it will match only that protocol and all other protocols won't
be able to display the adapter. For example, https://some.example.domain.com
won't match http://some.example.domain.com or
mail://some.example.domain.com.
CRM specific domains
Use the following domain naming conventions when entering your CRM domain.
Salesforce: *.visualforce.com *.force.com *.salesforce.com
Zendesk: *.zdusercontent.com *.zendesk.com
MS Dynamics: *.crm.dynamics.com
Kustomer: *.kustomerapp.com
HubSpot: *.hubspot