Salesforce installation guide for Salesforce version 1.41.
Salesforce Professional, Enterprise, Performance, Unlimited, and Developer Editions all integrate with Contact Center AI Platform (CCAI Platform).
Support for Salesforce Classic & Lightning
Installation link: Salesforce Enterprise 1.41
Installation steps
The Agent Adapter installed in Salesforce allows agents to take calls and chats directly in a Salesforce Organization (Org). Versions after 1.17 support both Classic Experience and Lightning Experience.
The installation consists of these steps:
Data required to perform installation
Field Name |
Where to Find |
Where to Enter |
|---|---|---|
Organization Id |
Salesforce |
Developer Settings in Portal |
Organization Name |
Salesforce |
Developer Settings in Portal |
Connected App Consumer Key |
Salesforce |
Developer Settings in Portal |
Connected App Consumer Secret |
Salesforce |
Developer Settings in Portal |
Tenant name |
Admin Portal <companyName>.<domain> |
Custom Settings in SFDC |
Customer Key |
Developer Settings |
Custom Settings in SFDC |
Secret |
Developer Settings |
Custom Settings in SFDC |
Connected App |
Salesforce Connected App |
Custom Settings in SFDC |
Locate Org ID and Org Name and Add to the Portal
In this section, you will set up an initial connection between the CCAI Platform portal and Salesforce by finding the required org information and adding it into the CCAI Platform portal.
Prerequisites
Access to the Company Information page within Salesforce.
User with Admin role assigned in the Portal to access Developer settings
Installation steps
In Salesforce, go to Setup > Settings > Company Settings > Company Information.
Locate the Salesforce.com Organization Name and Organization ID in Company Information.
Copy both values.
In another browser tab, open the CCAI Platform portal.
Go to Settings > Developer Settings > CRM > Agent Platform.
Select Salesforce.
Locate the Salesforce Organization ID and Salesforce Organization Name fields.
Enter the
Salesforce Organization IDinto the Salesforce Organization ID field and theSalesforce Organization Nameinto the Salesforce Organization Name field.Click Save.
Install the App in Salesforce
In this step we will install the app in Salesforce.
Prerequisite
Salesforce user must have privileges to install packages into an Organization.
Sign in to Salesforce if prompted to do so.
Select Install for All Users.

Select Install (or Upgrade if your Org used a previous version). This may take a few minutes.
Once the installation is complete, click Done.
To verify the package installation in Salesforce, go to Platform Tools > Apps > Packaging > Installed Packages.
Create a custom permission set and apply to all agents
In this section, you will create a custom permission set (with the minimum requirements needed for integration), update it with case and contact permissions, and apply it to all agents who use the CCAI Platform portal.
Prerequisites
User must be a Salesforce Admin to configure this section.
A list of agents who will be using the adapter in Salesforce.
Steps
In Salesforce, go to Administration > Users > Permission Sets.
Locate the CC_Agent Permission Set and click the Clone link.
Rename the cloned Permission Set and click Save. For example Company_Agent_Clone.
From the Permission Sets screen, click the name of the new cloned Permission Set.
Click Object Settings, in the Apps section.
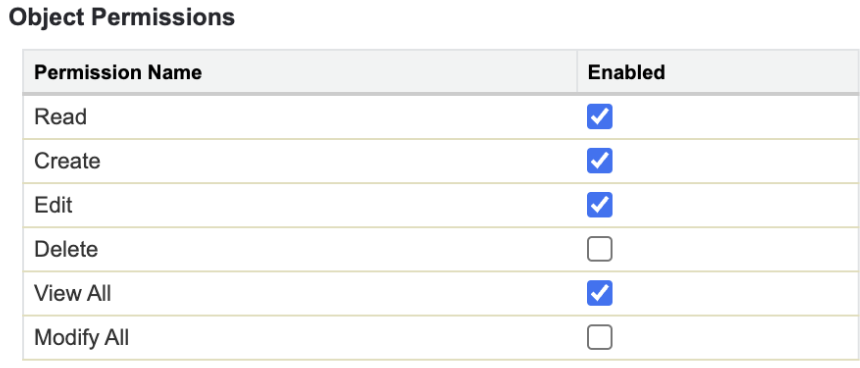
Configure the Object Settings for Accounts, Cases, Contacts, and Leads using this table:
| Object | Read | Create | Edit | Delete | View All | Modify All |
|---|---|---|---|---|---|---|
| Cases | X | X | X | X | ||
| Contacts | X | X | X | X | ||
| Accounts | X | X | X | X | ||
| Leads | X | X | X | X |
To configure these settings, click the Object Name. Click Edit (at the top).
Use the checkboxes in the Object Permissions section to enable each of the required permissions (Read, Create, Edit, and View All).
Click Save.
Repeat these steps for each of the four objects (Accounts, Cases, Contacts, and Leads).
Configure the tasks object's Type field permission.
| Object | Field | Read Access | Edit Access |
|---|---|---|---|
| Tasks | Type | X | X |

Once all configurations are done, click Manage Assignments.
Click the Add Assignments button.
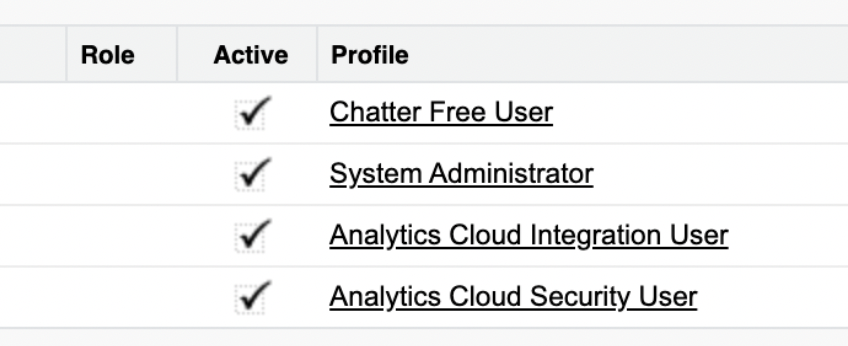
Use the checkboxes to select the users, then click Assign.
Create a connected app
Create a connected app in Salesforce, a required step for app version 1.15 and later.
A Connected App is an OAuth application that allows the CCAI Platform portal to communicate with Salesforce.
Prerequisites
Copy your Portal URL. It should follow this structure:
https://<tenant&>.<domain>.
Steps
In Salesforce, go to Setup > Apps > App Manager.
Click the New Connected App button.
Update the Basic Information fields with the contents:
Under API (Enable OAuth Settings), select the Enable OAuth Settings checkbox and update the settings using the table:
Field Name
Field Value
Enable OAuth Settings
Selected (TRUE)
Callback URL
https://<tenant>.<domain>/v1/salesforce/oauth_callback
Selected OAuth Scopes
Access the identity URL service (id, profile, email, address, phone)
Manage user data using APIs (API)
Perform requests at any time (refresh_token, offline_access)
Require Proof Key for Code Exchange (PKCE) Extension for Supported Authorization Flows
Unselected (False)
Required Secret for web flow
Selected (TRUE)
Require Secret for Refresh Token flow.
Selected (TRUE)
Under the Canvas App Settings, update the settings with the following:
Field Name
Field Value
Canvas
Selected (TRUE)
Canvas App URL
https://<tenant>.<domain>/v1/salesforce/start
Access Method
Signed Request (POST)
Locations
Console
Lightning Component
Open CTI
Visualforce Page
Navigate to the bottom of the page and click Save.
Click Continue to dismiss the confirmation message and wait for the Connected App to be created.
Go to Setup > Apps > Connected Apps > Manage Connected Apps.
Click the name of the app from the Connected Apps screen.
Click Manage.
Click the Edit Policies button.
Under OAuth policies, select the Admin approved users are pre-authorized option from the Permitted Users drop-down:

Click Save at the bottom of the page to return to the Manage screen for the Connected App.
Navigate to the Profiles section and click Manage Profiles.
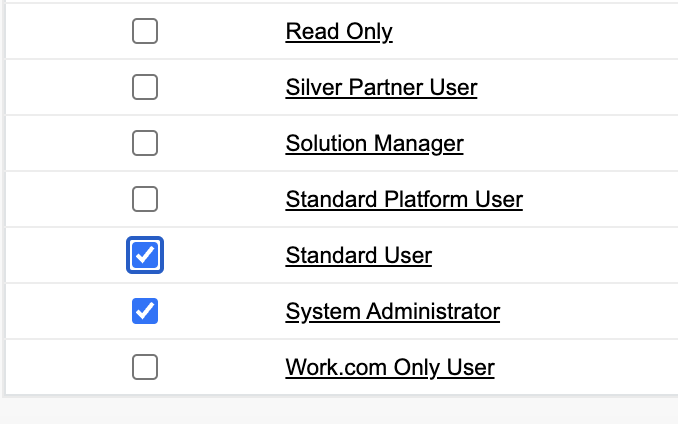
On the Application Assignment Profile screen, select the profile options your company will use, such as the System Administrator or another profile an agent may use.
In this example, we are selecting Standard User and System Administrator:
Click Save to return to the manage connected app view.
A Connected App has been created.To verify the connected app was created, check if the app is listed in Settings > Apps > App Manager.
Enter Connected App Consumer Key and Secret into Admin Portal
Enter client_id key and Secret into the Salesforce Admin Portal.
Prerequisites
Finish the steps in the Create a connected app previous section.
User must have access to the email address associated with Salesforce user account to receive an identity verification email.
Must be a user with the administrator role in the CCAI Platform portal.
Steps
Go to Setup > Create > Apps > Connected Apps and find your Connected App.
Click the arrow to the far right of the row.
Click View.
Click Manage consumer details.

Verify your identity by entering the verification code sent to your email address.
Copy the Consumer key and Consumer secret values displayed.

In the CCAI Platform portal, go to Settings > Developer Settings and locate the Connected App Consumer Key and Connected App Secret fields.
Paste the Consumer Secret into the Connected APP Consumer Secret field.
Paste the Consumer Key from Salesforce into the Connected APP Consumer Key field.
Click Save.
The Connected App information has been added to the CCAI Platform portal.
Manage the Configuration in Salesforce
Configure App version 1.22 and later.
Prerequisites
App version for Salesforce 1.22 or later is installed for the Salesforce Org.
Get your company's Company Key and Company Secret Code in the Admin Portal by going to Settings > Developer Settings.
Connected App is created (see the Create a connected app section above).
Steps
In Salesforce, go to Setup > Apps > Packaging > Installed Packages.
Locate the CC_Agent_App and click Configure.
On the new tab that opens, click Add New Configuration.
Complete the fields using the following values:

Field Name
Field Value
Location for Field
Setup Owner
Organization or Profile
If you want to set organizational level settings, select Organization. If you want to add profile level settings, select Profile. If you select Profile you can choose a profile for the settings to be applied to.
Organization
Your organization name displays here and is read-only.
Profile
Your profile list displays here and you can choose a Profile if you selected Profile for Setup Owner.
CompanyKey
Company Key
CCAI Platform portal > Settings > Developer Settings
CompanySecret
Company Secret
CCAI Platform portal > Settings > Developer Settings
Tenant
Tenant Name
In CCAI Platform portal:
https://<tenant>.<domain>
Important: only enter the <tenant> portion of the Portal URL in this field.
Note: This field has a 100 char limit.
ConnectedApp
Connected App API name
Match the name in Create a connected app (such as CCaaS_Platform_Connected_App)
If you select Profile from the Setup Owner drop-down, you can select a profile that will be applied to this new configuration. If Organization was selected from Setup Owner, the Profile field is disabled.
Click Save Configuration and you are returned to the list screen
Once the configuration is completed, close the browser window.
Manage the Call Center
Configure a Call Center in Salesforce to give agents access to the adapter.
Prerequisites
- Package has been installed (see section 2. Install the App in Salesforce above)
Steps
In Salesforce go to Setup > Feature Settings > Service > Call Center > Call Centers.
Locate and click the Call Center titled Softphone_v2.
Click Manage Call Center Users.
Click Add More Users.
Use the filter fields to search for specific users and then click Find. To view all users, click Find.
Use the checkboxes in the search results to select the users that will use the Portal.
Click Add to Call Center.
To verify the result, go to Call Center and see that the users are listed.
After Installation
Set up the console for Salesforce Classic or Salesforce Lightning:
Console setup for Salesforce Classic
Console setup for Salesforce Lighting
Console setup for Salesforce Classic
Configure the Console App to use the adapter in the Salesforce Classic Experience.
Prerequisites
Complete Salesforce installation
Organization is configured to use Salesforce Classic experience.
Steps
In Salesforce, go to Setup > Build > Create > Apps.
On the Apps screen, locate the Sample Console and click Edit.
To edit the Sample Console, go to the Choose Console Components field and select the UJET_Chat component from the Available Items list.
Click Add to move the component to the Selected Items list.
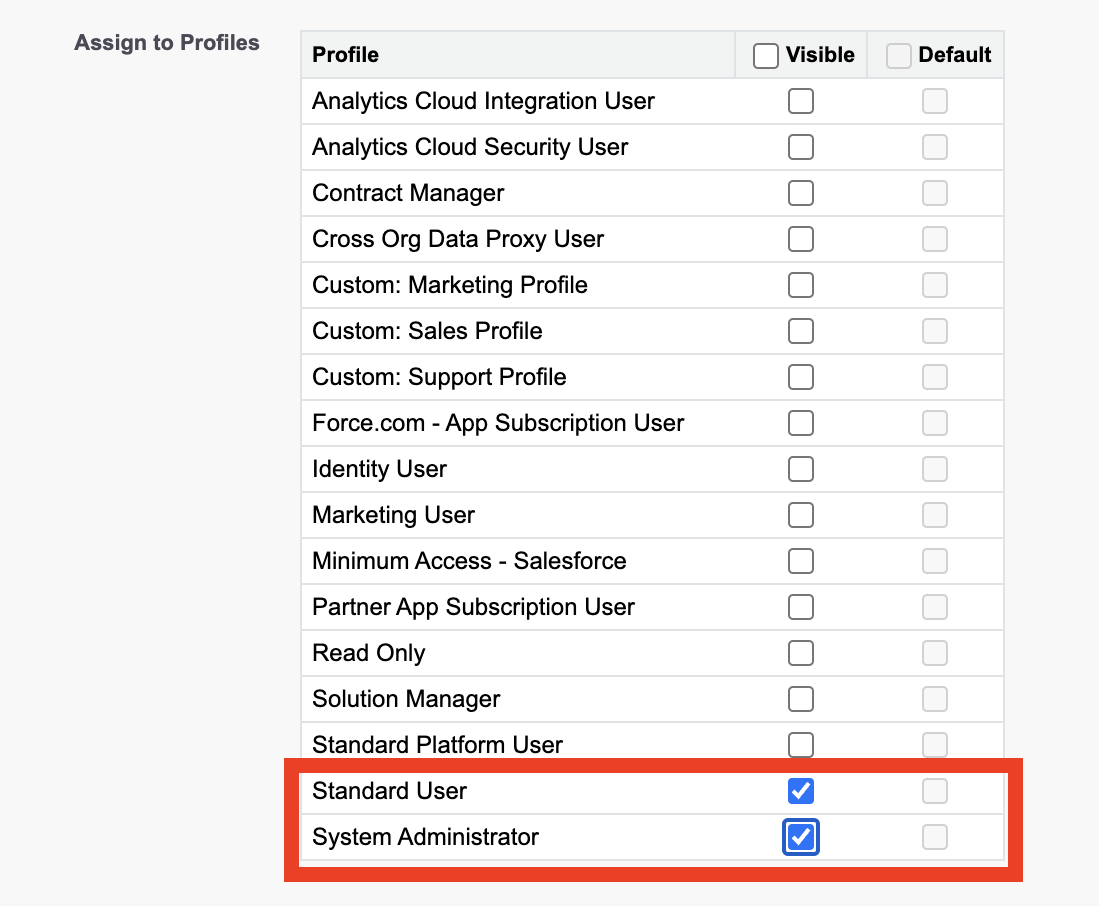
Go to the Assign to Profiles section and select the checkboxes for the profiles with the permission set that you configured in the previous section.
Click Save.
Verify the adapter is shown in the Console as expected:
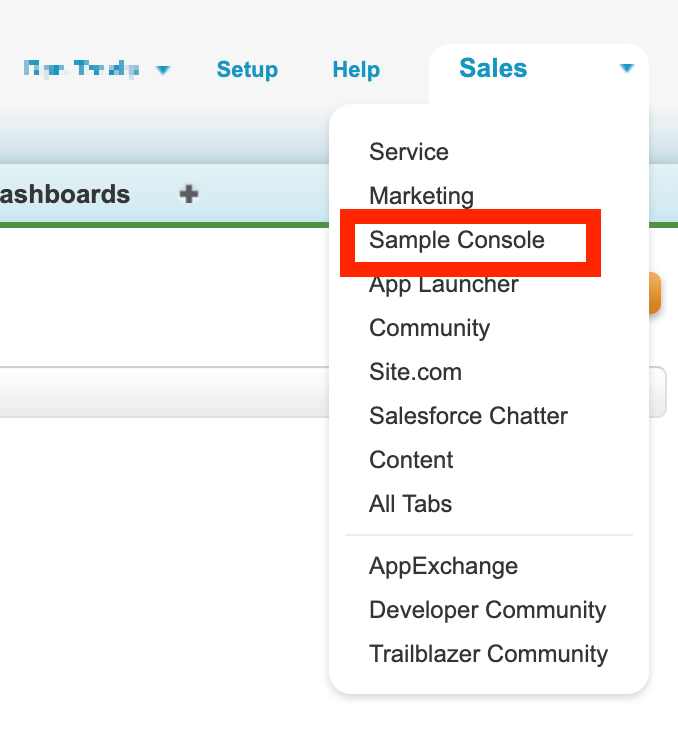
Use the app selector in the Sales menu at the top right corner of the screen to select Sample Console:
Result
Salesforce is set up in Salesforce Classic Console.
Console setup for Salesforce Lightning
Configure the Console App to use the adapter in the Salesforce Lightning Experience.
Prerequisites
Organization uses the Lightning Experience.
Must have System Administrator profile or be a user who can manage Apps.
Domain deployment for user with Salesforce is completed.
Steps
In Salesforce go to Setup > Apps > App Manager.
Locate the Sales and/or Service Console app that has Lightning in the App Type column.
Click the arrow drop-down at the far right and select Edit.
Click Utility Items from the App Settings menu on the left.
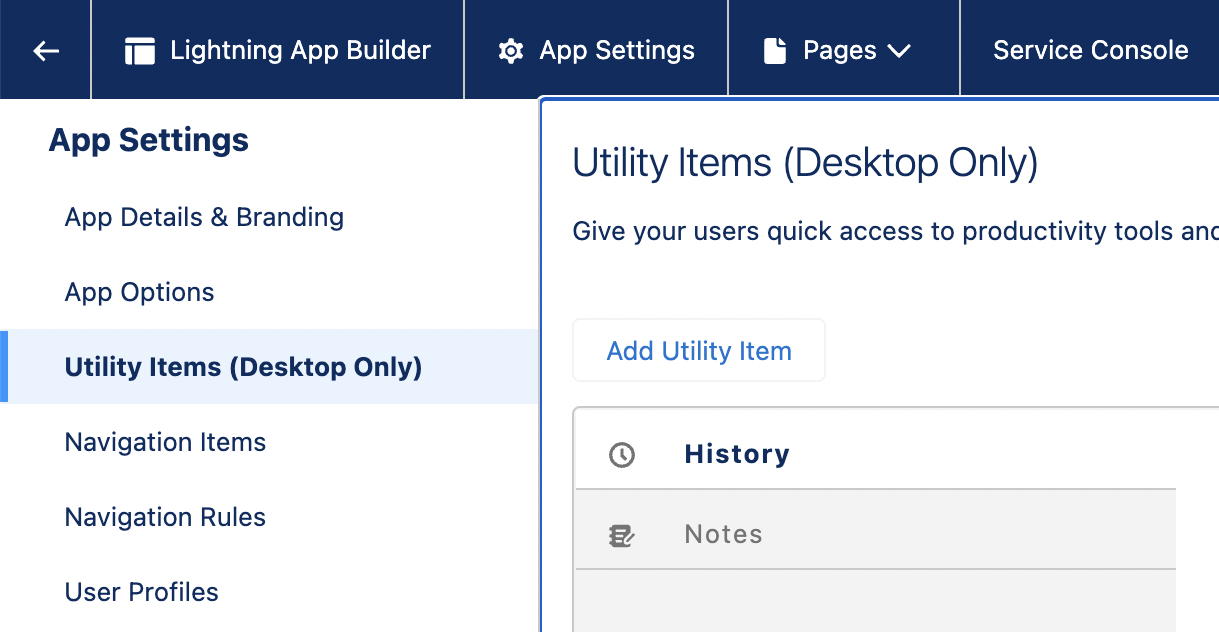
Click Add Utility Item and select the Open CTI Softphone option.
Configure the Label field.
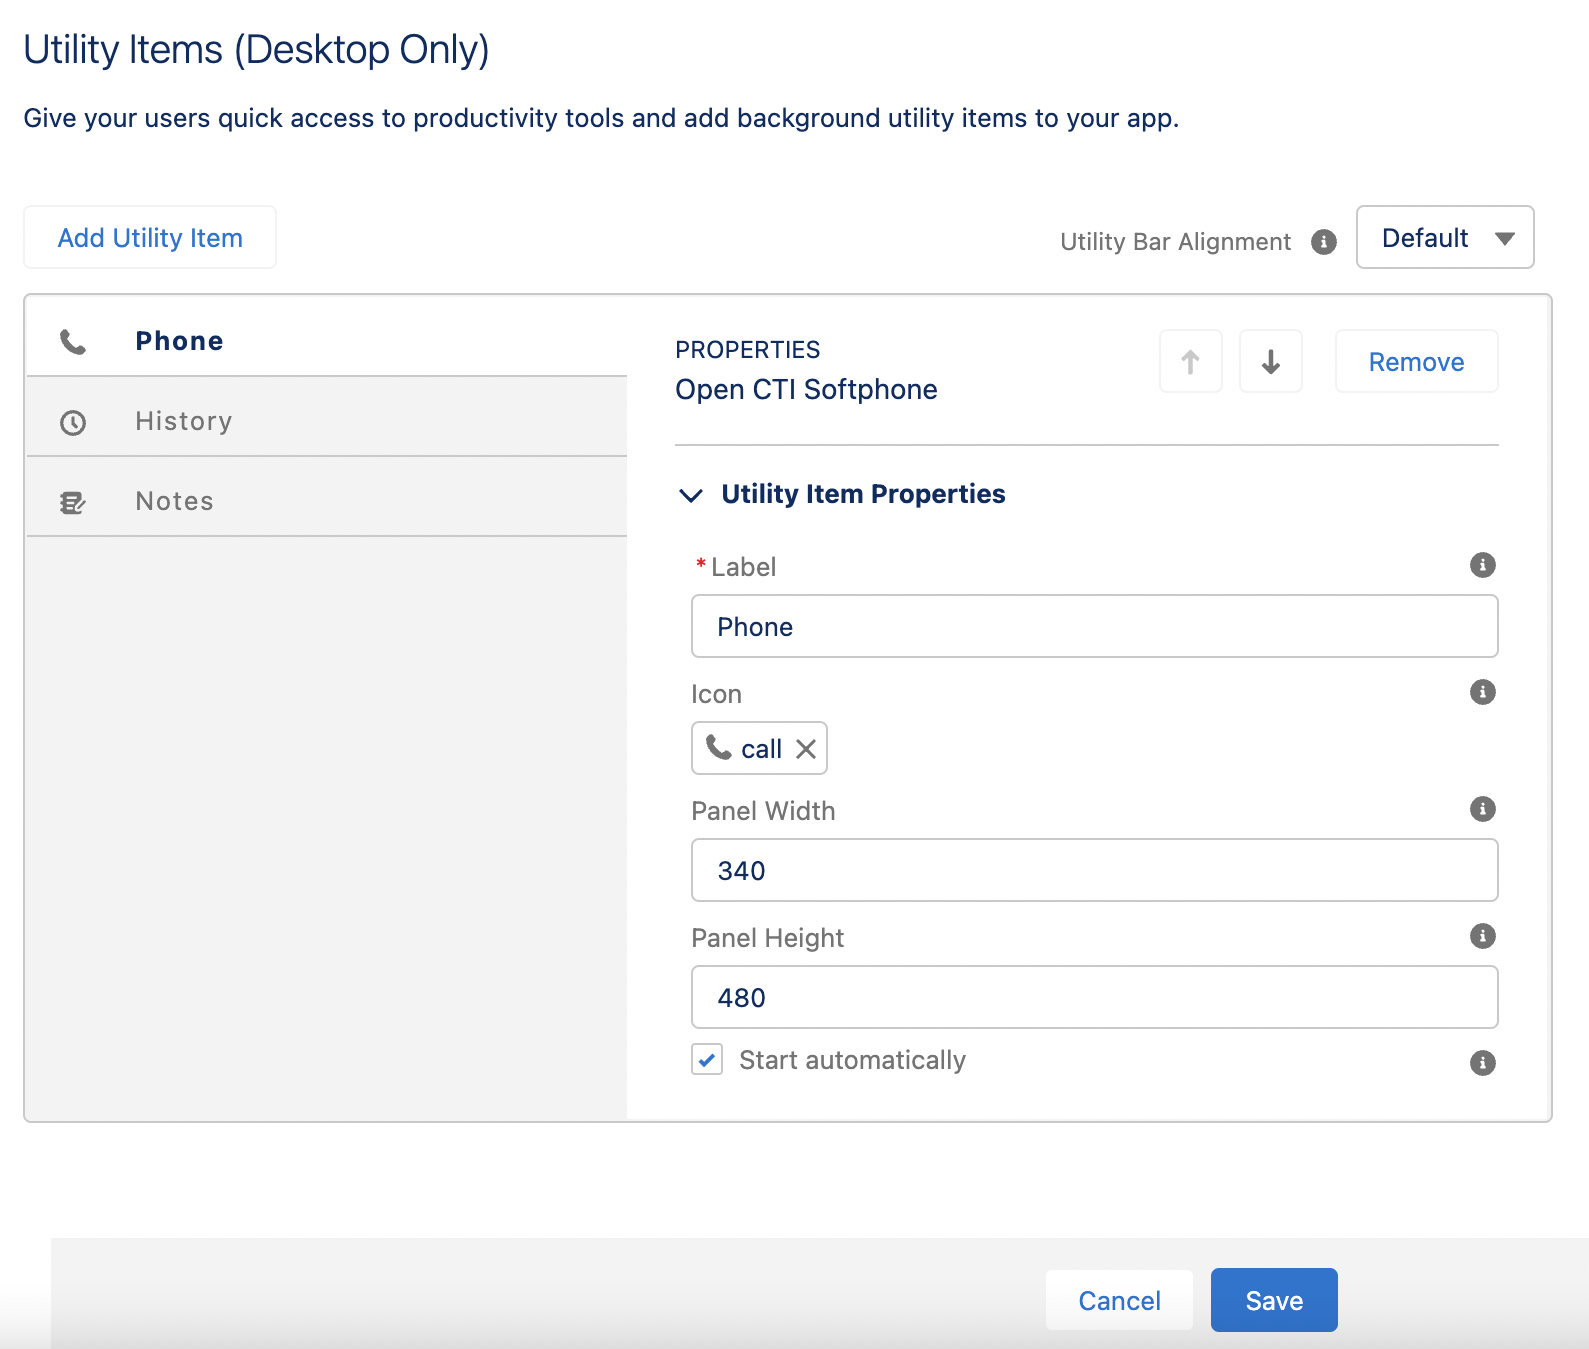
Click Add Utility Item again and select Chat Component in the Custom- Managed section.
Update the Label as needed.
Configure the Icon as needed.
Click Save.
Repeat Steps 2-10 if installing additional Lightning console apps.
The utility bar has been configured with the components. To confirm that Salesforce is set up with the Lightning Experience, check the utility bar in the console.
