To allow metadata from CRM records to be analyzed quickly, the Contact Center AI Platform (CCAI Platform) Web & Mobile SDKs can push data into CRM custom fields.
Custom CRM field mapping provides the ability to fully customize the CRM fields and what data is pushed into those fields from the CCAI Platform Web & Mobile SDKs.
Mobile SDK API example
The following sections outline an example specific to the mobile SDK.
Data from SDK to server
{
    custom_data: { # same format with previous custom data from SDK
        data_name: {
            value: value,
            type: string,
            label: "Data Name",
        },
        device: { # example
            value: "iOS",
            type: "string",
            label: "Device Type"}
    }
}
Data from server to CRM adaptor
{
    key: {
        crm_field: "crm custom field name",
        type: "text", # text / checkbox ...,
        value: "value"
    },
    device: { # example
        crm_field: "device",
        type: "text",
        value: "iOS"
    }
}
API endpoint
The CRM custom field mapping can be accessed using an API. The following endpoints are available:
Retrieve all fields: HTTP POST or GET:
/crm_custom_fieldsUpdate or delete a specific field: HTTP PUT or DELETE
/crm_custom_fields/:id
Steps to configure
Create the custom field and values in your CRM.
Assign the new values to contacts in your CRM.
Configure the setting in the CCAI Platform portal.
Test.
Zendesk configuration
The following sections outline the process to configure field mappings for the Zendesk CRM.
Create a custom field for User (Contact)
Sign in to Zendesk as an Admin.
Click the to access the Admin options.
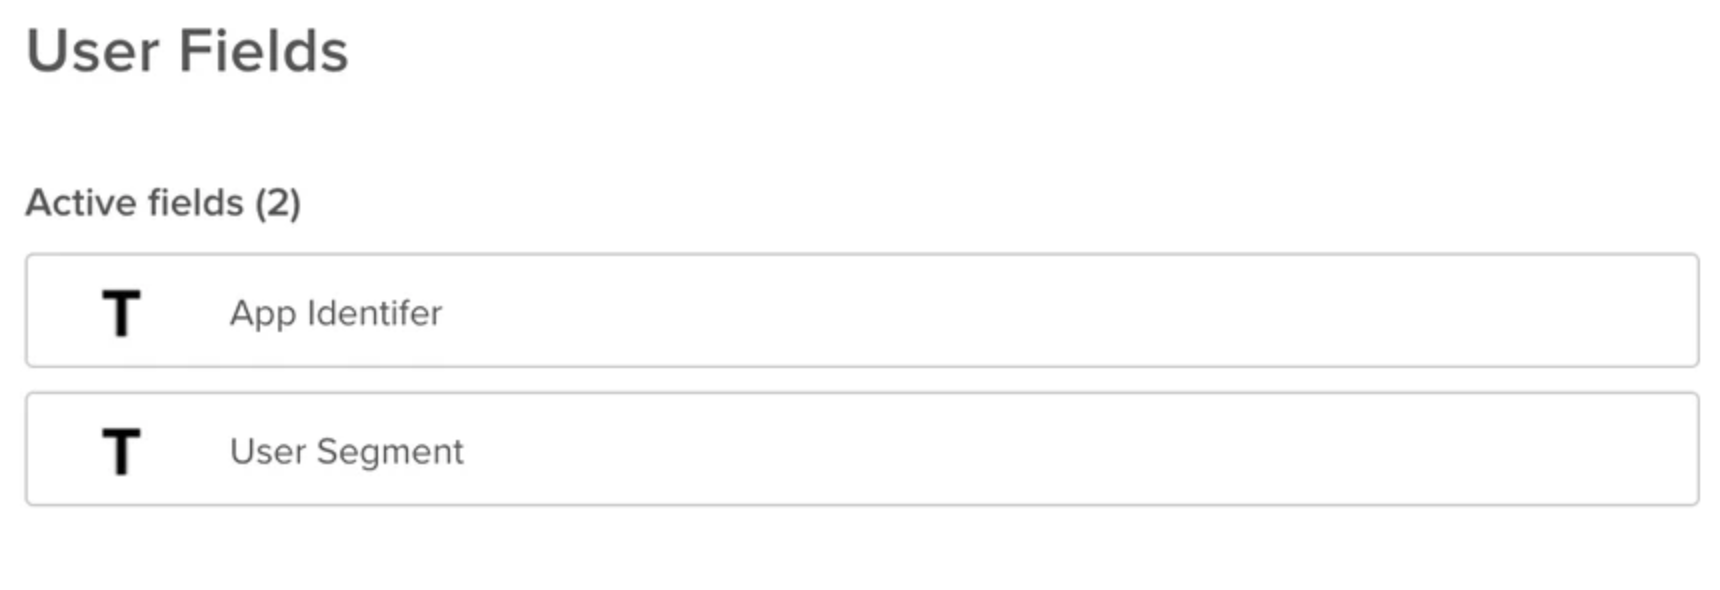
Select User Fields.
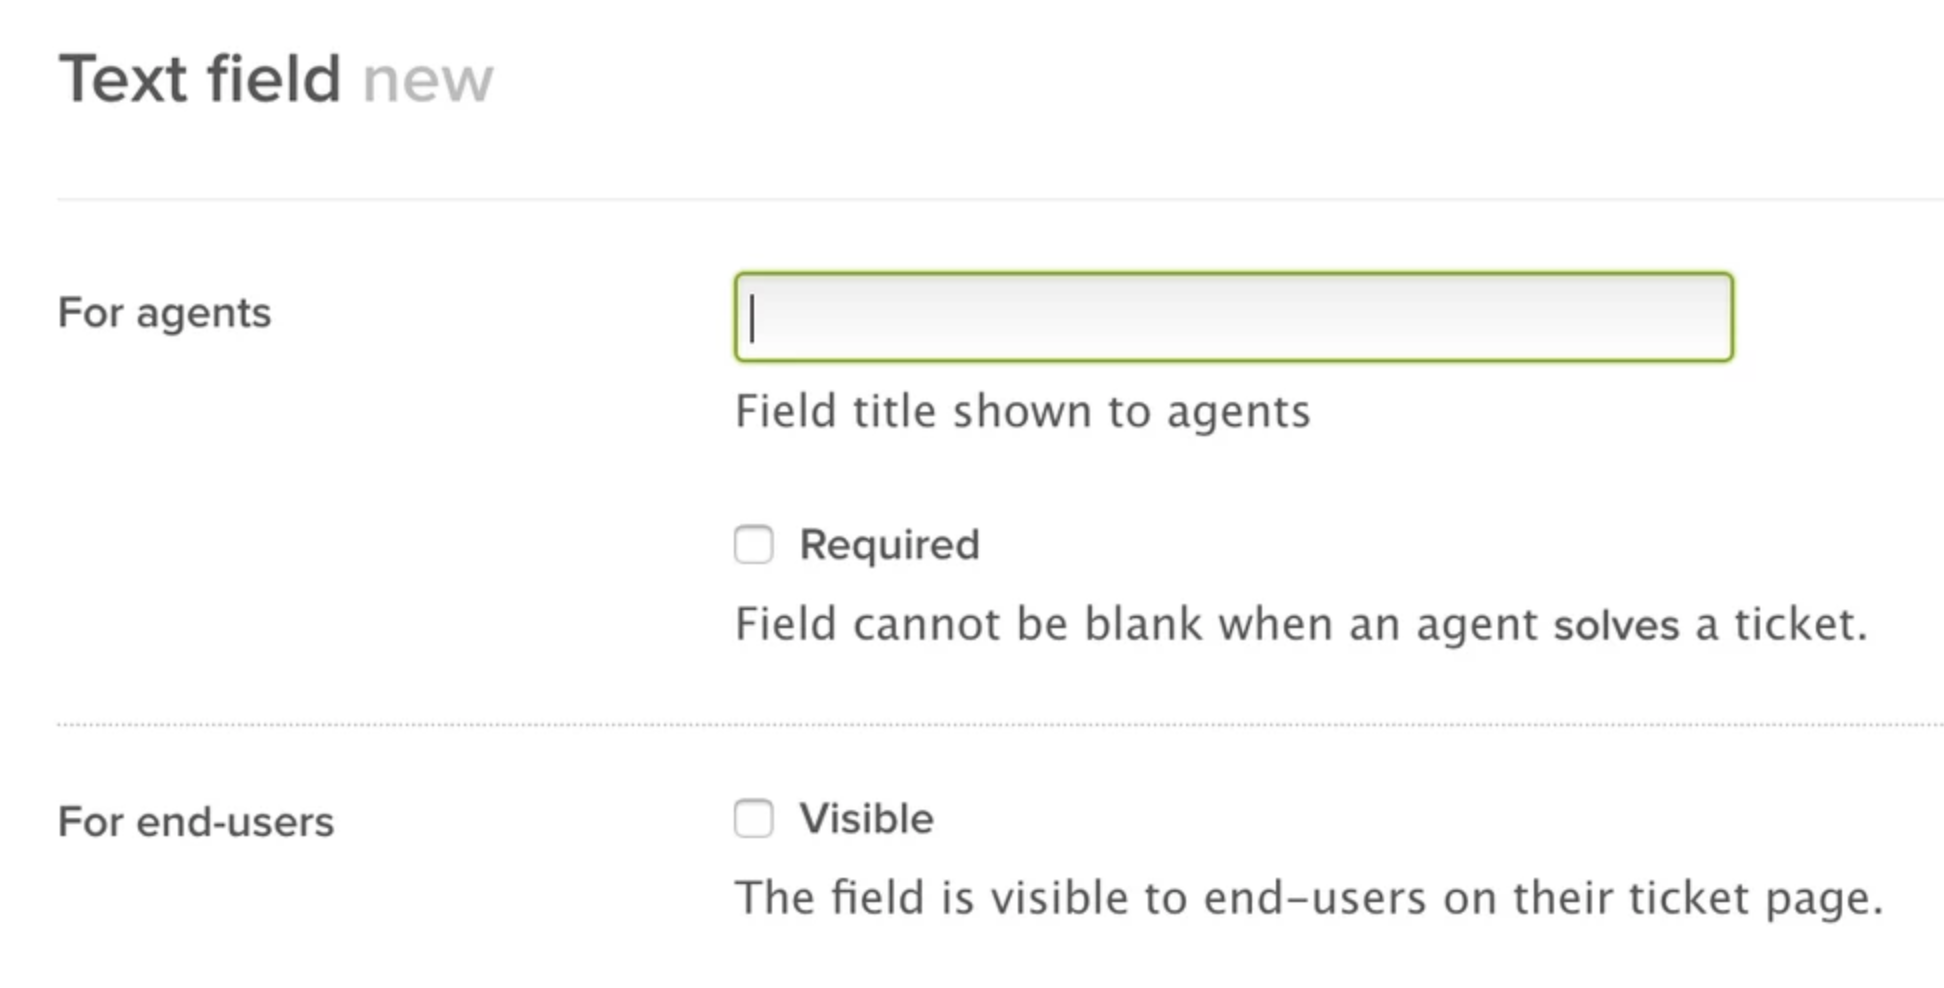
Select the field type that you want to create.
Add a field title and name within an agent's view.
Field key is filled automatically.
Click Create field.
You can now see this new field in the Active fields list, and this new field appears in the left-side column when viewing a user.
Create a custom field for Ticket
Sign in to Zendesk as an Admin.
Click the icon to access the Admin options.
Select Ticket Fields.
Click the add custom field button.
Select a field type that you want to create by clicking select.
Add a Field Title. The Field Title will appear in your Agent's view.
We recommend using the same value as the crm_field from the API.
Click the Add field button.
You can now see this new field in the Active fields list, and this new field appears in the left side column when viewing a ticket.
Salesforce configuration
Go to Setup.
Select Object Manager.
Choose the object on which you want to append custom fields (Case or CCAI Platform Session).
Click Fields & Relationships.
Click New.
Select Text as the Data Type.
In Field Label, enter a name for the field.
In Length, enter 255.
Field Name should automatically populate after you enter Field Label.
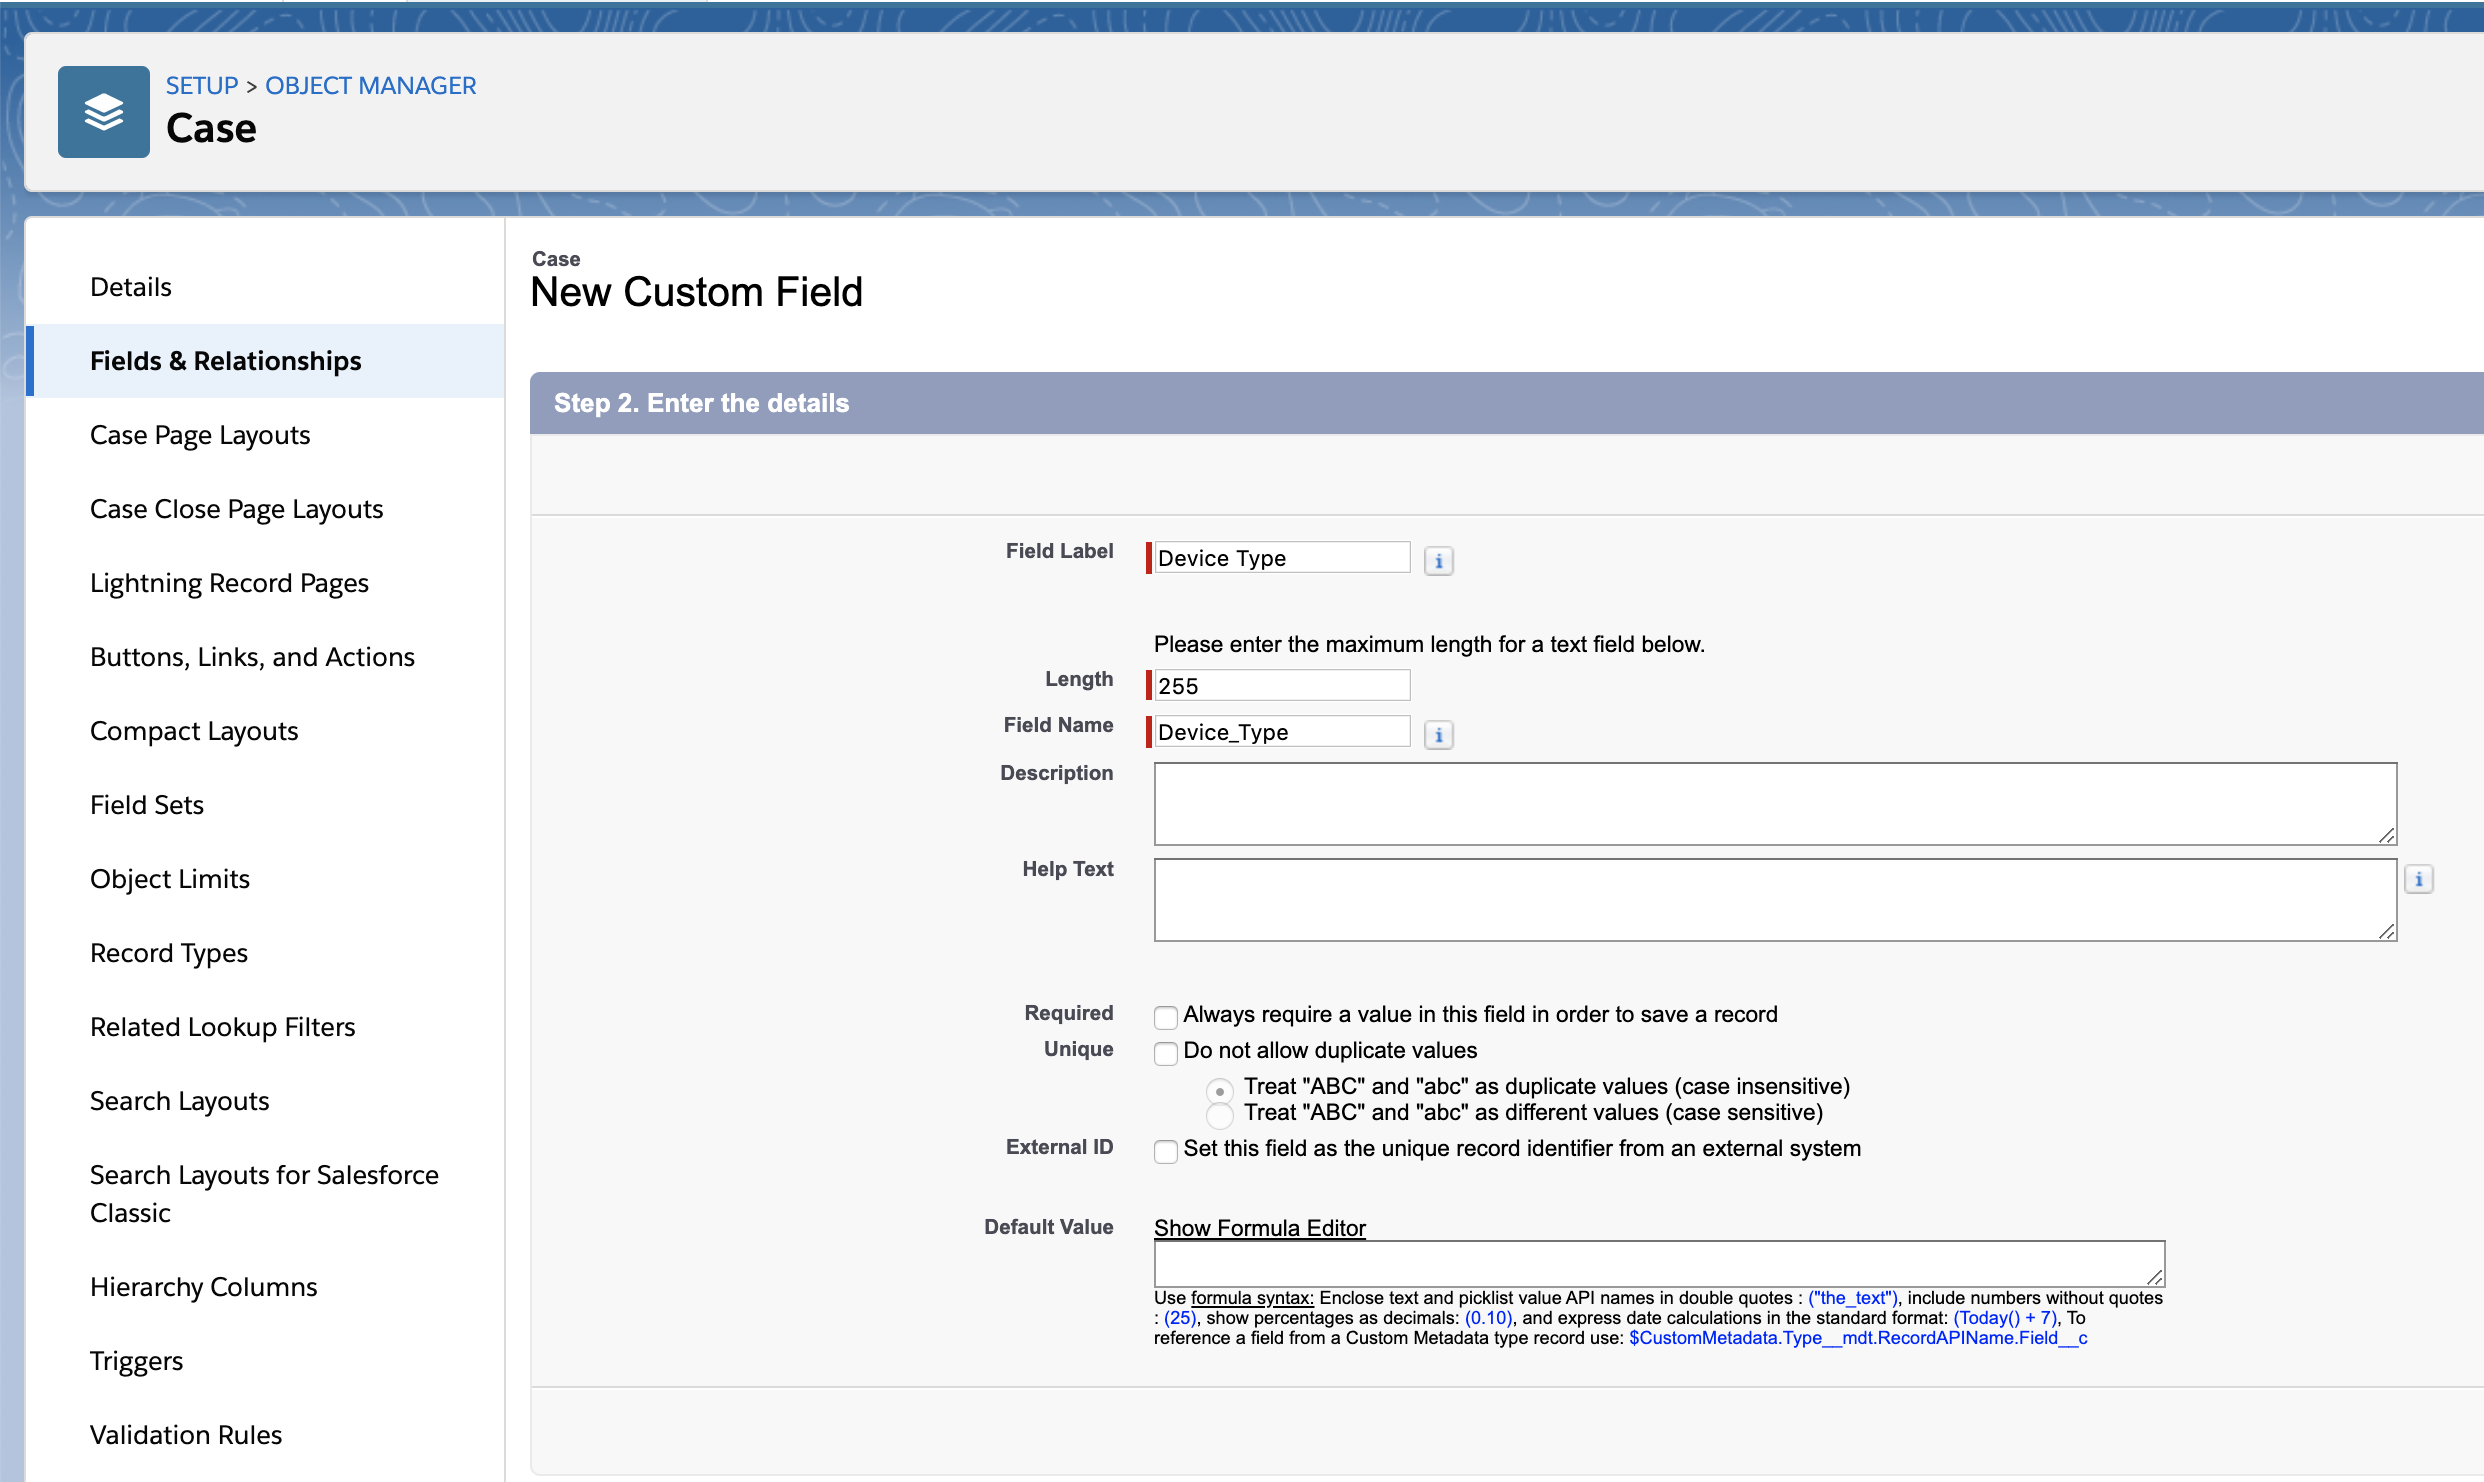
You may leave the rest of the variables at their default value.
Click Next.
Check the Visible box for any of the profiles that access the object (Case or CCAI Platform Session).
Click Next.
Click Save.
This will take you back to the Fields & Relationships view. Find the field that you just created, and take note of the Field Name.
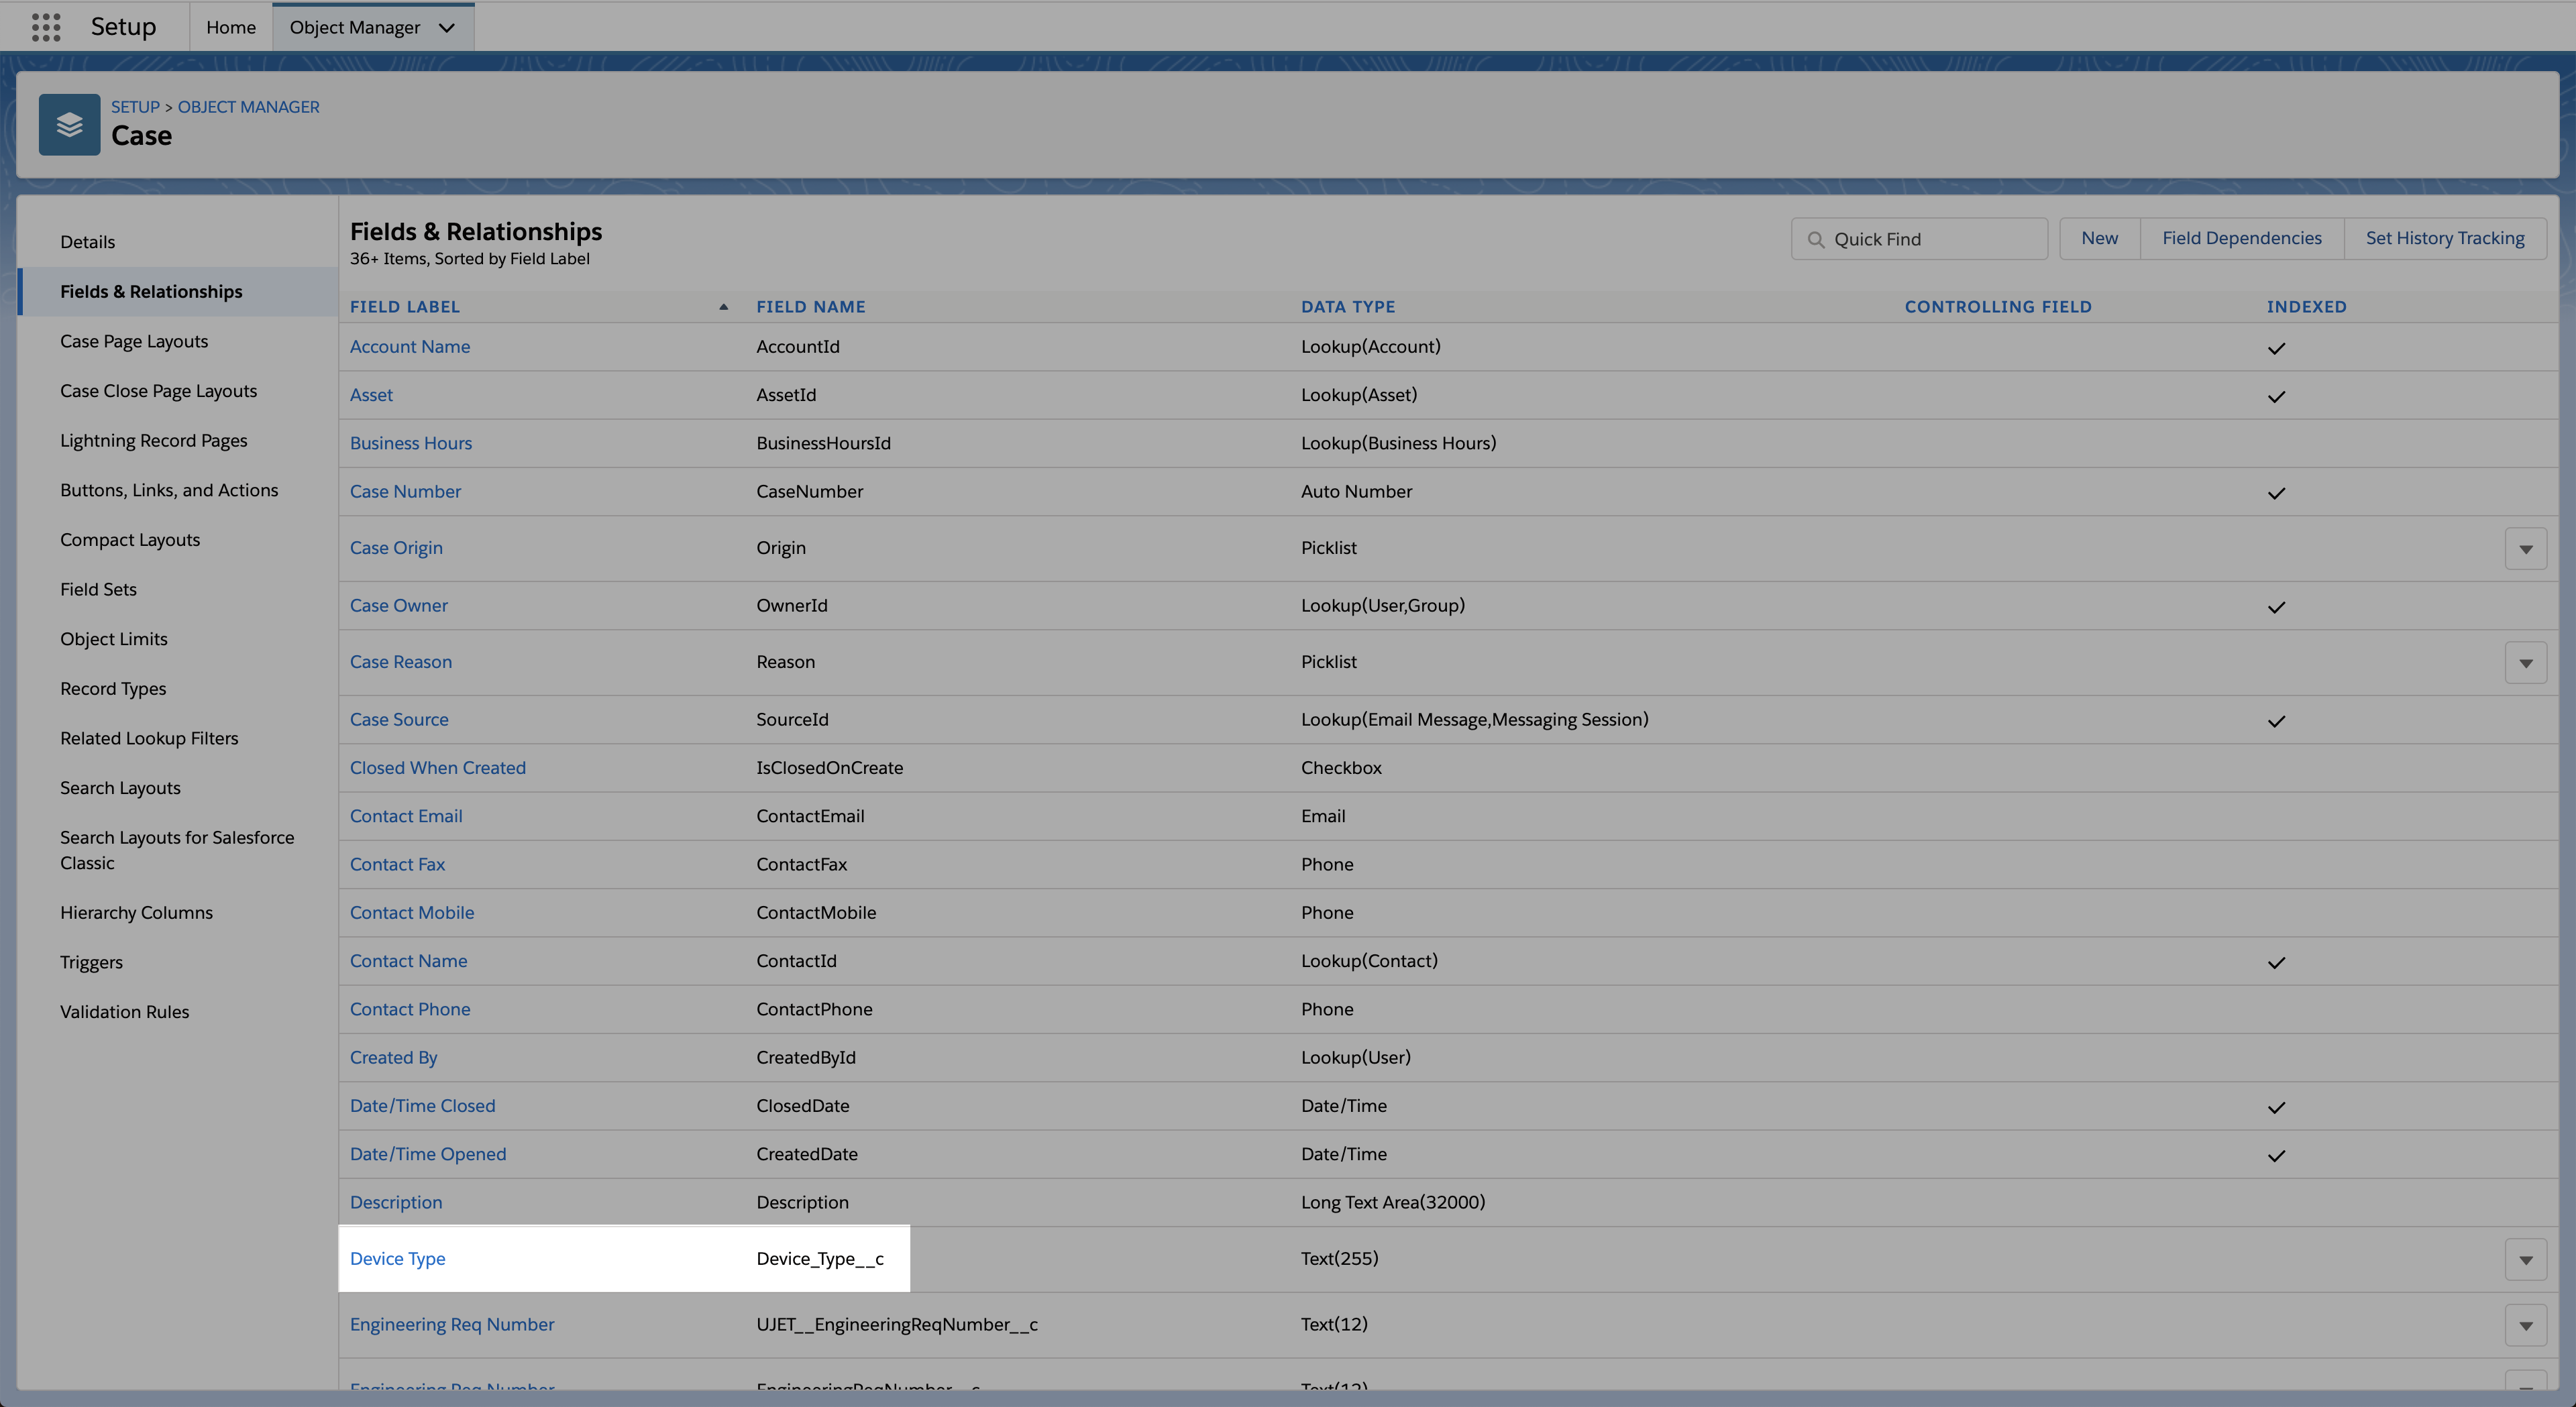
The Field Name is what you will enter in CRM Field Label in the CCAI Platform Custom Field Mapping page.
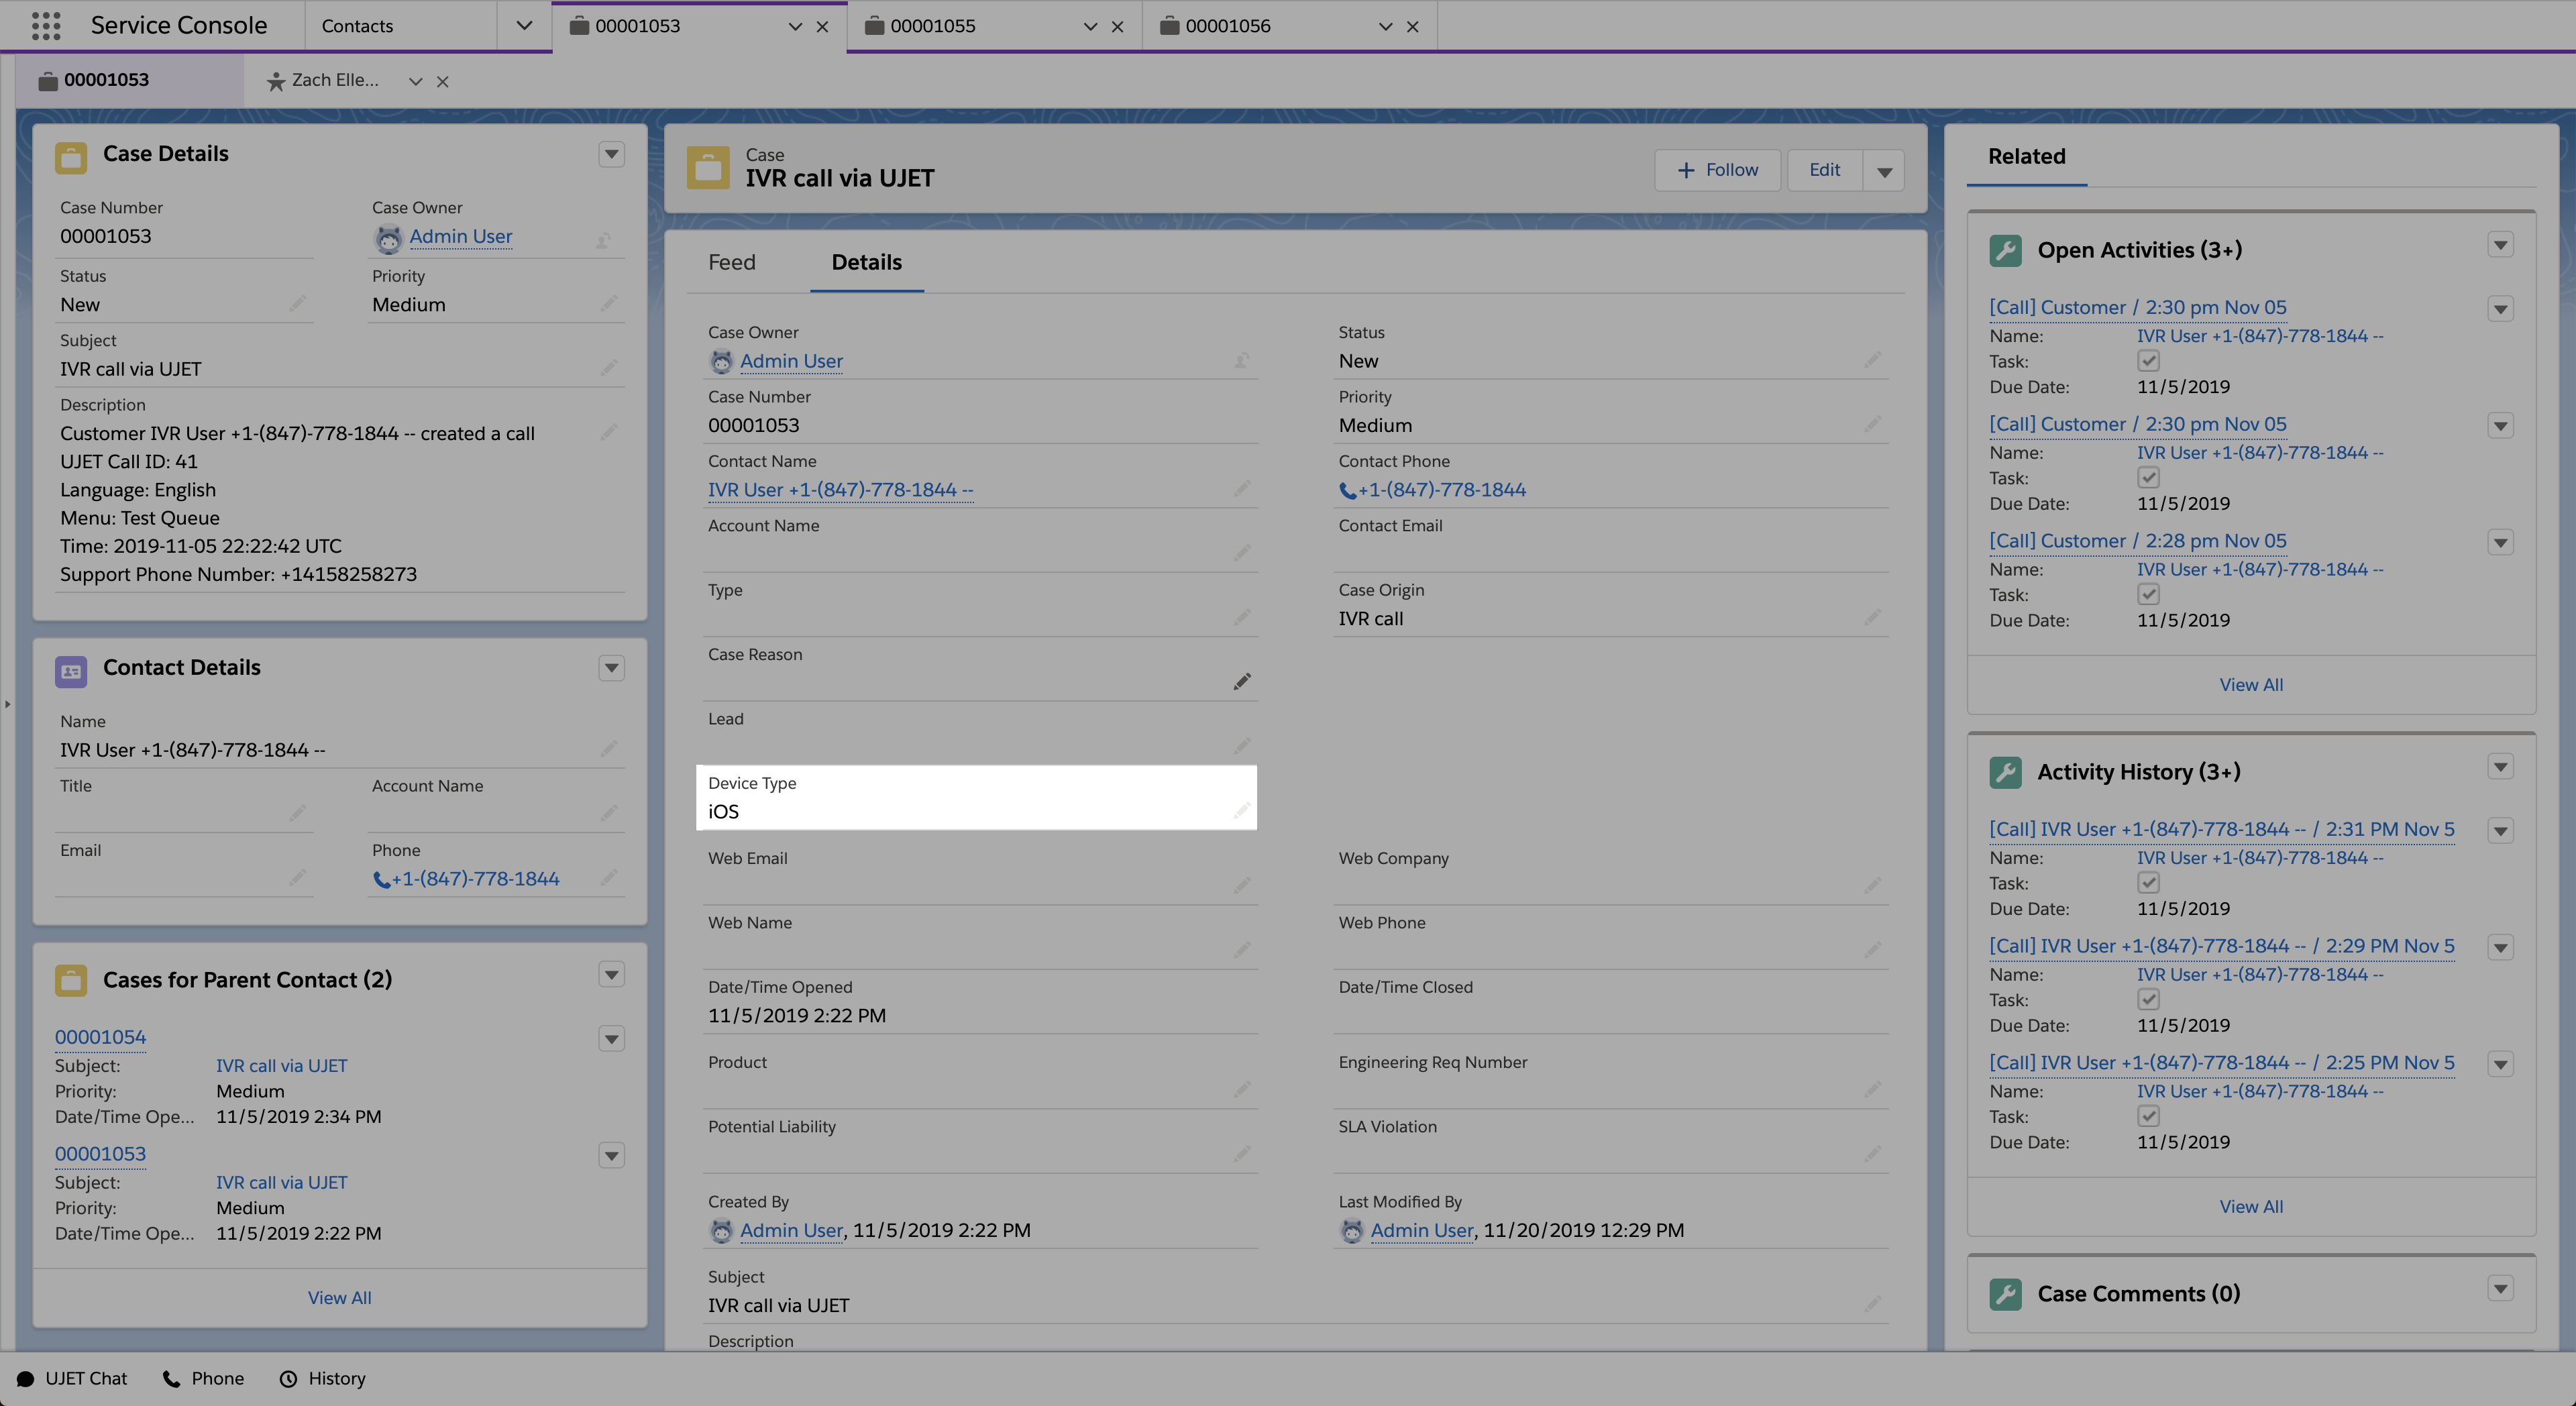
The following example shows what a New field will look like when correctly set up and used on the case object:
Kustomer configuration
See the Kustomer Help Center for details and information regarding setting up Custom Fields.
CCAI Platform configuration
The following sections outline the changes needed in the CCAI Platform portal to configure the Kustomer CRM field mapping.
Add CRM field mapping
In the CCAI Platform portal, go to Settings > Operation Management.
Go to the CRM Custom Field Mapping section and click View All.
Click the + Add CRM Field Mapping link.
Field Mapping Title: CCAI Platform name for this custom field mapping used in the CCAI Platform Portal
CRM Field Label: Label within your CRM of the CRM field to which you are mapping
Custom Data Field Label: Label of the SDK data field from which you are mapping