The CCAI Platform WFM configuration section provides an introduction on how to set up and customize various settings related to forecasting, agent portal, and campaign management.
Configuration of CCAI Platform WFM is performed through the WFM portal. To be able to access the portal you must first ensure that the WFM service has been enabled. Refer to Getting started for more details.
This section provides an overview of the different settings available and how to modify them to best suit the needs of the organization.
Default settings
This section explains the Default settings page.
Company information
Company: the name of your company
Status: indicates whether CCAI Platform WFM is enabled for your company
CRM URL: the URL of the corresponding customer relationship management (CRM) app that stores the call data necessary for forecasting
CC: the contact center used to make calls
CC login: the login username of your company's contact center account. These credentials are used to get the information required for CCAI Platform WFM workflows. This includes the following:
Campaigns
Agent skills
Agents status during the workday
Agent performance metrics
CC password: the password of your company's contact center account
The initial step in configuring CCAI Platform WFM involves determining the settings for different parts of the product, such as forecasting, scheduling, agent portal, and manager portal.
Some of these settings are preset and can be modified later by agents and administrators.
General settings
In the General settings page you can specify the following information:
Hours of operation: your company's hours of operation, specified in your company's time zone.
Company time zone: the time zone that your company is located in. This value is fetched automatically from the CRM and cannot be modified in CCAI Platform WFM. If you want to update the time zone, change it in the CRM, and it is automatically propagated to CCAI Platform WFM.
Minimum number of working hours per day: the minimum number of hours that an agent can work per day.
Maximum number of working hours per day: The maximum number of hours that an agent can work per day.
Default maximum days per week: The maximum number of days that the agent can work per week.
After you have updated the settings, click Save.
Forecasting settings
You can configure the following forecasting settings:
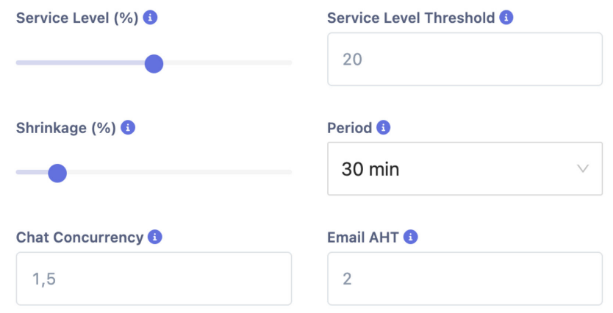
Service level: the percentage of calls that must be answered
Service level threshold: the service level threshold for this company, measured in seconds
Shrinkage: the shrinkage for this company. Shrinkage is a factored-in percentage of time the agents won't be working; for example meetings, trainings, and breaks.
Period: the optimal timeframe for forecasts. Possible values are 15 minutes, 30 minutes, and 1 hour.
Chat concurrency: the default number of chats that can be handled concurrently. Specified as a fractional number.
Email AHT: the average handle time for emails. Specified as a natural number.
After you have made your changes, click Save.
Agent portal settings
In this section you can configure the behavior of the CCAI Platform WFM agent portal.
Shift cover requests must be approved: indicates whether the shift cover requests must be approved by managers or if they can be automatically approved.
Shift covers can be sent to individual agents: if selected, agents are able to send their shift cover requests to individual agents. If cleared, shift cover requests are sent to all agents simultaneously.
Shift trade requests must be approved: indicates if shift trade requests must be approved by managers or if they can be automatically approved
Time-off requests must be approved: Indicates if time-off requests must be approved by managers or if they can be automatically.
Allow agents to modify their own personal info: Indicates if agents can modify their own personal data in the Agent Portal.
Users
You create users in the CCAI Platform portal. Agent information for users is automatically fetched from the CCAI Platform portal into the WFM admin portal daily. For more information about creating and editing users, see Add, view, and edit users.
The ability to edit user information in the WFM admin portal is limited. Only certain fields are editable; the rest are read-only. You can't delete a user using the WFM admin portal. If you try, the user reappears in the WFM admin portal during the next sync with the CCAI Platform portal.
View users
To view users in the WFM admin portal, follow these steps:
In the CCAI Platform portal, click WFM > Admin. If you don't see the WFM menu, click Menu.
Click WFM Settings > Users. A list of users appears.
To filter the list of users, do the following:
To filter by whether users are active or inactive, select All, Active, or Inactive.
To filter by the team that users belong to, click the Select a team field, and then select a team.
To filter by a user's name or email address, click the Search a user field, and then type the first few letters of a user's name or email address.
Agent details
To view a user's details, select the edit icon at the end of the user row.

Agent information is populated based on the details entered in the contact center.
| Attribute | Description |
| First name | Agent first name |
| Last name | Agent last name |
| Agent email address | |
| Job title | Agent job title |
| Hire date | Agent start date |
| Location | Agent geographical location |
| Managers | All managers assigned to the agent |
| Assigned teams | All teams assigned to the agent |
Availability and work preferences
Availability represents the time frames during which an agent can take shifts. Unlike lax preferences, availability is strict, meaning that shifts can't be assigned to agents outside the availability boundary.
Work preferences, on the other hand, are a subset of availability and they represent an agent's preferred time frames within availability.
Agent availability and preferences are taken into account during shift assignment when attempting to find suitable agents for a shift. Administrators see a list of available agents and those with matching availability and work preferences will be displayed at the top.

Workload
The workload section lets you set the minimum and maximum amount of hours and days for the user.
Minimum hours per day - The minimum number of hours the user can work per day.
Maximum hours per day - The maximum number of hours the user can work per day.
Maximum days per week - The minimum number of days the user can work per week.
Permission groups
CCAI Platform WFM provides comprehensive permission management capabilities that enable administrators to granularly grant access to specific features of the platform.
Permissions for individual features are assigned to permission groups whose members inherit permissions of the group. For example, you can create a group called Agent Portal users, grant it permissions to access the agent portal, assign all agents to this permission group. As a result, they will all be able to log into the agent portal.
Manage permission groups
You can create and manage permission groups on the Permission groups page, which is located in the CCAI Platform WFM Settings section.
To create a new permission group, follow these steps:
Click + Add in the corner.
In the menu that displays, start configuring the new permission group.
Name: provide a name for the group.
Description: Provide a description for the group.
Select the target permissions for the members of this group.
Click Next and go to the second step, where you must add members to this permission group.
A user can be a member of multiple permission groups, which results in the inheritance of permissions from all of the groups to which they are associated.
Click Save.
Members of the newly created permission group can now attempt to log into the WFM portal and use the capabilities granted to the group.
Modify and delete permission groups
You can modify or delete permission groups. To do this, go to the actions column and click the pencil icon to modify or the garbage can icon to delete the respective permission group.
After you remove a permission group, all former members of the group will automatically lose access to all the permissions that were previously granted to the group before its deletion.
Queues
In CCAI Platform WFM, a queue represents an event or business domain that triggers the dialing of a specific customer list. For example, if you want to notify your customers about a new product release, the first step is to create a new queue in the contact center dashboard, such as Product X Launch. This will have certain characteristics, such as target service level, service level time, shrinkage, required skill set, and more.
After a queue is created, CCAI Platform WFM automatically detects the queue, and you can use it for forecast calculations.
Queues are retrieved from the contact center on a daily basis. This means that any modifications will be reflected in CCAI Platform WFM, and if a campaign is deleted in the contact center it will also be removed from CCAI Platform WFM.
Queue management
The Queues tab, located under WFM settings, displays all campaigns.
Queues cannot be created or deleted within CCAI Platform WFM. These operations must be performed in the contact center. CCAI Platform WFM watches for all updates.
Modifying campaigns is also restricted. Some values fetched from the contact center cannot be modified, while others can be.
To modify a campaign, follow these steps:
Click the Edit icon in the Actions column. This opens a window where you can examine and modify the campaign's parameters.
The available parameters for campaign modification include the following:
Queue name: The name to identify the campaign.
Communication channel: The campaign's target communication channel.
Service Level (%): the percentage of calls that must be answered.
Shrinkage: The factored-in percentage of time the agents won't be working; for example, breaks and meetings.
Service level threshold: The number of seconds that you set as a goal for connecting a call with an agent.
Period: The optimal timeframe for forecasts. Possible values include 15 min, 30 min, and 1 hour.
Email AHT: The average handle time for emails, measured in minutes.
Chat concurrency: The number of chats that can be handled concurrently, measured in fractions.
This option is displayed only if the communication channel is set to Chat.
Hours of operation: The campaign's working days and hours.
Click Save.
WFM bulk data import
The bulk import feature lets site administrators to upload historical, day planner, or forecast data. This enables immediate forecasting and scheduling capabilities during setup.
Prepare your data for import
To download a template to upload your data, follow these steps:
In the CCAI Platform portal, click WFM > Admin. If you don't see the WFM menu, click Menu.
Select Bulk Import from the left menu under WFM Settings.
Select the File Templates tab
Select the Get File icon for the import type you need:
Historical Data
Forecast
Planner - 15, 30, or 60 minute increments.
This initiates an automatic download of the chosen template.
The template includes sample data to guide you in mapping your data to the import format.
Note: Column titles must exactly match those in the import template. Any columns that don't match won't be uploaded.
Table 1. Historical Data Import
| Column heading | Required format |
|---|---|
| Date time in UTC | mm/dd/yyyy 24hr hh:mm:ss |
| Contact center queue ID | Numerical queue ID |
| Language code | Text format (Example: en for English) |
| Queue name | Text format queue title |
| Communication channel | Text format (Example: Voice/Chat) |
| Type | Text format (Example: Inbound/Outbound) |
| Duration in ms | Numerical in ms |
| Agent email | Email address — agent1@email.com |
Table 2. Forecast data import
| Column heading | Required format |
|---|---|
| Date | yy/mm/dd |
| Calls | Numerical |
| AHT | Numerical in seconds |
Table 3. Planner data import
| Column heading | Required format |
|---|---|
| Timestamp | hh:mm:ss - The time increments will depend on your chosen planner template. |
| Date | yy/mm/dd |
| Agent count | Numerical |
Once you have completed mapping and entering your data, save the file.
When saving your import file, ensure you use an identifiable filename to locate the upload at a later date.
Import historical data
In the CCAI Platform portal, click WFM > Admin. If you don't see the WFM menu, click Menu.
Choose Admin
Select Bulk Import from the left menu
Select Upload
Drag your CSV file into the allocated field
- Alternatively, click in the field to browse and select a local file.
Select entity type Historical Data from the drop-down menu.
Click Upload. A progress indicator will display until complete.
Once complete, your data will be uploaded and saved into the Contact Center AI Platform portal.
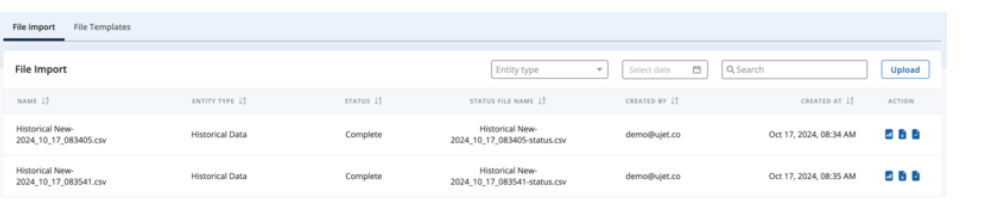
Search and filter historical imports
To locate a previous upload, you can use the search field. It is also possible to search by creation date.

Import forecast data
To import forecast data, follow these steps:
In the CCAI Platform portal, click WFM > Admin. If you don't see the WFM menu, click Menu.
Select WFM Forecasting from the left menu
Select Run
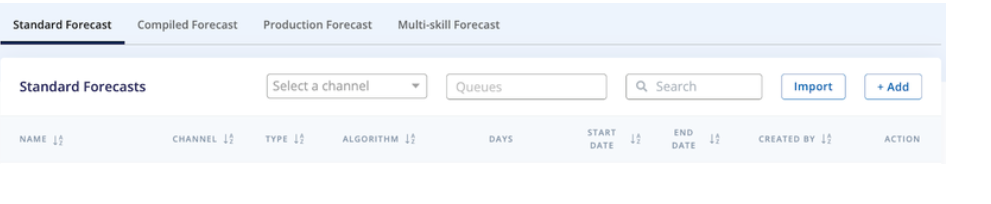
Select the Standard Forecast tab from the horizontal menu
Select Import
Drag your file into the allocated field, or click in the field to browse and select a local file.
Select a date range type:
Daily
Weekly
Monthly
Select Next
Select Check. This check validates the upload and date ranges applied.
Complete the Import form:
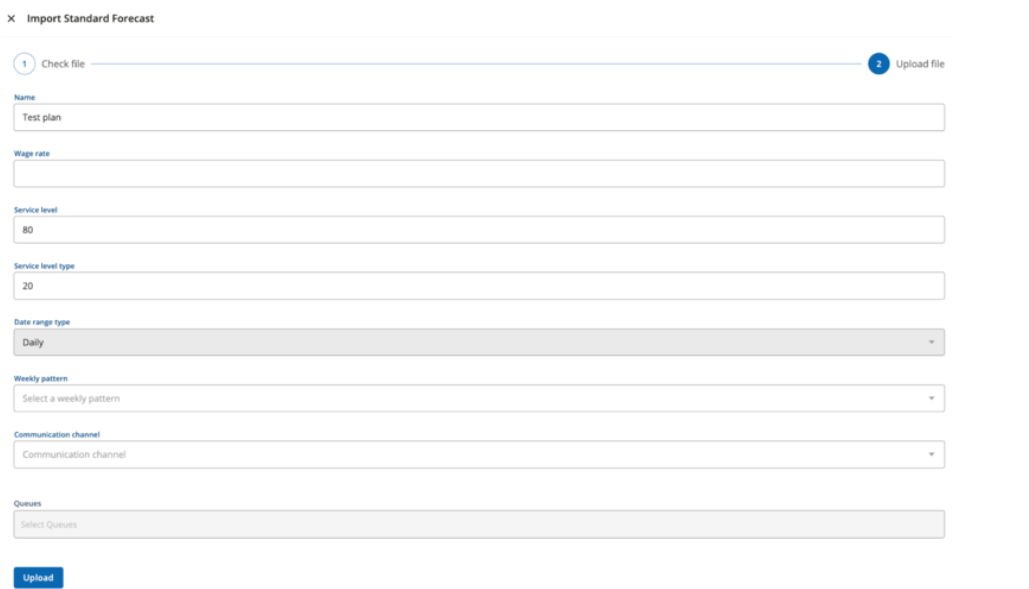
Enter an Import name
Wage rate. This is the hourly rate in your set currency.
Service level
Service level time. Enter the service level time in seconds.
Date range type. This will be automatically filled in with the selection chosen in the previous file check.
Weekly pattern. Select from your predefined current patterns.
Communication channel. Choose one or more options from:
Voice
Chat
MMS
Email
Back office
Social media
Select Upload.
Once complete, your data will be uploaded and saved into Contact Center AI Platform and a forecast report will be displayed.
Search and filter forecast imports
To locate a previous upload, you can use the search field. It is also possible to filter by channel, and queue.
Import day planner data
To import day planner data, follow these steps:
In the CCAI Platform portal, click WFM > Admin. If you don't see the WFM menu, click Menu.
Click WFM Forecasting from the left menu
Select Day Planner
Select the Import file and create day planner icon
Drag your file into the allocated field
- Alternatively, click in the field to browse and select a local file.
Select a planner type:
Daily
Weekly
Select a period: This should match your chosen import template time increment.
15 minutes
30 minutes
1 hour
Select Check. This check validates the upload data.
Select Next
Complete the Import form:
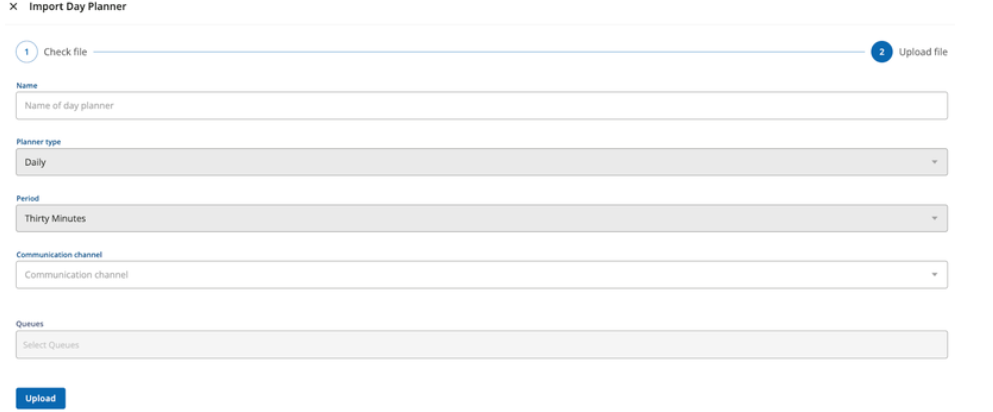
Enter an Import name
The planner type will be entered automatically based on the previous data check.
The Period will be entered automatically based on the previous data check.
Select a Communication channel:
Voice
Chat
MMS
Email
Back office
Social media
Select Upload.
Once complete, your data will be uploaded and saved into Contact Center AI Platform and a planner report will be displayed.
Search and filter planner imports
To locate a previous upload, you can use the search field. You can also filter by period and forecast type.

View import reports
Where available, you can view and download import reports.
Historical import report
To view a historical import report, follow these steps:
In the CCAI Platform portal, click WFM > Admin. If you don't see the WFM menu, click Menu.
Select Bulk Import from the left menu under WFM Settings.
Search for the required report
Click the Get report icon at the end of the report row under the Action column.
This will download a copy of the report locally for you to view.
Forecast import report
To view a forecast import report, follow these steps:
In the CCAI Platform portal, click WFM > Admin. If you don't see the WFM menu, click Menu.
Select WFM Forecasting from the left menu
Select Run
Select the Standard Forecast tab from the horizontal menu
Search for the required report
Select the eye icon in the action bar at the end of the report row under the Action column.
This will open up your forecast report. Select Next to progress through the report.
Day planner report
To view a day planner report, follow these steps:
In the CCAI Platform portal, click WFM > Admin. If you don't see the WFM menu, click Menu.
Select WFM Forecasting from the left menu
Select Day Planner
Search for the required report
Select the eye icon in the action bar at the end of the report row under the Action column.
This will open up your planner report. Select Next to progress through the report.