Mencoba BigQuery menggunakan sandbox
Dengan sandbox BigQuery, Anda dapat mempelajari kemampuan BigQuery yang terbatas tanpa biaya untuk memastikan apakah BigQuery sesuai dengan kebutuhan Anda. Dengan sandbox BigQuery, Anda dapat menggunakan BigQuery tanpa harus memberikan kartu kredit atau membuat akun penagihan untuk project Anda. Jika sudah membuat akun penagihan, Anda masih dapat menggunakan BigQuery tanpa biaya dalam paket penggunaan gratis.
Sandbox BigQuery memungkinkan Anda mempelajari BigQuery dengan sekumpulan fitur BigQuery terbatas tanpa biaya. Anda dapat mengevaluasi BigQuery dengan menggunakan sandbox BigQuery untuk melihat dan mengkueri set data publik.
Google Cloud menawarkan set data publik yang disimpan di BigQuery dan disediakan untuk masyarakat umum melalui Program Set Data Publik Google Cloud. Untuk mengetahui informasi selengkapnya tentang cara menggunakan set data publik, lihat Set data publik BigQuery.
Untuk mengikuti panduan langkah demi langkah tugas ini langsung di Google Cloud konsol, klik Pandu saya:
Sebelum memulai
Mengaktifkan sandbox BigQuery
Di konsol Google Cloud , buka halaman BigQuery.
Anda juga dapat membuka BigQuery di Google Cloud konsol dengan memasukkan URL berikut di browser:
https://console.cloud.google.com/bigquery
Konsol Google Cloud adalah antarmuka grafis yang Anda gunakan untuk membuat dan mengelola resource BigQuery serta menjalankan kueri SQL.
Autentikasi dengan Akun Google Anda, atau buat akun baru.
Di halaman sambutan, lakukan hal berikut:
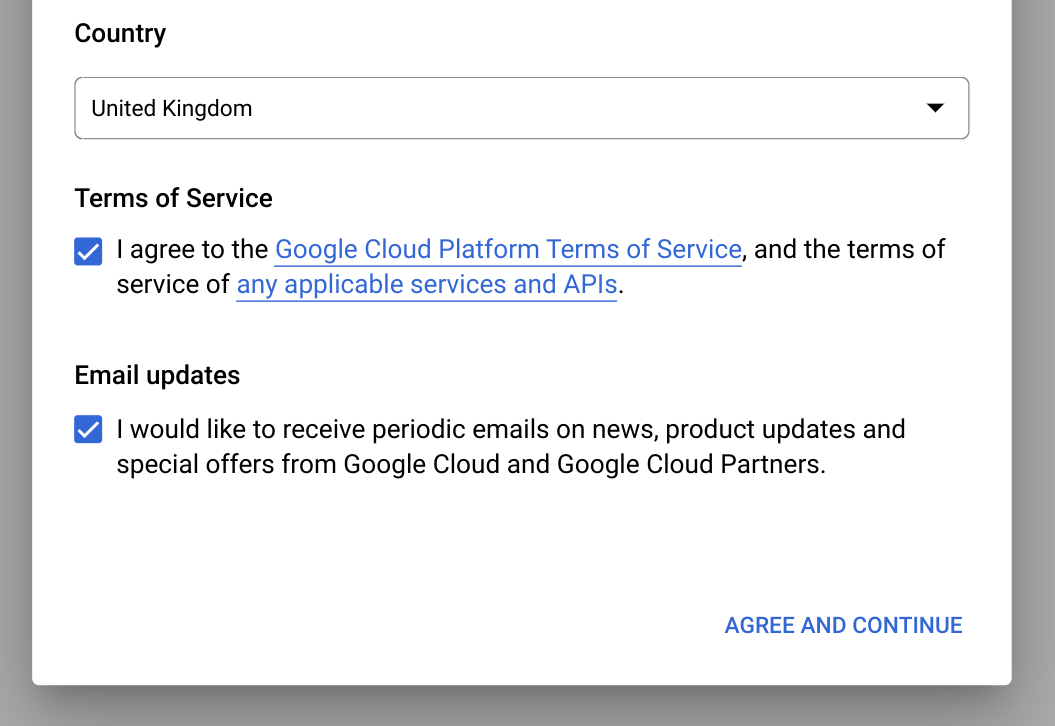
Untuk Negara, pilih negara Anda.
Untuk Persyaratan Layanan, centang kotak centang jika Anda menyetujui persyaratan layanan.
Opsional: Jika Anda ditanyai tentang info terbaru melalui email, pilih kotak centang jika Anda ingin menerima info terbaru via email.
Klik Setuju dan lanjutkan.
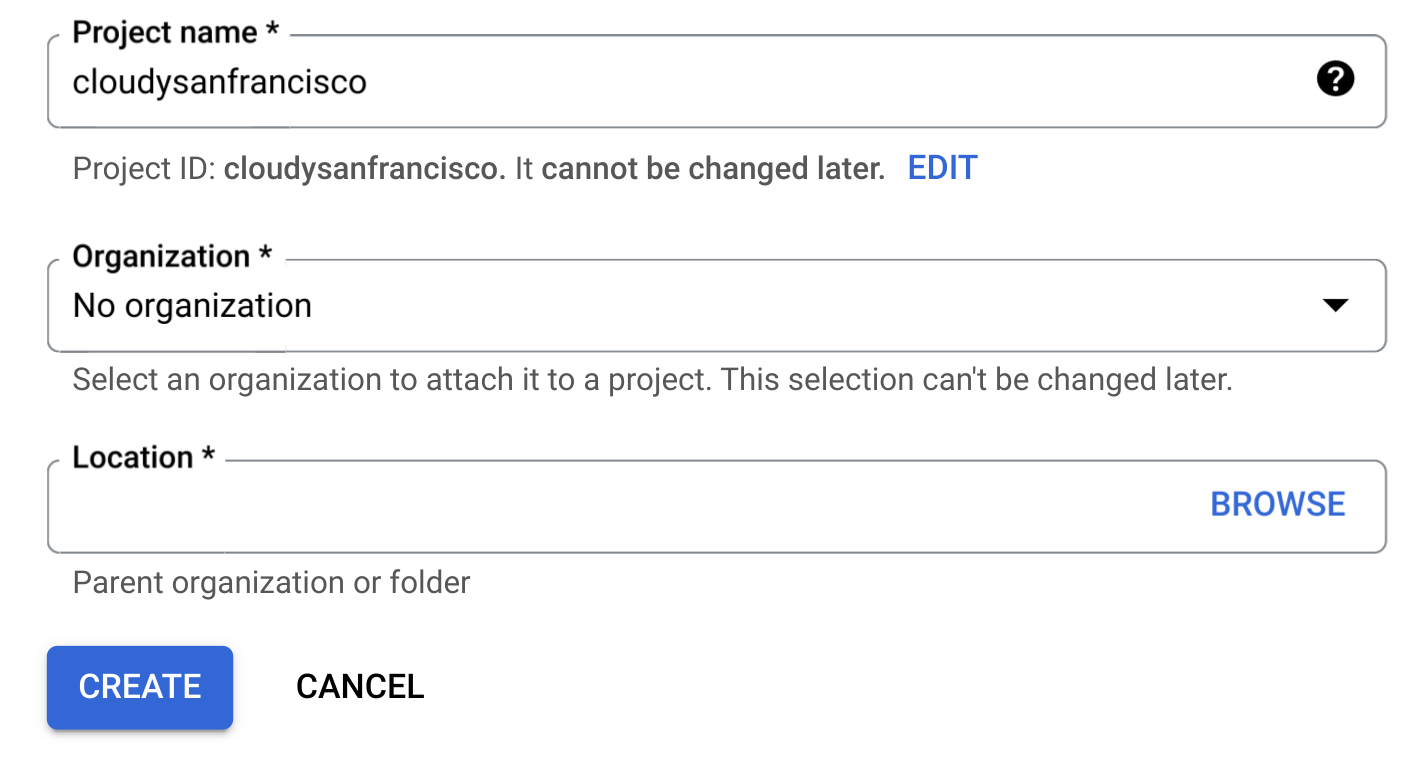
Klik Buat proyek.
Di halaman Project Baru, lakukan hal berikut:
Untuk Nama project, masukkan nama project Anda.
Untuk Organisasi, pilih organisasi atau pilih Tidak ada organisasi jika Anda bukan bagian dari organisasi. Akun terkelola, seperti akun yang terkait dengan institusi akademis, harus memilih organisasi.
Jika diminta memilih Lokasi, klik Jelajah, lalu pilih lokasi untuk project Anda.
Klik Buat. Anda akan dialihkan kembali ke halaman BigQuery di konsol Google Cloud .
Anda telah berhasil mengaktifkan sandbox BigQuery. Pemberitahuan sandbox BigQuery sekarang ditampilkan di halaman BigQuery:

Batasan
Sandbox BigQuery memiliki batasan berikut:
- Semua kuota dan batas BigQuery berlaku.
- Anda diberi batas penggunaan gratis yang sama seperti paket gratis BigQuery, termasuk 10 GB penyimpanan aktif dan 1 TB data kueri yang diproses setiap bulan.
- Semua set data BigQuery memiliki waktu habis masa berlaku tabel default, serta semua tabel, tampilan, dan partisi akan berakhir masa berlakunya secara otomatis setelah 60 hari.
Sandbox BigQuery tidak mendukung beberapa fitur BigQuery, termasuk fitur berikut:
Melihat set data publik
Set data publik BigQuery tersedia secara default di BigQuery Studio dalam project bernama bigquery-public-data. Dalam
tutorial ini, Anda akan membuat kueri set data Perjalanan NYC Citi Bike. Citi Bike adalah program berbagi sepeda besar, dengan 10.000 sepeda dan 600 stasiun di Manhattan, Brooklyn, Queens, dan Jersey City. Set data ini mencakup perjalanan Citi Bike sejak Citi Bike diluncurkan pada September 2013.
Di konsol Google Cloud , buka halaman BigQuery.
Di BigQuery Studio, di panel Penjelajah, klik Tambahkan data.
Dalam dialog Tambahkan data, di panel Filter Menurut, klik
 Set data publik.
Di halaman Marketplace, di kolom Search Marketplace, ketik
NYC
Citi Bike Trips
untuk mempersempit penelusuran Anda.Di hasil penelusuran, klik NYC Citi Bike Trips.
Di halaman Detail produk, klik Lihat set data. Anda dapat melihat informasi tentang set data di tab Detail.
Mengkueri set data publik
Pada langkah-langkah berikut, Anda akan membuat kueri tabel citibike_trips untuk menentukan
100 stasiun Citi Bike paling populer dalam set data publik Perjalanan NYC Citi Bike.
Kueri mengambil nama dan lokasi stasiun, serta jumlah perjalanan yang dimulai di stasiun tersebut.
Kueri menggunakan fungsi ST_GEOGPOINT
untuk membuat titik dari parameter bujur dan lintang setiap stasiun dan
menampilkan titik tersebut dalam kolom GEOGRAPHY. Kolom GEOGRAPHY digunakan untuk
membuat peta panas di penampil data geografi terintegrasi.
Di konsol Google Cloud , buka halaman BigQuery.
Klik
SQL query .Di
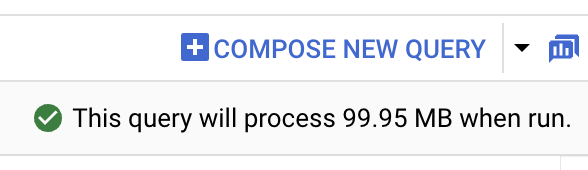
query editor , masukkan kueri berikut:SELECT start_station_name, start_station_latitude, start_station_longitude, ST_GEOGPOINT(start_station_longitude, start_station_latitude) AS geo_location, COUNT(*) AS num_trips FROM `bigquery-public-data.new_york.citibike_trips` GROUP BY 1, 2, 3 ORDER BY num_trips DESC LIMIT 100;Jika kueri valid, tanda centang akan muncul bersama dengan jumlah data yang diproses kueri. Jika kueri tidak valid, tanda seru akan muncul bersama dengan pesan error.
Klik
Jalankan . Stasiun paling populer tercantum di bagianHasil kueri .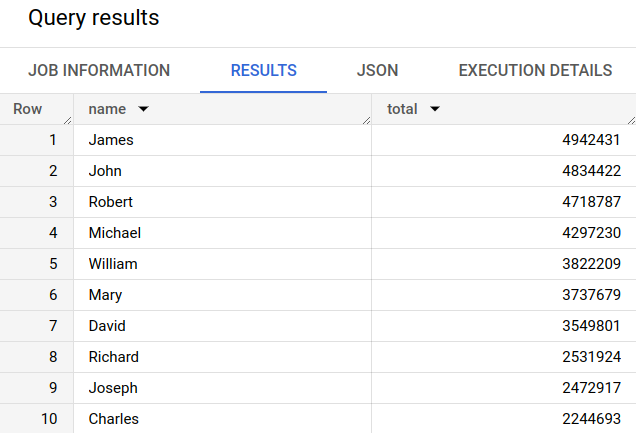
Opsional: Untuk menampilkan durasi tugas dan jumlah data yang diproses tugas kueri, klik tab Informasi tugas di bagian Hasil kueri.
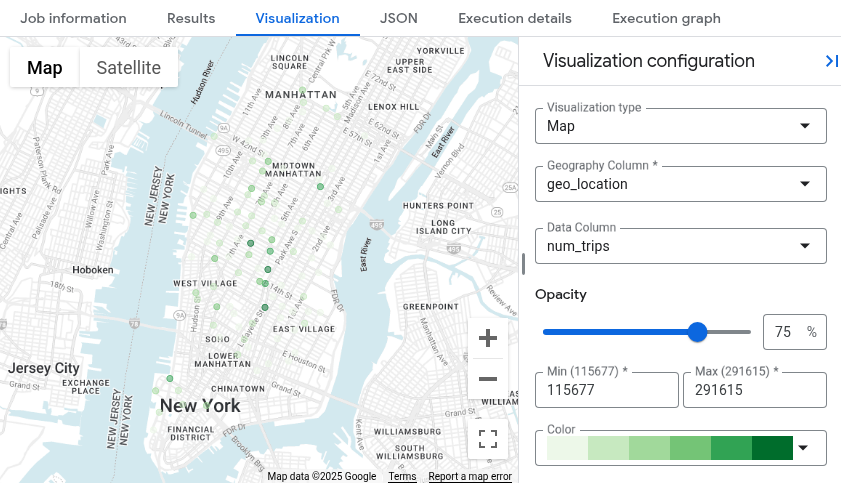
Beralihlah ke tab
Visualisasi . Tab ini membuat peta untuk memvisualisasikan hasil Anda dengan cepat.Di panel Konfigurasi visualisasi:
- Pastikan Jenis visualisasi disetel ke Peta.
- Pastikan Kolom geografi disetel ke
geo_location. - Untuk Kolom data, pilih
num_trips. - Gunakan opsi Perbesar untuk menampilkan peta Manhattan.
Mengupgrade dari sandbox BigQuery
Dengan sandbox BigQuery, Anda dapat mempelajari kemampuan BigQuery yang terbatas tanpa biaya. Jika Anda sudah siap untuk meningkatkan kemampuan penyimpanan dan kueri, upgrade dari sandbox BigQuery.
Untuk melakukan upgrade, lakukan langkah berikut:
Aktifkan penagihan untuk project Anda.
Pelajari edisi BigQuery dan tentukan model harga yang tepat untuk Anda.
Setelah mengupgrade dari sandbox BigQuery, Anda harus memperbarui waktu habis masa berlaku default untuk resource BigQuery, seperti tabel, tampilan, dan partisi.
Pembersihan
Agar akun Google Cloud Anda tidak dikenai biaya untuk resource yang digunakan pada halaman ini, ikuti langkah-langkah berikut.
Menghapus project
Jika Anda menggunakan sandbox BigQuery untuk mengkueri set data publik, penagihan tidak akan diaktifkan untuk project Anda, dan Anda tidak perlu menghapus project.
Cara termudah untuk menghilangkan penagihan adalah dengan menghapus project yang Anda buat untuk tutorial.
Untuk menghapus project:
- In the Google Cloud console, go to the Manage resources page.
- In the project list, select the project that you want to delete, and then click Delete.
- In the dialog, type the project ID, and then click Shut down to delete the project.
Langkah berikutnya
- Untuk mengetahui informasi lebih lanjut tentang cara menggunakan BigQuery tanpa biaya dalam paket penggunaan gratis, lihat Paket penggunaan gratis.
- Pelajari cara membuat set data, memuat data, dan mengkueri tabel di BigQuery.