Create and use workspaces
This document shows you how to work with workspaces in BigQuery, including the following tasks:
- Creating workspaces
- Deleting workspaces
- Working with files in workspaces
- Performing version control on files in workspaces
Before you begin
If you haven't done so already, create a BigQuery repository.
Required roles
Access to workspaces is determined by roles granted on their parent repository. For more information, see Required roles.
Create a workspace
Workspace creation is handled differently based on whether you are using a BigQuery repository or a third-party repository.
Create a workspace in a BigQuery repository
To create a new workspace in a BigQuery repository, follow these steps:
In the Google Cloud console, go to the BigQuery page.
In the left pane, click Explorer:

If you don't see the left pane, click Expand left pane to open the pane.
In the Explorer pane, expand your project and then click Repositories to open the Repositories tab in the details pane.
Select the repository in which you want to create a workspace.
In the editor, click Add Workspace.
In the Create development workspace pane, in the Workspace ID field, enter a unique ID for the workspace.
IDs can only include numbers, letters, hyphens, and underscores.
Click Create.
Create a workspace in a third-party repository
To create a new workspace in a third-party repository, follow these steps:
In the Google Cloud console, go to the BigQuery page.
In the left pane, click Explorer:
In the Explorer pane, expand your project and then click Repositories to open the Repositories tab in the details pane.
Select the repository in which you want to create a workspace.
In the editor, click Add Workspace. This opens the Create development workspace pane.
Choose either the Existing remote branch or New branch radio button, depending on whether you want to use an existing or new branch for the workspace.
Specify the branch to use:
- If you chose the Existing remote branch radio button, choose an existing branch in the Remote branch field.
If you chose the New branch radio button, type a branch name in the Workspace ID field. The branch name created in the third-party repository is the same as the BigQuery workspace ID.
IDs can only include numbers, letters, hyphens, and underscores.
Click Create.
Create a directory in a workspace
To create a directory in a workspace, follow these steps:
In the Google Cloud console, go to the BigQuery page.
In the left pane, click Explorer:
In the Explorer pane, expand your project and then click Repositories to open the Repositories tab in the details pane.
Select the repository that contains the workspace that you want to work with.
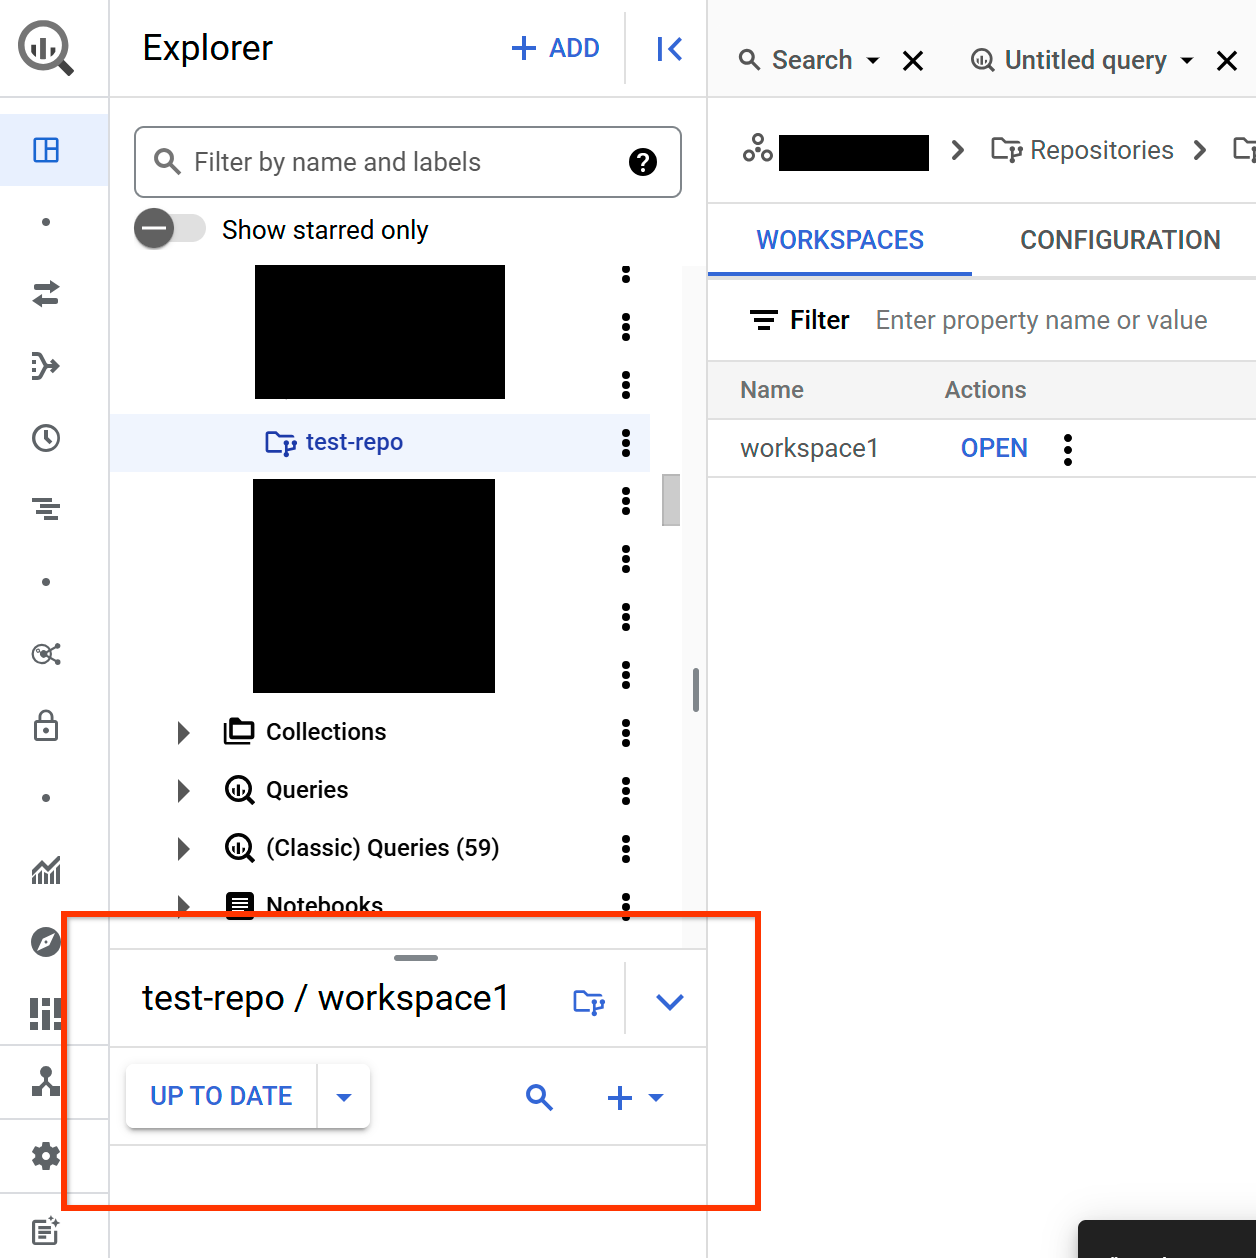
Locate the workspace and then click Open.
This opens the workspace in the folder_data Git repository pane.
Click Open creation menu.
Click Create in repository > Directory.
In the Add a directory path field, type a directory path.
Click Create directory.
Work with files in a workspace
You can create new files in a workspace, or upload existing files.
You can create or upload the following types of files to a repository:
- SQL queries
- Python notebooks
- Data canvases
- Data preparations
- Files of any other type
Create a file
To create a file in a workspace, follow these steps:
In the Google Cloud console, go to the BigQuery page.
In the left pane, click Explorer:
In the Explorer pane, expand your project and then click Repositories to open the Repositories tab in the details pane.
Select the repository that contains the workspace that you want to work with.
Locate the workspace and then click Open.
This opens the workspace in the folder_data Git repository pane.
Click Open creation menu.
Click Create in repository and then click the type of file that you want to create.
In the Name field, type a filename.
Optional: In the Parent directory field, type the directory path in which you want to create the file.
Click Save.
Upload a file
To upload a file to a workspace, follow these steps:
In the Google Cloud console, go to the BigQuery page.
In the left pane, click Explorer:
In the Explorer pane, expand your project and then click Repositories to open the Repositories tab in the details pane.
Select the repository that contains the workspace that you want to work with.
Locate the workspace and then click Open.
This opens the workspace in the folder_data Git repository pane.
Click Open creation menu.
Click Upload to repository and then click the type of file that you want to upload.
In the upload pane, do one of the following:
- In the File upload field, click Browse, select a file, and then click Open.
- In the URL field, type the URL for the file.
Optional: in the Parent directory field, type the directory path in which you want to create the file.
Click Upload.
Delete a file
To delete a file from a workspace, follow these steps:
In the Google Cloud console, go to the BigQuery page.
In the left pane, click Explorer:
In the Explorer pane, expand your project and then click Repositories to open the Repositories tab in the details pane.
Select the repository that contains the workspace that you want to work with.
Locate the workspace and then click Open.
This opens the workspace in the folder_data Git repository pane.
Select the file that you want to delete, click View actions, and then click Delete.
Click Delete to confirm.
Use version control with a file
This section shows you how to use version control in BigQuery to keep track of files in workspaces.
BigQuery uses Git to keep track of each change made to the files inside a repository. In a BigQuery repository, you interact directly with the Git repository. In a connected repository, you interact with the default branch of the remote repository that you configured when you connected the repository.
BigQuery displays version control options based on the status of changes in your workspace. For example, BigQuery displays the commit option only when there are uncommitted local changes in your workspace. When the files in your workspace are an exact copy of your default or default branch, BigQuery displays the Up to date status.
BigQuery displays the following version control options:
- Commit X change(s)
- Commit the X number of local changes in your workspace or selected changed files. BigQuery displays the uncommitted changes.
- Push to default branch
- Push your committed changes to your default branch. This option is available in a repository if you have no uncommitted changes in your workspace and there are unpushed commits.
- Push to
your-branch-name - Push your committed changes to
your-branch-name. This option is available in a repository connected to a third-party Git repository if you have no uncommitted changes in your workspace. The remote branch name in the third-party repository is the same as the BigQuery workspace ID. - Pull from default branch
- Update your workspaces with recent changes from your default branch. This option is available in a repository if you have no uncommitted changes in your workspace.
- Pull from
your-branch-name - Update your workspace with recent changes from
your-branch-name. This option is available in a repository connected to a third-party Git repository if you have no uncommitted changes in your workspace. The remote branch name in the third-party repository is the same as the BigQuery workspace ID. - Revert to last commit
- Restore the files in your workspace to their state from your last commit.
Pull changes
If your workspace is out of sync with your repository, BigQuery displays the Pull option.
To pull changes from your repository to your workspace, follow these steps:
In the Google Cloud console, go to the BigQuery page.
In the left pane, click Explorer:
In the Explorer pane, expand your project and then click Repositories to open the Repositories tab in the details pane.
Select the repository that contains the workspace that you want to work with.
Locate the workspace and then click Open.
This opens the workspace in the folder_data Git repository pane.
In the workspace pane, do the following:
- If you are in a BigQuery repository, click Pull from default branch.
If you are in a repository connected to a third-party Git repository, do one of the following:
- Click Pull from default branch to pull from the default branch of the third-party repository.
- Click Pull from
your-branch-nameto pull from the branch of the third-party repository that corresponds to the current workspace.
Commit changes
After you make a change in a workspace, BigQuery displays the Commit option. You can commit all local changes or selected files. Files that you have added or modified are identified with a blue dot next to them in the workspace pane.
To commit changes from your workspace to your repository, follow these steps:
In the Google Cloud console, go to the BigQuery page.
In the left pane, click Explorer:
In the Explorer pane, expand your project and then click Repositories to open the Repositories tab in the details pane.
Select the repository that contains the workspace that you want to work with.
Locate the workspace and then click Open.
This opens the workspace in the folder_data Git repository pane.
In the workspace pane, click Commit X changes.
In the Commit changes pane, do the following:
Select the changed files that you want to commit.
If you don't select any files, BigQuery commits all local changes. You can filter changed files by file state, filename, and path.
In the Add a commit message field, type a description for your commit.
Click Commit All changes, or Commit X changes.
The button name depends on your selection of files to commit.
Push changes
BigQuery displays the Push option after you commit changes.
To push changes from your workspace to your repository, follow these steps:
In the Google Cloud console, go to the BigQuery page.
In the left pane, click Explorer:
In the Explorer pane, expand your project and then click Repositories to open the Repositories tab in the details pane.
Select the repository that contains the workspace that you want to work with.
Locate the workspace and then click Open.
This opens the workspace in the folder_data Git repository pane.
In the workspace pane, do the following:
- If you are in a BigQuery repository, click Push to default branch.
If you are in a repository connected to a third-party Git repository, do one of the following:
- Click Push to default branch to push to the default branch of the third-party repository.
- Click Push to
your-branch-nameto push to the branch of the third-party repository that corresponds to the current workspace.
Revert uncommitted changes
To revert uncommitted changes, follow these steps:
In the Google Cloud console, go to the BigQuery page.
In the left pane, click Explorer:
In the Explorer pane, expand your project and then click Repositories to open the Repositories tab in the details pane.
Select the repository that contains the workspace that you want to work with.
Locate the workspace and then click Open.
This opens the workspace in the folder_data Git repository pane.
In the workspace pane, click the arrow drop-down on the version control button, and then click Revert to last commit.
Resolve merge conflicts
A merge conflict can happen when a local change in your workspace is incompatible with a change that has been made to the default default branch of your repository. Merge conflicts usually occur when multiple users simultaneously edit the same file.
You usually encounter a merge conflict when you pull from a branch after a different user has pushed a conflicting change to the same branch. You need to resolve a merge conflict manually by editing the affected file.
The following code sample shows a merge conflict displayed in a SQL file:
    <<<<<<< HEAD
    SELECT 1 as CustomerOrders
    =======
    SELECT 1 as Orders
    >>>>>>> refs/heads/main
To resolve a merge conflict, follow these steps:
In the Google Cloud console, go to the BigQuery page.
In the left pane, click Explorer:
In the Explorer pane, expand your project and then click Repositories to open the Repositories tab in the details pane.
Select the repository that contains the workspace that you want to work with.
Locate the workspace and then click Open.
This opens the workspace in the folder_data Git repository pane.
Select the affected file and edit it with your chosen changes.
Optional: Push changes.
View commit history
To view commit history, follow these steps:
In the Google Cloud console, go to the BigQuery page.
In the left pane, click Explorer:
In the Explorer pane, expand your project and then click Repositories to open the Repositories tab in the details pane.
Select the repository that contains the workspace that you want to work with.
Locate the workspace and then click Open.
This opens the workspace in the folder_data Git repository pane.
In the workspace pane, click the arrow drop-down on the version control button, and then click View commit history.
Delete a workspace
To delete a workspace and all its contents, follow these steps:
In the Google Cloud console, go to the BigQuery page.
In the left pane, click Explorer:
In the Explorer pane, expand your project and then click Repositories to open the Repositories tab in the details pane.
Select the repository that contains the workspace that you want to delete.
Locate your workspace, and then click Open actions > Delete.
Click Delete.
What's next
- Learn how to create repositories.