Halaman ini menjelaskan cara menjadwalkan pengiriman laporan dasbor Google SecOps melalui email.
Anda dapat menjadwalkan pengiriman laporan Google SecOps untuk dasbor default dan dasbor kustom. Saat menjadwalkan pengiriman laporan dasbor Google SecOps, Anda akan melakukan tugas berikut:
Jadwalkan pengiriman laporan dasbor segera atau secara berulang.
Tentukan alamat email untuk mengirimkan laporan.
Tentukan format laporan seperti file CSV, PDF, atau PNG.
Memfilter laporan berdasarkan jangka waktu tertentu.
Tetapkan detail penomoran halaman dan uji pengiriman laporan terjadwal.
Mengontrol akses ke laporan dasbor penjadwalan
Anda harus memiliki peran Administrator atau Editor untuk menjadwalkan laporan dasbor. Untuk mengetahui informasi selengkapnya tentang cara mengelola Pengguna dan Grup, atau menetapkan peran, lihat Kontrol Akses Berbasis Peran.
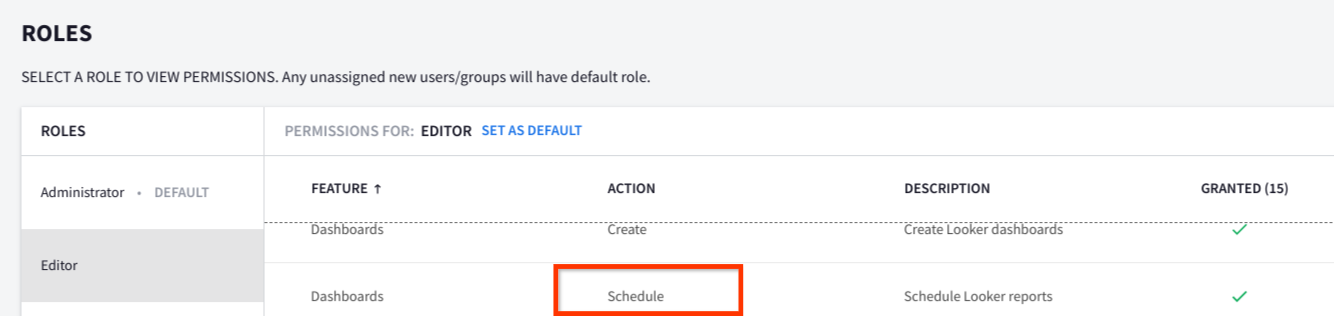
Gambar: Peran Administrator dan peran Editor memberikan akses untuk menjadwalkan laporan
Membuat jadwal baru untuk pengiriman laporan
Jika Anda tidak memiliki jadwal yang sudah ada untuk laporan dasbor, buat jadwal
untuk laporan dasbor dan sesuaikan pengulangan, email tujuan, format, filter,
dan penomoran halaman.
Pilih dasbor default atau kustom yang pengiriman laporannya ingin Anda jadwalkan.
Di menu navigasi, klik Dasbor & Laporan > Dasbor SIEM. Untuk pelanggan Google Security Operations SIEM, cukup klik Dasbor.
Dari daftar dasbor default dan pribadi, pilih dasbor yang pengiriman laporannya ingin Anda jadwalkan.
Untuk menjadwalkan pengiriman laporan dasbor, di halaman dasbor, klik ikon
more_vertLainnya, lalu pilih Jadwalkan pengiriman.
Jika jadwal laporan ada untuk dasbor, dialog Jadwal akan muncul dengan opsi
untuk mengedit atau membuat jadwal baru. Jika jadwal laporan tidak ada untuk dasbor,
dialog Jadwalkan akan muncul dengan nama dasbor yang ditambahkan dalam format berikut: Jadwalkan <Dashboard Name>.
Dalam dialog Jadwalkan, tentukan detail berikut di tab Setelan:
Pilih interval pengiriman dari daftar Pengulangan dan pilih waktu pengiriman. Anda juga dapat menentukan zona waktu pengiriman di tab Opsi lanjutan.
Di kolom Alamat email, masukkan daftar alamat email yang dipisahkan koma yang ingin Anda kirimi laporan. Domain email harus sama dengan domain pengguna yang Anda gunakan untuk login ke Google SecOps. Misalnya,
jika Anda login ke Google SecOps menggunakan sara@altostrat.com, Anda hanya dapat menentukan email
yang menggunakan domain altostrat.com, seperti alex@altostrat.com. Secara default, Anda tidak dapat
mengirim email ke domain email eksternal lainnya.
Untuk mengirim email ke domain tambahan atau mengizinkan email dikirim ke domain mana pun dengan menonaktifkan validasi domain email, hubungi Dukungan SecOps Google.
Di daftar Format, pilih format file CSV, PDF, atau PNG untuk laporan.
Di tab Filter, tentukan jangka waktu berdasarkan waktu yang ingin Anda gunakan untuk memfilter laporan. Jika dasbor tidak berisi filter, pesan bahwa dasbor tidak memiliki filter akan muncul.
Untuk menentukan filter, klik kolom Waktu, lalu tentukan kondisi filter, bulan, dan tahun.
Untuk menambahkan filter waktu lainnya, klik ikon addTambahkan.
Di tab Opsi lanjutan, tentukan opsi penomoran halaman untuk email.
Untuk menyertakan pesan kustom dalam email, di kolom Pesan Kustom, tambahkan pesan kustom.
Jika perlu, pilih opsi berikut:
Sertakan link: menyertakan link dalam email ke dasbor yang pengiriman laporannya telah Anda jadwalkan.
Luaskan tabel untuk menampilkan semua baris.
Susun kartu dasbor dalam satu kolom.
Dalam daftar Ukuran kertas, pilih ukuran kertas.
Di daftar Zona waktu pengiriman, pilih zona waktu untuk mengirimkan pesan.
Untuk menguji pengiriman laporan melalui email, klik Uji sekarang.
Klik Simpan. Dialog Jadwal akan muncul.
Untuk mengedit, menduplikasi, atau menghapus pengiriman terjadwal, di dialog Jadwal,
klik ikon more_vertLainnya.
Untuk mengirim laporan segera, klik Kirim sekarang.
Untuk membuat jadwal baru lainnya, klik Baru.
Untuk menutup dialog, klik Selesai.
Menggunakan jadwal yang ada untuk pengiriman laporan
Jika jadwal pengiriman laporan dasbor ada, Anda dapat segera mengirim laporan atau mengubah opsi pengiriman laporan.
Pilih dasbor default atau kustom yang jadwal laporannya ingin Anda perbarui.
Di menu navigasi, klik Dasbor & Laporan > Dasbor SIEM.
Dari daftar dasbor default dan pribadi, pilih dasbor yang pengiriman laporannya ingin Anda jadwalkan.
Di halaman dasbor, klik ikon
more_vertLainnya, lalu pilih Jadwalkan pengiriman.
Jika jadwal laporan ada untuk dasbor, dialog Jadwal akan muncul dengan opsi
untuk mengedit atau membuat jadwal baru.
Untuk mengedit, menduplikasi, atau menghapus pengiriman terjadwal, di dialog Jadwal,
klik ikon more_vertLainnya.
Untuk mengirim laporan segera, klik Kirim sekarang.
[[["Mudah dipahami","easyToUnderstand","thumb-up"],["Memecahkan masalah saya","solvedMyProblem","thumb-up"],["Lainnya","otherUp","thumb-up"]],[["Sulit dipahami","hardToUnderstand","thumb-down"],["Informasi atau kode contoh salah","incorrectInformationOrSampleCode","thumb-down"],["Informasi/contoh yang saya butuhkan tidak ada","missingTheInformationSamplesINeed","thumb-down"],["Masalah terjemahan","translationIssue","thumb-down"],["Lainnya","otherDown","thumb-down"]],["Terakhir diperbarui pada 2025-08-21 UTC."],[[["\u003cp\u003eThis page outlines how to schedule the delivery of Google Security Operations dashboard reports via email, including both default and custom dashboards.\u003c/p\u003e\n"],["\u003cp\u003eUsers with Administrator or Editor roles can schedule reports to be delivered immediately or on a recurring basis to specified email addresses within the same domain.\u003c/p\u003e\n"],["\u003cp\u003eReports can be customized in CSV, PDF, or PNG format, and filters can be applied based on a specific time period, including advanced options such as pagination and custom messages.\u003c/p\u003e\n"],["\u003cp\u003eThe process involves selecting a dashboard, configuring the schedule details such as recurrence, email recipients, format, filters, and pagination, and then saving the schedule or testing it.\u003c/p\u003e\n"],["\u003cp\u003eExisting schedules can be managed, allowing users to edit, duplicate, delete, or send reports immediately, offering flexibility in report delivery management.\u003c/p\u003e\n"]]],[],null,["# Schedule Google SecOps dashboard reports\n========================================\n\nSupported in: \nGoogle secops [SIEM](/chronicle/docs/secops/google-secops-siem-toc)\n\nThis page explains how you can schedule the delivery of Google SecOps dashboard reports over email.\n\nYou can schedule the delivery of Google SecOps reports for both the default dashboards\nand custom dashboards. When you schedule delivery of a Google SecOps dashboard report,\nyou perform the following tasks:\n\n- Schedule the delivery of the dashboard report immediately or on a recurring schedule.\n- Specify the email addresses to deliver the report.\n- Specify the format of the report such as CSV, PDF, or PNG file.\n- Filter the report based on a specified time period.\n- Set the pagination details and test the delivery of the scheduled report.\n\nControl access to scheduling dashboard reports\n----------------------------------------------\n\nYou must have the Administrator role or Editor role to schedule dashboard reports. For more information about managing Users and Groups, or assigning roles, see [Role-based Access Control](/chronicle/docs/administration/rbac).\n\n**Figure: Administrator role and Editor role provide access to schedule reports**\n\nCreate a new schedule for report delivery\n-----------------------------------------\n\nIf you do not have any pre-existing schedules for the dashboard report, create a schedule\nfor dashboard reports and customize the recurrence, destination email, format, filters,\nand pagination.\n| **Note:** This feature is built on Looker. For detailed information on the features and capabilities of Looker dashboards, see the [Looker documentation](https://docs.looker.com/).\n\n1. Select the default or custom dashboard for which you want to schedule the report delivery.\n 1. In the navigation bar, click **Dashboards \\& Reports \\\u003e SIEM Dashboards** . For Google Security Operations SIEM customers, just click **Dashboards**.\n 2. From the list of default and personal dashboards, select the dashboard for which you want to schedule the report delivery.\n2. To schedule the delivery of a dashboard report, on the dashboard page, click the *more_vert* **More** icon and select **Schedule delivery** . If report schedules exist for the dashboard, the **Schedules** dialog appears with options to edit or create new schedules. If report schedules don't exist for the dashboard, the **Schedule** dialog appears with the dashboard name appended in the following format: Schedule \u003cvar translate=\"no\"\u003e<Dashboard Name>\u003c/var\u003e.\n3. In the **Schedule** dialog, specify the following details on the **Settings** tab:\n\n 1. Select the interval of delivery from the **Recurrence** list and select the time of delivery. You can also specify the delivery timezone on the **Advanced options** tab.\n 2. In the **Email addresses** field, enter a comma-separated list of email\n addresses to which you want to deliver the report. The email domain must\n be the same as the user domain that you use to login to Google SecOps. For example,\n if you login to Google SecOps using `sara@altostrat.com`, you can specify only emails\n that uses the `altostrat.com` domain, such as `alex@altostrat.com`. By default, you cannot\n send emails to other external email domains.\n\n To send emails to an additional domain or to allow emails to be sent to any domain by disabling email domain validation, contact Google SecOps Support.\n 3. In the **Format** list, select the CSV, PDF, or PNG file format for the report.\n\n4. On the **Filters** tab, specify the time period based on which you want to filter\n the report. If the dashboard does not contain filters, a message that the dashboard\n has no filters appears.\n\n 1. To specify a filter, click the **Time** field and specify the filter condition, month, and year.\n 2. To add more time filters, click *add* **Add** icon.\n5. On the **Advanced options** tab, specify the pagination options for the email.\n\n 1. To include a custom message in the email, in the **Custom Message** field, add a custom message.\n 2. If necessary, select the following options:\n - **Include links**: includes links in emails to the dashboards for which you have scheduled report delivery.\n - **Expand tables to show all rows**.\n - **Arrange dashboard tiles in a single column**.\n 3. In the **Paper size** list, select the paper size.\n 4. In the **Delivery time zone** list, select the timezone to deliver the message.\n6. To test the delivery of the report over email, click **Test now**.\n\n7. Click **Save** . The **Schedules** dialog appears.\n\n8. To edit, duplicate, or delete the scheduled delivery, in the **Schedules** dialog,\n click the *more_vert* **More** icon.\n\n9. To send the report immediately, click **Send now**.\n\n10. To create another new schedule, click **New**.\n\n11. To close the dialog, click **Done**.\n\nUse an existing schedule for report delivery\n--------------------------------------------\n\nIf a schedule for the dashboard report delivery exists, you can immediately send the report or modify the report delivery options.\n\n1. Select the default or custom dashboard for which you want to update the report schedule.\n 1. In the navigation bar, click **Dashboards \\& Reports \\\u003e SIEM Dashboards**.\n 2. From the list of default and personal dashboards, select the dashboard for which you want to schedule the report delivery.\n2. On the dashboard page, click the *more_vert* **More** icon and select **Schedule delivery** . If report schedules exist for the dashboard, the **Schedules** dialog appears with options to edit or create new schedules.\n3. To edit, duplicate, or delete the scheduled delivery, in the **Schedules** dialog, click the *more_vert* **More** icon.\n4. To send the report immediately, click **Send now**.\n5. To create another new schedule, click **New**.\n6. To close the dialog, click **Done**.\n\n**Need more help?** [Get answers from Community members and Google SecOps professionals.](https://security.googlecloudcommunity.com/google-security-operations-2)"]]