Sie können ein benutzerdefiniertes Dashboard erstellen, um spezifische Statistiken zu den Daten zu erhalten.
Sie fügen dem Dashboard Kacheln hinzu, auf denen Visualisierungsdiagramme, Text oder Schaltflächen angezeigt werden.
Sie haben folgende Möglichkeiten, ein benutzerdefiniertes Dashboard zu erstellen:
Nachdem Sie ein benutzerdefiniertes Dashboard erstellt haben, können Sie es im Bereich Persönliche Dashboards oder Freigegebene Dashboards in der linken Navigationsleiste verwalten. Persönliche Dashboards sind nur für Sie sichtbar. Geteilte Dashboards sind für alle Mitglieder des Teams sichtbar, die in Google Security Operations auf Dashboards zugreifen können.
Wenn Sie mit benutzerdefinierten Dashboards arbeiten, müssen Sie häufig auf die Menüs Dashboard-Aktionen und Kachelaktionen zugreifen.
Wenn Sie Aktionen für ein benutzerdefiniertes Dashboard ausführen möchten, öffnen Sie das Menü Dashboard-Vorgänge.
Die folgende Abbildung zeigt die Menüposition.
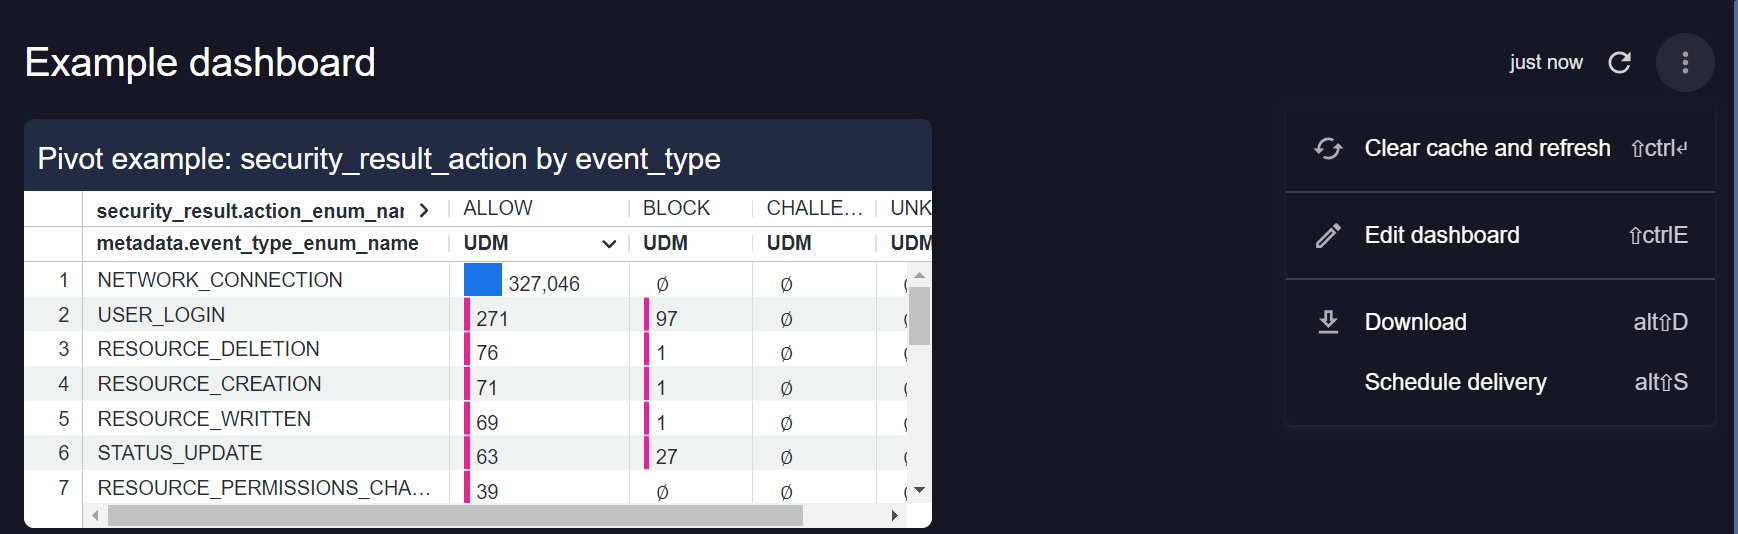
Dashboard-Aktionsmenü öffnen
Wenn Sie Aktionen für eine Kachel ausführen möchten, öffnen Sie das Menü Kachelaktionen. Die folgende Abbildung zeigt, wo sich das Menü befindet.
Menü mit Kachelaktionen öffnen
Neues Dashboard erstellen
So erstellen Sie ein neues Dashboard:
Klicken Sie in der linken Navigationsleiste unter Persönliche Dashboards oder Gemeinsam genutzte Dashboards auf Hinzufügen > Neu erstellen. Ein neues leeres Dashboard wird angezeigt.
Klicken Sie auf Dashboard bearbeiten und geben Sie einen Namen für das neue Dashboard ein.
Wenn Sie ein vorhandenes Dashboard kopieren, können Sie Zeit sparen, da das ursprüngliche Dashboard ein Datenmodell und Visualisierungen enthält, die Sie verwenden möchten. Sie können ein vorhandenes Dashboard aus den Bereichen Standard-Dashboards, Persönliche Dashboards oder Freigegebene Dashboards in der linken Navigationsleiste kopieren.
So kopieren Sie ein vorhandenes Dashboard:
Wählen Sie im Navigationsbereich links im Abschnitt Standard-Dashboards, Persönliche Dashboards oder Freigegebene Dashboards ein Dashboard aus, das Sie kopieren möchten.
Klicken Sie neben dem Namen des Dashboards auf more_vertMenü und wählen Sie dann In „Persönlich“ kopieren oder In „Geteilt“ kopieren aus.
Das Dashboard wird in der linken Navigationsleiste in den Bereich Persönliche Dashboards oder Freigegebene Dashboards kopiert.
Dashboard bearbeiten
Rufen Sie Persönliche Dashboards oder Freigegebene Dashboards auf und wählen Sie ein Dashboard aus.
Klicken Sie auf more_vertDashboard-Aktionen > Dashboard bearbeiten.
Kachel zu einem Dashboard hinzufügen
Sie haben folgende Möglichkeiten, eine Kachel hinzuzufügen:
Neue leere Kachel erstellen
Eine vorhandene Kachel im Dashboard duplizieren
Sie können einen der folgenden Kacheln auswählen:
Visualisierung
Text
Markdown
Schaltfläche
Neue Kachel erstellen
So fügen Sie einem Dashboard eine neue Kachel hinzu:
Klicken Sie im Dialogfeld zum Bearbeiten des Dashboards auf Hinzufügen und wählen Sie den Kacheltyp aus: Visualisierung, Text, Markdown oder Schaltfläche.
Je nach ausgewähltem Kacheltyp werden unterschiedliche Konfigurationsoptionen angezeigt. Wenn Sie IOC-Übereinstimmungen auswählen, können Sie das Nur-Filter-Feld Event Timestamp Filter hinzufügen.
Vorhandene Kachel duplizieren
So duplizieren Sie eine Kachel im aktuellen Dashboard: Sie können die Kopie dann bearbeiten, um andere Felder, Visualisierungen und Filter zu verwenden.
Klicken Sie auf der Kachel, die Sie duplizieren möchten, auf more_vertKachelaktionen und dann auf Kachel duplizieren.
Es wird eine neue Kachel mit demselben Explore und denselben benutzerdefinierten Feldern wie die Originalkachel erstellt.
Sie können das mit der Kachel verknüpfte Explore-Datenmodell nicht ändern.
Bearbeiten Sie die Kachel, um einen bestimmten Anwendungsfall zu unterstützen.
[[["Leicht verständlich","easyToUnderstand","thumb-up"],["Mein Problem wurde gelöst","solvedMyProblem","thumb-up"],["Sonstiges","otherUp","thumb-up"]],[["Schwer verständlich","hardToUnderstand","thumb-down"],["Informationen oder Beispielcode falsch","incorrectInformationOrSampleCode","thumb-down"],["Benötigte Informationen/Beispiele nicht gefunden","missingTheInformationSamplesINeed","thumb-down"],["Problem mit der Übersetzung","translationIssue","thumb-down"],["Sonstiges","otherDown","thumb-down"]],["Zuletzt aktualisiert: 2025-09-04 (UTC)."],[[["\u003cp\u003eCustom dashboards in Google SecOps provide specific insights through visualization charts, text, or buttons organized into tiles.\u003c/p\u003e\n"],["\u003cp\u003eYou can create a new dashboard from scratch, copy an existing one, or import an exported dashboard to quickly build them.\u003c/p\u003e\n"],["\u003cp\u003eDashboards can be designated as either "Personal," visible only to the creator, or "Shared," accessible to all team members within Google Security Operations.\u003c/p\u003e\n"],["\u003cp\u003eDashboards and individual tiles within them have dedicated action menus, "Dashboard actions" and "Tile actions," for editing and managing them.\u003c/p\u003e\n"],["\u003cp\u003eAdding a tile to a dashboard can be done by creating a new blank one or by duplicating an existing tile, allowing for customization with different tile types like visualization, text, markdown, and button.\u003c/p\u003e\n"]]],[],null,["# Create a custom dashboard\n=========================\n\nSupported in: \nGoogle secops [SIEM](/chronicle/docs/secops/google-secops-siem-toc)\n\nYou can create a custom dashboard to provide specific insights into the data.\nYou add tiles to the dashboard that display visualization charts, text, or buttons.\n\nThe following are options to create a custom dashboard:\n\n- [Copy an existing dashboard](#existing)\n- [Create a new dashboard from scratch](#new)\n- [Import an exported dashboard](/chronicle/docs/reports/import-export-dashboards)\n\nAfter creating a custom dashboard, you maintain it under the\n**Personal Dashboards** section or the **Shared Dashboards** section of the left\nnavigation. **Personal Dashboards** are visible to you only. **Shared Dashboards**\nare visible to all members of the team who can access dashboards in Google Security Operations.\n\nWhen working with custom dashboards, you will often need to access the **Dashboard actions**\nand **Tile actions** menus.\n\n- To perform actions on a custom dashboard, open the **Dashboard actions** menu.\n The following image shows the menu location.\n\n **Open dashboard actions menu**\n- To perform actions on a tile, open the **Tile actions** menu. The following image\n shows the menu location.\n\n **Open tile actions menu**\n\nCreate a new dashboard\n----------------------\n\nUse the following steps to create a new dashboard:\n\n1. Under the **Personal Dashboards** or **Shared Dashboards** section in the left navigation, click **Add \\\u003e Create new**. A new blank dashboard appears.\n2. Click **Edit dashboard** and enter a name for the new dashboard.\n3. [Add a tile to a dashboard](#add-tile).\n4. When you're done, click **Save**.\n\nCopy an existing dashboard\n--------------------------\n\nCopying an existing dashboard can save time if the original dashboard uses a\ndata model and has visualizations that you want to use. You can copy an existing\ndashboard from the **Default Dashboards** , **Personal Dashboards** , or **Shared Dashboards**\nsection in the left navigation.\n\nDo the following to copy an existing dashboard:\n\n1. Choose a dashboard you want to copy, from the **Default Dashboards** , **Personal Dashboards** , or **Shared Dashboards** section in the left navigation.\n2. Click more_vert **Menu** next to the\n dashboard name, and then select **Copy to Personal** or **Copy to Shared**.\n\n This copies the dashboard to the **Personal Dashboards** or\n **Shared Dashboards** section in the left navigation.\n\nEdit a dashboard\n----------------\n\n1. Go to **Personal Dashboards** or **Shared Dashboards** and select a dashboard.\n2. Click more_vert **Dashboard actions \\\u003e Edit dashboard**.\n\nAdd a tile to a dashboard\n-------------------------\n\nYou can add a tile using one of the following ways:\n\n- Create a new blank tile.\n- Duplicate an existing tile that exists on the dashboard.\n\nYou can select any of the following types of tile:\n\n- Visualization\n- Text\n- Markdown\n- Button\n\n### Create a new tile\n\nTo add a new tile to a dashboard, do the following:\n\n1. Open an existing [dashboard to edit](#edit-dashboard) or [create a new dashboard](#new).\n2. In the dashboard edit dialog, click **Add** and select the type of tile: **Visualization** , **Text** , **Markdown** , or **Button**.\n3. Depending on the tile type you select, you'll see different configuration options. If you select **IOC Matches** , you can add the `Event Timestamp Filter` filter-only field.\n\n| **Important:** We recommend that you don't filter directly on `Event Timestamp Filter`. This capability will be deprecated.\n\n### Duplicate an existing tile\n\nFollow these steps to duplicate a tile in the current dashboard. You can then edit\nthe copy to use different fields, visualization, and filters.\n\n1. Open an existing [dashboard to edit](#edit-dashboard).\n2. Click more_vert **Tile actions** in the tile that you want to duplicate, and then click **Duplicate tile**. A new tile is created with the same Explore and custom fields as the original tile. You cannot change the Explore data model bound to the tile.\n3. Edit the tile to support a specific use case.\n4. Click **Save**.\n\nEdit a tile\n-----------\n\n1. Open an existing [dashboard to edit](#edit-dashboard).\n2. Identify the tile you want to edit, and then click more_vert **Tile actions \\\u003e Edit**.\n3. Modify the tile to support a specific use case.\n4. Click **Save**.\n\nWhat's next:\n------------\n\n- [Add a chart to a dashboard](/chronicle/docs/reports/create-chart-visualization)\n\n**Need more help?** [Get answers from Community members and Google SecOps professionals.](https://security.googlecloudcommunity.com/google-security-operations-2)"]]