Halaman ini berlaku untuk Apigee dan Apigee Hybrid.
Lihat dokumentasi
Apigee Edge.

Kelola halaman di portal Anda, seperti yang dijelaskan di bagian berikut.
Tentang jalur URL yang dicadangkan
Jalur URL berikut dicadangkan untuk digunakan oleh portal developer dan tidak dapat ditentukan sebagai jalur halaman saat membuat halaman:
aaccounts/createapiscreatedocsloginlogoutmy-appssitesteams
Jalur yang dicadangkan /create dapat digunakan sebagai URL target MenuItem atau
ditautkan dari Halaman.
Jalur yang dicadangkan /create akan mengalihkan ke
halaman pembuatan akun.
Menjelajahi halaman Halaman
Untuk mengakses halaman Halaman:
UI Konsol Cloud
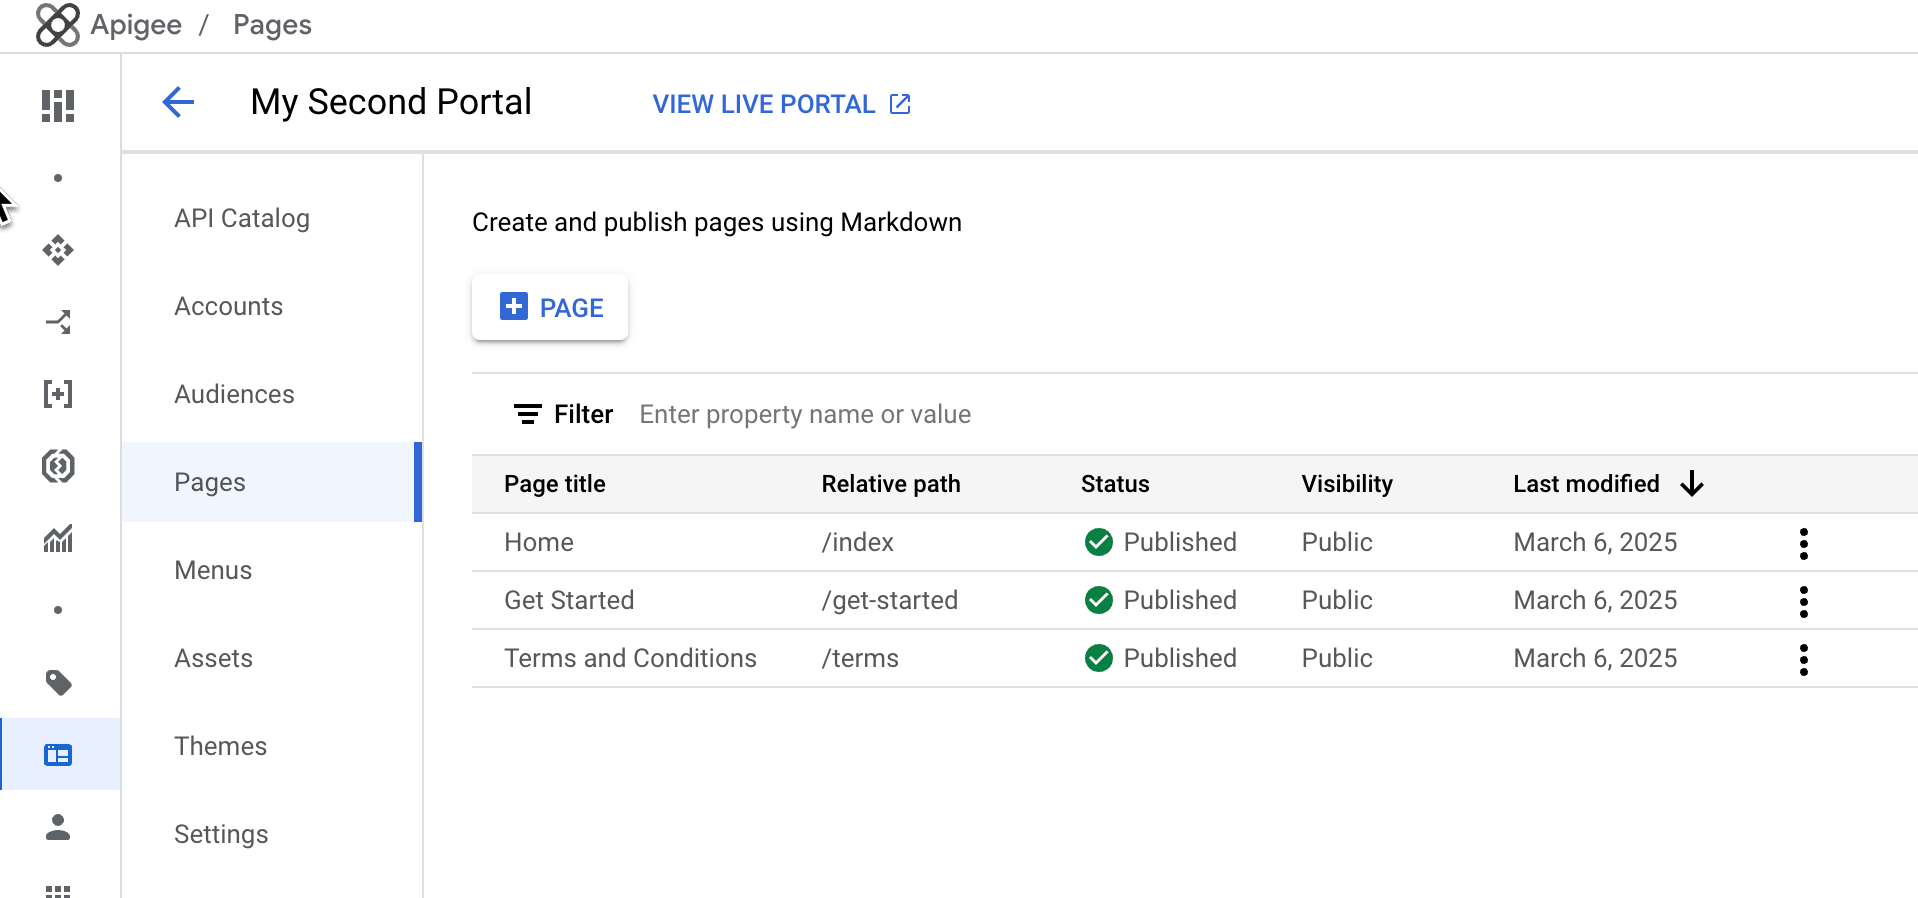
Di konsol Apigee di Cloud, buka halaman Distribution > Portals.
Daftar halaman di portal Anda akan ditampilkan.
UI Klasik
- Pilih Publikasikan > Portal di menu navigasi samping, pilih portal Anda, lalu klik Halaman di halaman landing.
- Saat mengedit portal, pilih Halaman di menu drop-down di panel navigasi atas.
Daftar halaman di portal Anda akan ditampilkan.
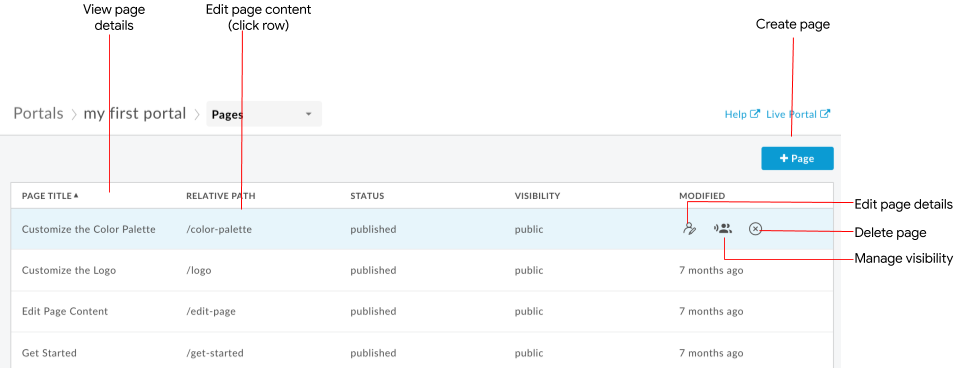
Halaman Halaman memungkinkan Anda:
- Membuat halaman
- Melihat detail halaman, termasuk nama, jalur relatif, status, visibilitas, dan jumlah waktu sejak halaman terakhir diubah
- Mengedit konten dan detail halaman
- Mengelola visibilitas halaman di portal Anda
- Menghapus halaman di portal Anda
- Urutkan daftar halaman menurut kolom (panah menunjukkan kolom aktif dan arah konten yang diurutkan)
Membuat halaman
Untuk membuat halaman baru:
- Akses halaman Pages.
- Klik +Halaman.
Dalam dialog Buat Halaman, masukkan detail berikut:
Kolom Deskripsi Wajib? Nama Nama halaman. Nama halaman harus unik dalam portal. Nama ini digunakan di header halaman portal dan tab browser. Ya Jalur URL relatif yang mudah digunakan untuk halaman. Untuk mengetahui praktik terbaik, lihat Menerapkan pengoptimalan mesin telusur (SEO). Gunakan hanya karakter alfanumerik dan tanda hubung. Spasi dan karakter khusus tidak diizinkan. Secara default, nama halaman dengan spasi dikonversi menjadi tanda hubung.
Catatan: Hindari menentukan jalur URL yang dicadangkan saat membuat portal. Untuk mengetahui daftar jalur URL yang dicadangkan, lihat Tentang jalur URL yang dicadangkan.Ya Simpan halaman.
UI Konsol Cloud
Klik Simpan.
UI Klasik
Klik Buat.
Mengedit isi halaman
Untuk mengedit konten halaman:
- Akses halaman Pages.
- Klik nama halaman yang ingin Anda edit.
- Edit isi halaman. Lihat Mengembangkan konten portal menggunakan editor halaman.
Mengedit detail halaman
Untuk mengedit detail halaman, termasuk nama, deskripsi, dan jalur relatif:
- Akses halaman Pages.
Buka editor.
UI Konsol Cloud
Di baris untuk halaman yang ingin Anda edit, klik Lainnya, Edit.
UI Klasik
Posisikan kursor di atas halaman yang ingin Anda edit, lalu klik
 di menu tindakan.
Edit detail halaman.
Simpan halaman.
UI Konsol Cloud
Klik Simpan.
UI Klasik
Klik Buat.
Mengelola visibilitas halaman di portal Anda
Untuk mengelola visibilitas halaman di portal Anda:
Buka editor visibilitas:
UI Konsol Cloud
- Di baris untuk halaman yang ingin Anda ubah, klik Lainnya, Edit.
- Di area Visibilitas, klik Edit.
UI Klasik
Posisikan kursor di halaman yang ingin Anda kelola visibilitasnya dan klik
 di menu tindakan. Dialog Visibilitas akan terbuka.
Pilih salah satu opsi berikut:
- Publik (dapat dilihat oleh siapa saja) agar semua pengguna dapat melihat halaman.
- Pengguna terautentikasi untuk mengizinkan hanya pengguna terdaftar yang melihat halaman.
- Audiens yang dipilih untuk memilih audiens tertentu yang Anda inginkan agar dapat melihat halaman. Untuk mengetahui informasi tentang cara mengelola audiens yang ditentukan untuk portal Anda, lihat Mengelola audiens untuk portal Anda.
Simpan setelan visibilitas.
UI Konsol Cloud
Klik Terapkan
UI Klasik
Klik Simpan.
Menghapus halaman dari portal Anda
Untuk menghapus halaman dari portal Anda:
Hapus halaman.
UI Konsol Cloud
- Klik Lainnya, Hapus.
- Ketik Hapus, lalu klik Hapus halaman untuk mengonfirmasi.
UI Klasik
- Posisikan kursor di halaman yang ingin Anda edit, lalu klik
 di menu tindakan.
 - Klik Hapus untuk mengonfirmasi operasi.