Manage curations

This page applies to Apigee and Apigee hybrid.

This page describes how to set up and manage custom curations in API hub. Custom curations enable you to override the default curation logic of your plugin instances to implement a tailored data transformation and enrichment process based on your organization's needs.

Before you begin

Ensure the following before setting up a custom curation:

  • Provision Application Integration in your Google Cloud project. See Set up Application Integration for more information.

Create a custom curation

To create a new custom curation logic, do the following:

  1. Create an integration for the custom curation in Application Integration.
  2. Set up a custom curation in API hub.

Create an integration for the custom curation in Application Integration

To create a custom curation logic in Application Integration, perform the following steps:

  1. In the Google Cloud console, go to the Apigee page.

    Go to Apigee

  2. In the navigation menu, click Integrations. The Integrations page appears.
  3. Click Create integration and provide the following details in the Create Integration page:
    1. Integration name: Enter a name for your integration.
    2. Description: Optionally, enter a description for your integration.
    3. Region: Select the region for your integration. This must be the same region as your API hub instance.
    4. Click Create to open the integration in the integration editor.
  4. Configure integration variables using the ApiData definition. These variables will be used as input and output task variables for the custom curation logic.
  5. Add an API trigger and use the available tasks to build your custom curation logic.
  6. Once complete, click Publish to publish the integration.

For more information about Application Integration, see the Application Integration documentation.

Set up a custom curation

Once you have created and published your integration in Application Integration, you can set up the custom curation in API hub. To set up a custom curation, do the following:

  1. In the Google Cloud console, go to the API hub page.

    Go to API hub

  2. Click Settings from the left navigation menu to open the Settings page.
  3. Click the Curations tab to view the list of curations.
  4. Click Setup a new curation.
  5. In the Set up curation pane, provide the following details:
    1. Optional: Click Specify ID to provide a unique ID for the curation. API hub generates a unique ID if you don't provide one.
    2. Display name: Enter a name for the curation.
    3. Description: Enter a description for the curation.
    4. If you have an existing integration created for your curation logic in Application Integration, do the following under Associate an existing integration section:
      1. Integration: Choose the integration that you want to associate for the curation.
      2. Trigger ID: Choose the API trigger ID that you want to associate for the curation.
    5. If you don't have an existing integration created for your curation logic in Application Integration, follow the instructions in Create an integration for the custom curation to create an integration and then continue from Step 5d.
  6. Click Create curation to initiate the creation of the custom curation.

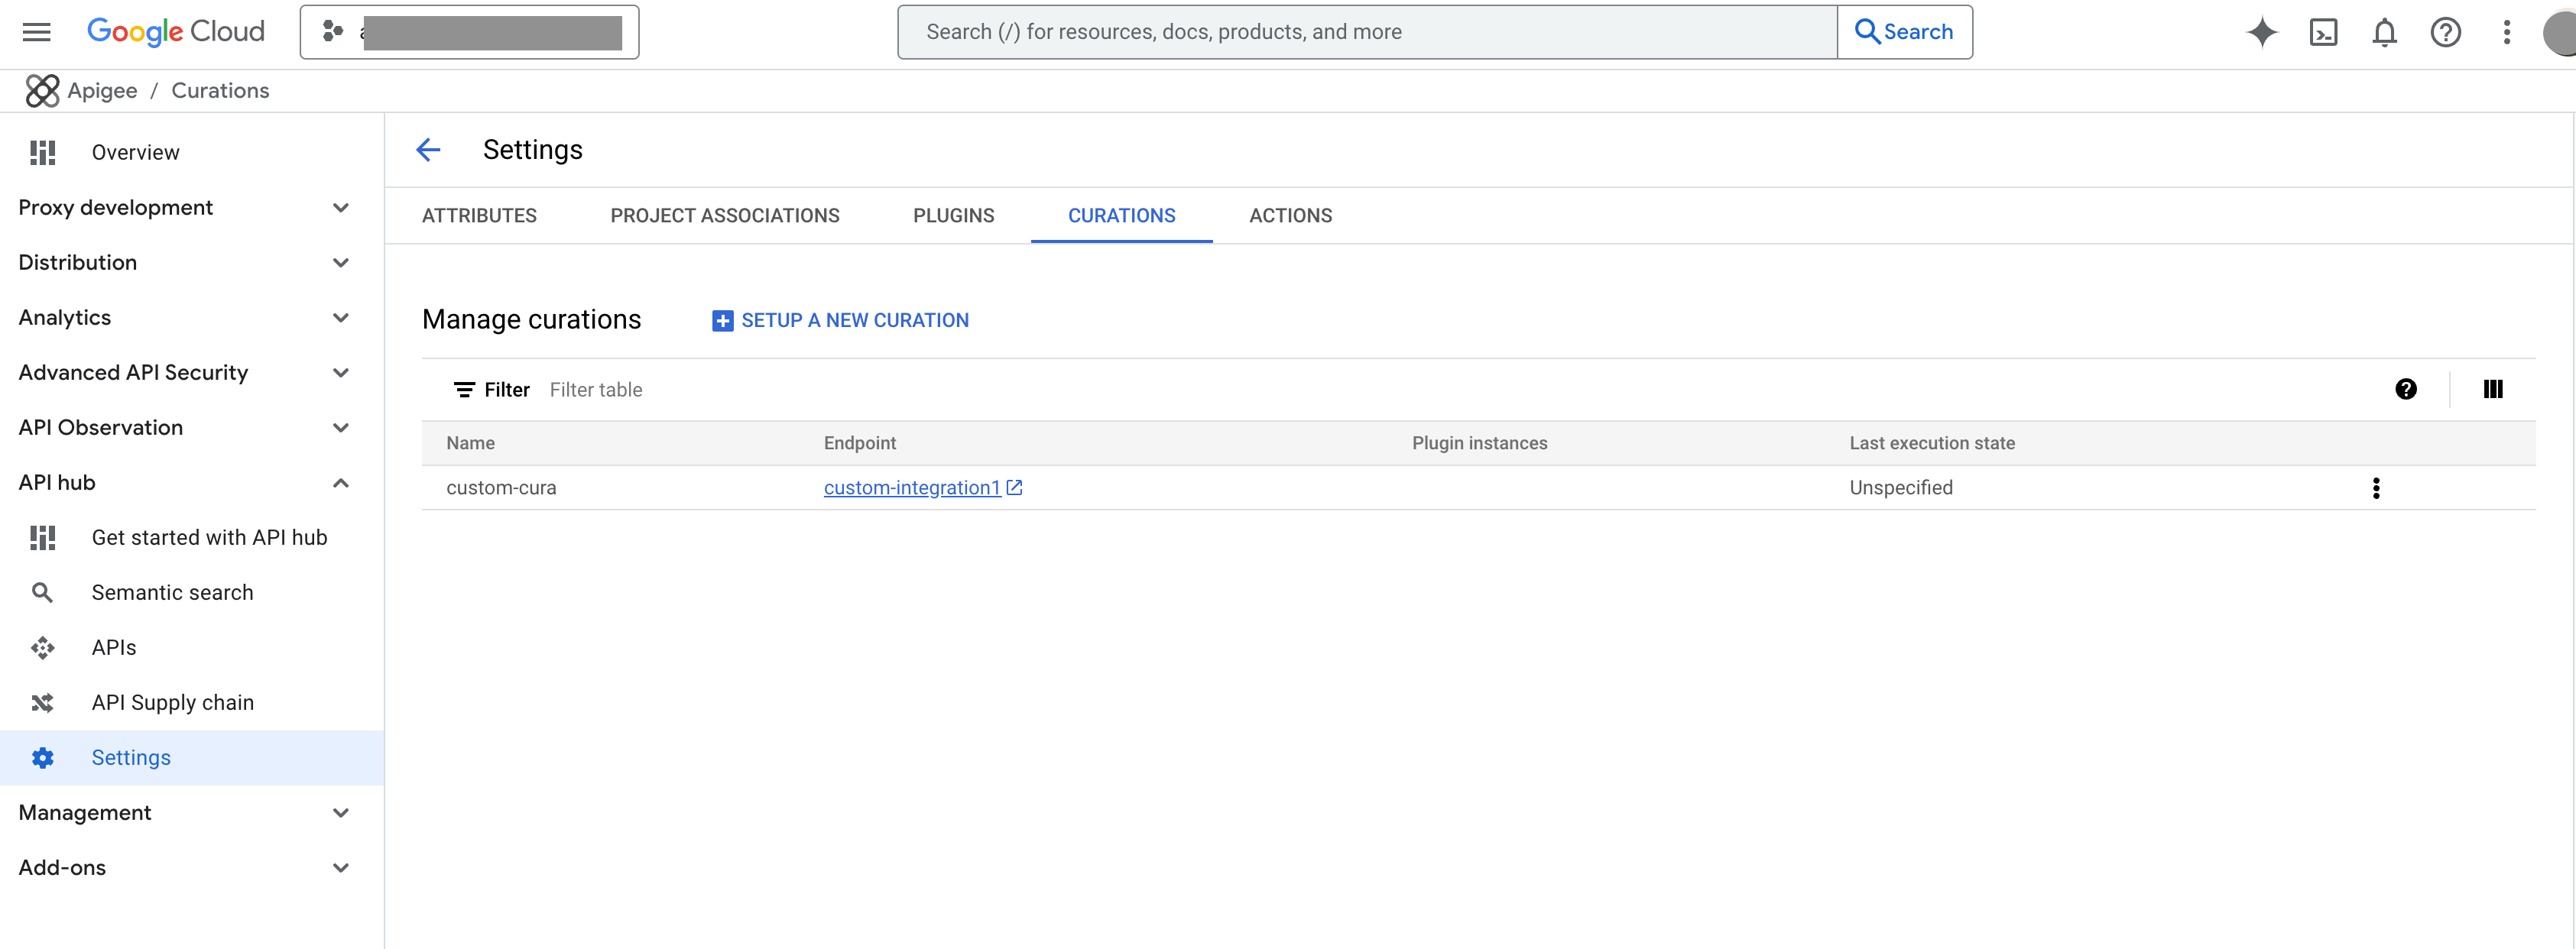
    On successful creation, the curation is listed under Manage curations as shown in the following image:

    Image showing the custom curation. Image showing the custom curation.

Delete a custom curation

To delete a custom curation, perform the following steps:

  1. In the Google Cloud console, go to the API hub page.

    Go to API hub

  2. Click Settings from the left navigation menu to open the Settings page.
  3. Click the Curations tab and go to the Manage curations section to view the list of curations in your project.
  4. For the curation that you want to delete, click (Curation actions) and then select Delete.
  5. In the confirmation dialog, click Delete to confirm the deletion of the curation.

What's next