第 1 步:创建 Apigee 工作区
使用集合让一切井井有条
根据您的偏好保存内容并对其进行分类。
本页面适用于 Apigee 和 Apigee Hybrid。
查看 Apigee Edge 文档。

创建一个 Apigee 工作区,用于开发 API。
如需访问 Apigee in Cloud Code,请启动 VS Code 并点击活动栏中的  Cloud Code 图标,然后选择 Apigee 部分。
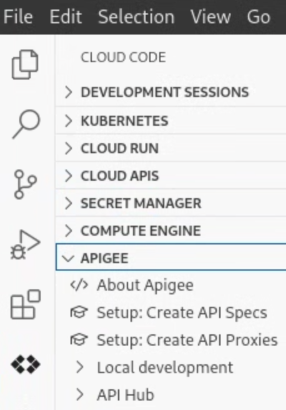
点击本地开发,然后点击该文件夹中的创建 Apigee 工作区图标 ( )。或者,您也可以选择视图 > 命令面板以打开命令面板,然后选择 Cloud Code:打开 Apigee 工作区。
选择与您的首选开发样式匹配的工作区类型。您可以选择单代码库工作区或多代码库工作区。
在提示符处输入 myapigeeworkspace,然后按 Enter 键。
导航到要保存 Apigee 工作区的目录。
如果您使用的是源代码控制管理,请在源代码控制代码库中选择一个位置。
点击 Select workspace folder。
系统会创建 Apigee 工作区,将其存储在指定本地目录中,并在 Apigee 部分中显示:
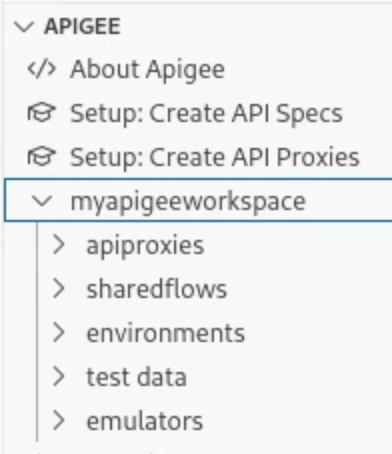
如上所示,系统为您创建了一组文件夹,供您开发 API 代理和共享流、配置部署环境以及构建测试资源。
1
(下一步)第 2 步:创建 API 代理
3
4
5
6
7
8
如未另行说明,那么本页面中的内容已根据知识共享署名 4.0 许可获得了许可,并且代码示例已根据 Apache 2.0 许可获得了许可。有关详情,请参阅 Google 开发者网站政策。Java 是 Oracle 和/或其关联公司的注册商标。
最后更新时间 (UTC):2025-10-06。
[[["易于理解","easyToUnderstand","thumb-up"],["解决了我的问题","solvedMyProblem","thumb-up"],["其他","otherUp","thumb-up"]],[["很难理解","hardToUnderstand","thumb-down"],["信息或示例代码不正确","incorrectInformationOrSampleCode","thumb-down"],["没有我需要的信息/示例","missingTheInformationSamplesINeed","thumb-down"],["翻译问题","translationIssue","thumb-down"],["其他","otherDown","thumb-down"]],["最后更新时间 (UTC):2025-10-06。"],[],[]]