本页面适用于 Apigee 和 Apigee Hybrid。
查看 Apigee Edge 文档。

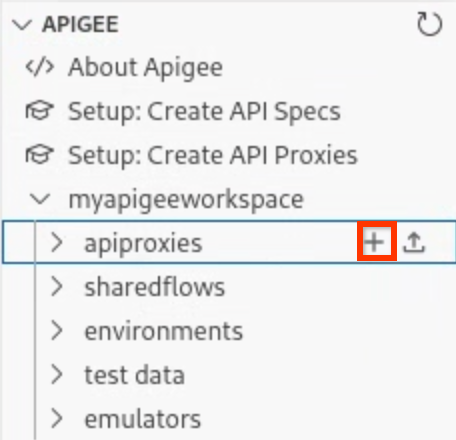
接下来,创建 API 代理。
将光标悬停在工作区中的 apiproxies 文件夹上,然后点击
 。
。
此时,创建 API 代理向导会打开。
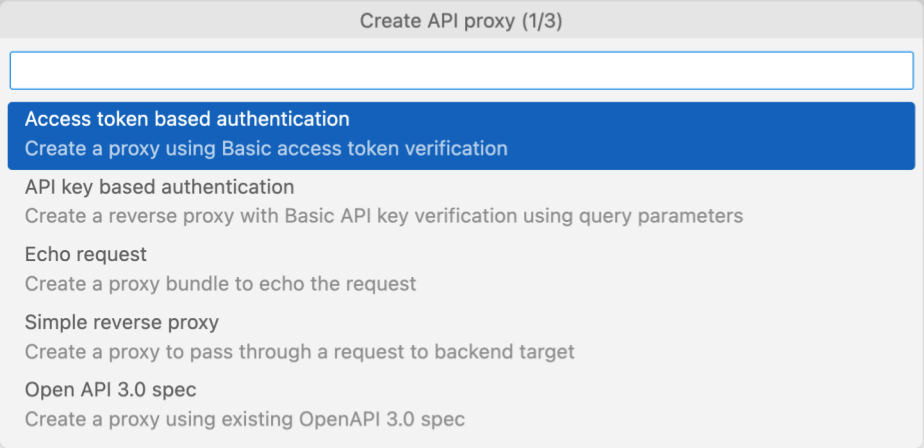
点击 API key based authentication。
为下一组提示输入以下值。输入每个值后按 Enter 键确认并继续。
字段 值 说明 API proxy namehelloworld 用于标识 API 代理的名称。 API proxy base pathhelloworld 用于向 API 发出请求的网址的一部分。Apigee 使用该网址来匹配传入的请求并将其路由到相应的 API 代理。 Backend target URLhttps://mocktarget.apigee.net API 代理收到请求时 Apigee 调用的目标网址。 mocktarget服务托管在 Apigee 上,并返回简单的数据。API 代理创建完成。
展开 helloworld 文件夹,以查看 API 代理软件包的内容。
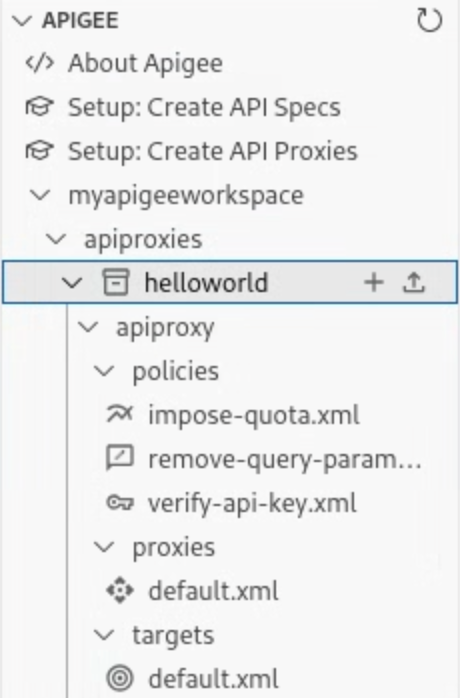
根据您使用向导进行的选择,默认 API 代理、目标端点和一组管理基于 API 密钥的身份验证的政策会添加到 API 代理配置中。
在下一步中,您将配置和部署包含 helloworld API 代理的环境。
1 2 (下一步)第 3 步:配置和部署环境 4 5 6 7 8