Menyimpan notebook ke GitHub
Untuk mencadangkan instance notebook yang dikelola pengguna dan menyediakannya untuk orang lain, simpan konten instance notebook yang dikelola pengguna ke GitHub.
Membuat repositori GitHub
Jika belum memiliki repositori GitHub, Anda harus membuatnya.
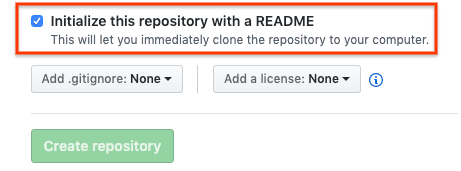
Saat membuat repositori GitHub, pastikan repositori GitHub Anda dapat di-clone dengan mencentang kotak Inisialisasi repositori ini dengan README.
Meng-clone repositori GitHub Anda di instance notebook yang dikelola pengguna
Untuk meng-clone repositori GitHub di instance notebook yang dikelola pengguna, selesaikan langkah-langkah berikut:
Di repositori GitHub Anda, klik tombol Kode, lalu klik tab Lokal.
Salin URL HTTPS.
Di konsol Google Cloud , buka halaman User-managed notebooks.
Klik Buka JupyterLab untuk membuka instance notebook yang dikelola pengguna.
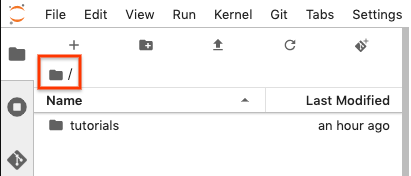
Di JupyterLab Browser File, pilih folder tempat Anda ingin meng-clone repositori GitHub. Misalnya, folder beranda.
Di JupyterLab, pilih Git > Clone Repositori.
Jika diminta, masukkan kredensial Anda.
Jika Anda menggunakan nama pengguna dan sandi GitHub, masukkan nama pengguna dan sandi GitHub Anda.
Jika Anda menggunakan autentikasi 2 langkah dengan GitHub, buat dan gunakan token akses pribadi.
Dalam dialog Clone repo, tempel URL HTTPS untuk repositori GitHub Anda.
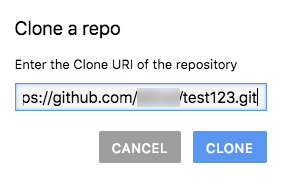
Klik Clone.
Mengonfigurasi instance notebook yang dikelola pengguna dengan informasi pengguna GitHub Anda
Di JupyterLab, pilih Git > Buka Repositori Git di Terminal untuk membuka jendela terminal Git.
Di jendela terminal Git, masukkan perintah berikut untuk mengonfigurasi nama pengguna dan email Git Anda:
git config --global user.name "YOUR_NAME"
git config --global user.email "YOUR_EMAIL"
Jika akun GitHub Anda memerlukan autentikasi SSH, selesaikan langkah-langkah berikut untuk menghubungkan akun:
Dari terminal Git Anda di instance notebook yang dikelola pengguna, ikuti petunjuk GitHub untuk membuat kunci SSH baru.
Ikuti petunjuk untuk menambahkan kunci SSH ke akun GitHub Anda.
Tutup jendela terminal Git.
Menambahkan file yang di-commit ke repositori GitHub Anda
Instance notebook yang dikelola pengguna akan menampilkan repositori sebagai folder baru. Jika Anda tidak melihat repositori GitHub yang di-clone sebagai folder, klik tombol Refresh Daftar File.

Klik dua kali folder repositori Anda untuk membukanya.
Tambahkan notebook baru ke instance notebook yang dikelola pengguna.
Untuk menambahkan file notebook, Anda dapat menggunakan menu atau Peluncur.
Menu
Untuk menambahkan file notebook baru dari menu, pilih File > Baru > Notebook.
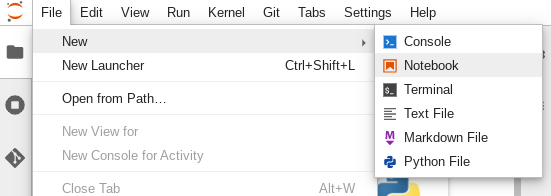
Pada dialog Pilih kernel, pilih kernel untuk notebook baru Anda, misalnya, Python 3, lalu klik Pilih.
File notebook baru akan terbuka.
Peluncur
Untuk menambahkan file notebook baru dari Peluncur, pilih File > Baru > Peluncur.
Klik kotak untuk kernel yang ingin Anda gunakan.
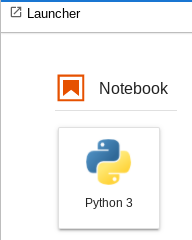
File notebook baru Anda akan terbuka.
Ganti nama file notebook baru Anda.
Menu
Pilih File > Ganti nama notebook. Dialog Ganti nama file akan terbuka.
Di kolom Nama baru, ubah
Untitled.ipynbmenjadi sesuatu yang bermakna, sepertiinstall.ipynb.Klik Ganti nama.
Peluncur
Klik kanan tab
Untitled.ipynb, lalu klik Ganti nama notebook. Dialog Ganti nama file akan terbuka.Di kolom Nama baru, ubah
Untitled.ipynbmenjadi sesuatu yang bermakna, sepertiinstall.ipynb.Klik Ganti nama.
Pilih tab Git. Notebook baru Anda tercantum dalam pengelompokan Tidak terlacak.
Untuk menambahkan notebook baru sebagai file untuk repositori GitHub Anda, klik kanan notebook baru dan pilih Lacak. Pada tab Git, notebook Anda kini ditambahkan ke pengelompokan Stage.
Untuk commit notebook baru ke repositori GitHub Anda, pada tab Git, tambahkan komentar commit, lalu klik Commit.
Untuk membuka jendela terminal Git, pilih Git > Buka repositori Git di terminal.
Di jendela terminal Git, masukkan perintah
git push.Jika Anda menggunakan nama pengguna dan sandi GitHub, saat diminta, masukkan nama pengguna dan sandi GitHub Anda.
Jika Anda menggunakan autentikasi 2 langkah dengan GitHub, buat token akses pribadi untuk digunakan.
Setelah perintah
git pushselesai, file yang di-commit akan berada di repositori GitHub Anda.