Hello image data: Train an AutoML image classification model
Stay organized with collections
Save and categorize content based on your preferences.
Use the Google Cloud console to train an AutoML image classification model.
After your dataset is created and data is imported, use the
Google Cloud console to review the training images and begin model
training.
Each page assumes that you have already performed the instructions from the
previous pages of the tutorial.
Review imported images
After the dataset import, you are taken to the Browse tab. You can also access
this tab by selecting Datasets from the menu. Select the
annotation set (set of single-label image annotations) associated with your
new dataset.
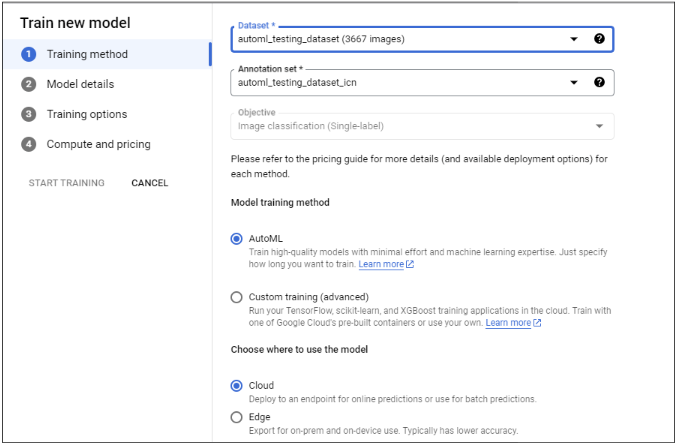
Select Select Training method, and select the target Dataset
if they are not automatically selected. Make sure
the radio_button_checkedAutoML
radio button is selected, and then choose CONTINUE.
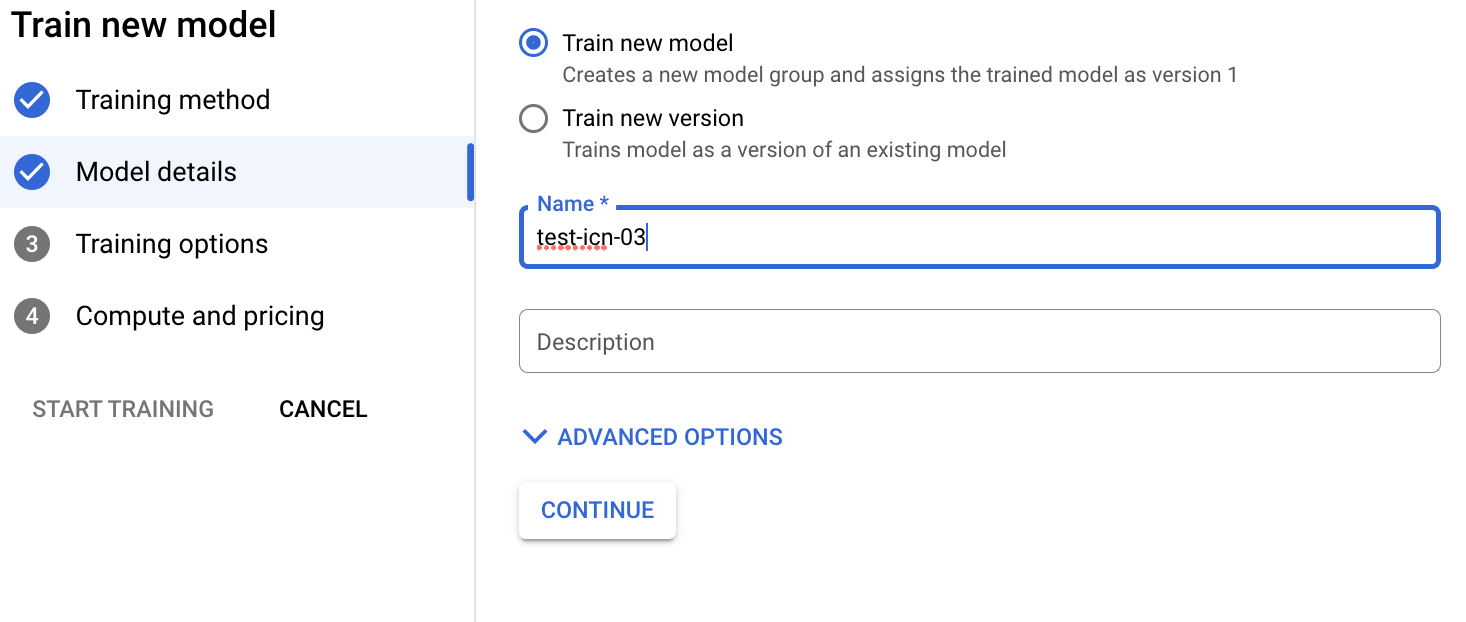
(Optional) Select Define your model, and enter the Model name. Click CONTINUE.
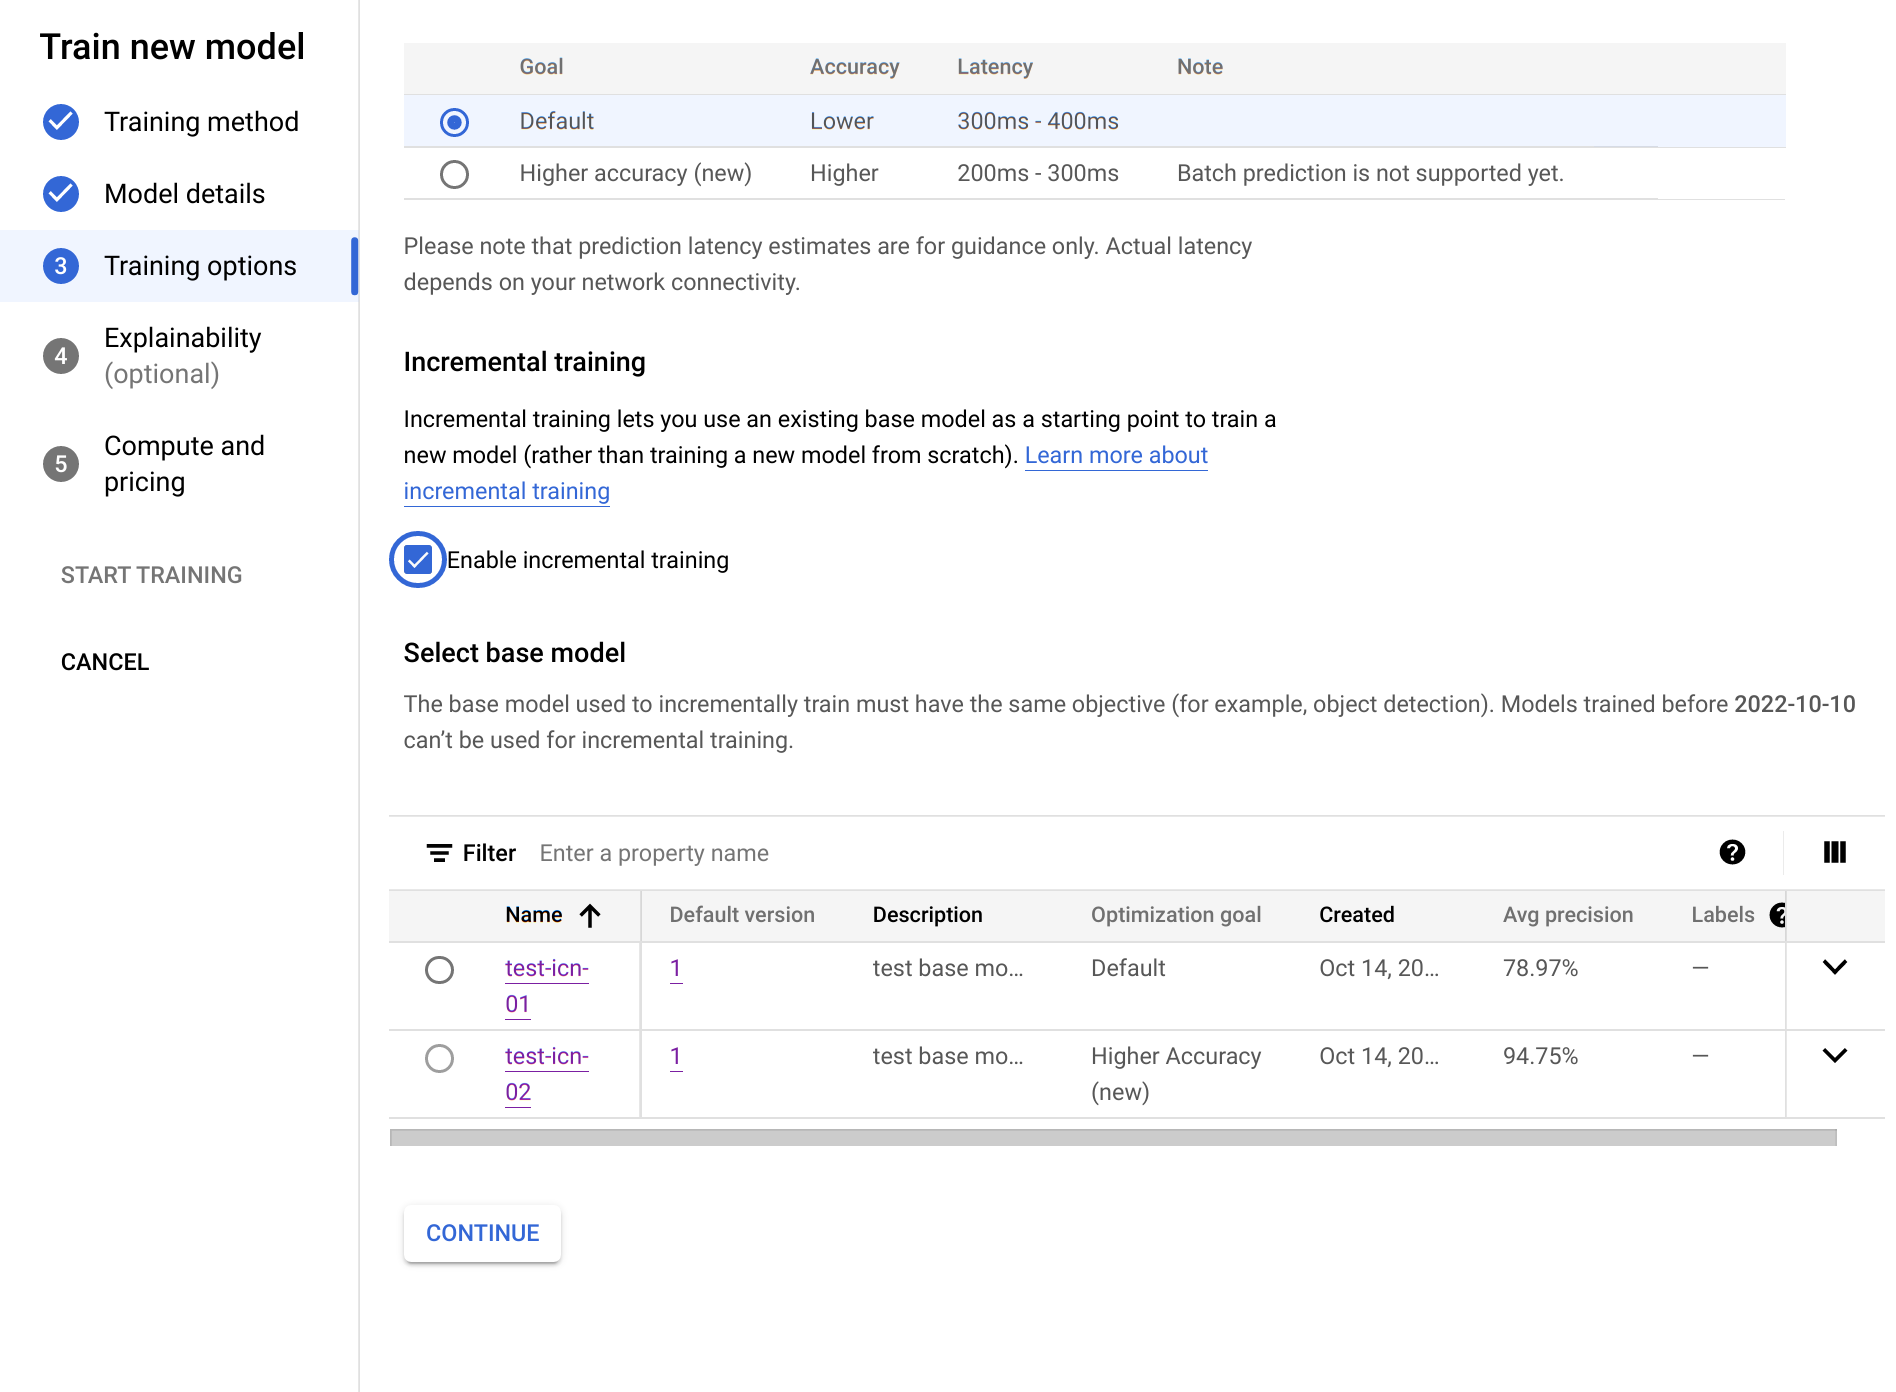
Select Train options. Select a model option according to your accuracy and latency needs. Optionally, enable incremental training and click CONTINUE.
Incremental training considerations follow:
Incremental training can be enabled when there is at least one base model
that has been trained in this project with the same objective.
Incremental training lets you use an existing base model as a starting point
to train a new model rather than training a new model from scratch.
Incremental training generally helps training to occur faster and saves
training time.
The base model can be trained from a different dataset.
Select Compute and pricing. Specify a node-hour budget of 8 node hours. Select Start training.
Node-hour budget is the maximum time (may vary slightly) that the model
spends training. This value is multiplied by the
price per node hour
to calculate to total training cost. More training hours results in a more
accurate (up to a point) model but results in a higher cost. For development
purposes, a low budget is fine but for production it's important to strike a
balance between cost and accuracy.
Training takes several hours. An email notification is sent when the model training completes.
What's next
Follow the next page of this tutorial to check the
performance of your trained AutoML model and explore ways of making it better.
[[["Easy to understand","easyToUnderstand","thumb-up"],["Solved my problem","solvedMyProblem","thumb-up"],["Other","otherUp","thumb-up"]],[["Hard to understand","hardToUnderstand","thumb-down"],["Incorrect information or sample code","incorrectInformationOrSampleCode","thumb-down"],["Missing the information/samples I need","missingTheInformationSamplesINeed","thumb-down"],["Other","otherDown","thumb-down"]],["Last updated 2025-08-29 UTC."],[],[],null,["# Hello image data: Train an AutoML image classification model\n\nUse the Google Cloud console to train an AutoML image classification model.\nAfter your dataset is created and data is imported, use the\nGoogle Cloud console to review the training images and begin model\ntraining.\n\nThis tutorial has several pages:\n\n1. [Set up your project and environment.](/vertex-ai/docs/tutorials/image-classification-automl)\n\n2. [Create an image classification dataset, and\n import images.](/vertex-ai/docs/tutorials/image-classification-automl/dataset)\n\n3. Train an AutoML image classification\n model.\n\n4. [Evaluate and analyze model performance.](/vertex-ai/docs/tutorials/image-classification-automl/error-analysis)\n\n5. [Deploy a model to an endpoint, and send a\n prediction.](/vertex-ai/docs/tutorials/image-classification-automl/deploy-predict)\n\n6. [Clean up your project.](/vertex-ai/docs/tutorials/image-classification-automl/cleanup)\n\nEach page assumes that you have already performed the instructions from the\nprevious pages of the tutorial.\n\nReview imported images\n----------------------\n\nAfter the dataset import, you are taken to the **Browse** tab. You can also access\nthis tab by selecting **Datasets** from the menu. Select the\n**annotation set** (set of single-label image annotations) associated with your\nnew dataset.\n| **Key point:** An *annotation set* is the collection of annotations associated with a data type and a specific objective (image data type, classification objective in this case). For more information about *annotation sets* , see [Creating an annotation\n| set](/vertex-ai/docs/datasets/create-annotation-set).\n\n[Go to the Datasets page](https://console.cloud.google.com/vertex-ai/datasets)\n\nBegin AutoML model training\n---------------------------\n\nChoose one of the following options to begin training:\n\n- Choose **Train new model**.\n\n- Select **Models** from the menu, and select **Create**.\n\n1. [Go to the Models page](https://console.cloud.google.com/vertex-ai/models)\n\n2. Select **Create** to open the **Train new model** window.\n\n3. Select **Select Training method** , and select the **target Dataset**\n if they are not automatically selected. Make sure\n the radio_button_checked**AutoML**\n radio button is selected, and then choose **CONTINUE**.\n\n4. (Optional) Select **Define your model** , and enter the **Model name** . Click **CONTINUE**.\n\n5. Select **Train options** . Select a model option according to your accuracy and latency needs. Optionally, enable incremental training and click **CONTINUE**.\n\n Incremental training considerations follow:\n - Incremental training can be enabled when there is at least one base model that has been trained in this project with the same objective.\n - Incremental training lets you use an existing base model as a starting point to train a new model rather than training a new model from scratch.\n - Incremental training generally helps training to occur faster and saves training time.\n - The base model can be trained from a different dataset.\n\n6. Select **Compute and pricing** . Specify a node-hour budget of **8 node hours** . Select **Start training**.\n\n Node-hour budget is the maximum time (may vary slightly) that the model\n spends training. This value is multiplied by the\n [price per node hour](/vertex-ai/pricing#automl_models)\n to calculate to total training cost. More training hours results in a more\n accurate (up to a point) model but results in a higher cost. For development\n purposes, a low budget is fine but for production it's important to strike a\n balance between cost and accuracy.\n\nTraining takes several hours. An email notification is sent when the model training completes.\n\nWhat's next\n-----------\n\nFollow the [next page of this tutorial](/vertex-ai/docs/tutorials/image-classification-automl/error-analysis) to check the\nperformance of your trained AutoML model and explore ways of making it better.\n\nFollow [Deploy a model to an endpoint and make a prediction](/vertex-ai/docs/tutorials/image-classification-automl/deploy-predict) to deploy your trained AutoML model. An image is sent to the model for prediction."]]