Mit Sammlungen den Überblick behalten
Sie können Inhalte basierend auf Ihren Einstellungen speichern und kategorisieren.
Mit der Google Cloud -Konsole ein AutoML-Bildklassifizierungsmodell trainieren
Nachdem Ihr Dataset erstellt und Daten importiert wurden, prüfen Sie die Trainingsbilder in derGoogle Cloud Console und beginnen Sie mit dem Modelltraining.
Auf jeder Seite wird davon ausgegangen, dass Sie die Anleitung auf den vorherigen Seiten des Leitfadens bereits ausgeführt haben.
Importierte Bilder prüfen
Nach dem Import des Datasets gelangen Sie zum Tab Durchsuchen. Sie können auch auf diesen Tab zugreifen, indem Sie im Menü Datasets auswählen. Wählen Sie den Annotationssatz (Satz von Einzellabelbildern, die mit Ihrem neuen Dataset verknüpft sind) aus.
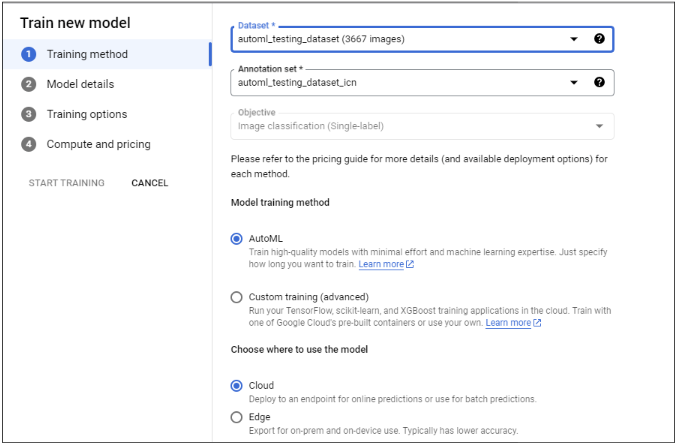
Wählen Sie Erstellen aus, um das Fenster Neues Modell trainieren zu öffnen.
Klicken Sie auf Trainingsmethode auswählen und wählen Sie das Ziel-Dataset aus, wenn die Methode nicht automatisch ausgewählt wird. Achten Sie darauf, dass das Optionsfeld radio_button_checkedAutoML ausgewählt ist, und klicken Sie dann auf Weiter.
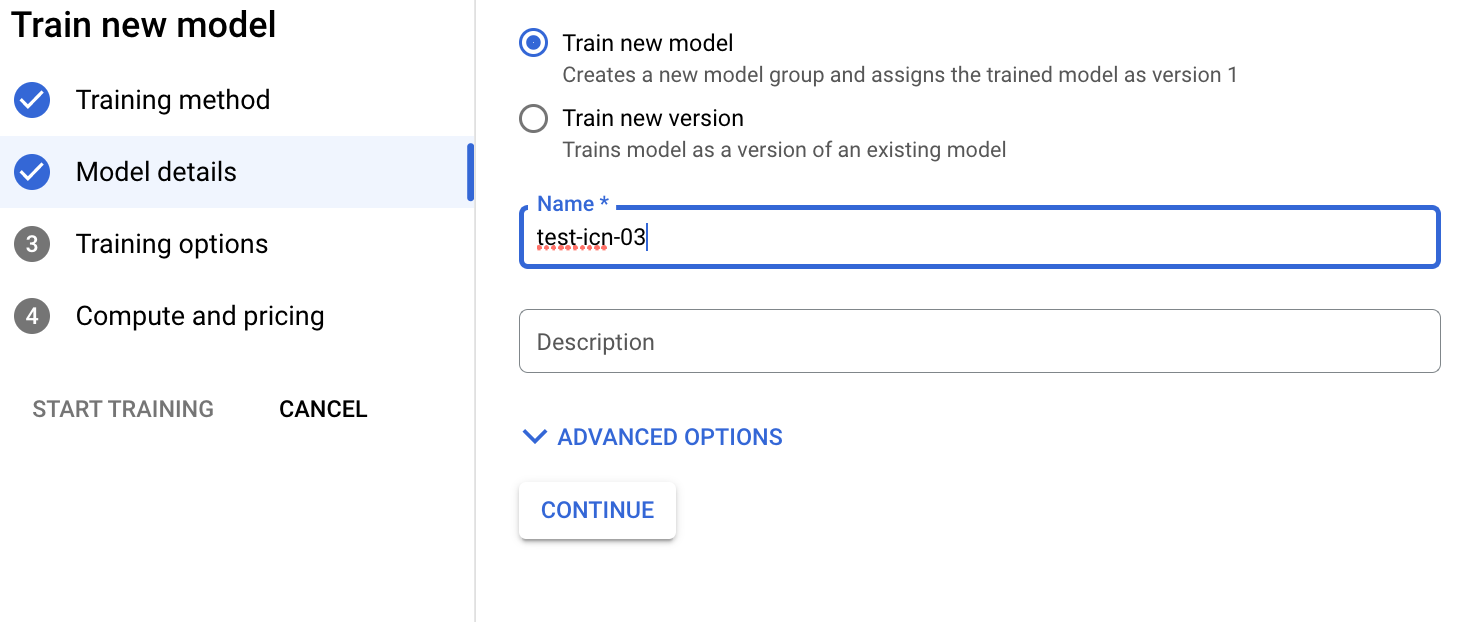
Optional: Wählen Sie Modell bestimmen aus und geben Sie den Modelnamen ein. Klicken Sie auf Weiter.
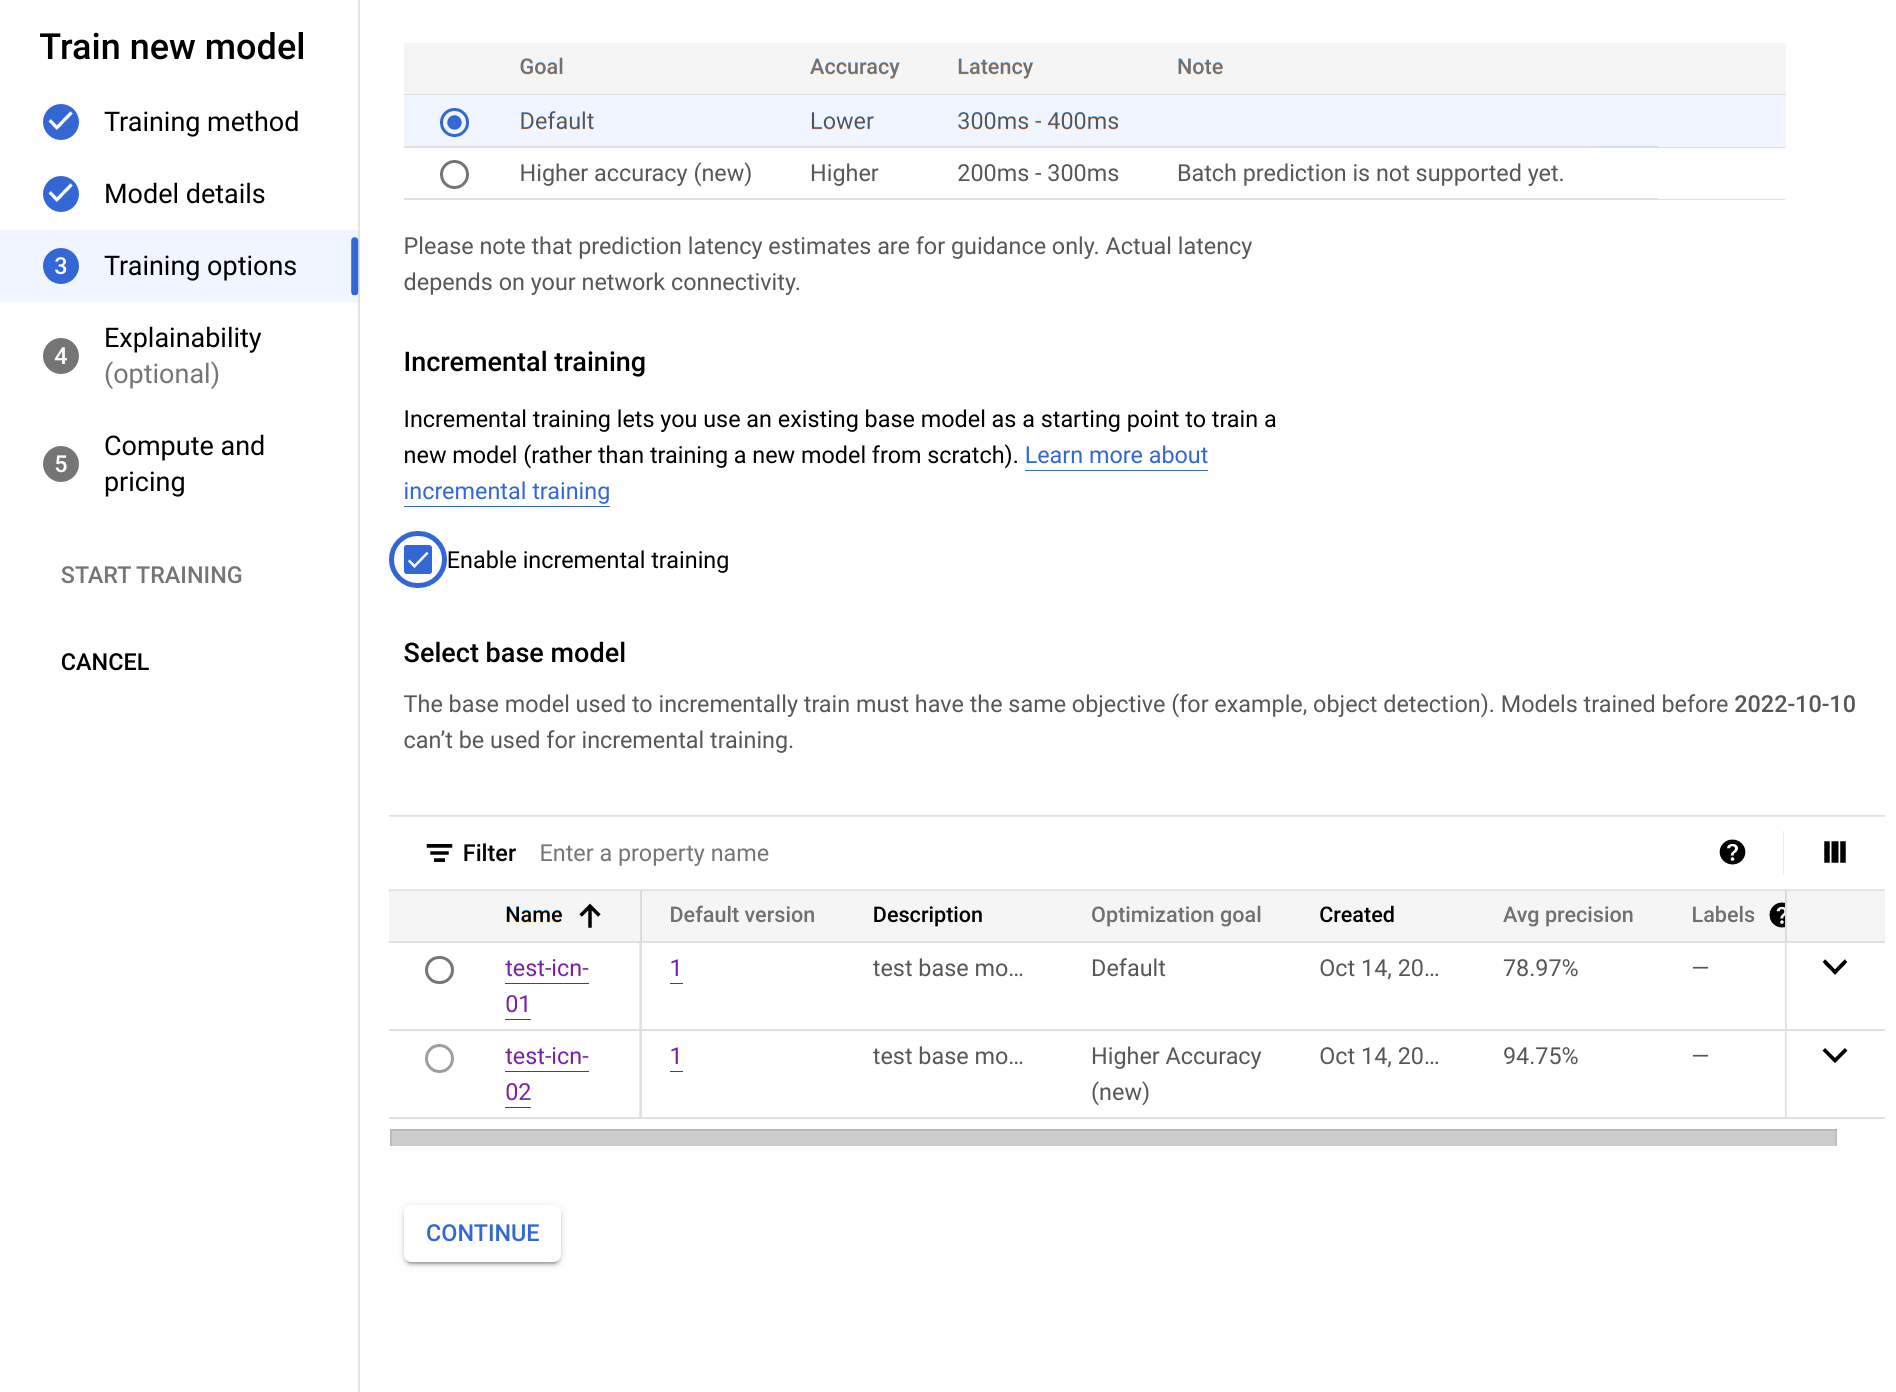
Wählen Sie Trainoptionen aus. Wählen Sie eine Modelloption gemäß Ihren Genauigkeits- und Latenzanforderungen aus. Aktivieren Sie optional inkrementelles Training und klicken Sie auf Weiter.
Weitere Hinweise zu inkrementellen Trainings:
Inkrementelles Training kann aktiviert werden, wenn mindestens ein Basismodell vorhanden ist, das in diesem Projekt mit demselben Ziel trainiert wurde.
Mit dem inkrementellen Training können Sie ein vorhandenes Basismodell als Ausgangspunkt für das Training eines neuen Modells verwenden, anstatt ein neues Modell komplett neu zu trainieren.
Inkrementelles Training trägt im Allgemeinen dazu bei, dass das Training schneller erfolgt und Trainingszeit gespart wird.
Das Basismodell kann mit einem anderen Dataset trainiert werden.
Wählen Sie Computing und Preise. Geben Sie ein Knotenstundenbudget von 8 Knotenstunden an. Wählen Sie Training starten aus.
Das Knotenstundenbudget ist die maximale Dauer (kann leicht variieren), die das Modell für das Training benötigt. Dieser Wert wird mit dem Stundenpreis pro Knoten multipliziert, um die Gesamtkosten für das Training zu berechnen. Mehr Trainingsstunden führen zu einem genaueren Modell (bis zu einem gewissen Punkt), aber auch zu höheren Kosten. Für Entwicklungszwecke ist ein niedriges Budget in Ordnung, aber für die Produktion ist es wichtig, ein Gleichgewicht zwischen Kosten und Genauigkeit zu finden.
Das Training dauert mehrere Stunden. Eine E-Mail-Benachrichtigung wird gesendet, wenn das Modelltraining abgeschlossen ist.
Nächste Schritte
Auf der nächsten Seite dieser Anleitung können Sie die Leistung Ihres trainierten AutoML-Modells prüfen und Möglichkeiten zu seiner Verbesserung kennenlernen.
[[["Leicht verständlich","easyToUnderstand","thumb-up"],["Mein Problem wurde gelöst","solvedMyProblem","thumb-up"],["Sonstiges","otherUp","thumb-up"]],[["Schwer verständlich","hardToUnderstand","thumb-down"],["Informationen oder Beispielcode falsch","incorrectInformationOrSampleCode","thumb-down"],["Benötigte Informationen/Beispiele nicht gefunden","missingTheInformationSamplesINeed","thumb-down"],["Problem mit der Übersetzung","translationIssue","thumb-down"],["Sonstiges","otherDown","thumb-down"]],["Zuletzt aktualisiert: 2025-08-18 (UTC)."],[],[],null,["# Hello image data: Train an AutoML image classification model\n\nUse the Google Cloud console to train an AutoML image classification model.\nAfter your dataset is created and data is imported, use the\nGoogle Cloud console to review the training images and begin model\ntraining.\n\nThis tutorial has several pages:\n\n1. [Set up your project and environment.](/vertex-ai/docs/tutorials/image-classification-automl)\n\n2. [Create an image classification dataset, and\n import images.](/vertex-ai/docs/tutorials/image-classification-automl/dataset)\n\n3. Train an AutoML image classification\n model.\n\n4. [Evaluate and analyze model performance.](/vertex-ai/docs/tutorials/image-classification-automl/error-analysis)\n\n5. [Deploy a model to an endpoint, and send a\n prediction.](/vertex-ai/docs/tutorials/image-classification-automl/deploy-predict)\n\n6. [Clean up your project.](/vertex-ai/docs/tutorials/image-classification-automl/cleanup)\n\nEach page assumes that you have already performed the instructions from the\nprevious pages of the tutorial.\n\nReview imported images\n----------------------\n\nAfter the dataset import, you are taken to the **Browse** tab. You can also access\nthis tab by selecting **Datasets** from the menu. Select the\n**annotation set** (set of single-label image annotations) associated with your\nnew dataset.\n| **Key point:** An *annotation set* is the collection of annotations associated with a data type and a specific objective (image data type, classification objective in this case). For more information about *annotation sets* , see [Creating an annotation\n| set](/vertex-ai/docs/datasets/create-annotation-set).\n\n[Go to the Datasets page](https://console.cloud.google.com/vertex-ai/datasets)\n\nBegin AutoML model training\n---------------------------\n\nChoose one of the following options to begin training:\n\n- Choose **Train new model**.\n\n- Select **Models** from the menu, and select **Create**.\n\n1. [Go to the Models page](https://console.cloud.google.com/vertex-ai/models)\n\n2. Select **Create** to open the **Train new model** window.\n\n3. Select **Select Training method** , and select the **target Dataset**\n if they are not automatically selected. Make sure\n the radio_button_checked**AutoML**\n radio button is selected, and then choose **CONTINUE**.\n\n4. (Optional) Select **Define your model** , and enter the **Model name** . Click **CONTINUE**.\n\n5. Select **Train options** . Select a model option according to your accuracy and latency needs. Optionally, enable incremental training and click **CONTINUE**.\n\n Incremental training considerations follow:\n - Incremental training can be enabled when there is at least one base model that has been trained in this project with the same objective.\n - Incremental training lets you use an existing base model as a starting point to train a new model rather than training a new model from scratch.\n - Incremental training generally helps training to occur faster and saves training time.\n - The base model can be trained from a different dataset.\n\n6. Select **Compute and pricing** . Specify a node-hour budget of **8 node hours** . Select **Start training**.\n\n Node-hour budget is the maximum time (may vary slightly) that the model\n spends training. This value is multiplied by the\n [price per node hour](/vertex-ai/pricing#automl_models)\n to calculate to total training cost. More training hours results in a more\n accurate (up to a point) model but results in a higher cost. For development\n purposes, a low budget is fine but for production it's important to strike a\n balance between cost and accuracy.\n\nTraining takes several hours. An email notification is sent when the model training completes.\n\nWhat's next\n-----------\n\nFollow the [next page of this tutorial](/vertex-ai/docs/tutorials/image-classification-automl/error-analysis) to check the\nperformance of your trained AutoML model and explore ways of making it better.\n\nFollow [Deploy a model to an endpoint and make a prediction](/vertex-ai/docs/tutorials/image-classification-automl/deploy-predict) to deploy your trained AutoML model. An image is sent to the model for prediction."]]