Hello-Bilddaten: Modell auf einem Endpunkt bereitstellen und eine Vorhersage senden
Mit Sammlungen den Überblick behalten
Sie können Inhalte basierend auf Ihren Einstellungen speichern und kategorisieren.
Nach Abschluss des Trainings des AutoML-Bildklassifizierungsmodells verwenden Sie dieGoogle Cloud -Konsole, um einen Endpunkt zu erstellen und Ihr Modell auf dem Endpunkt bereitzustellen. Nachdem Ihr Modell auf diesem neuen Endpunkt bereitgestellt wurde, senden Sie ein Bild zur Vorhersage für das Label an das Modell.
Wählen Sie das trainierte AutoML-Modell aus. So gelangen Sie zum Tab Bewerten, auf dem Sie Leistungsmesswerte für das Modell einsehen können.
Wählen Sie den Tab tabBereitstellen und Testen aus.
Klicken Sie auf In Endpunkt bereitstellen.
Wählen Sie radio_button_checkedNeuen Endpunkt erstellen aus, legen Sie den Endpunktnamen auf hello_automl_image fest und klicken Sie dann auf Weiter.
Akzeptieren Sie in den Modelleinstellungen die Trafficaufteilung von 100 %, geben Sie bei Anzahl der Rechenknoten den Wert 1 ein und klicken Sie dann auf Fertig.
Klicken Sie auf Bereitstellen, um das Modell auf dem neuen Endpunkt bereitzustellen.
Das Erstellen des Endpunkts und das Bereitstellen des AutoML-Modells auf dem neuen Endpunkt dauert einige Minuten.
Vorhersage an das Modell senden
Nachdem der Endpunkt-Erstellungsprozess abgeschlossen ist, können Sie eine einzelne Anfrage zur Bildannotation (Vorhersage) in der Google Cloud -Konsole senden.
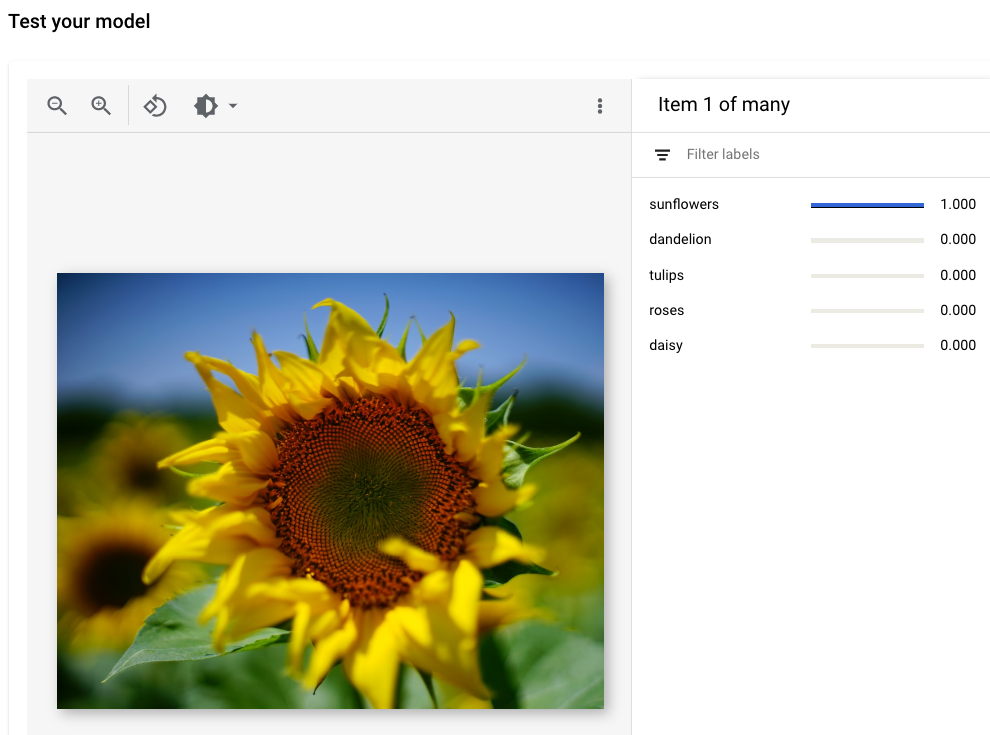
Wechseln Sie auf demselben Tab Bereitstellen & Testen zum Abschnitt „Modell testen”, den Sie im vorherigen Schritt erstellt haben (Modelle > your_model > tab Bereitstellen & Testen).
Klicken Sie auf Bild hochladen, wählen Sie ein lokal gespeichertes Bild für die Vorhersage aus und sehen Sie sich das vorhergesagte Label an.
[[["Leicht verständlich","easyToUnderstand","thumb-up"],["Mein Problem wurde gelöst","solvedMyProblem","thumb-up"],["Sonstiges","otherUp","thumb-up"]],[["Schwer verständlich","hardToUnderstand","thumb-down"],["Informationen oder Beispielcode falsch","incorrectInformationOrSampleCode","thumb-down"],["Benötigte Informationen/Beispiele nicht gefunden","missingTheInformationSamplesINeed","thumb-down"],["Problem mit der Übersetzung","translationIssue","thumb-down"],["Sonstiges","otherDown","thumb-down"]],["Zuletzt aktualisiert: 2025-08-19 (UTC)."],[],[],null,["# Hello image data: Deploy a model to an endpoint and send a prediction\n\nAfter your AutoML image classification model is done training, use the\nGoogle Cloud console to create an endpoint and deploy your model to\nthe endpoint. After your model is deployed to this new endpoint, send an image\nto the model for label prediction.\n\nThis tutorial has several pages:\n\n1. [Set up your project and environment.](/vertex-ai/docs/tutorials/image-classification-automl)\n\n2. [Create an image classification dataset, and\n import images.](/vertex-ai/docs/tutorials/image-classification-automl/dataset)\n\n3. [Train an AutoML image classification\n model.](/vertex-ai/docs/tutorials/image-classification-automl/training)\n\n4. [Evaluate and analyze model performance.](/vertex-ai/docs/tutorials/image-classification-automl/error-analysis)\n\n5. Deploy a model to an endpoint, and send a\n prediction.\n\n6. [Clean up your project.](/vertex-ai/docs/tutorials/image-classification-automl/cleanup)\n\nEach page assumes that you have already performed the instructions from the\nprevious pages of the tutorial.\n\nDeploy your model to an endpoint\n--------------------------------\n\nAccess your trained model to deploy it to a new or existing endpoint from\nthe Models page:\n\n1. In the Google Cloud console, in the Vertex AI section, go to\n the **Training** page.\n\n [Go to the Training page](https://console.cloud.google.com/vertex-ai/training)\n2. Select your trained AutoML model. This takes you to the **Evaluate** tab\n where you can view model performance metrics.\n\n3. Choose the tab **Deploy \\& test** tab.\n\n4. Click **Deploy to endpoint**.\n\n5. Choose radio_button_checked**Create new\n endpoint** , set the endpoint name to `hello_automl_image`, then click\n **Continue**.\n\n6. In **Model settings** , accept the **Traffic split** of\n **100%** , enter **1** in **Number of compute nodes** , then click **Done**.\n\n7. Click **Deploy** to deploy your model to your new endpoint.\n\nIt takes several minutes to create the endpoint and deploy the AutoML model\nto the new endpoint.\n\nSend a prediction to your model\n-------------------------------\n\nAfter the endpoint creation process finishes you can send a single image\nannotation (prediction) request in the Google Cloud console.\n\n1. Navigate to the \"Test your model\" section of the same **Deploy \\& test** tab\n you used to create an endpoint in the previous step\n (**Models \\\u003e \u003cvar translate=\"no\"\u003eyour_model\u003c/var\u003e \\\u003e tab Deploy \\& test**).\n\n2. Click **Upload image** and choose a locally saved image for prediction, and\n view its predicted label.\n\n *Image credit* : [Siming Ye, Unsplash](https://unsplash.com/photos/qE-_sYxOMa8) (*shown in UI view*).\n\nWhat's next\n-----------\n\nFollow the [last page of the tutorial](/vertex-ai/docs/tutorials/image-classification-automl/cleanup) to clean up\nresources that you have created."]]