이 페이지는 Apigee에 적용되지만 Apigee Hybrid에는 적용되지 않습니다.
Apigee Edge 문서 보기

개발자가 API 프록시에 액세스하여 사용하려면 먼저 API 프록시를 배포해야 합니다.
Cloud 콘솔의 Apigee
- Google Cloud 콘솔에서 Apigee > 프록시 개발 > API 프록시 페이지로 이동합니다.
- API 프록시를 만든 것과 동일한 Google Cloud 프로젝트가 페이지 상단의 드롭다운에서 선택되어 있는지 확인합니다.
- 프록시 목록에서 myproxy를 선택합니다.
- 배포를 클릭하여 배포 대화상자를 표시하고 다음 정보를 입력합니다.
- 버전: 배포하려는 프록시의 버전 번호입니다. 이 튜토리얼을 처음부터 실행하는 경우 선택할 수 있는 버전이 하나뿐입니다.
- 환경: 프록시를 배포하려는 환경을 선택입니다. 환경은 조직의 API 프록시에 대한 런타임 실행 컨텍스트입니다. 환경에 액세스하려면 API 프록시를 환경에 배포해야 합니다.
- 서비스 계정(선택사항): 프록시의 서비스 계정입니다. 서비스 계정은 배포된 프록시의 ID를 나타내며 프록시에 부여되는 권한을 결정합니다. 고급 기능이므로 이 튜토리얼에서는 무시해도 됩니다.
- 배포를 클릭합니다.
프록시가 배포되면 배포 섹션의 상태 열에 API 프록시 버전이 배포됨을 보여주는 녹색 아이콘이 표시됩니다. 상태 아이콘 위로 커서를 가져가면 배포에 대한 자세한 정보를 볼 수 있습니다
기본 Apigee IU
- 브라우저에서 Apigee UI를 엽니다.
- Apigee UI에서 개발 > API 프록시를 선택합니다.
'test' 환경이 선택되어 있는지 확인합니다.
UI의 프록시 목록에 새 프록시가 표시됩니다.

'myproxy' 프록시를 클릭합니다.
UI에 프록시 편집기의 해당 프록시에 대한 API 프록시 개요 탭이 표시됩니다.
배포 아래의 버전 열에 '배포되지 않음'이 표시됩니다.
- 버전 열에서 드롭다운 선택기를 펼쳐 배포할 버전을 선택합니다.
드롭다운 목록에는 '1'과 'Undeploy'만 표시됩니다.
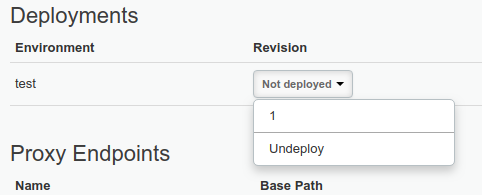
드롭다운 목록에서 배포하려는 버전인 '1'을 선택합니다.
UI에 배포를 확인하라는 메시지가 표시됩니다.
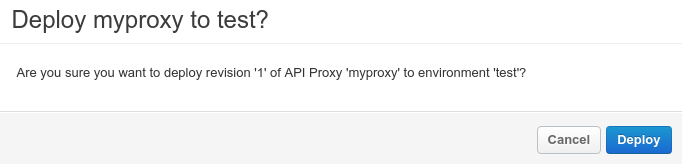
- 배포를 클릭합니다.
Apigee에서 새 프록시 버전 1을 배포하는 프로세스를 시작합니다.
다음 단계에서는 방금 배포한 API 프록시를 호출하는 방법을 설명합니다.
1 2 (다음) 3단계: API 프록시 테스트 4 5