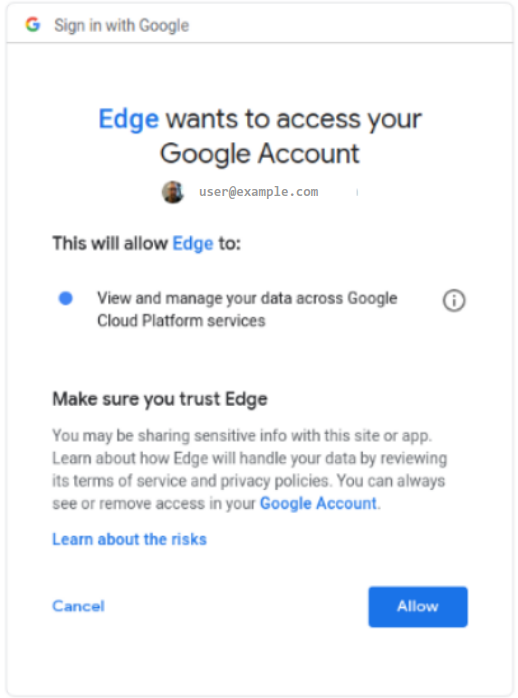
Agora é possível testar a IU híbrida e adicionar um novo ambiente. Sem um ambiente, você não tem
onde implantar os proxies de API. Além disso, se você não criar um ambiente conforme descrito
nesta seção, várias etapas do processo de instalação do ambiente de execução híbrido falharão.
A IU híbrida inclui funcionalidades que permitem estas ações em uma organização com ativação híbrida:
Criar, editar e excluir ambientes
Atribuir controle de acesso no nível do ambiente para usuários do projeto do GCP
Implantar e remover proxies de API do cluster
Receber o status da implantação de pods no cluster
Para acessar a IU do híbrido e adicionar um ambiente, siga estas etapas:
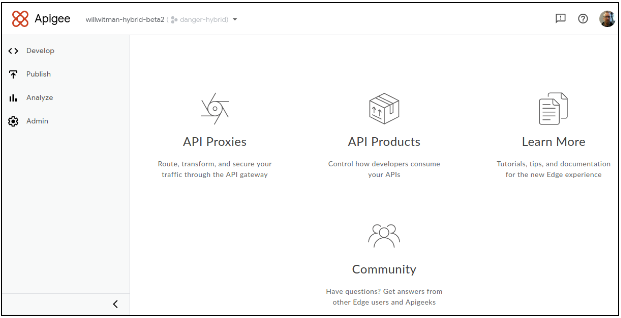
Seu navegador acessa a página de destino principal da IU do híbrido:
Verifique se a organização ativada para acesso híbrido está selecionada na lista suspensa da organização.
Caso contrário, selecione-a na lista suspensa, conforme mostrado neste exemplo:
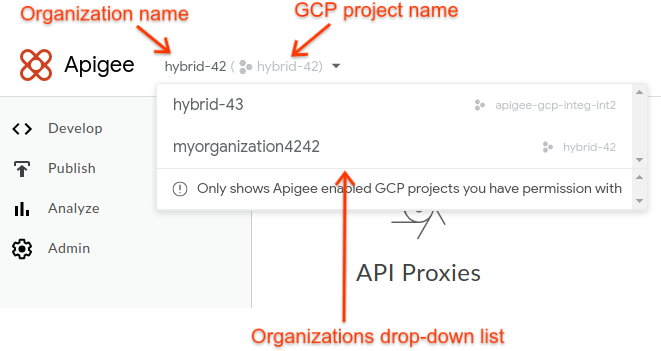
Quando você seleciona uma organização compatível com híbridas na lista suspensa, a IU
híbrida exibe o nome da organização da Apigee e o nome do projeto do GCP no cabeçalho. Em muitos casos,
os nomes da organização da Apigee e do projeto do GCP são iguais.
Clique em Administrador > Ambientes > Visão geral.
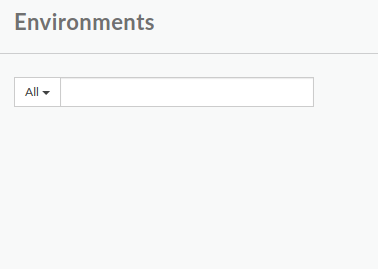
A visualização Ambientes será exibida, sem ambientes (ainda):
Clique em +Ambiente no canto superior direito da IU.
A caixa de diálogo Definir um novo ambiente é exibida:
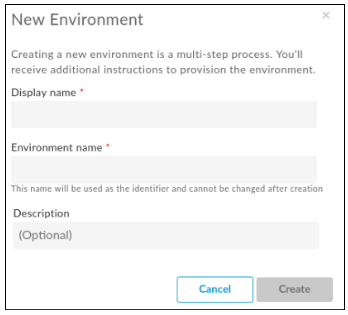
Digite as informações a seguir na caixa de diálogo Novas informações:
Nome de exibição: um nome fácil para o ambiente e que será usado na
IU.
Por exemplo, "Meu primeiro ambiente" ou "teste". Ao contrário do Nome do
ambiente, o Nome de exibição pode incluir maiúsculas e outros caracteres
especiais. Obrigatório.
Nome do ambiente: é o nome programático do ambiente, também conhecido
como ID do ambiente. Obrigatório.
O Nome de exibição e o Nome do ambiente podem ser
diferentes.
Descrição: outras informações sobre o ambiente que
você quer adicionar como um lembrete da finalidade do ambiente. Por exemplo, "Criado
durante a instalação inicial". Opcional.
Clique em Criar.
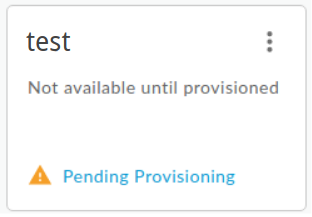
A Apigee cria o novo ambiente e mostra que o conteúdo está em "Provisionamento pendente":
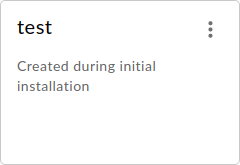
Em alguns instantes, ele será "provisionado":
No entanto, ainda não acabou. Também é necessário adicionar o novo ambiente ao
arquivo overrides.yaml do ambiente de execução. Portanto, antes de continuar,
instale o ambiente de execução.
[[["Fácil de entender","easyToUnderstand","thumb-up"],["Meu problema foi resolvido","solvedMyProblem","thumb-up"],["Outro","otherUp","thumb-up"]],[["Difícil de entender","hardToUnderstand","thumb-down"],["Informações incorretas ou exemplo de código","incorrectInformationOrSampleCode","thumb-down"],["Não contém as informações/amostras de que eu preciso","missingTheInformationSamplesINeed","thumb-down"],["Problema na tradução","translationIssue","thumb-down"],["Outro","otherDown","thumb-down"]],["Última atualização 2025-08-21 UTC."],[[["\u003cp\u003eVersion 1.1 of the Apigee hybrid documentation is end-of-life, and users should upgrade to a newer version.\u003c/p\u003e\n"],["\u003cp\u003eThe hybrid UI allows users to create, edit, and delete environments, manage environment-level access, deploy and undeploy API proxies, and monitor pod deployment status.\u003c/p\u003e\n"],["\u003cp\u003eAdding an environment in the hybrid UI is crucial for deploying API proxies, and not doing so will cause failure in several steps of the hybrid runtime installation process.\u003c/p\u003e\n"],["\u003cp\u003eCreating a new environment involves setting a display name, a programmatic environment name, and an optional description, all within the "Define a new environment" dialog box.\u003c/p\u003e\n"],["\u003cp\u003eAfter creating a new environment, users must also add it to the runtime's \u003ccode\u003eoverrides.yaml\u003c/code\u003e file, which requires the runtime to be installed first.\u003c/p\u003e\n"]]],[],null,["# Step 5: Add a new environment in the hybrid UI\n\n| You are currently viewing version 1.1 of the Apigee hybrid documentation. **This version is end of life.** You should upgrade to a newer version. For more information, see [Supported versions](/apigee/docs/hybrid/supported-platforms#supported-versions).\n\nYou can now try out the hybrid UI and add a new environment. Without an environment, you have\nnowhere to deploy your API proxies. Additionally, if you don't create an environment as described\nin this section, then several steps in the hybrid runtime installation process will fail.\n\nThe hybrid UI includes functionality that lets you do the following in a hybrid-enabled organization:\n\n- Create, edit, and delete environments\n- Assign environment-level access control to GCP project users\n- Deploy and undeploy API proxies to your cluster\n- Get the deployment status of pods in your cluster\n\n**To access the hybrid UI and add an environment:**\n\n1. Open the [Apigee UI](https://apigee.google.com).\n\n If this is the first time you are logging in, hybrid displays a consent dialog box:\n\n2. If you are prompted to select from more than one account, choose the account that owns the project you created in [Step 2: Create a Google Cloud project](/apigee/docs/hybrid/v1.1/precog-gcpproject).\n3. Click **Allow** .\n\n Your browser navigates to the hybrid UI main landing page:\n\n4. Ensure that your hybrid-enabled organization is selected from the organization drop-down list. If not, select it from the drop-down list, as the following example shows:\n\n Note that when you select a hybrid-enabled organization from the drop-down list, the hybrid\n UI displays the Apigee organization name and the GCP project name in the header. In many cases,\n the Apigee organization name and GCP project name are the same.\n5. Click **Admin \\\u003e Environments \\\u003e Overview** .\n\n The **Environments** view is displayed, with no environments (yet):\n\n6. Click **+Environment** in the upper right corner of the UI.\n\n The **Define a new environment** dialog box is displayed:\n\n7. Enter the following information in the **New Environment** dialog box:\n 1. **Display name:** A friendly name for the environment that is used in the UI. For example, \"My First Environment\" or \"test\". Unlike, the **Environment\n name** , the **Diplay name** can include upper case and other special characters. Required.\n 2. **Environment name:** The programmatic name for the environment; also known as the *environment ID* . Required.\n\n For example, \"my-environment\" or \"test\".\n | An environment name can contain only lower-case letters, numbers, and hyphens. You cannot use upper-case letters or any other special characters. In addition, the **Environment name** can be up to a maximum of 32 characters long. For example: `my-test-env` or `my-test-env-42`.\n\n You will also use this name in the `overrides.yaml` file when you\n [install the hybrid runtime](/apigee/docs/hybrid/v1.1/install-before-begin).\n\n The **Display name** and the **Environment name** can be\n different.\n 3. **Description:** Additional information about the environment that you want to add as a reminder of the purpose of the environment. For example, \"Created during initial installation\". Optional.\n8. Click **Create** .\n\n Apigee creates the new environment and indicates that it is \"Pending Provisioning\":\n\n In a few moments, it will be \"provisioned\":\n\n However, you're not quite done. You also need to add your new environment to the\n runtime's overrides.yaml file---but first you've got to install the runtime,\n so let's not get ahead of ourselves.\n\n| **Congratulations!**\n|\n| Now that you've created a GCP account and project, gotten an org provisioned, had a snack,\n| added some service accounts and other users, and created a new environment, you're ready to\n| install the hybrid runtime on your Kubernetes cluster.\n\nNext step\n---------\n\nTo continue with the installation, see\n[Runtime installation: Before you begin](/apigee/docs/hybrid/v1.1/install-before-begin)."]]