You can now try out the hybrid UI and add a new environment. Without an environment, you have nowhere to deploy your API proxies. Additionally, if you don’t create an environment as described in this section, then several steps in the hybrid runtime installation process will fail.
The hybrid UI includes functionality that lets you do the following in a hybrid-enabled organization:
- Create, edit, and delete environments
- Assign environment-level access control to GCP project users
- Deploy and undeploy API proxies to your cluster
- Get the deployment status of pods in your cluster
To access the hybrid UI and add an environment:
- Open the Apigee UI.
If this is the first time you are logging in, hybrid displays a consent dialog box:
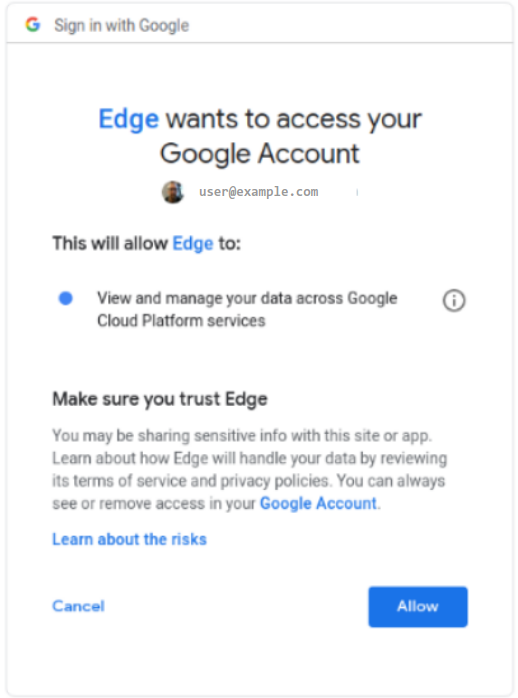
- If you are prompted to select from more than one account, choose the account that owns the project you created in Step 2: Create a Google Cloud project.
- Click Allow.
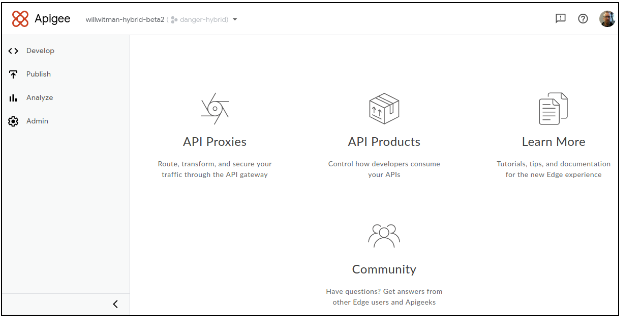
Your browser navigates to the hybrid UI main landing page:
- Ensure that your hybrid-enabled organization is selected from the organization drop-down list.
If not, select it from the drop-down list, as the following example shows:
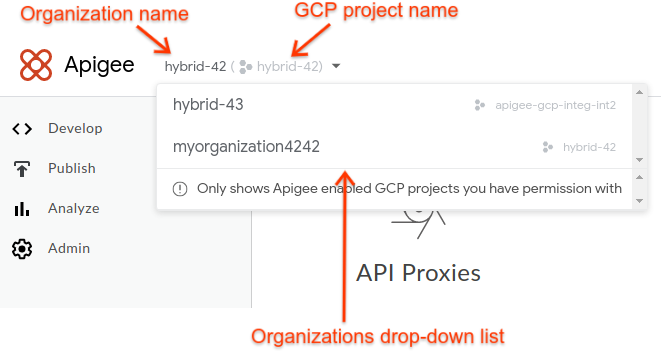
Note that when you select a hybrid-enabled organization from the drop-down list, the hybrid UI displays the Apigee organization name and the GCP project name in the header. In many cases, the Apigee organization name and GCP project name are the same.
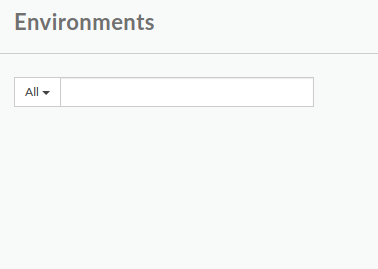
- Click Admin > Environments > Overview.
The Environments view is displayed, with no environments (yet):
- Click +Environment in the upper right corner of the UI.
The Define a new environment dialog box is displayed:
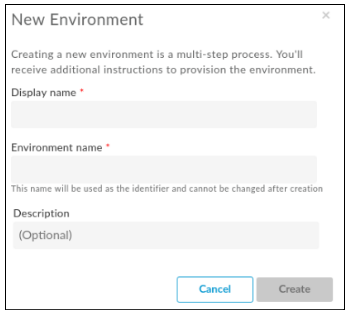
- Enter the following information in the New Environment dialog box:
- Display name: A friendly name for the environment that is used in the UI. For example, "My First Environment" or "test". Unlike, the Environment name, the Diplay name can include upper case and other special characters. Required.
- Environment name: The programmatic name for the environment; also known
as the environment ID. Required.
For example, "my-environment" or "test".
You will also use this name in the
overrides.yamlfile when you install the hybrid runtime.The Display name and the Environment name can be different.
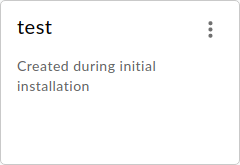
- Description: Additional information about the environment that you want to add as a reminder of the purpose of the environment. For example, "Created during initial installation". Optional.
- Click Create.
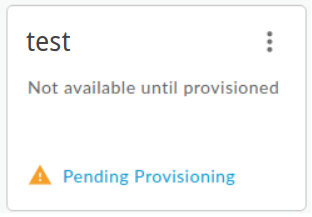
Apigee creates the new environment and indicates that it is "Pending Provisioning":
In a few moments, it will be "provisioned":
However, you’re not quite done. You also need to add your new environment to the runtime’s overrides.yaml file—but first you've got to install the runtime, so let's not get ahead of ourselves.
Next step
To continue with the installation, see Runtime installation: Before you begin.