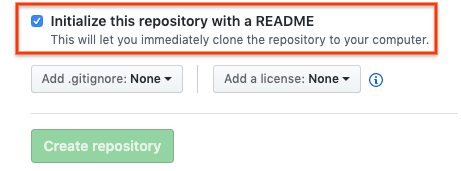
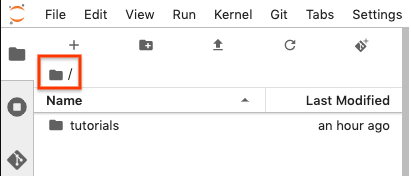
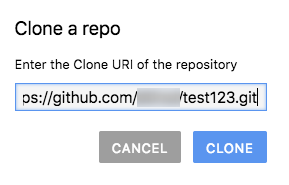
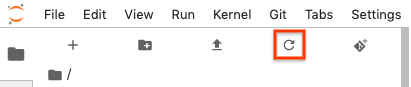
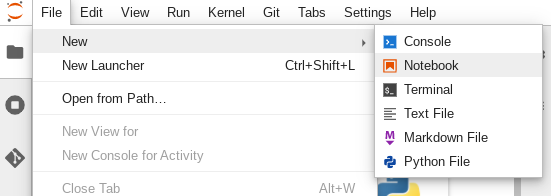
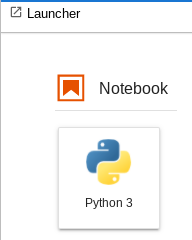
[[["易于理解","easyToUnderstand","thumb-up"],["解决了我的问题","solvedMyProblem","thumb-up"],["其他","otherUp","thumb-up"]],[["很难理解","hardToUnderstand","thumb-down"],["信息或示例代码不正确","incorrectInformationOrSampleCode","thumb-down"],["没有我需要的信息/示例","missingTheInformationSamplesINeed","thumb-down"],["翻译问题","translationIssue","thumb-down"],["其他","otherDown","thumb-down"]],["最后更新时间 (UTC):2025-08-28。"],[],[],null,["# Save a notebook to GitHub\n=========================\n\n\n| Vertex AI Workbench managed notebooks is\n| [deprecated](/vertex-ai/docs/deprecations). On\n| April 14, 2025, support for\n| managed notebooks will end and the ability to create managed notebooks instances\n| will be removed. Existing instances will continue to function\n| but patches, updates, and upgrades won't be available. To continue using\n| Vertex AI Workbench, we recommend that you\n| [migrate\n| your managed notebooks instances to Vertex AI Workbench instances](/vertex-ai/docs/workbench/managed/migrate-to-instances).\n\n\u003cbr /\u003e\n\nTo back up your managed notebooks instance and make it available\nto others, save the contents of your managed notebooks instance\nto GitHub.\n\nCreate a GitHub repository\n--------------------------\n\nIf you don't already have a [GitHub](https://github.com/) repository, you must create one.\n\nWhen you create your GitHub repository make sure that your GitHub repository\ncan be cloned by selecting the **Initialize this repository with a README**\ncheckbox.\n\nClone your GitHub repository in your managed notebooks instance\n---------------------------------------------------------------\n\nTo clone your GitHub repository in your managed notebooks\ninstance, complete the following steps:\n\n1. In your GitHub repository, click the **Code** button,\n and then click the **Local** tab.\n\n2. Copy the **HTTPS** URL.\n\n3. In the Google Cloud console, go to the **Managed notebooks** page.\n\n [Go to Managed notebooks](https://console.cloud.google.com/vertex-ai/workbench/managed)\n4. Click **Open JupyterLab** to open\n your managed notebooks instance.\n\n5. In the JupyterLab\n folder **File Browser**, select\n the folder where you want to clone the GitHub repository. For example,\n the home folder.\n\n6. In JupyterLab, select\n **Git \\\u003e Clone a Repository**.\n\n7. If prompted, enter your credentials.\n\n - If you use a GitHub username and password, enter your\n GitHub username and password.\n\n - If you use two-factor authentication with GitHub,\n create and use a [personal access token](https://help.github.com/en/articles/creating-a-personal-access-token-for-the-command-line).\n\n8. In the **Clone a repo** dialog, paste the HTTPS URL for your GitHub repository.\n\n9. Click **Clone**.\n\nConfigure your managed notebooks instance with your GitHub user information\n---------------------------------------------------------------------------\n\n1. In JupyterLab, select\n **Git \\\u003e Open Git Repository in Terminal**\n to open a Git terminal window.\n\n2. In the Git terminal window, enter the following commands to configure\n your Git username and email:\n\n ```scdoc\n git config --global user.name \"YOUR_NAME\"\n git config --global user.email \"YOUR_EMAIL\"\n ```\n3. If your GitHub account requires SSH authentication, complete\n the following steps to connect your account:\n\n 1. From your Git terminal in your managed notebooks\n instance, follow GitHub's\n [instructions for generating a new SSH key](https://help.github.com/en/github/authenticating-to-github/generating-a-new-ssh-key-and-adding-it-to-the-ssh-agent).\n\n 2. Follow the\n [instructions for adding that SSH key to your GitHub\n account](https://help.github.com/en/github/authenticating-to-github/adding-a-new-ssh-key-to-your-github-account).\n\n4. Close the Git terminal window.\n\nAdd your committed files to your GitHub repository\n--------------------------------------------------\n\n1. Your managed notebooks instance shows your repository\n as a new folder. If you don't\n see your cloned GitHub repository as a folder, click the **Refresh File\n List** button.\n\n2. Double-click your repository folder to open it.\n\n3. Add a new notebook to your managed notebooks instance.\n\n To add a notebook file, you can use the menu or the Launcher. \n\n ### Menu\n\n 1. To add a new notebook file from the menu, select\n **File \\\u003e New \\\u003e Notebook**.\n\n 2. In the **Select kernel** dialog, select the kernel for your new\n notebook, for example, **Python 3** , and then click **Select**.\n\n Your new notebook file opens.\n\n ### Launcher\n\n 1. To add a new notebook file from the Launcher, select\n **File \\\u003e New \\\u003e Launcher**.\n\n 2. Click the tile for the kernel you want to use.\n\n Your new notebook file opens.\n4. Rename your new notebook file.\n\n ### Menu\n\n 1. Select **File \\\u003e Rename notebook** . The\n **Rename file** dialog opens.\n\n 2. In the **New name** field, change `Untitled.ipynb` to something\n meaningful, such as `install.ipynb`.\n\n 3. Click **Rename**.\n\n ### Launcher\n\n 1. Right-click the `Untitled.ipynb` tab and then click\n **Rename notebook** . The **Rename file** dialog opens.\n\n 2. In the **New name** field, change `Untitled.ipynb` to something\n meaningful, such as `install.ipynb`.\n\n 3. Click **Rename**.\n\n5. Select the **Git** tab. Your new notebook is listed in the **Untracked**\n grouping.\n\n6. To add the new notebook as a file for your GitHub repository, right-click\n the new notebook and select **Track** . On the **Git** tab, your notebook\n is now added to the **Staged** grouping.\n\n7. To commit your new notebook to your GitHub repository, on the **Git** tab,\n add a commit comment and click **Commit**.\n\n8. To open a Git terminal window, select\n **Git \\\u003e Open Git repository in terminal**.\n\n9. In the Git terminal window, enter the `git push` command.\n\n - If you use a GitHub username and password, when prompted, enter your\n GitHub username and password.\n\n - If you use two-factor authentication with GitHub,\n [create a personal access token](https://help.github.com/en/articles/creating-a-personal-access-token-for-the-command-line)\n to use.\n\n When the `git push` command completes, your committed files are in\n your GitHub repository."]]