Mantenha tudo organizado com as coleções
Salve e categorize o conteúdo com base nas suas preferências.
Acessar buckets e arquivos do Cloud Storage no JupyterLab
Nesta página, mostramos como montar um bucket do Cloud Storage na
interface do JupyterLab da
instância de notebooks gerenciados do Vertex AI Workbench
para procurar arquivos armazenados
no Cloud Storage. Também é possível abrir e editar arquivos compatíveis com o JupyterLab, como arquivos de texto e de notebook (IPYNB).
Visão geral
As instâncias de notebooks gerenciados do Vertex AI Workbench
incluem uma integração com o Cloud Storage que permite
montar um bucket do Cloud Storage. Isso significa que é possível navegar pelo conteúdo do bucket e trabalhar com arquivos compatíveis na interface JupyterLab.
É possível acessar qualquer um dos
buckets e arquivos do Cloud Storage aos quais sua instância
tem acesso no mesmo projeto que a
instância de notebooks gerenciados.
Antes de começar
Neste guia, você precisa ter acesso a pelo menos um bucket do Cloud Storage no mesmo projeto da instância de notebooks gerenciado.
Se você precisar criar um bucket do Cloud Storage,
consulte Criar buckets.
Ao lado do nome da instância de notebooks gerenciados,
clique em Abrir JupyterLab.
Sua instância de notebooks gerenciados abre o JupyterLab.
Ativar os buckets e arquivos do Cloud Storage
Para ativar e acessar um bucket do Cloud Storage, faça o seguinte:
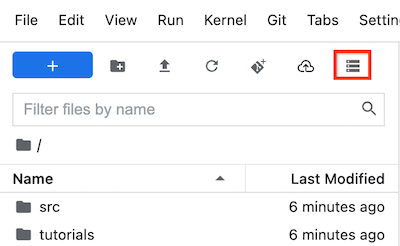
No JupyterLab, verifique se a
guia folderNavegador de arquivos
está selecionada.
Na barra lateral esquerda, clique no botão
Ativar armazenamento
compartilhado. Se o botão não aparecer, arraste o lado direito
da barra lateral para expandi-la até encontrar o botão.
No campo Nome do bucket, insira o nome do bucket do Cloud Storage
que você quer ativar.
Clique em Mount.
Seu bucket do Cloud Storage aparece como uma pasta na guia
Navegador de arquivos da barra lateral esquerda. Clique duas vezes na pasta para abri-la
e navegar pelo conteúdo.
[[["Fácil de entender","easyToUnderstand","thumb-up"],["Meu problema foi resolvido","solvedMyProblem","thumb-up"],["Outro","otherUp","thumb-up"]],[["Difícil de entender","hardToUnderstand","thumb-down"],["Informações incorretas ou exemplo de código","incorrectInformationOrSampleCode","thumb-down"],["Não contém as informações/amostras de que eu preciso","missingTheInformationSamplesINeed","thumb-down"],["Problema na tradução","translationIssue","thumb-down"],["Outro","otherDown","thumb-down"]],["Última atualização 2025-08-18 UTC."],[],[],null,["# Access Cloud Storage buckets and files in JupyterLab\n====================================================\n\n\n| Vertex AI Workbench managed notebooks is\n| [deprecated](/vertex-ai/docs/deprecations). On\n| April 14, 2025, support for\n| managed notebooks will end and the ability to create managed notebooks instances\n| will be removed. Existing instances will continue to function\n| but patches, updates, and upgrades won't be available. To continue using\n| Vertex AI Workbench, we recommend that you\n| [migrate\n| your managed notebooks instances to Vertex AI Workbench instances](/vertex-ai/docs/workbench/managed/migrate-to-instances).\n\n\u003cbr /\u003e\n\nThis page shows you how to mount a Cloud Storage bucket to the\nJupyterLab interface of\nyour Vertex AI Workbench managed notebooks instance\nso that you can browse files that are stored\nin Cloud Storage. You can also open and edit files that are compatible\nwith JupyterLab, such as text files and notebook (IPYNB) files.\n\nOverview\n--------\n\nVertex AI Workbench managed notebooks instances\ninclude a Cloud Storage integration that lets you\nmount a Cloud Storage bucket. This means you can browse the contents\nof the bucket and work with compatible files from within\nthe JupyterLab interface.\n\nYou can access any of\nthe Cloud Storage buckets and files that your instance\nhas access to within the same project as\nyour managed notebooks instance.\n| **Note:** Your managed notebooks instance's access to Cloud Storage is determined by the single user or service account that you used to grant access to your instance. For example, if you granted a specific service account access to your instance, you must also grant that service account access to the Cloud Storage buckets that you want to use in JupyterLab.\n\nBefore you begin\n----------------\n\nThis guide requires you to have access to\nat least one Cloud Storage bucket in the same project\nas your managed notebooks instance.\n\n1. If you need to create a Cloud Storage bucket,\n see [Create buckets](/storage/docs/creating-buckets).\n\n2. If you haven't already,\n [create\n a managed notebooks instance](/vertex-ai/docs/workbench/managed/create-instance#create) in the same project\n as your Cloud Storage bucket.\n\nOpen JupyterLab\n---------------\n\n1. In the Google Cloud console, go to the **Managed notebooks** page.\n\n [Go to Managed notebooks](https://console.cloud.google.com/vertex-ai/workbench/managed)\n2. Next to your managed notebooks instance's name,\n click **Open JupyterLab**.\n\n Your managed notebooks instance opens JupyterLab.\n\nMount the Cloud Storage buckets and files\n-----------------------------------------\n\nTo mount and then access a Cloud Storage bucket, do the following:\n\n1. In JupyterLab, make sure the\n folder **File Browser** tab\n is selected.\n\n2. In the left sidebar, click the\n **Mount\n shared storage** button. If you don't see the button, drag the right side\n of the sidebar to expand the sidebar until you see the button.\n\n3. In the **Bucket name** field, enter the Cloud Storage bucket name\n that you want to mount.\n\n4. Click **Mount**.\n\n5. Your Cloud Storage bucket appears as a folder in the\n **File browser** tab of the left sidebar. Double-click the folder to open\n it and browse the contents.\n\nWhat's next\n-----------\n\n- Learn more about [Cloud Storage](/storage/docs/introduction).\n\n- Learn how to [query data in BigQuery\n from within JupyterLab](/vertex-ai/docs/workbench/managed/bigquery)."]]