This page guides you through the following processes:
- Create a calculated field in your data source
- Edit a calculated field in your data source
- Create a chart-specific calculated field
- Edit a chart-specific calculated field
- Reuse a chart-specific calculated field
- Troubleshoot calculated fields
- Related resources
Create a calculated field in your data source
Calculated fields in data sources are available in any report that uses that data source. To create a calculated field, follow these steps:
- Edit the data source.
- Click
 ADD A FIELD.
 - Select Add calculated field.
- Enter a Name value for this field:
- This is the default name that appears in your reports. You can change this for individual charts by editing the name in the dimension and metric picker.
- The field name must be unique.
- You can't use a reserved keyword as the field name.
Enter a value for Formula :
- To select a dimension, metric, or function, start typing its name.
- If you have multiple fields with similar names, or fields that duplicate part of a function name, for example, Date and Date2, type part of the name, and then scroll through the list and select the field that you want.
- You can also click a field in the Available Fields list to add it to the formula editor.
- On the bottom right, click SAVE (or UPDATE if you are editing an existing field).
- Adjust the Type, Aggregation, and Show As options, as appropriate.
Alternatively, you can create a calculated field in your data source from a report by following these steps:
- To select a dimension, metric, or function, start typing its name.
Create or edit your report.
Click
Add a field.Select Add calculated field.
Enter a Name value for this field:
- This is the default name that appears in your reports. You can change this for individual charts by editing the name in the dimension and metric picker.
- The field name must be unique.
- You can't use a reserved keyword as the field name.
Enter a value for Formula :
- To select a dimension, metric, or function, start typing its name.
- If you have multiple fields with similar names, or fields that duplicate part of a function name, for example, Date and Date2, type part of the name, and then scroll through the list and select the field that you want.
- You can also click a field in the Available Fields list to add it to the formula editor.
- On the bottom right, click SAVE (or UPDATE if you are editing an existing field).
- Adjust the Type, Aggregation, and Show As options, as appropriate.
- To select a dimension, metric, or function, start typing its name.
Learn more about what you can do with calculated fields and the difference between calculated fields that are created in a data source versus chart-specific calculated fields.
Edit a calculated field in your data source
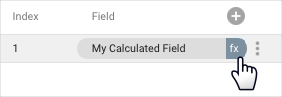
Calculated fields appear in the data source with an fx symbol. To edit the formula, click fx next to the field name. This opens the formula editor, where you can adjust the field as needed.
Create a chart-specific calculated field
Chart-specific calculated fields exist only in the chart in which you create them.
To create a chart-specific calculated field, follow these steps:
Create or edit your report.
Add a new chart or select an existing chart.
In the Setup tab of the Properties panel, click + Add dimension or + Add metric, depending on the kind of calculated field that you want to create.
Click + ADD FIELD.
Enter a field name.
Enter your formula.
You can use the same operators and functions as data source calculated fields. However, you can't reference other chart-specific calculated fields. You can use chart-specific calculated fields with blended data.
Click APPLY.
Adjust the Type, Aggregation, Display Format, and Show As options, as appropriate.
Edit a chart-specific calculated field
Chart-specific calculated fields appear in the Setup tab of the chart's Properties panel.
When you hover your cursor over the field type next to the field name, an fx symbol will appear. To edit the formula, click fx. This brings up the formula editor, where you can adjust the field as needed.
Reuse a chart-specific calculated field
Chart-specific calculated fields only exist in the chart in which you create them. You can't directly reuse chart-specific calculated field, or reference it in other calculated fields.
However, you can copy a chart containing chart-specific calculated fields. The copy will contain any calculated fields defined in the original. You can then edit them as needed in the new chart.
Troubleshoot calculated fields
If there is an error in a calculated field formula, you'll see a warning message, and you won't be able to save the field. Here are a few reasons why a formula might be rejected:
| Error message or reason | Possible Solutions |
|---|---|
| Invalid field name. A valid field name automatically appears as a green or blue chip in the formula editor. |
Check the spelling and any special characters in the field name. |
| Invalid function name. A valid function automatically appears in uppercase green letters in the formula editor. |
Check the spelling of the function name. |
| Missing quotes. Literal strings must be quoted with matched pairs of single or double quotes. |
Make sure all string literals are properly quoted. |
| Mismatched parentheses. When nesting functions, a closing parentheses may have been missed. |
Make sure that you have the same number of opening parentheses as closing parentheses, and that they are in the right spots. |
| Function argument type mismatch. Functions expect arguments to be of a particular type. If there's a mismatch, it can cause an error. For example, trying to use a Date function on a Text dimension will create a function argument type mismatch. |
Choose the correct input values. You can possibly use CAST() to change the input value type. |
| Re-aggregating metrics is not supported. Aggregation functions can't be applied to already aggregated data. This includes most metrics that are found in Google Analytics and Google Ads. For example, Sessions is already aggregated as a sum in your data set, so the formula SUM( Sessions ) will produce an error. |
This limitation comes from the underlying data set. Any solution will involve changing how the data appears there, if possible. |
| An expression can have either metrics or dimensions, but not both. You can't mix dimensions and metrics in function arguments. |
Make sure you are using the appropriate function for your data. For example, use CONCAT() to append text to a Text field, instead of using +. |
| Metric expressions and aggregations are not allowed in this expression. You're creating a new chart-specific calculated dimension, but the result of the formula you've provided would create a metric. |
Try creating the new field as a metric instead. |
Related resources
- Dimensions and metrics
- Format fields in reports
- Create a data source
- About calculated fields
- Create a custom group
- Create a custom bin