本頁內容適用於 Apigee 和 Apigee Hybrid。
查看
Apigee Edge 說明文件。

如要測試已部署的 helloworld API,請點選 Cloud Code 中 Apigee 的「終端機」分頁,然後輸入下列 curl 呼叫:
curl 0:8998/helloworld
系統會顯示下列錯誤訊息:

由於您在建立 API Proxy 時啟用了以 API 金鑰為準的驗證機制,因此呼叫 API 時,必須使用 apikey 查詢參數傳遞 API 金鑰。
如要取得 API 金鑰,您必須建立測試套件,並設定下列測試資源:
API 產品:用於整合 API 並提供給開發人員。
開發人員:負責建立應用程式來存取 API。
開發人員應用程式,可使用 API 金鑰存取 API。
建立及匯出測試資源
- 建立測試套件:
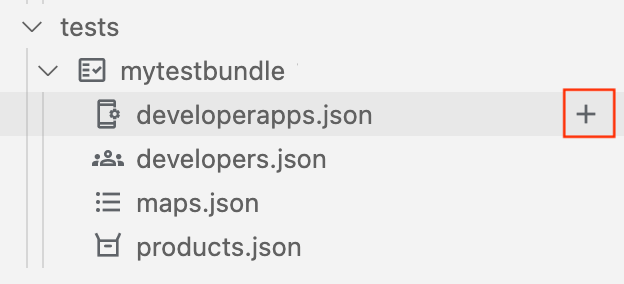
- 將游標移到「test data」資料夾上,然後按一下
 。
。
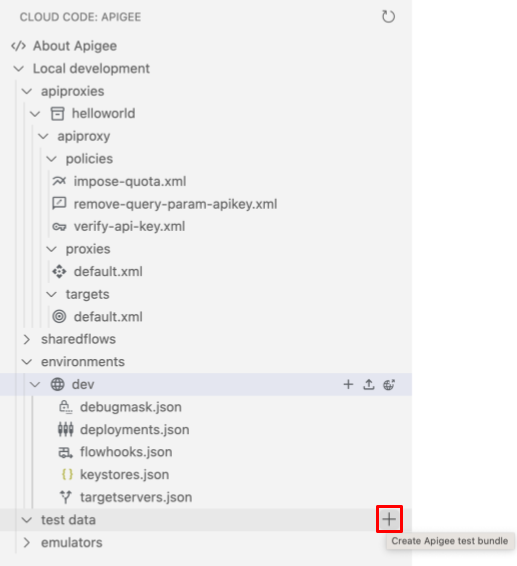
「建立測試套裝組合」精靈隨即開啟。
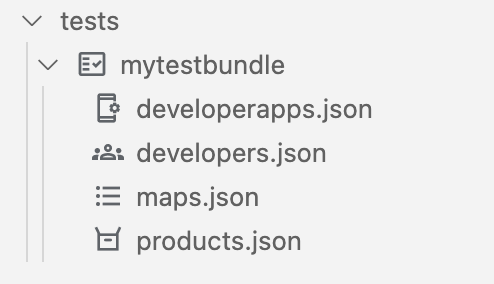
- 輸入「mytestbundle」做為測試套裝組合名稱,然後按下 Enter 鍵。
測試套裝組合建立完成。
- 展開「mytestbundle」資料夾,即可查看內容。
- 將游標移到「test data」資料夾上,然後按一下
- 設定 API 產品測試資源:
- 將游標移到 products.json 檔案上,然後按一下 。
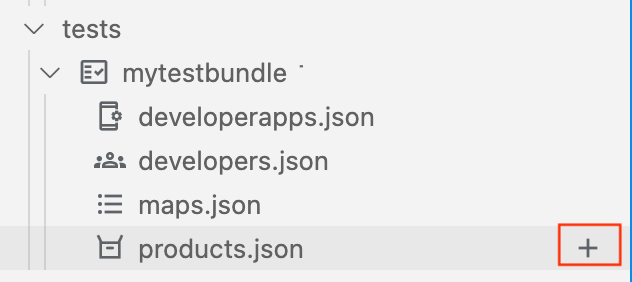
「建立 API 產品」精靈隨即開啟。

- 輸入 API 產品名稱「myproduct」,然後按下「Enter」鍵確認並繼續。
- 輸入 API 產品的說明「myproduct」,然後按 Enter 鍵確認並繼續。
- 選取「helloworld」,將 API 代理加入 API 產品,然後按一下「確定」。
系統會在編輯器中開啟
products.json檔案,並設定新的 API 產品:[ { "attributes": [ { "name": "sample_attribute_0", "value": "sample_attribute_value_0" } ], "scopes": [], "environments": [], "apiResources": [ "/", "/*", "/**" ], "quota": "100", "quotaInterval": "1", "quotaTimeUnit": "minute", "name": "myproduct", "displayName": "myproduct", "proxies": [ "helloworld" ] } ]
- 將游標移到 products.json 檔案上,然後按一下
- 設定開發人員測試資源:
- 將游標移到 developers.json 檔案上,然後按一下 。
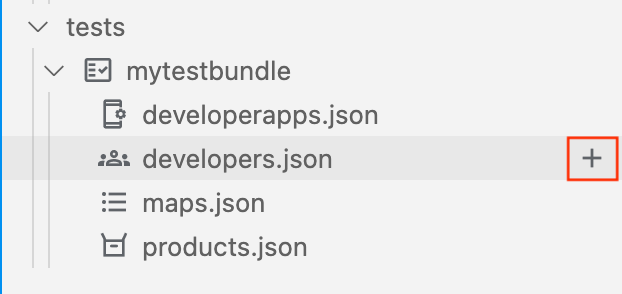
「建立開發人員」精靈隨即開啟。

- 在提示中輸入下列值,然後按下 Enter 鍵確認並繼續:
- 開發人員電子郵件地址:ahamilton@example.com
- 使用者名稱:ahamilton
- 名字:Alex
- 姓氏:Hamilton
編輯器會開啟
developers.json檔案,並設定新的開發人員:[ { "attributes": [ { "name": "sample_attribute_0", "value": "sample_attribute_value_0" } ], "email": "ahamilton@example.com", "userName": "ahamilton", "firstName": "Alex", "lastName": "Hamilton" } ]
- 將游標移到 developers.json 檔案上,然後按一下
- 設定開發人員應用程式測試資源:
- 將游標移到 developerapps.json 檔案上,然後按一下 。
「建立開發人員應用程式」精靈隨即開啟。

- 選取「ahamilton@example.com」ahamilton@example.com做為應用程式擁有者。
- 在下一組提示中輸入下列值,然後按下 Enter 鍵確認並繼續:
- 應用程式名稱:myapp
- 說明:myapp
- 回呼網址:留空
- 選取「myproduct」,將其新增至應用程式,然後按一下「確定」。
- 將到期值設為「永不到期」。
編輯器會開啟
developerapps.json檔案,並設定新的應用程式:[ { "attributes": [ { "name": "sample_attribute_0", "value": "sample_attribute_value_0" } ], "developerEmail": "ahamilton@example.com", "name": "myapp", "displayName": "myapp", "callbackUrl": "", "apiProducts": [ "myproduct" ], "expiryType": "never" } ]
- 將游標移到 developerapps.json 檔案上,然後按一下
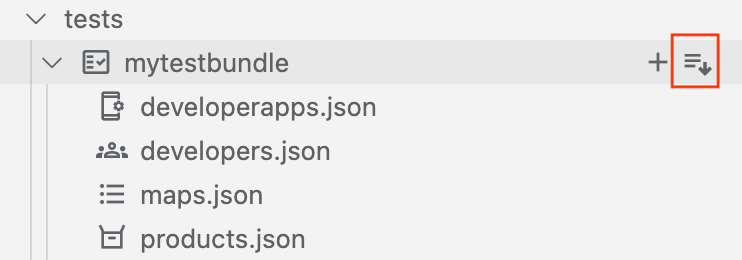
- 將測試資源匯出至 Apigee Emulator。
將游標移至 mytestbundle 測試套件上,然後按一下
 。
。
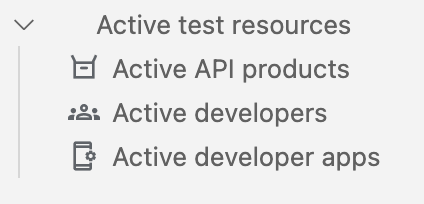
有效測試資源會顯示在「Apigee Emulators」部分,如下圖所示。
取得 API 金鑰
取得開發人員應用程式的 API 金鑰憑證:
- 在「模擬器」部分,按一下「有效測試資料」下方的「有效開發人員應用程式」。
編輯器會開啟有效的開發人員應用程式設定檔。檔案包含
myproduct的憑證,如下圖所示。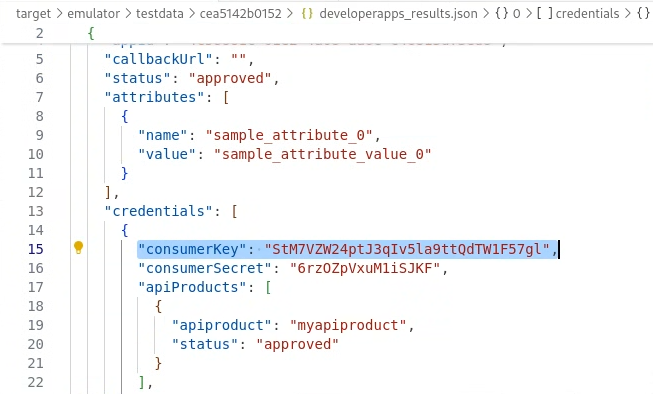
- 複製
myproductAPI 產品的consumerKey值 (不含引號)。
測試 API
使用 API 金鑰測試 API:
- 在 curl 呼叫中傳遞 API 金鑰,使用
apikey查詢參數,如下所示:curl 0:8998/helloworld?apikey=API_KEY
系統會傳回以下回應:
Hello, Guest!
恭喜!您已在本機環境中成功執行 API。
在下一個步驟中,您將瞭解如何變更目標端點。
1 2 3 4 (NEXT) Step 5: Change the target endpoint 6 7 8