This page explains how to use the data federation feature in Gemini Enterprise to perform real-time searches of your Slack account.
About data federation
With data federation, Gemini Enterprise directly retrieves information from the third-party data sources using APIs, instead of copying the data into Gemini Enterprise. Using this approach, you can access external data sources immediately, without waiting for ingestion.
Before you begin
Before you set up your connection, do the following:
- Verify that you have access to the Slack workspace you want to connect.
- Verify that you have a Slack plan that includes Slack AI Search.
Create a federated search connector with Slack
Console
Use the following steps for Google Cloud console to perform federated search through Slack from Gemini Enterprise.
In the Google Cloud console, go to the Gemini Enterprise page.
In the navigation menu, click Data Stores.
Click Create Data store.
On the Select a data source page, scroll or search for Slack Federated to connect your third-party source.
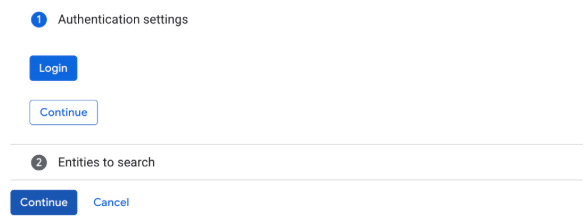
In the Authentication settings section, do the following:
- Click Login.
Login - In the Slack dialog, select your workspace from the menu in the top-right corner.
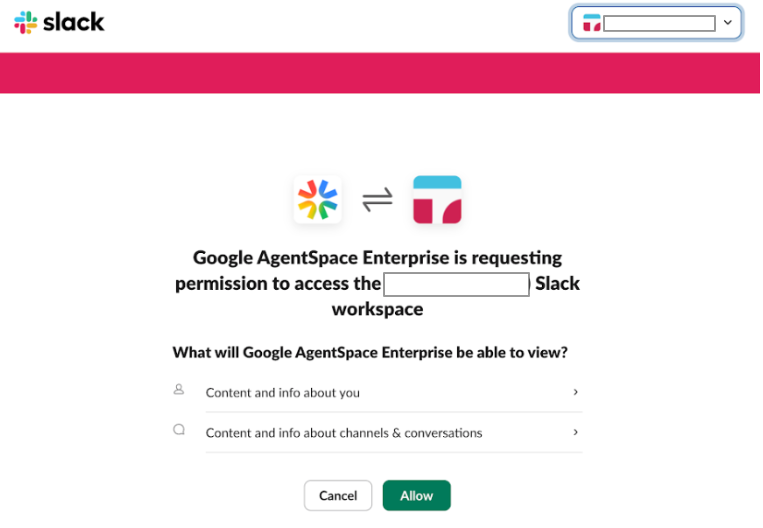
Choose a workspace Click Allow to be redirected to the Google Cloud console.
Click Continue.
- Click Login.
In the Entities to search section, select the entities you want to search from the following:
Message
File
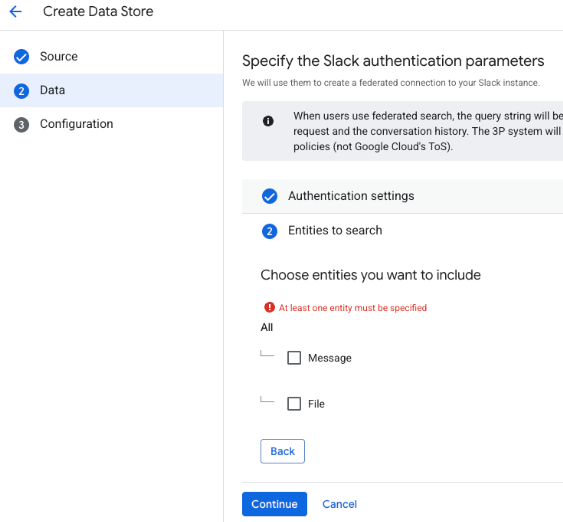
Entities to search
Click Continue.
In the Configure your data connector section, do the following:
Select a region for your data store. You cannot change the region later. For more information on multi-regions, see Gemini Enterprise locations.
Enter a name for your data connector. You can change the name later.
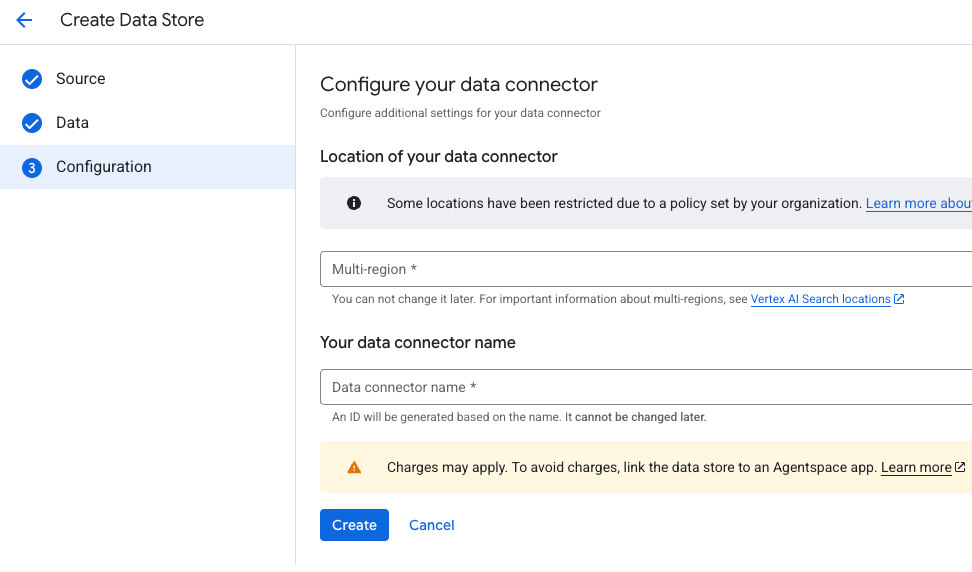
Configure data connector Optional. To change the data connector ID after entering the name, click Edit and change the value. You cannot change the data connector ID after creating the data store.
Click Create. Gemini Enterprise creates your data store and displays it on the Data Stores page.
Once the data store is created, go to the Data Stores page and click your data store name to see the status. The Connector state changes from Creating to Active when the connector is ready for use.
User authorization
After creating a federated search data store, you can see it listed as one of the data sources in your source management panel. If you haven't previously authorized Gemini Enterprise, wait 10 minutes and click Authorize to proceed.
To initiate the authorization flow:
Click Authorize.
Sign in to your Slack account.
Click Grant access. After granting access, you are redirected back to Gemini Enterprise to complete the authorization flow. Gemini Enterprise obtains the
access_token, and uses it to access the third-party search.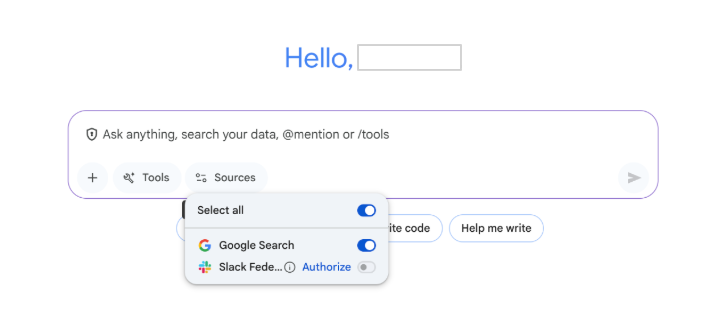
User authorization
Query execution
After you authorize Slack, and send a search request to Gemini Enterprise:
Gemini Enterprise sends your search query to the Slack API.
If the Gemini Enterprise app is connected to multiple data stores, a blended search result is displayed. For more information, see About blended search.
Data handling
When using third-party federated search, your query string is sent to the third-party search backend. These third parties can associate queries with your identity. If multiple federated search data sources are enabled, the query might be sent to all of them.
Once the data reaches the third-party system, it is governed by that system's terms of service and privacy policies.
Rate limits
Slack supports approximately 10 requests per minute, depending on the complexity of the query.
Known limitations
- You can search for files based on their content. However, search results can vary and are not always comprehensive of the entire file content.
Next steps
To attach your data store to an app, create an app and select your data store following the steps in Create an app.
To preview how your search results appear after your app and data store are set up, see Preview search results.
To enable alerts for the data store, see Configure alerts for third-party data stores.