This page describes how to connect ServiceNow to Gemini Enterprise.
After you set up your data source and import data the first time, the data store syncs data from that source at a frequency that you select during setup.
Before you begin
Before setting up your connection, ensure you have the following in place:
- ServiceNow instance: Create a ServiceNow instance by following the instructions on the ServiceNow Developer documentation.
Google Cloud project: Set up a Google Cloud project with an administrator account capable of managing organization-level configurations, ensuring the organization can set up a workforce pool.
Workforce pool: Make sure your organization is set up to manage a workforce pool.
Set up ServiceNow
ServiceNow offers two primary sites:
Main ServiceNow site: The site for your ServiceNow instance.
- Manages users, groups, and system administration tasks.
- URL: The URL for your ServiceNow instance.
- Sign in using your administrator credentials.
-
- Configures the knowledge base, sets up workflows, and develops custom applications.
- URL:
https://developer.service-now.com. - Sign in using your ServiceNow ID.
To create an OAuth endpoint:
- Sign into the main ServiceNow instance with an administrator role.
Navigate to All > System OAuth > Application registry.
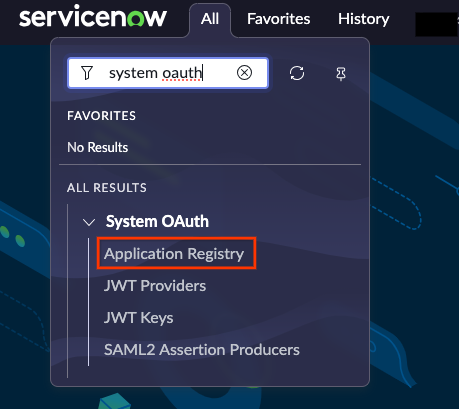
Select application registry Click New.
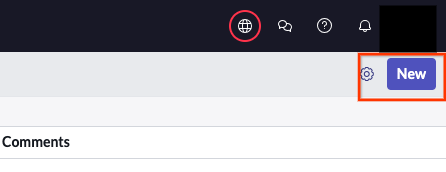
Click the New button Click Create an OAuth API endpoint for external clients.
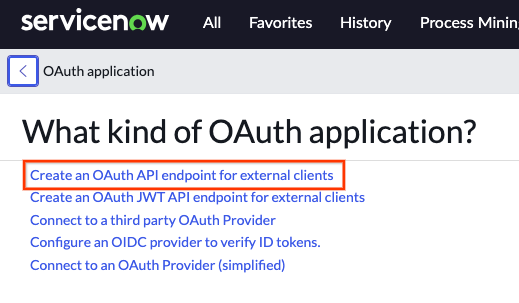
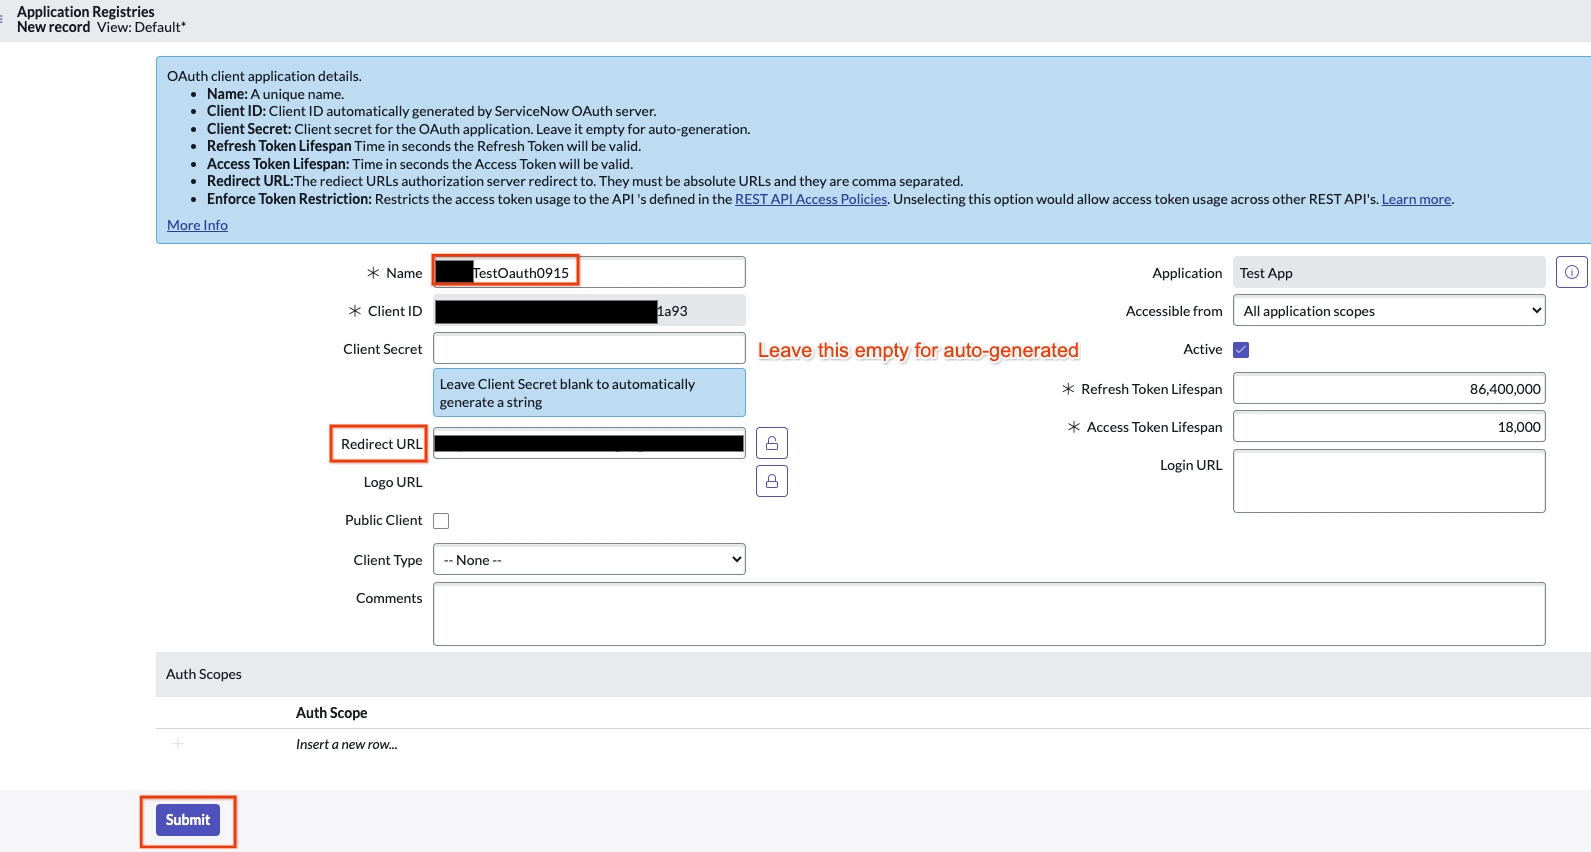
Select the option to create an OAuth API endpoint for external clients Fill in the required fields:
- Name: Enter a Unique name.
- Redirect URL: Enter the redirect URL:
https://vertexaisearch.cloud.google.com/console/oauth/servicenow_oauth.html
Click Submit to create the credential.
Enter the redirect URL After submission, click the name to view the Client ID.

View the client ID The secret is masked. Click the lock icon next to it to unmask and view client secret.
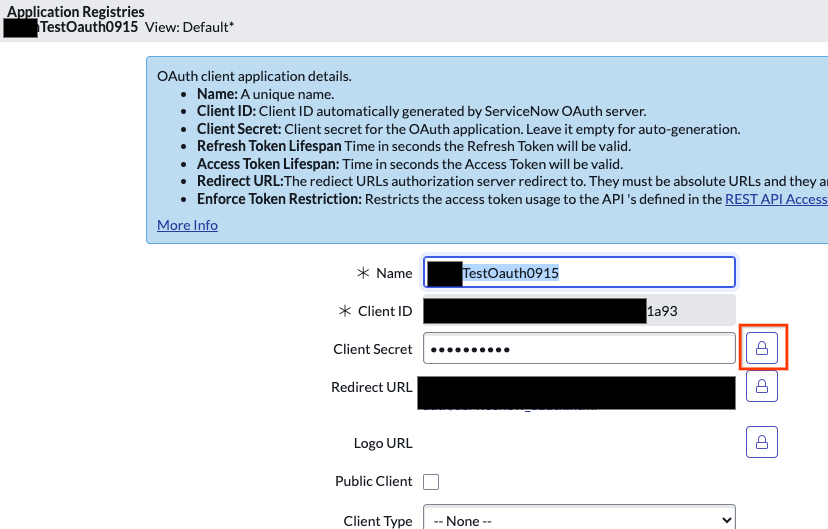
Click the lock icon Save the Client ID and Client secret for later use.
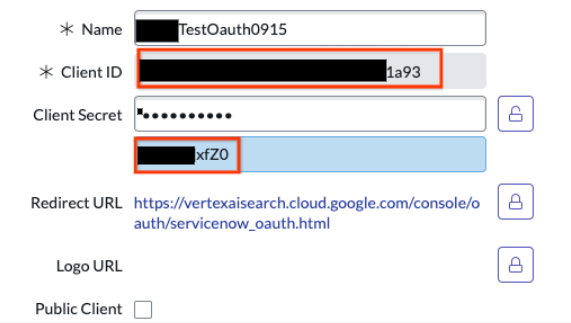
Copy the client ID and client secret
To retrieve ServiceNow instance credentials:
Go to developer.service-now.com and click Manage instance password.
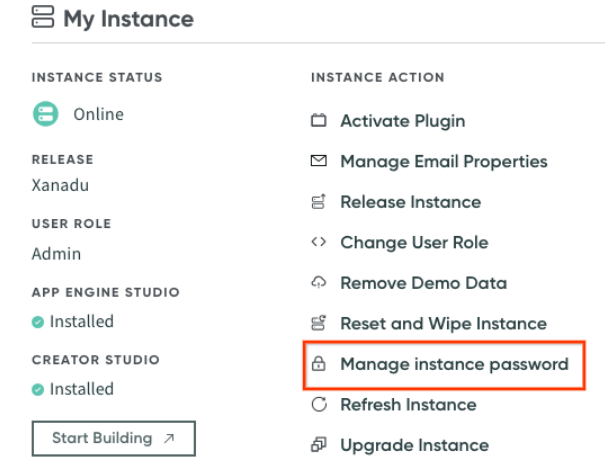
Click the Manage instance password button Keep a copy of the instance URL, username, and password to use when required.
At this stage, all five pieces of information needed to set up a ServiceNow data store are available. If there are no concerns with using the administrator role to pull data, proceed to creating a data store.
Set up administrator roles and permissions
Elevate the administrator role to security_admin to manage users and roles.
Click your profile icon and then select Elevate role.
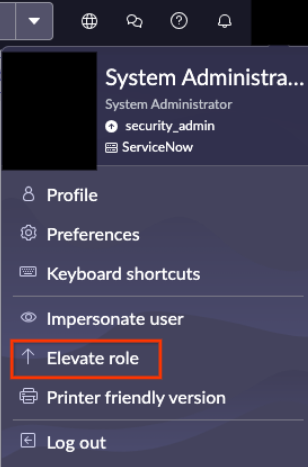
Click the Elevate role button Select
security_adminand then click Update. Thesecurity_adminrole helps to create roles and manage users.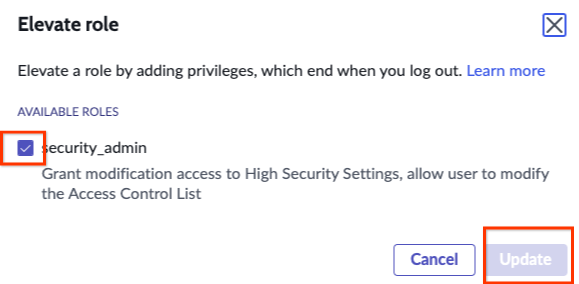
Select the security_adminrole and then click the Update button
Set up user roles and permissions
To create a ServiceNow data store in Gemini Enterprise, you need to grant the appropriate roles and permissions to users. Before you begin, it is critical to understand how the connector handles access to the incident entity. See Incident visibility and access control.
Choose one of the following options to give users the roles and permissions that they need to set up a data store in Google Cloud. Each option provides the required access to your instance.
Incident visibility and access control
To enhance security and prevent unintentional data exposure, the ServiceNow connector uses restrictive access control for the incident entity. This ensures that end users can only view incidents with which they are directly associated.
As part of this restrictive approach, the connector doesn't honor broad,
role-based permissions for incident visibility. Standard ServiceNow roles such
as itil and sn_incident_read, which might grant a user visibility over all
incidents in the ServiceNow UI, don't grant the same level of access in
Gemini Enterprise.
Users with any of the following roles have global incident visibility and can view all incidents:
adminincident_managerchange_manager
All other users can only view an incident if they have opened, reopened, resolved, or closed the incident. They can also view an incident if they are:
- In the assignment group for the incident.
- A caller associated with the incident.
- An assignee.
- In a watch list.
- In a work notes list.
- In an additional assignee list.
This behavior prevents a user of Gemini Enterprise from finding an incident to which they don't have access. Because of the additional restrictions compared to the broader ServiceNow permissions, this behavior may occasionally prevent a user from finding an incident in Gemini Enterprise to which they have access in ServiceNow.
Create a custom role with ACL rules (Recommended)
Create a custom role with the minimum set of permissions.
Go to All > User administration > Roles.
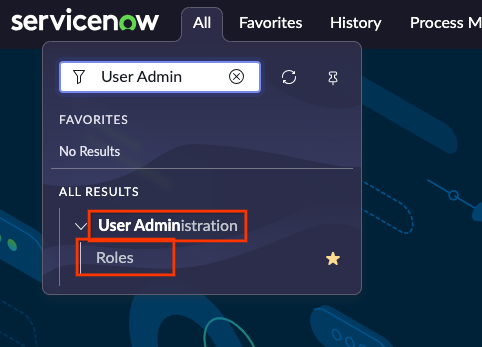
Select roles Click New.
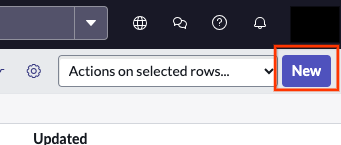
Click the New button Provide a name and Submit.
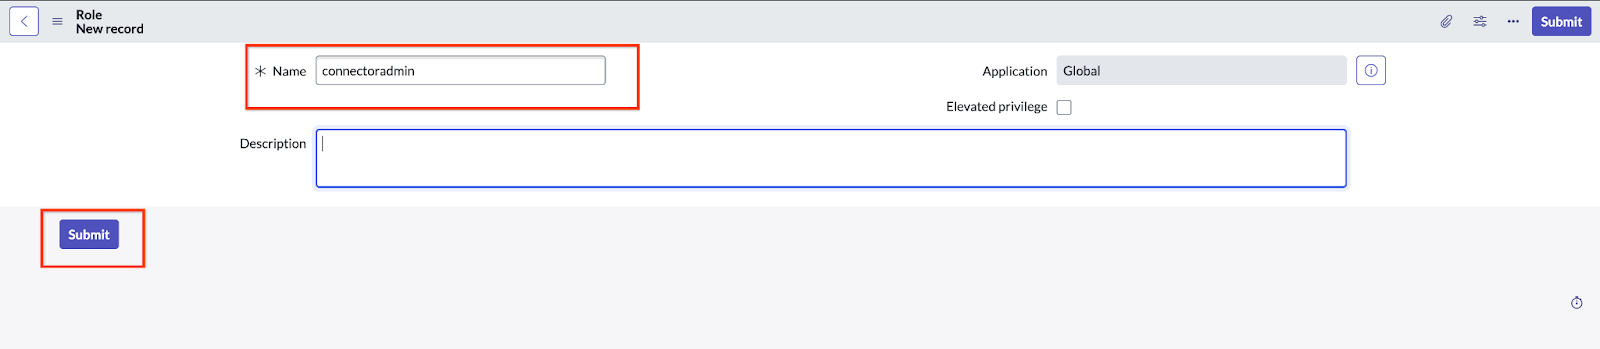
Select a name and submit Go to System security > Access control (ACL).
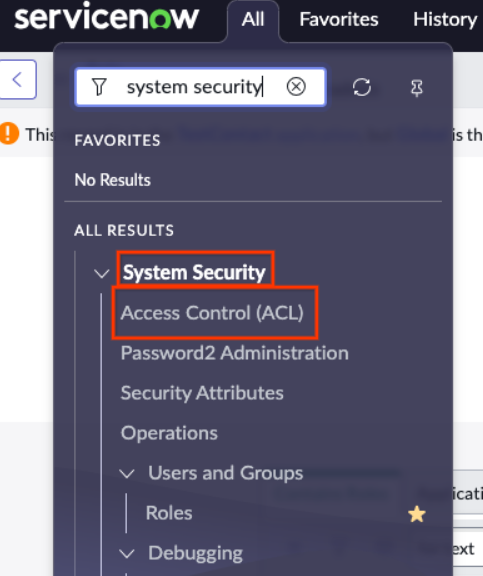
Select access control (ACL) Click New to create a new ACL rule.
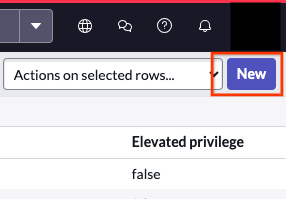
Click the New button Repeat the following two steps until you grant access to all required tables.
Use
sys_user_roleas an example to see how table access is granted.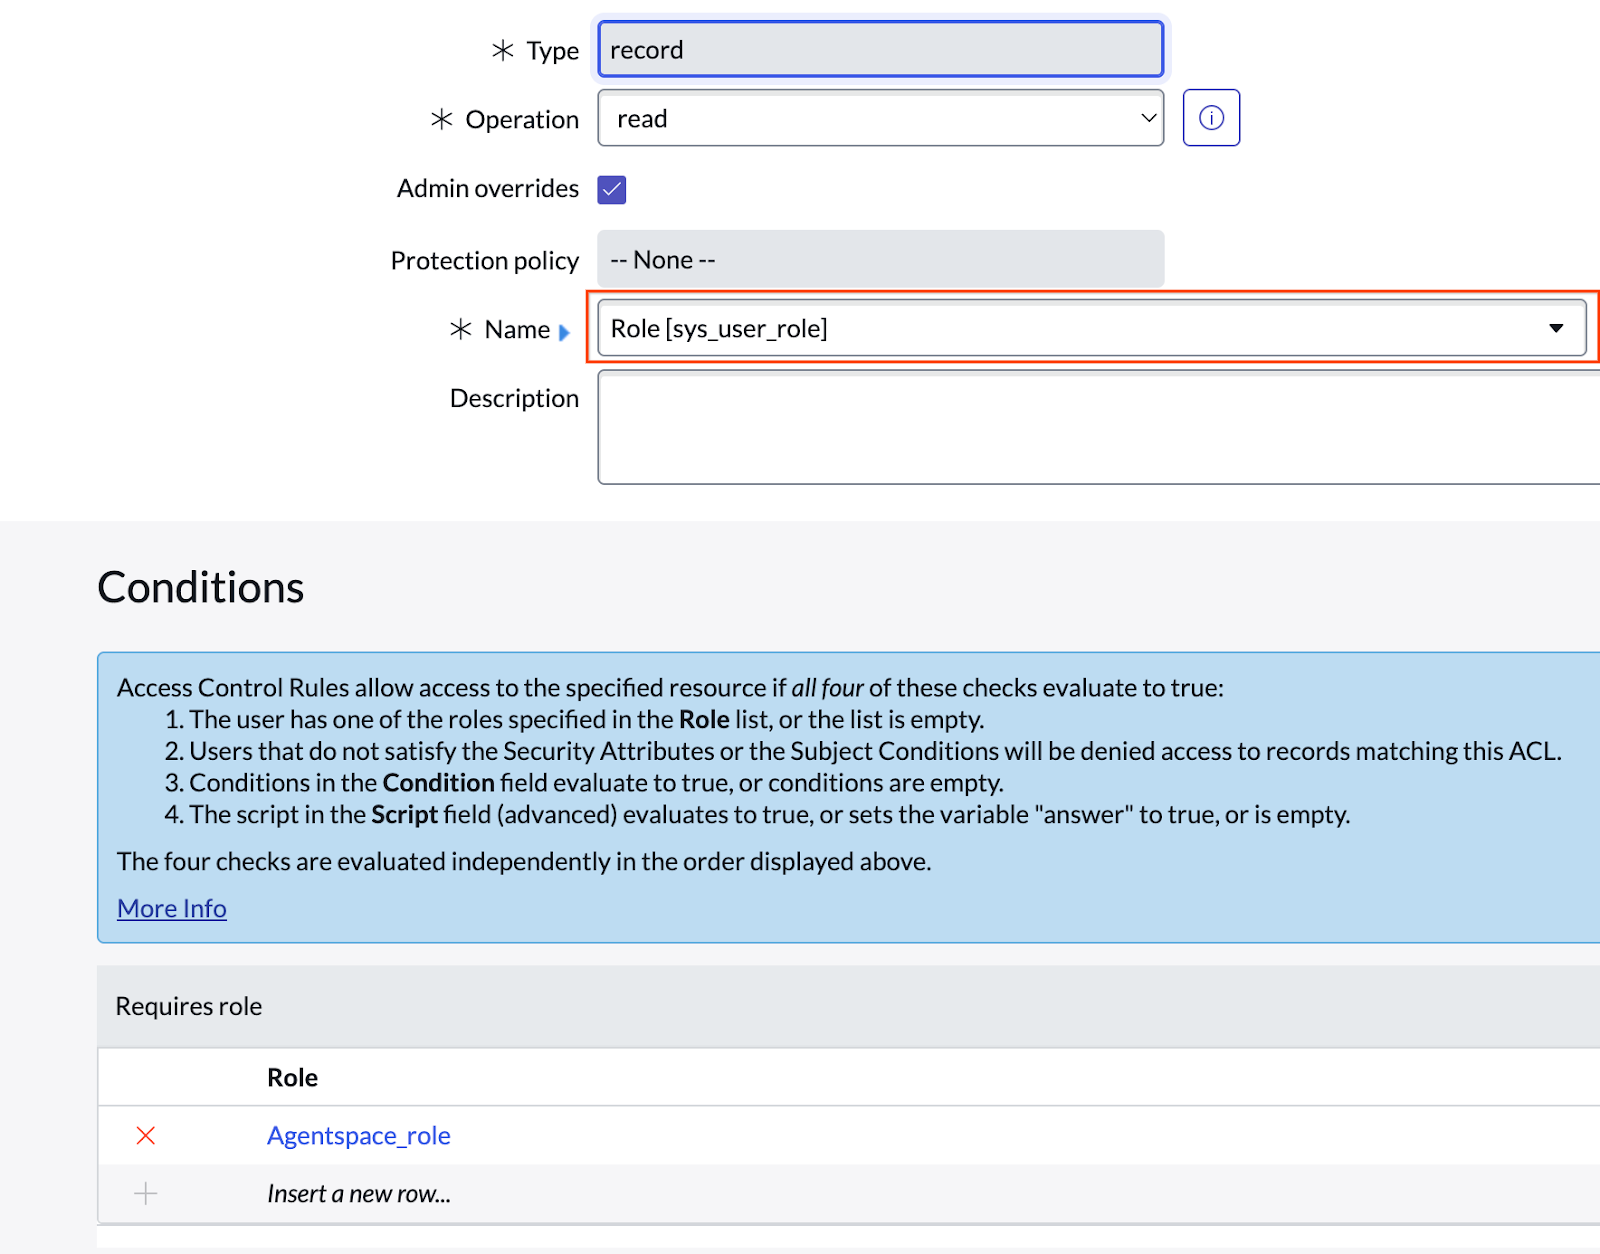
Select sys_user_roleClick Submit and select the role.
Required tables
The connector needs access to these tables for each entity to run.
| Table name | Description |
|---|---|
incident |
Show incidents in search results. |
sc_cat_item |
Show catalog items in search results. |
sc_cat_item_user_criteria_mtom |
Show users who can access catalog items based on user criteria. |
sc_cat_item_user_criteria_no_mtom |
Show users who can't access catalog items based on user criteria. |
sc_cat_item_user_mtom |
Show which users can access catalog items. |
sc_cat_item_user_no_mtom |
Show users who can't access catalog items. |
kb_knowledge |
The list of knowledge articles that can be shown in search results. |
kb_knowledge_base |
The list of knowledge bases that can be shown in search results. |
kb_uc_can_contribute_mtom |
Show who can contribute to knowledge bases based on user criteria. |
kb_uc_can_read_mtom |
Show who can read knowledge bases based on user criteria. |
kb_uc_cannot_read_mtom |
Show who can't read knowledge bases based on user criteria. |
sys_user_role |
List of roles that can be assigned to users. |
sys_user_has_role |
List of roles mapped to the users. |
sys_user_group |
List of user group segments. |
sys_user_grmember |
List of group members for groups. |
sys_user |
List of all users. |
core_company |
List of all company attributes. |
cmn_location |
List of all location attributes. |
cmn_department |
List of all department attributes. |
user_criteria |
List of user criteria records. |
sp_portal |
Link portal URI in search results. |
m2m_sp_portal_knowledge_base |
Link portal URI for knowledge articles in search results. |
m2m_sp_portal_catalog |
Link portal URI for catalog items in search results. |
Grant and verify ACL access
The connector requires ACL access to the catalog item fields of the
sc_cat_item table.
To grant and verify access, do the following:
Grant explicit access by creating a new ACL rule and manually entering
sc_cat_item.*in the Name field of the form.
Enter sc_cat_item.*Verify that the ACLs are updated.
Go to
sys_security_acl_role_list.doin the search bar.
Enter sys_security_acl_role_list.doSet Role to the role that you want to verify.
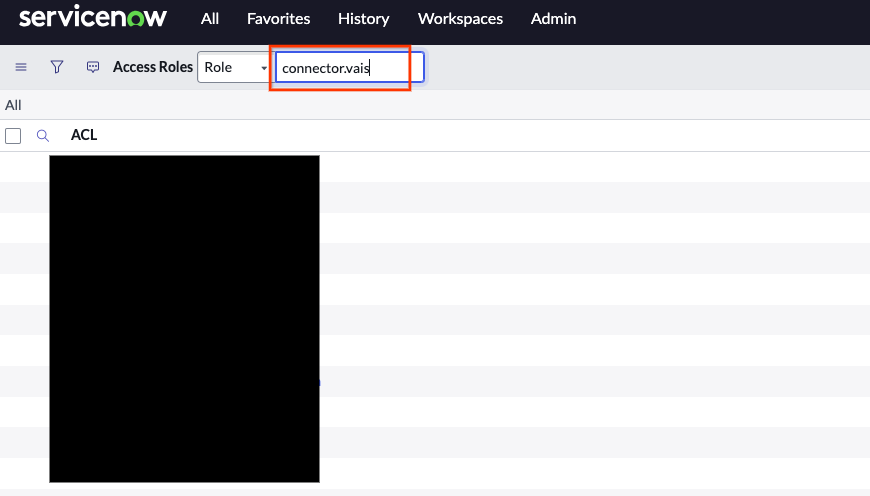
Select role to verify Verify that the required ACLs are assigned to the role.
Use a custom role with entity administrators
Using the administrator role may not suit teams or organizations that want to avoid assigning overly powerful permissions. This option provides a role with three specific permissions that grant the required access.
Go to All > System security > Users and groups > Roles.
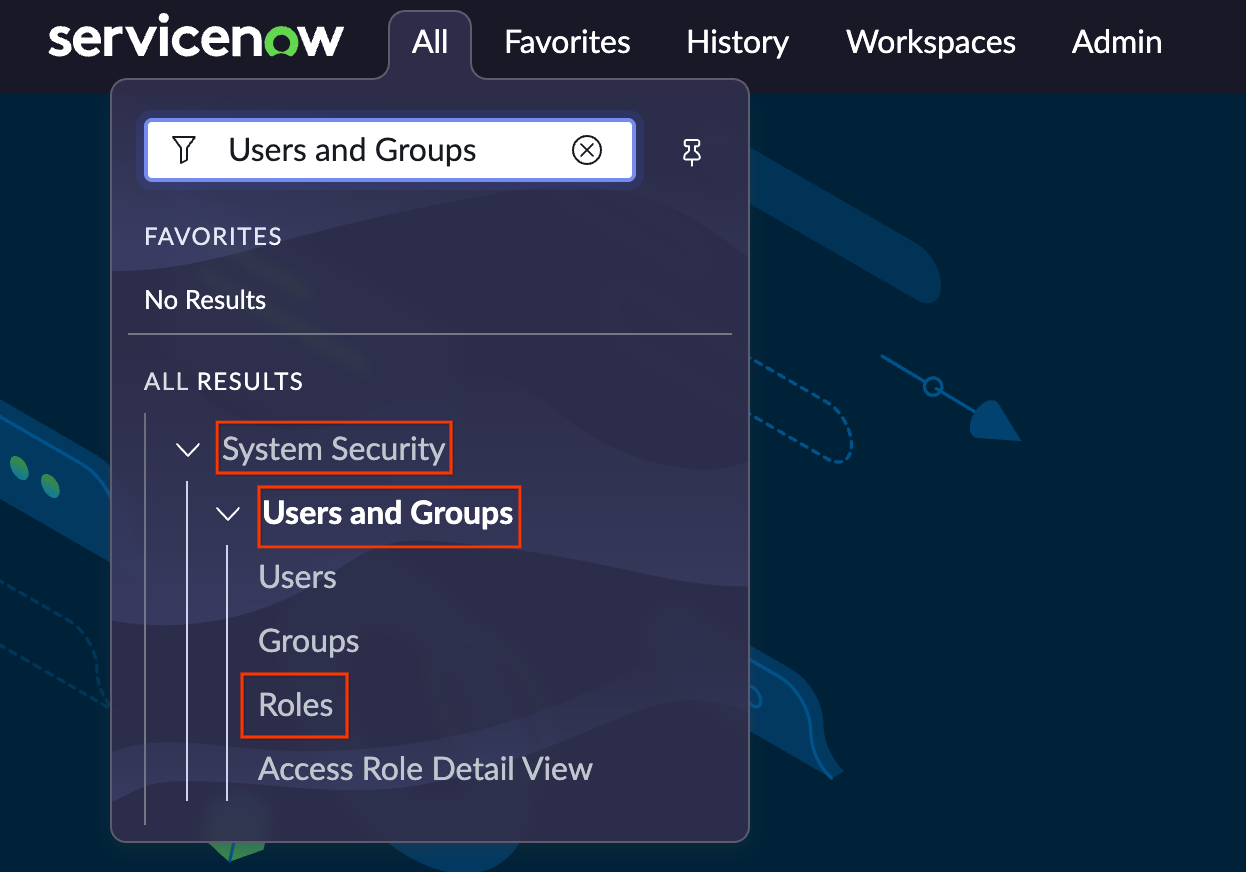
Add roles Select New, enter a name.
Click the New button Click Submit.
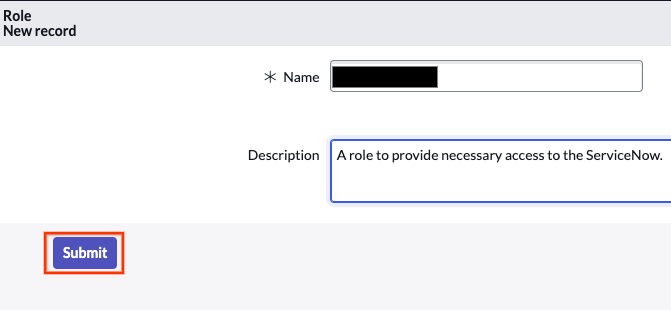
Click the Submit button Find the created role in the list.
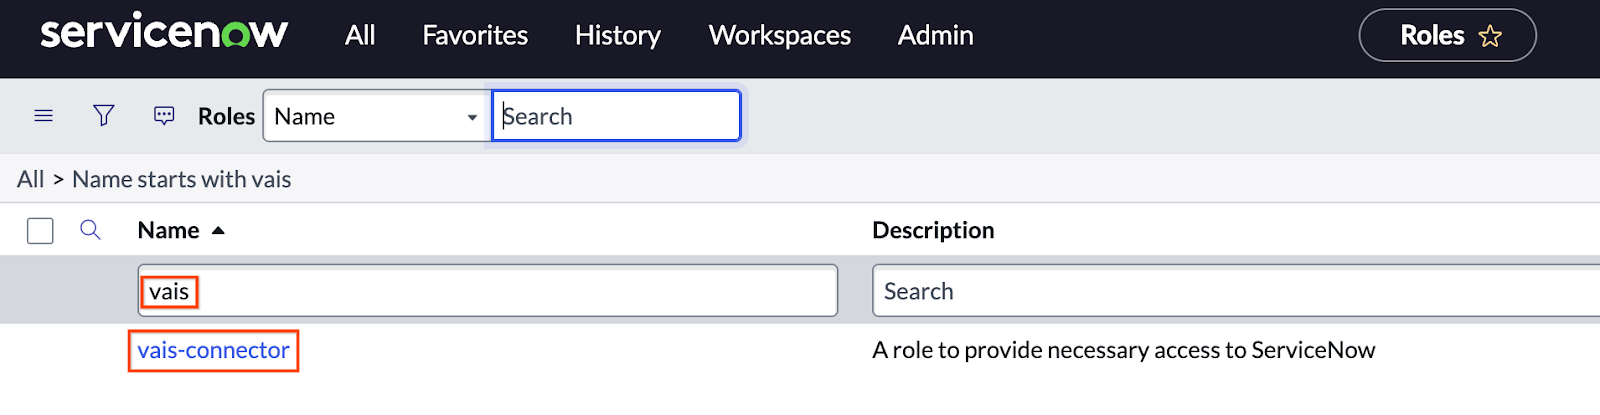
Search using the role name and click the role Navigate to Contains roles > Edit.
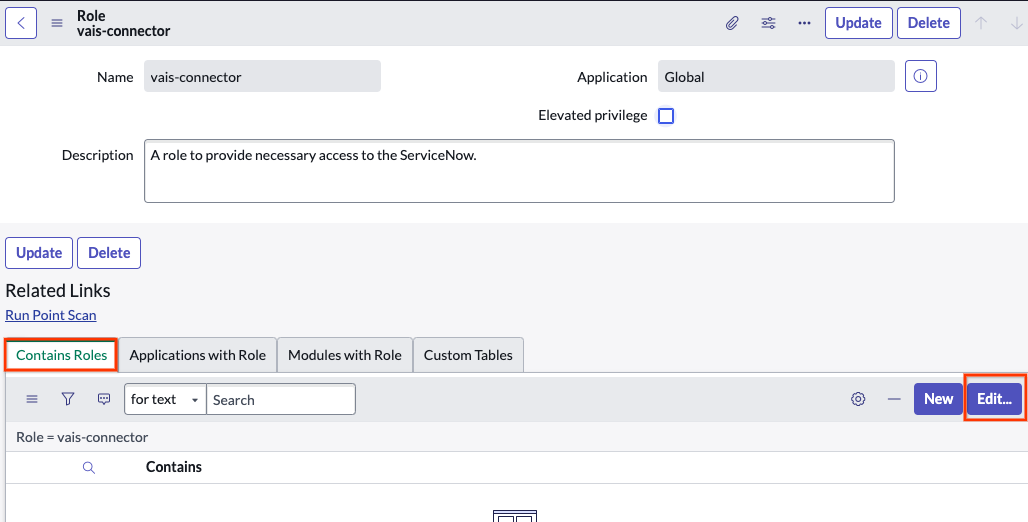
Click the Edit button Add the following roles to the newly created role, and then click Save.
catalog_adminknowledge_adminincident_manager
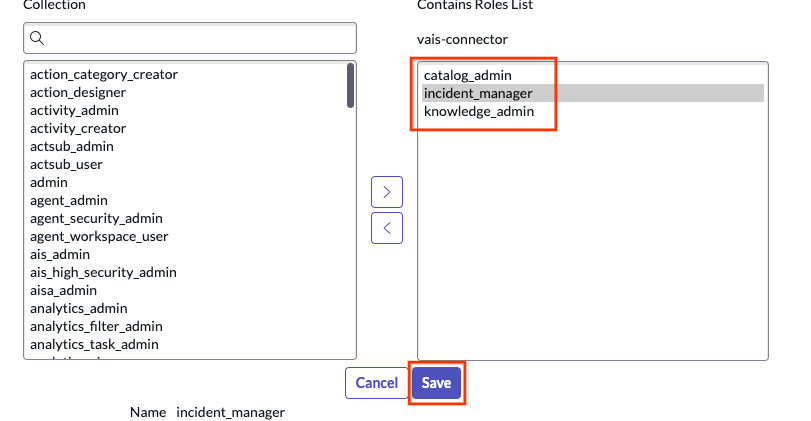
Add roles and click the Save button Confirm updates.
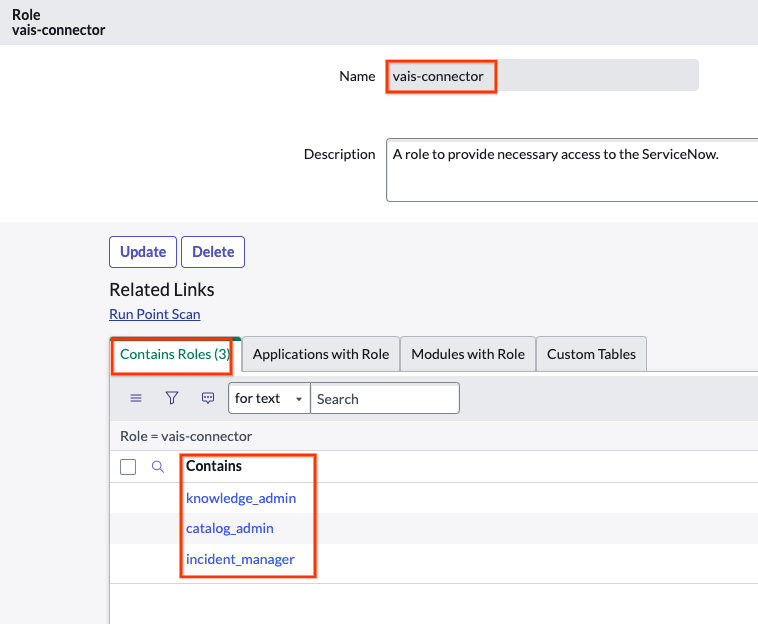
Confirm roles The following figure shows the custom role that includes three roles:
Custom roles
Use an administrator role
You can use an administrator role to pull data. Use the default administrator role configured with the instance, or create a new user with an administrator role by doing the following:
Go to All > User administration > Users.
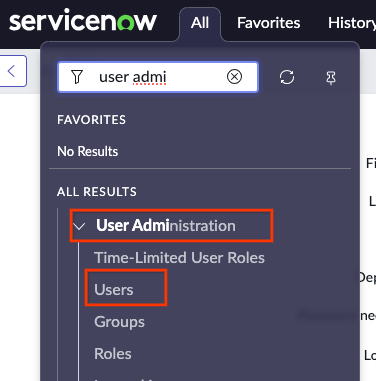
Select users Create a new user with a name.
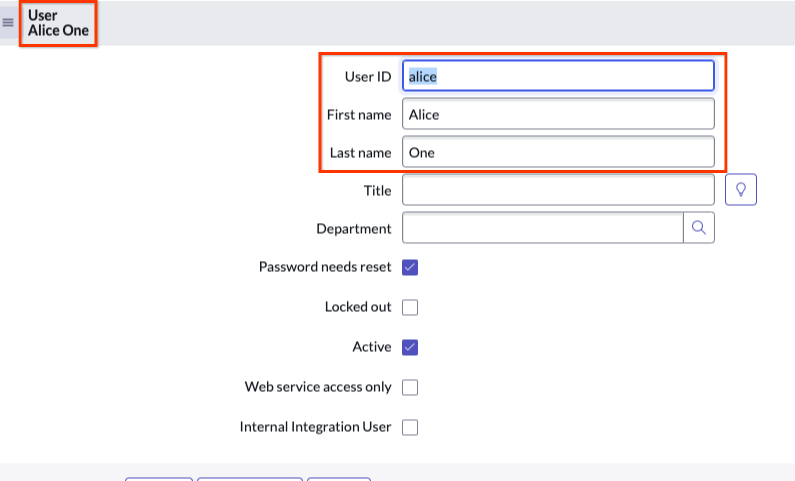
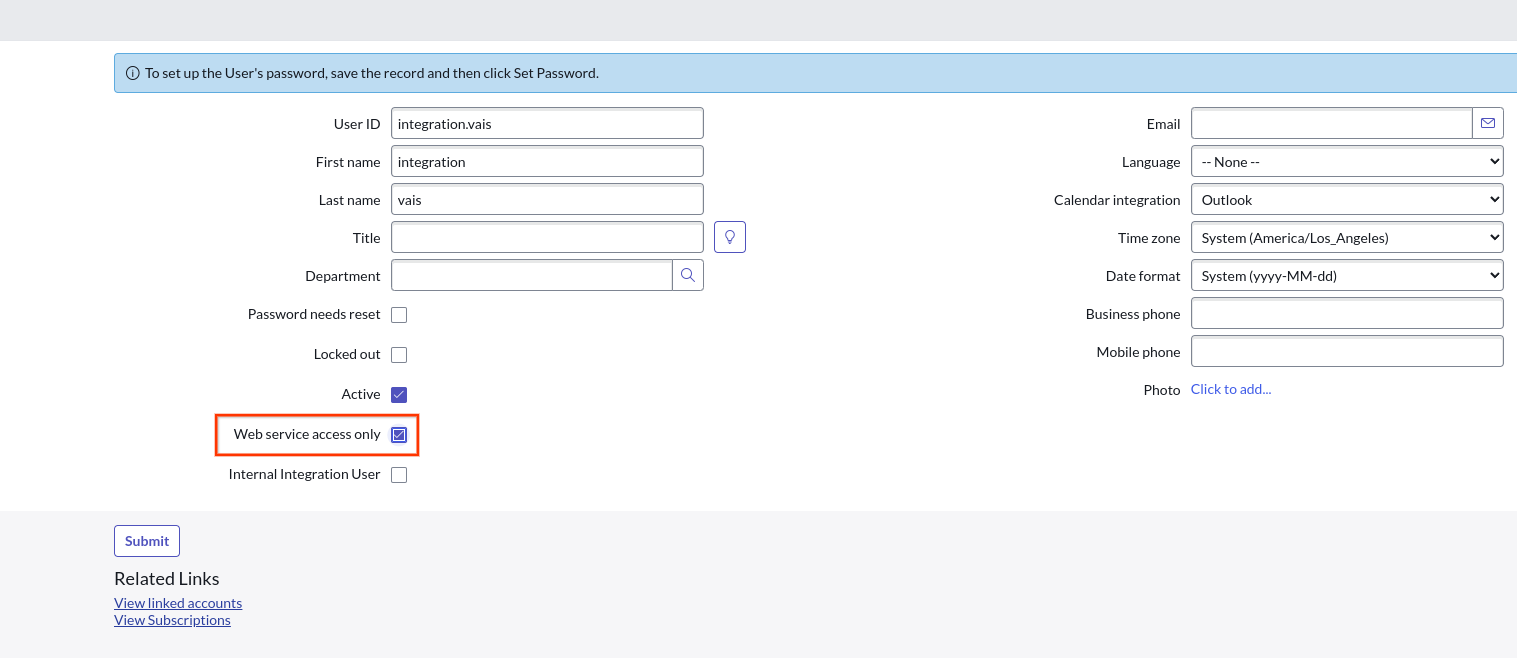
Select username Enable Web service access only. When you select Web service access only, you create a non-interactive user.
Interactive users vs. non-interactive users: Interactive users can sign in to the ServiceNow UI or service portal using their username and password. They can access an instance through a URL that points to a UI page, form, or list. They can also connect using single sign-on methods such as digest authentication or security assertion markup language (SAML). Additionally, they can use their credentials to authorize SOAP connections if permitted by strict security settings, and they have unrestricted access to other API connections such as WSDL, JSON, XML, or XSD.
Whereas, non-interactive users can only use their credentials to authorize API connections like JSON, SOAP, and WSDL. They can't sign in to the ServiceNow UI and can only access the instance through API protocols.
After user creation, select the user from the users list.
Pick a user Click Roles > Edit.
Edit roles Add Admin.
Click Save to add a list of roles to the user.
Add list of roles to the user Click Set password, auto-generate, and save it.
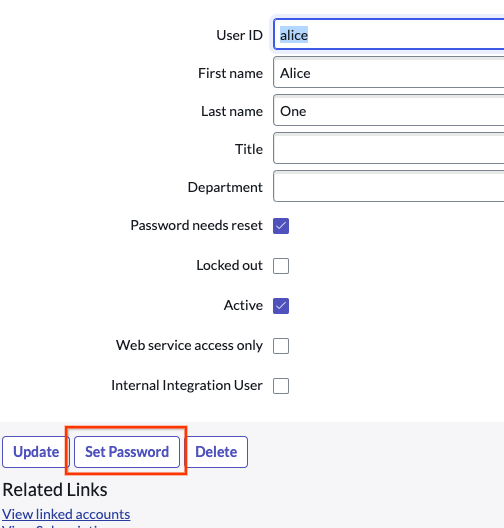
Set password
Grant role to a user
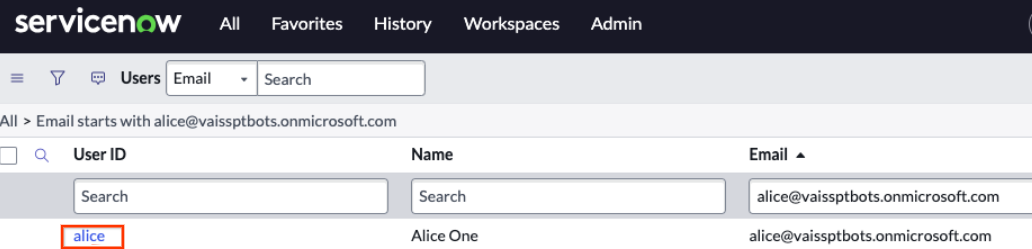
Go to All > User administration > Users.
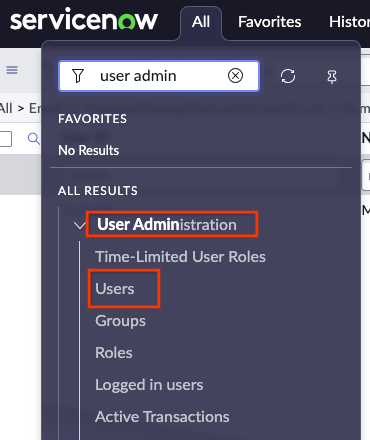
Select users Find or create a new user.

Find or create a new user If no user is available, go to System security > Users and groups > Users.
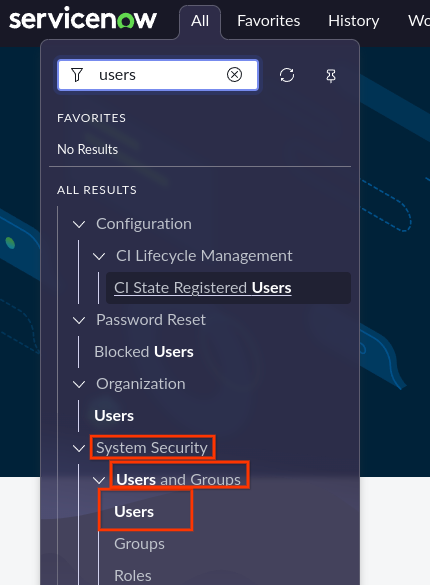
Select users Click New.

Click the New button Create a new service account in the user table. Make sure to click Web service access only.
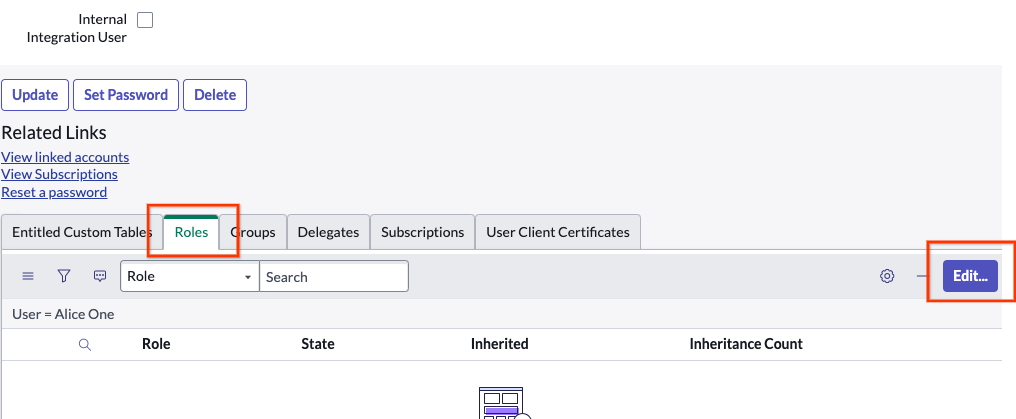
Click the Web service access only option Scroll to Roles.

Navigate to Roles Click Edit.
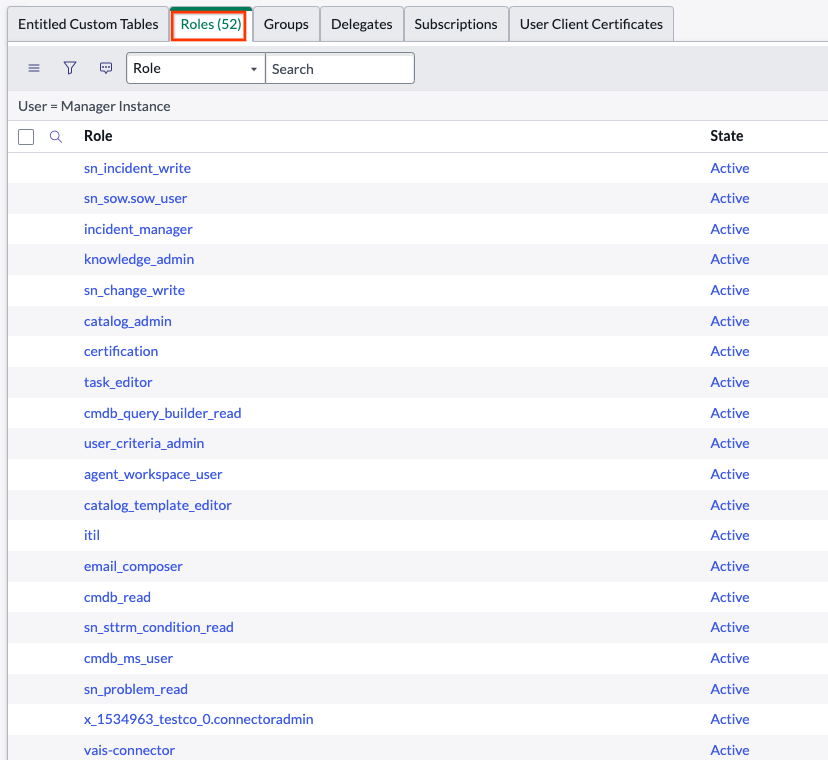
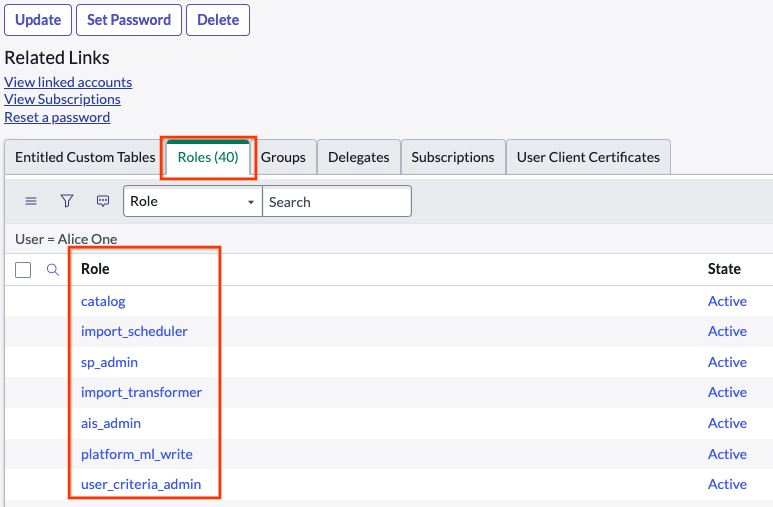
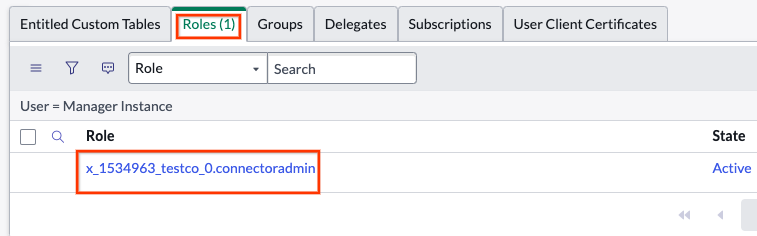
Edit Roles Grant the role you created and assign it to the user. Based on the type of role you created in the previous step, select the appropriate one and assign it to the user. Click Save.
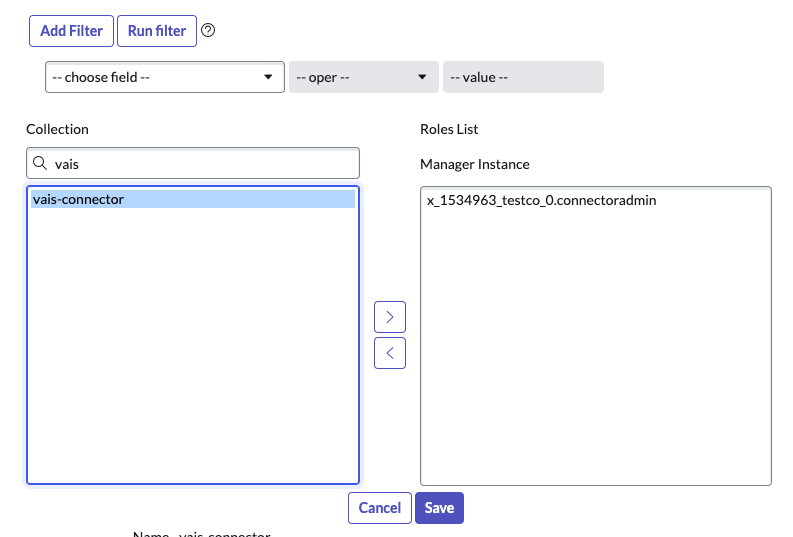
Select and assign the role OR
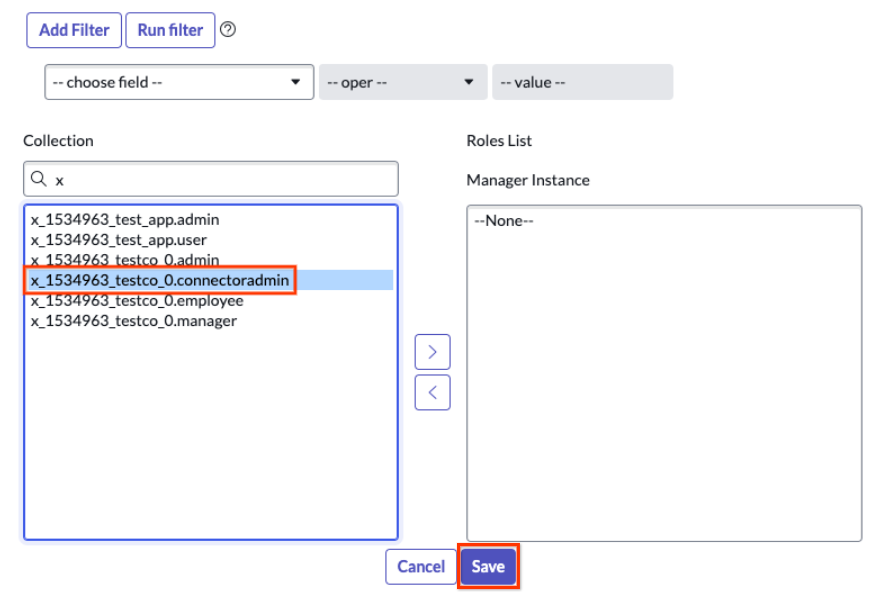
Assign the role and save View the custom role with ACL.
Custom role with ACL Obtain the username and password for the user and click Set password.
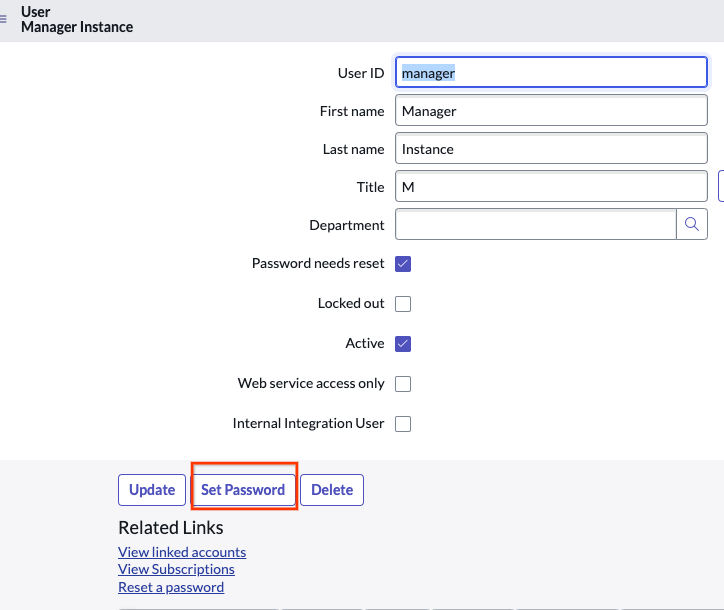
Set password Auto-generate a password and keep it for later use.
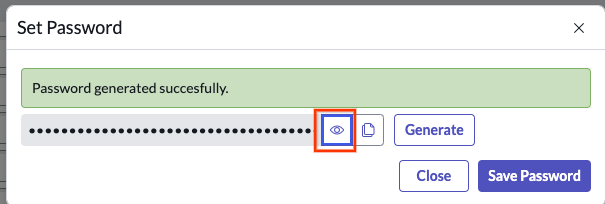
Auto-generate a password
Create a ServiceNow connector
Console
To use the Google Cloud console to sync data from ServiceNow to Gemini Enterprise, follow these steps:
In the Google Cloud console, go to the Gemini Enterprise page.
In the navigation menu, click Data Stores.
Click Create Data Store.
On the Select a data source page, scroll or search for ServiceNow to connect your third-party source.
Enter your ServiceNow authentication information.
- Instance URI
- Client ID
- Client secret
- User account
- Password
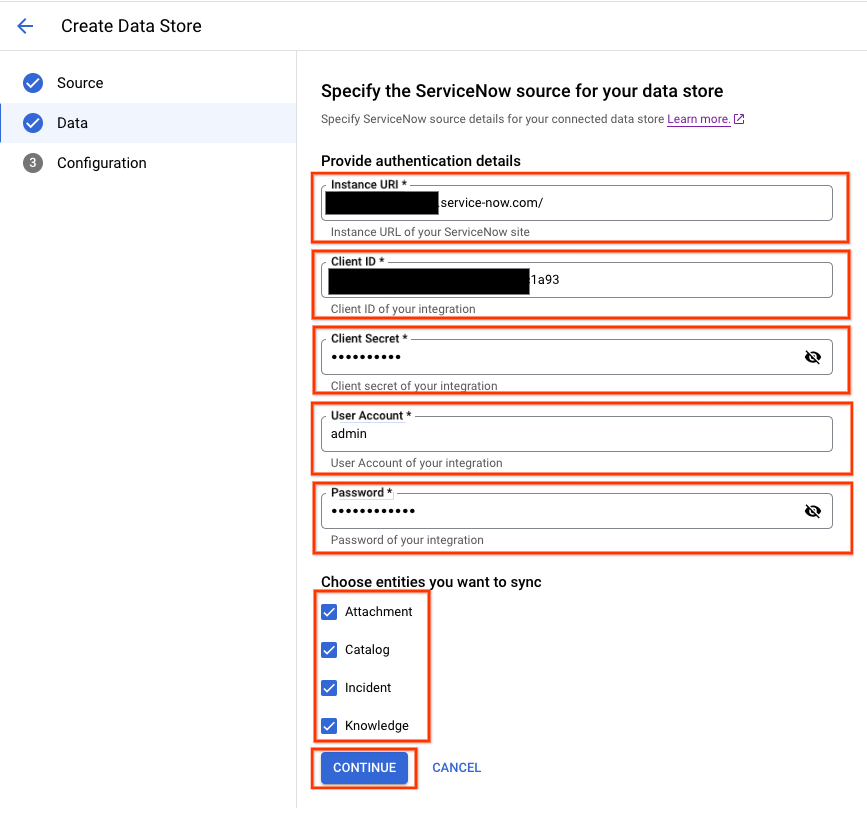
ServiceNow authentication information Fill in a unique name for your data store and click Create.
Select which entities to sync:
Knowledge Article
Service Catalog
Incident
Attachment
To filter entities out of the index or ensure that they are included in the index, click Filter.
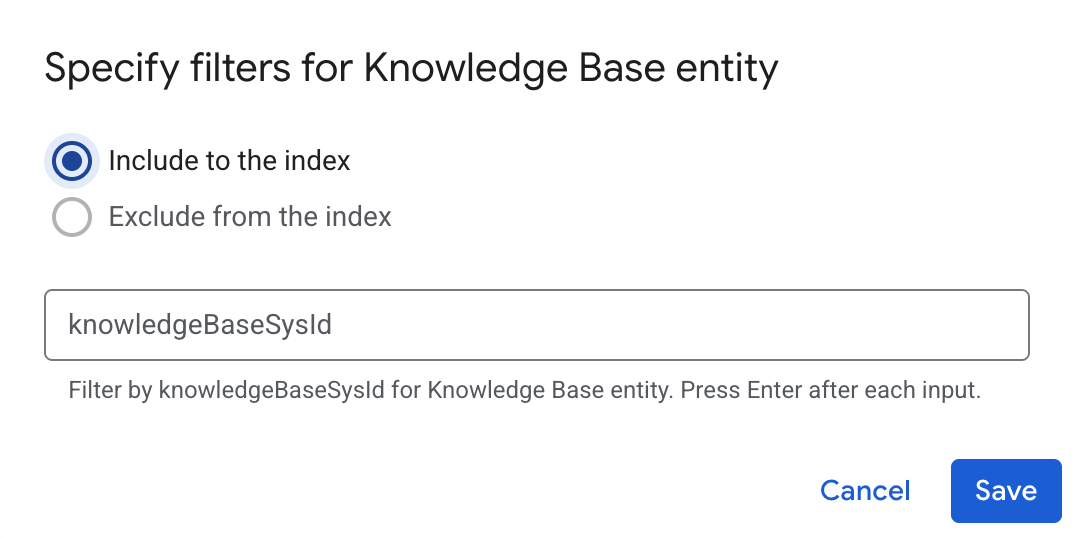
Specify filters to include or exclude entities Click Save.
Click Continue.
Select the Sync frequency for Full sync and the Incremental sync frequency for Incremental data sync. For more information, see Sync schedules.
If you want to schedule separate full syncs of entity and identity data, expand the menu under Full sync and then select Custom options.

Setting separate schedules for full entity sync and full identity sync. Select a region for your data connector.
Click Create. Gemini Enterprise creates your data store and displays your data stores on the Data Stores page.
To check the status of your ingestion, go to the Data Stores page and click your data connector name to see details about it on its Data page. The Connector state changes from Creating to Running when it starts synchronizing data. When ingestion is complete, the state changes to Active to indicate that the connection to your data source is set up and awaiting the next scheduled synchronization.
Depending on the size of your data, ingestion can take several minutes or several hours.
Enable real-time sync
Real-time sync only syncs document entities and doesn't sync data related to identity entities. The following table shows which document events are supported with real-time sync.
| ServiceNow entities | Create | Update | Delete | Permission changes |
|---|---|---|---|---|
| Attachments | ||||
| Catalogs | ||||
| Incidents | ||||
| Knowledge |
To enable real-time sync for your connector, follow these steps.
In the Google Cloud console, go to the Gemini Enterprise page.
In the navigation menu, click Data Stores.
Click the name of the ServiceNow connector for which you want to enable real-time sync.
On the connector Data page, wait until the Connector state changes to Active.
In the Real-time sync field, click View/edit.
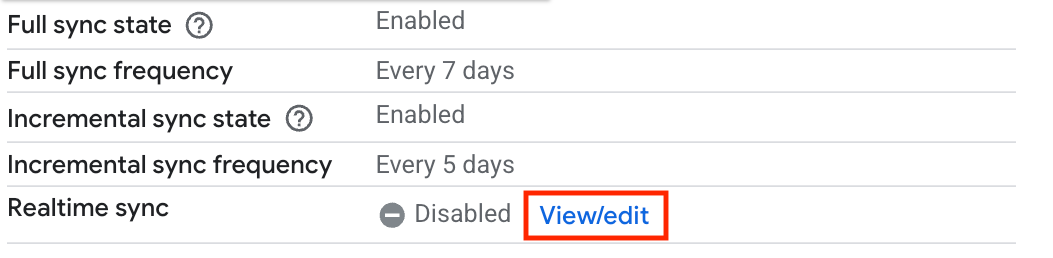
View and edit real-time sync settings. Click the Enable real-time sync toggle to the on position.
Provide a value for Client secret. This value is used to verify ServiceNow webhook events. We recommend using a string of 20 characters.
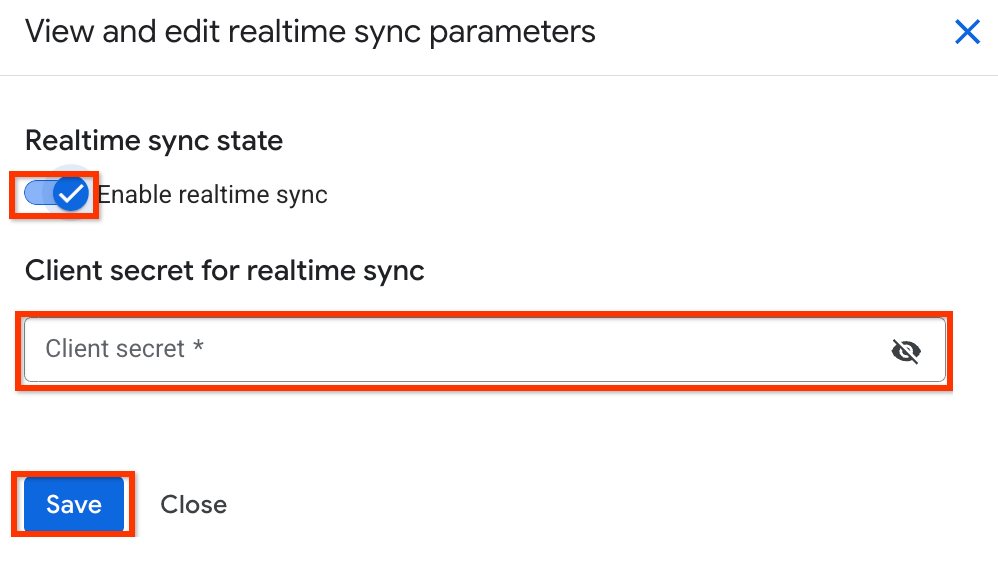
Enable real-time sync and provide a client secret. Click Save.
Wait for the Real-time sync field to change to Running.
Go to your ServiceNow instance using an account with an administrator role.
Click All.
In the Filter field, enter
sys_properties.listand submit.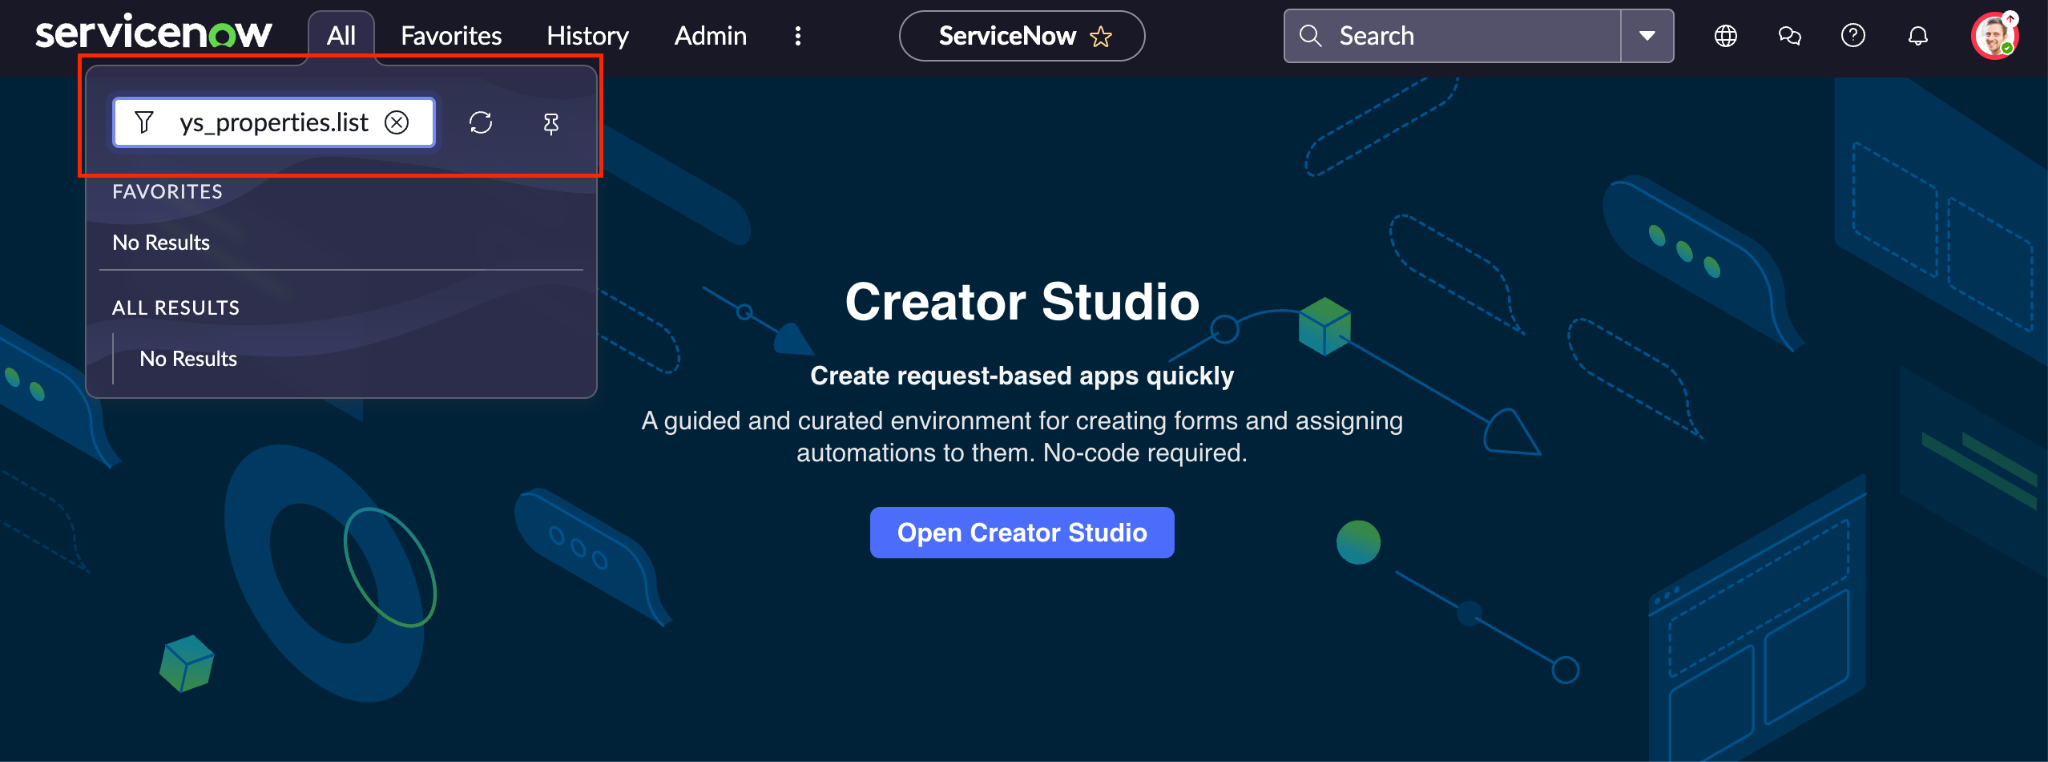
Locate system properties in ServiceNow. Click New to create a system property.
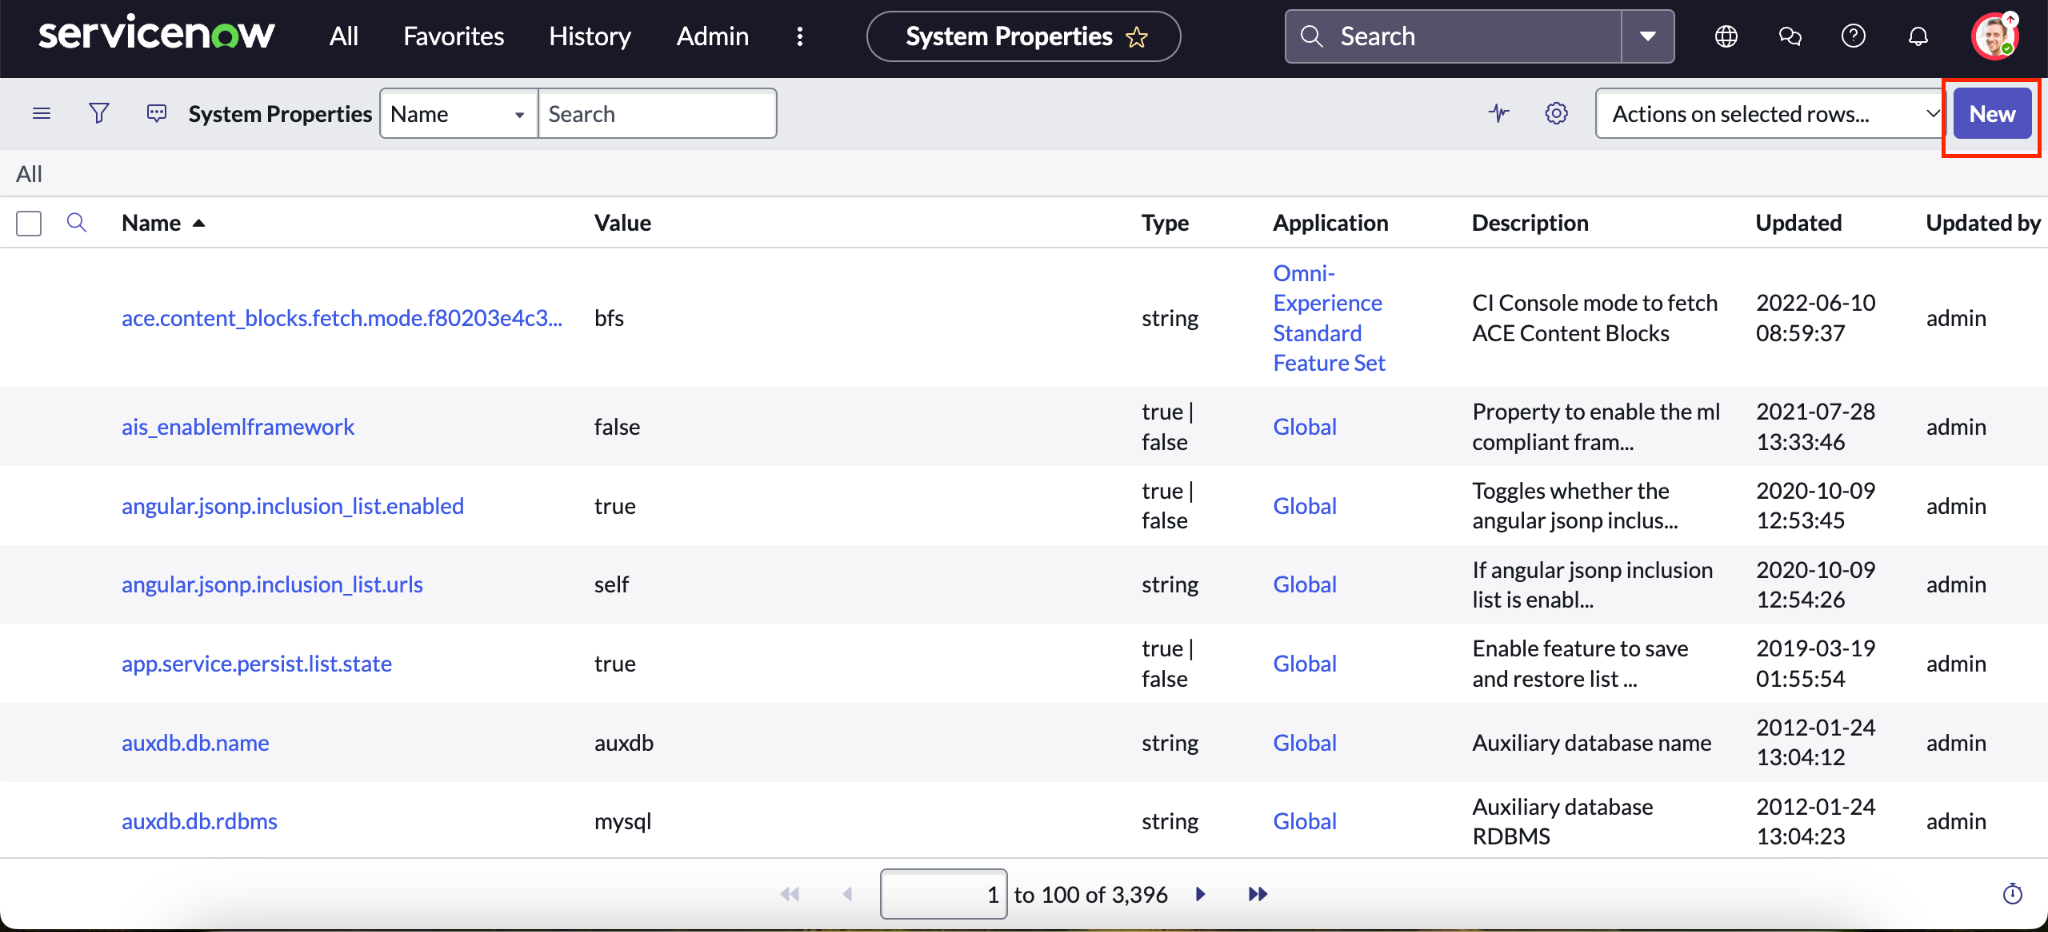
Create a new system property in ServiceNow. Fill out the fields for the new system property.
For Name, enter a descriptive name, such as
webhook_secret.For Value, enter the value you used for the Client secret field in the Gemini Enterprise connector real-time sync settings.
Click Submit.
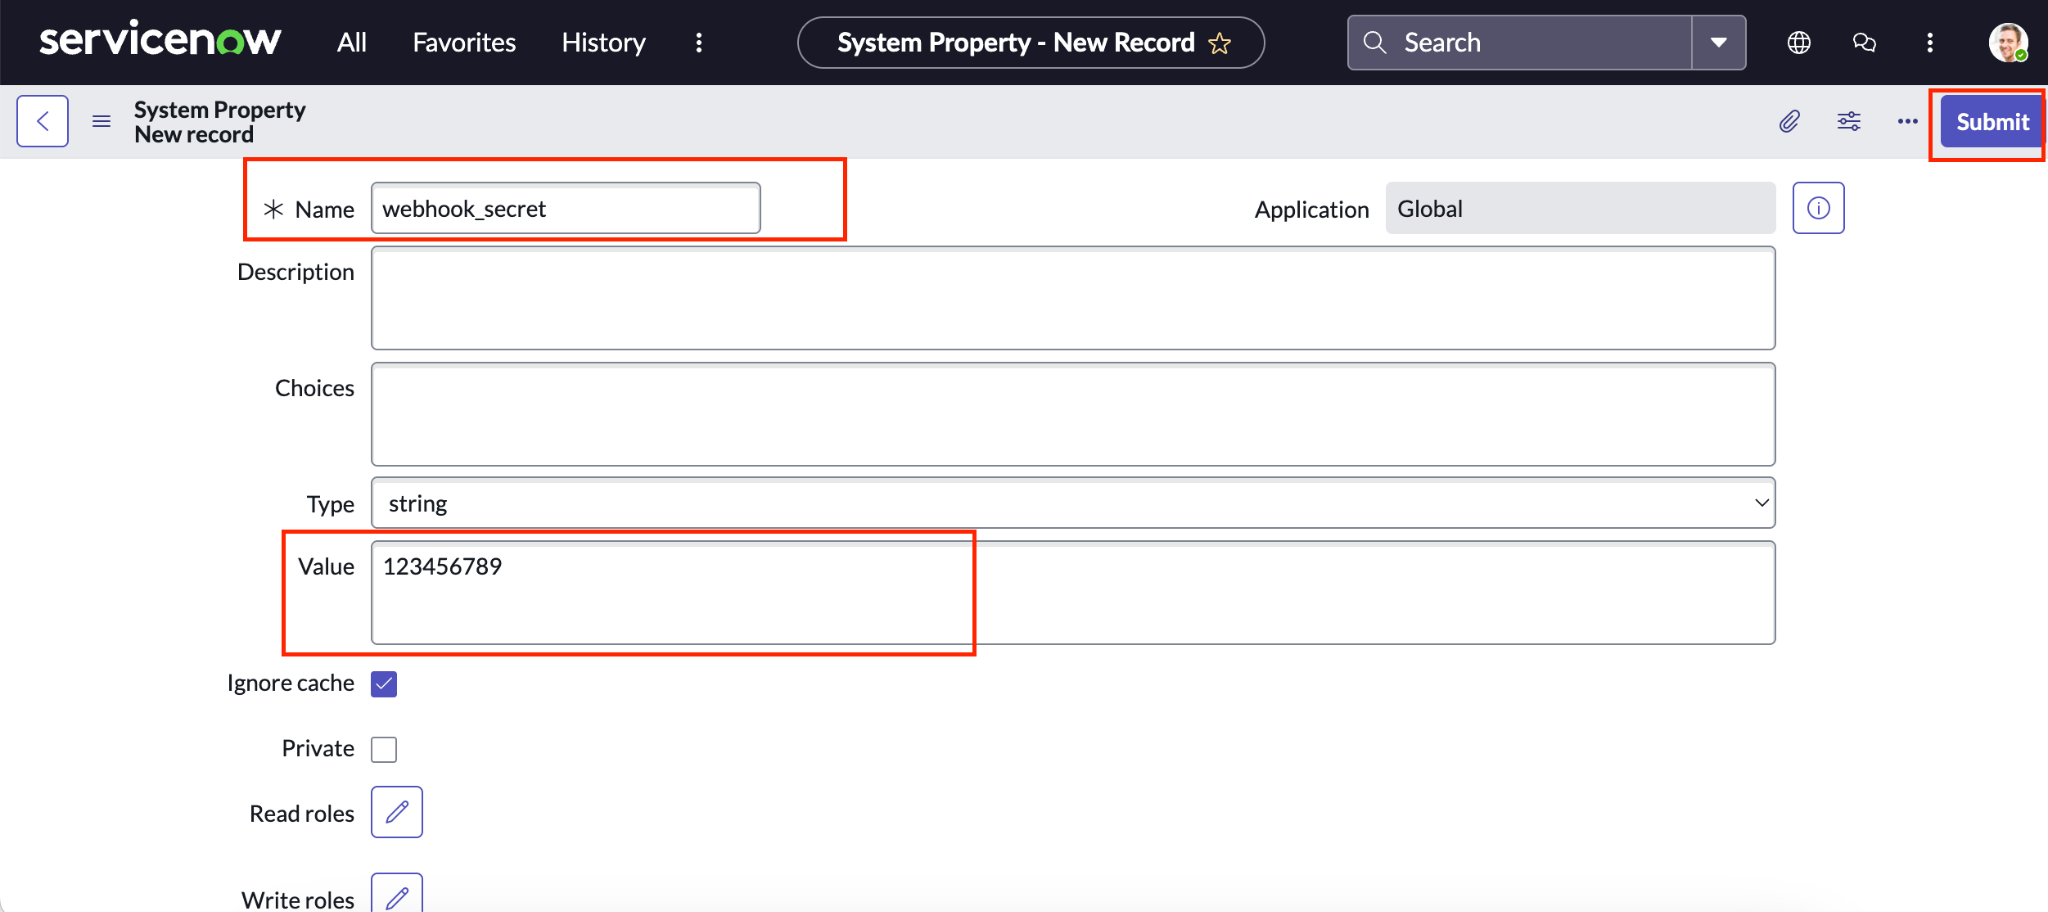
Fill out fields for the new ServiceNow system property.
Create a webhook for knowledge entities
To create a webhook for ServiceNow knowledge entities, follow these steps.
Go to your ServiceNow instance using an account with an administrator role, and click All > System Definition > Business Rules.
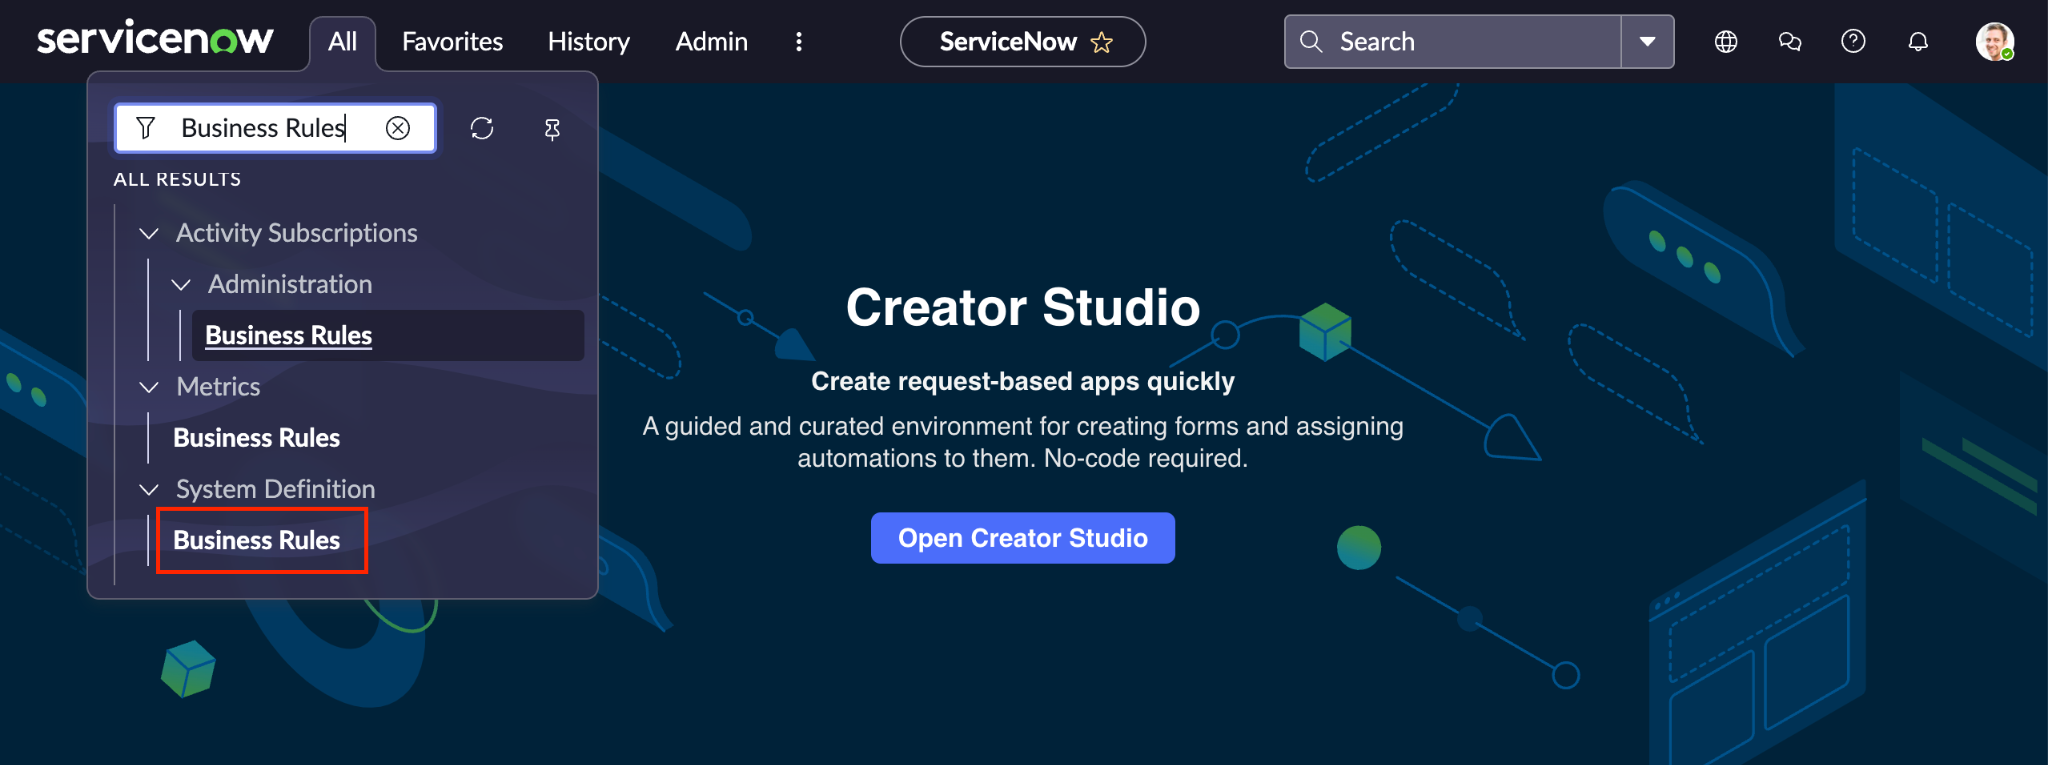
View ServiceNow Business Rules. Click New to create a new Business Rule.
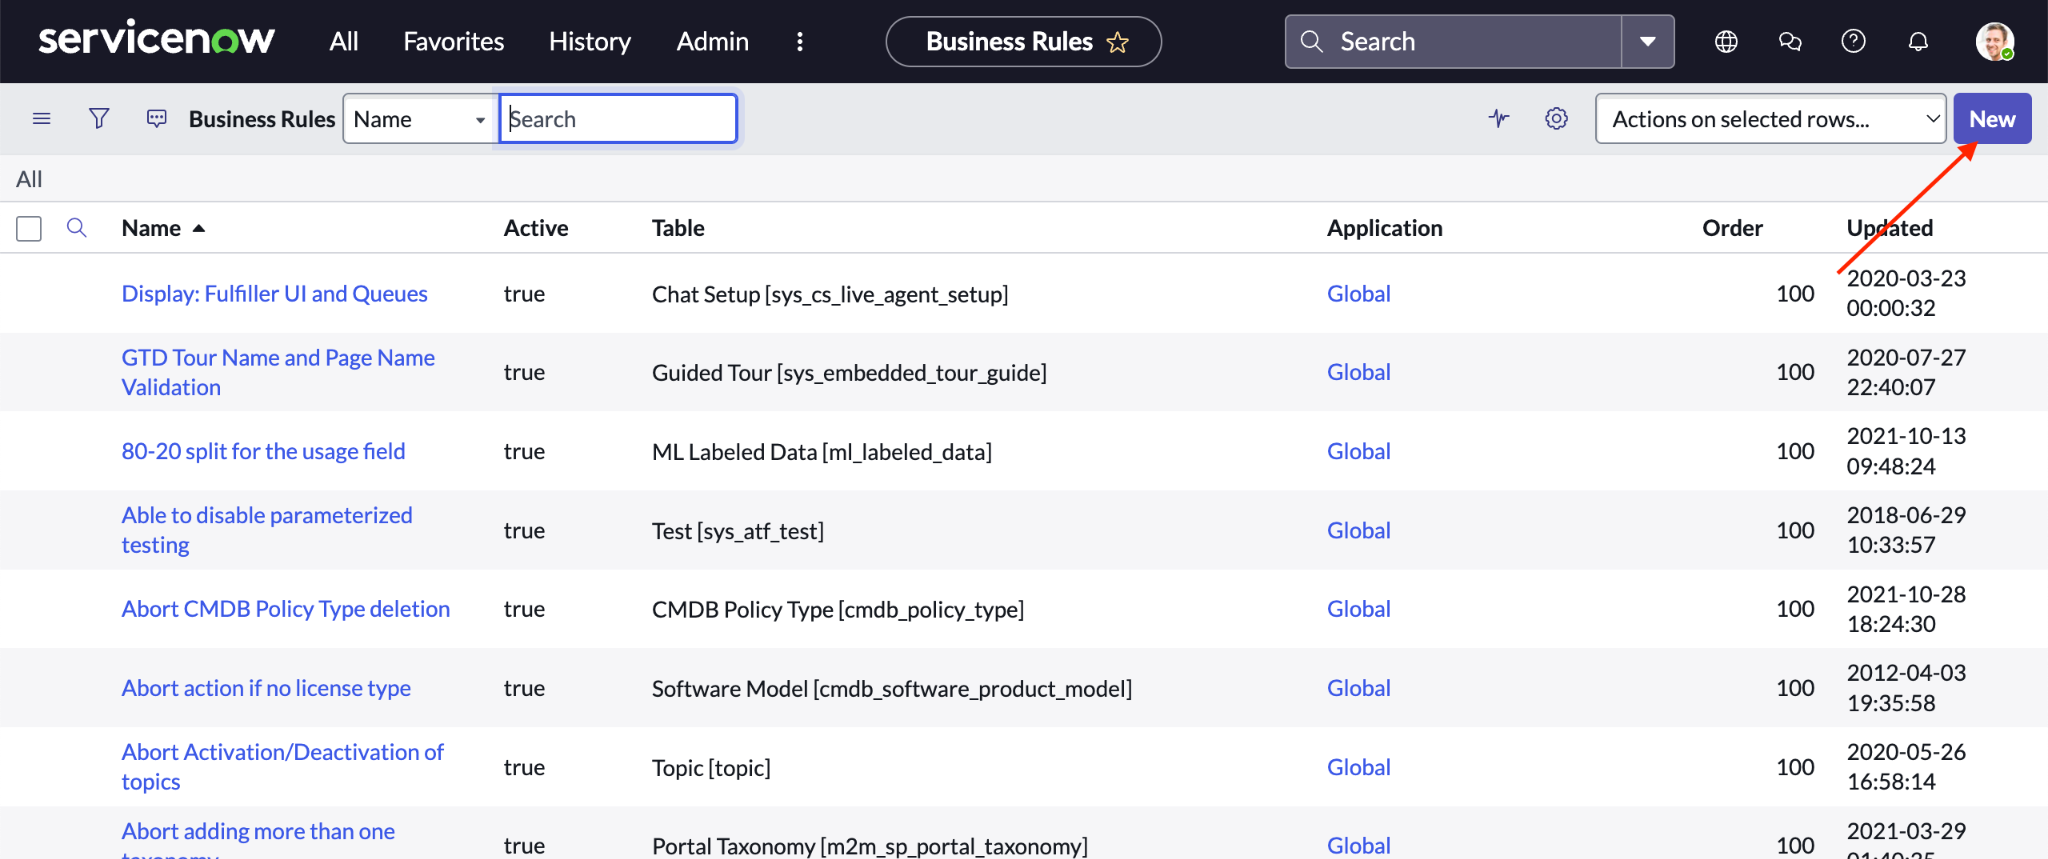
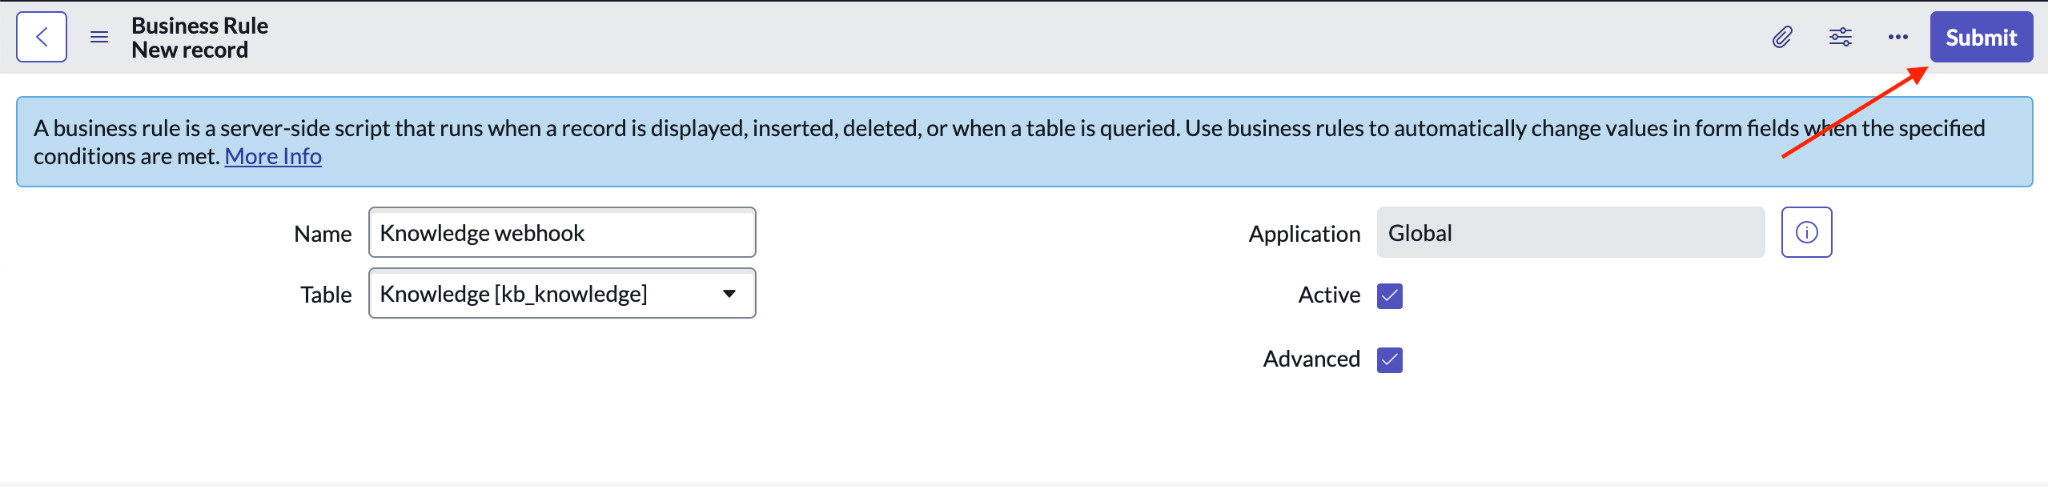
Create a new ServiceNow Business Rule. Fill out the fields for the webhook.
For Name, enter a descriptive name, such as
Knowledge webhook.Select Advanced.
For Table, select Knowledge [kb_knowledge].
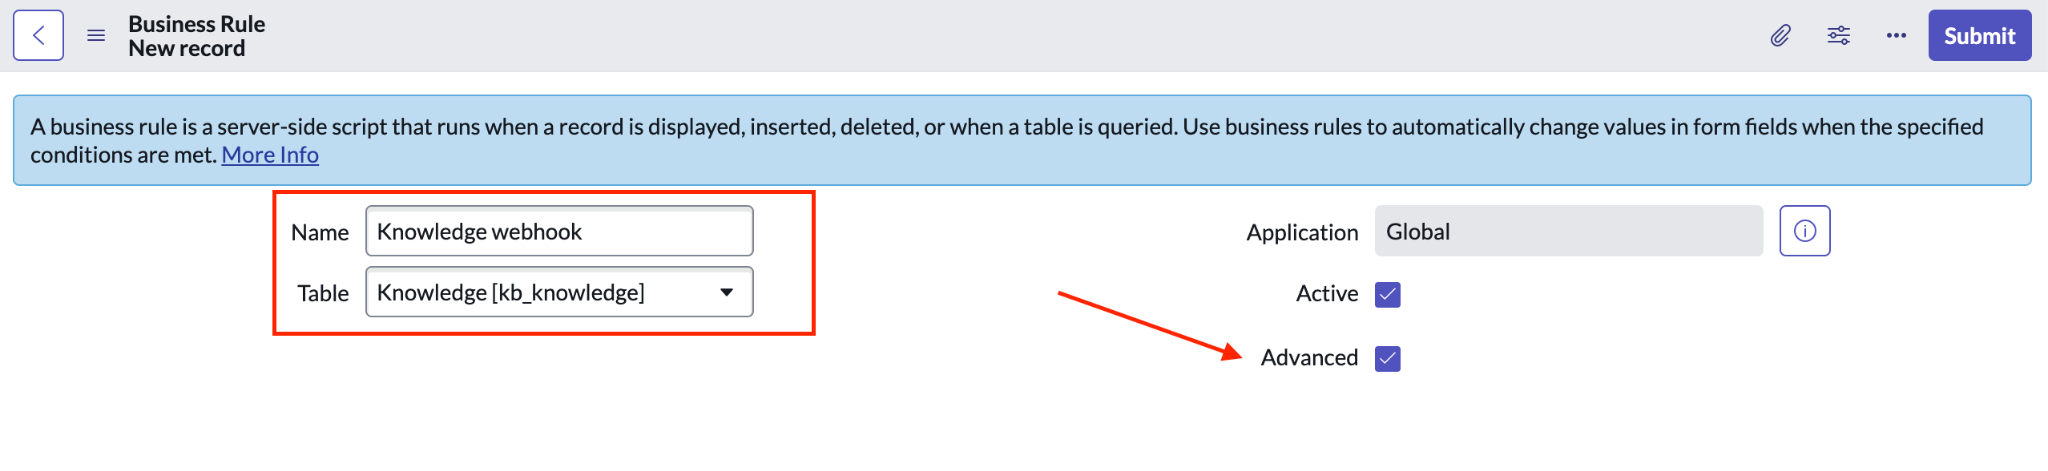
Fill out fields for the knowledge entity webhook. Click When to run.
For When, select before.
Select Insert, Update, and Delete.
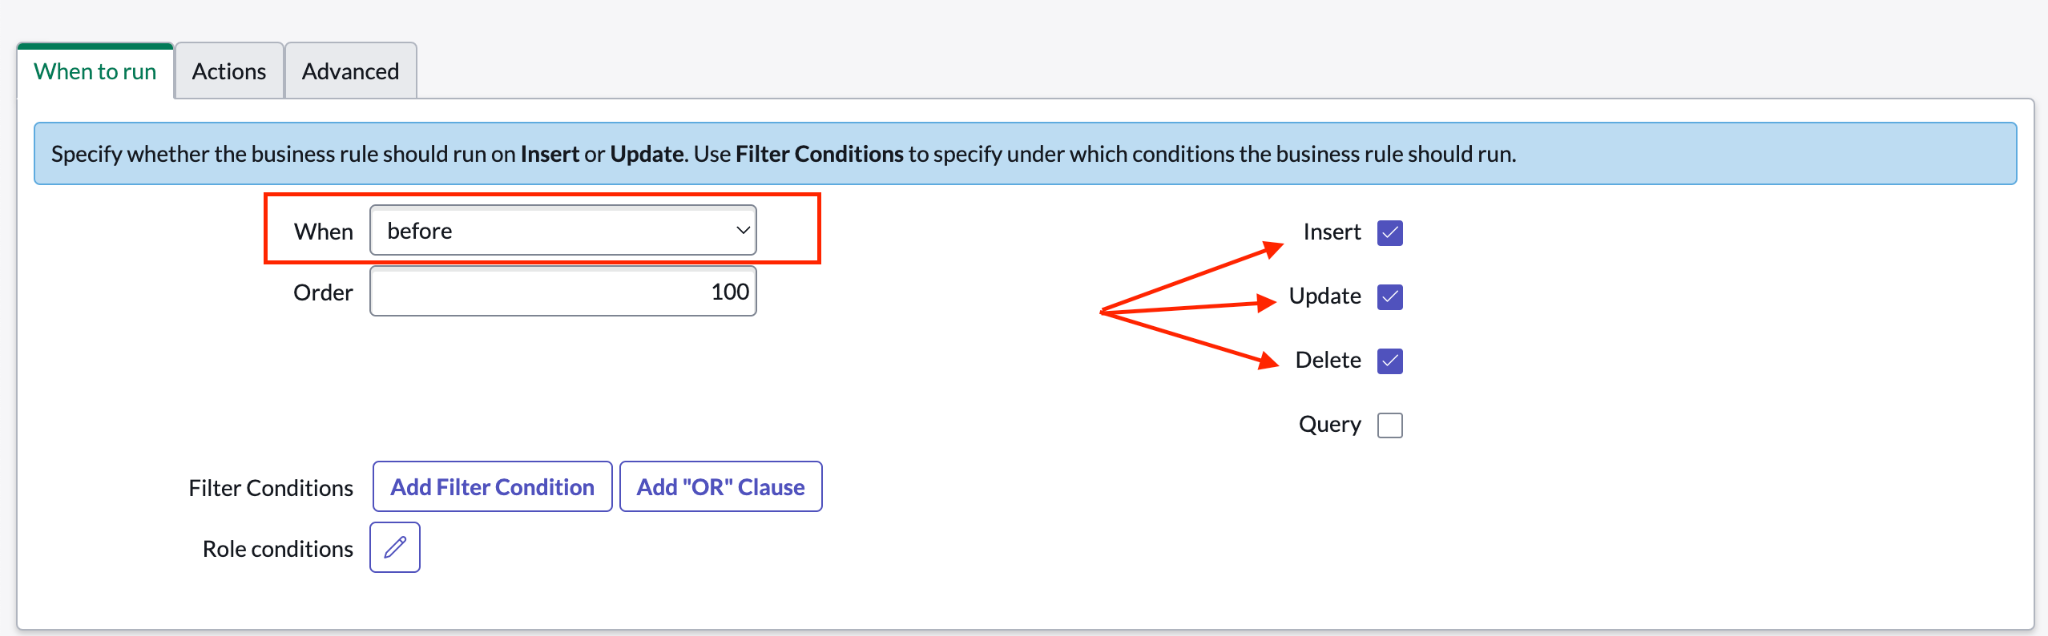
Specify when the knowledge entity webhook should run. Click Advanced.
Paste the following code in the Script field, replacing the endpoint value with the webhook notification URL provided when you enabled real-time sync for the Gemini Enterprise connector:
(function executeRule(current, previous /*null when async*/) {
  var request = new sn_ws.RESTMessageV2();
  request.setEndpoint('WEBHOOK_NOTIFICATION_URL');
  request.setHttpMethod('POST');

  var token = gs.getProperty('webhook_secret');
  var requestBody = "{\"sys_id\":\"" + current.sys_id + "\",\"entity\":\"" + "knowledge" + "\",\"operation\":\"" + current.operation() + "\"}";
  request.setRequestHeader("Accept","application/json");
  request.setRequestHeader('Content-Type','application/json');
  request.setRequestBody(requestBody);
  var signature = SncAuthentication.encode(requestBody, token, "HmacSHA256");
  request.setRequestHeader("X-Hub-Signature", 'sha256=' + signature);

  var response = request.execute();
  gs.log(response.getBody());
})(current, previous);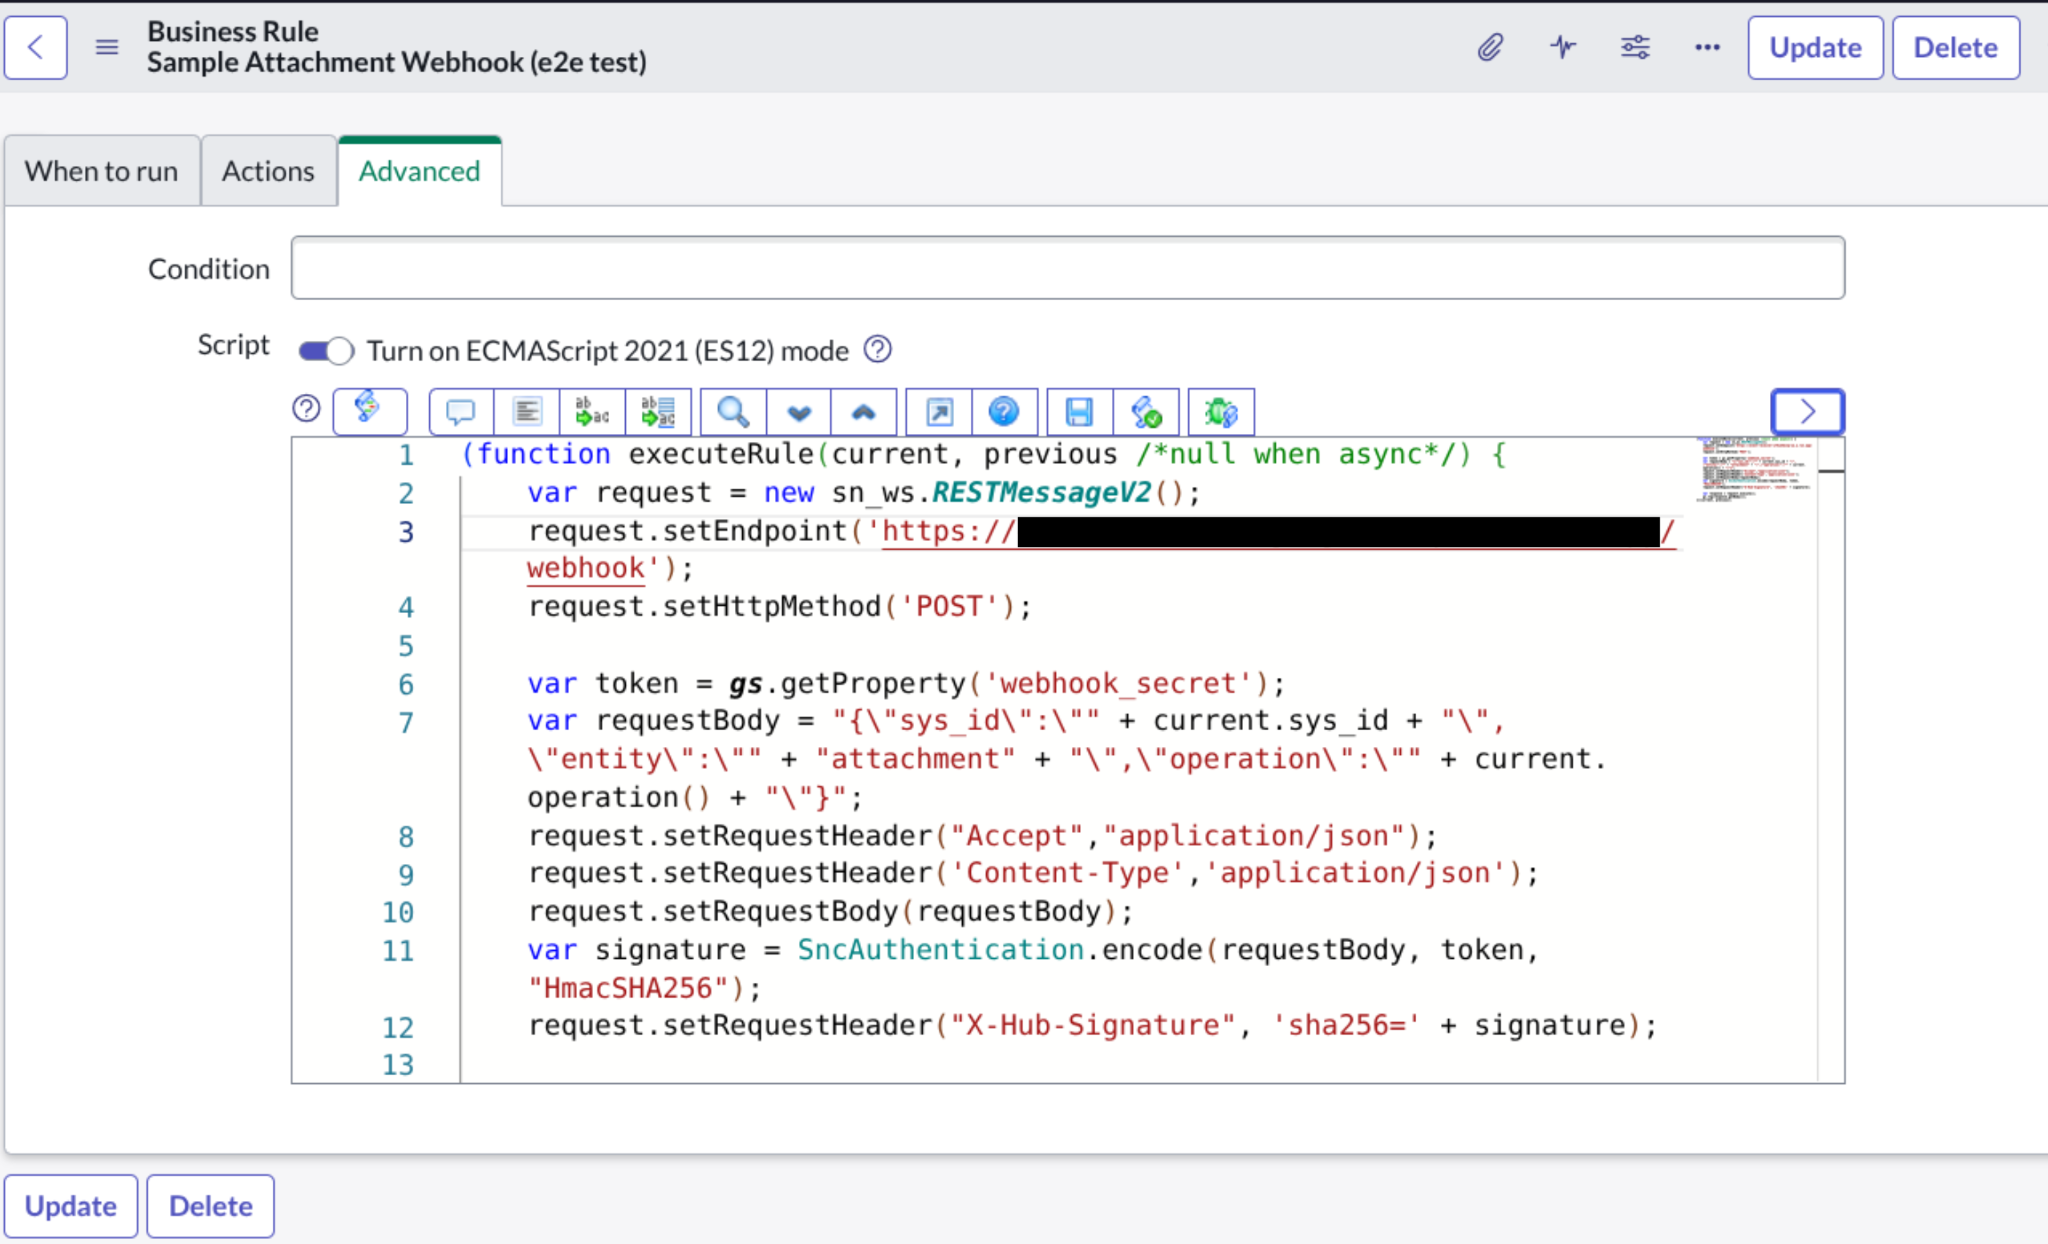
Enter the provided script. Click Submit.
Submit your new Business Rule.
Create a webhook for catalog entities
To create a webhook for ServiceNow catalog entities, follow the steps in Create a webhook for knowledge entities, with the following differences:
When creating a new Business Rule, for Table, select Catalog Item [sc_cat_item].
In the Advanced tab, for Script, paste the following code, replacing the endpoint value with the webhook notification URL provided when you enabled real-time sync for the Gemini Enterprise connector:
(function executeRule(current, previous /*null when async*/) {
  var request = new sn_ws.RESTMessageV2();
  request.setEndpoint('WEBHOOK_NOTIFICATION_URL');
  request.setHttpMethod('POST');

  var token = gs.getProperty('webhook_secret');
  var requestBody = "{\"sys_id\":\"" + current.sys_id + "\",\"entity\":\"" + "catalog" + "\",\"operation\":\"" + current.operation() + "\"}";
  request.setRequestHeader("Accept","application/json");
  request.setRequestHeader('Content-Type','application/json');
  request.setRequestBody(requestBody);
  var signature = SncAuthentication.encode(requestBody, token, "HmacSHA256");
  request.setRequestHeader("X-Hub-Signature", 'sha256=' + signature);

  var response = request.execute();
  gs.log(response.getBody());
})(current, previous);
Create a webhook for incident entities
To create a webhook for ServiceNow incident entities, follow the steps in Create a webhook for knowledge entities, with the following differences:
When creating a new Business Rule, for Table, select Incident [incident].
In the Advanced tab, for Script, paste the following code, replacing the endpoint value with the webhook notification URL provided when you enabled real-time sync for the Gemini Enterprise connector:
(function executeRule(current, previous /*null when async*/) {
  var request = new sn_ws.RESTMessageV2();
  request.setEndpoint('WEBHOOK_NOTIFICATION_URL');
  request.setHttpMethod('POST');

  var token = gs.getProperty('webhook_secret');
  var requestBody = "{\"sys_id\":\"" + current.sys_id + "\",\"entity\":\"" + "incident" + "\",\"operation\":\"" + current.operation() + "\"}";
  request.setRequestHeader("Accept","application/json");
  request.setRequestHeader('Content-Type','application/json');
  request.setRequestBody(requestBody);
  var signature = SncAuthentication.encode(requestBody, token, "HmacSHA256");
  request.setRequestHeader("X-Hub-Signature", 'sha256=' + signature);

  var response = request.execute();
  gs.log(response.getBody());
})(current, previous);
Create a webhook for attachment entities
To create a webhook for ServiceNow attachment entities, follow the steps in Create a webhook for knowledge entities, with the following differences:
When creating a new Business Rule, for Table, select Attachment [sys_attachment].
In the Advanced tab, for Script, paste the following code, replacing the endpoint value with the webhook notification URL provided when you enabled real-time sync for the Gemini Enterprise connector:
(function executeRule(current, previous /*null when async*/) {
  var request = new sn_ws.RESTMessageV2();
  request.setEndpoint('WEBHOOK_NOTIFICATION_URL');
  request.setHttpMethod('POST');

  var token = gs.getProperty('webhook_secret');
  var requestBody = "{\"sys_id\":\"" + current.sys_id + "\",\"entity\":\"" + "attachment" + "\",\"operation\":\"" + current.operation() + "\"}";
    request.setRequestHeader("Accept","application/json");
    request.setRequestHeader('Content-Type','application/json');
    request.setRequestBody(requestBody);
    var signature = SncAuthentication.encode(requestBody, token, "HmacSHA256");
    request.setRequestHeader("X-Hub-Signature", 'sha256=' + signature);

    var response = request.execute();
    gs.log(response.getBody());
})(current, previous);
Configure the workforce pool
The workforce pool lets you to manage and authenticate users from external identity providers, such as Azure or Okta, within Google Cloud console. To configure your workforce pool and enable the web app for seamless user access, do the following:
Create workforce pool at the organization level in Google Cloud by following the appropriate setup manual:
Configure the workforce pool in Gemini Enterprise > Settings for the region where you create your app.
Next steps
To attach your data store to an app, create an app and select your data store following the steps in Create an app.
To preview how your search results appear after your app and data store are set up, see Preview search results.
To enable alerts for the data store, see Configure alerts for third-party data stores.