This page describes how to connect Microsoft Entra ID to Gemini Enterprise.
After you set up your data source and import data the first time, the data store syncs data from that source at a frequency that you select during setup.Supported versions
The Entra ID connector supports all hosted versions of Entra ID through the Microsoft Graph API v1.0.
Before you begin
Before you set up your data store and import data, you must obtain a client ID and secret for authentication and configure the minimum required permissions for the application. This section provides information about how to complete these tasks.
Set up access control for Entra ID
To enforce data source access control and secure data in Gemini Enterprise, ensure that you have configured your identity provider.
Obtain a client ID and client secret
Create an Entra ID application:
- Sign in to Microsoft Entra administrator center as an administrator and click Application.
- In the Application drop-down list, click App registrations.
- In the App registrations page, click New registration.
- Click Add new registration and do the following:
- Enter a name for the application.
- Under Supported account types, select Accounts in the organizational directory only.
- Under Redirect URI, add a web redirect URI pointing
to:
https://login.microsoftonline.com/common/oauth2/nativeclient.
- Click Register.
Save credentials:
On your registered application window, save the following values for later use:
- Use the Application (client) ID to set the Client ID parameter.
- Use the Directory (tenant) ID to set the Azure Tenant parameter.
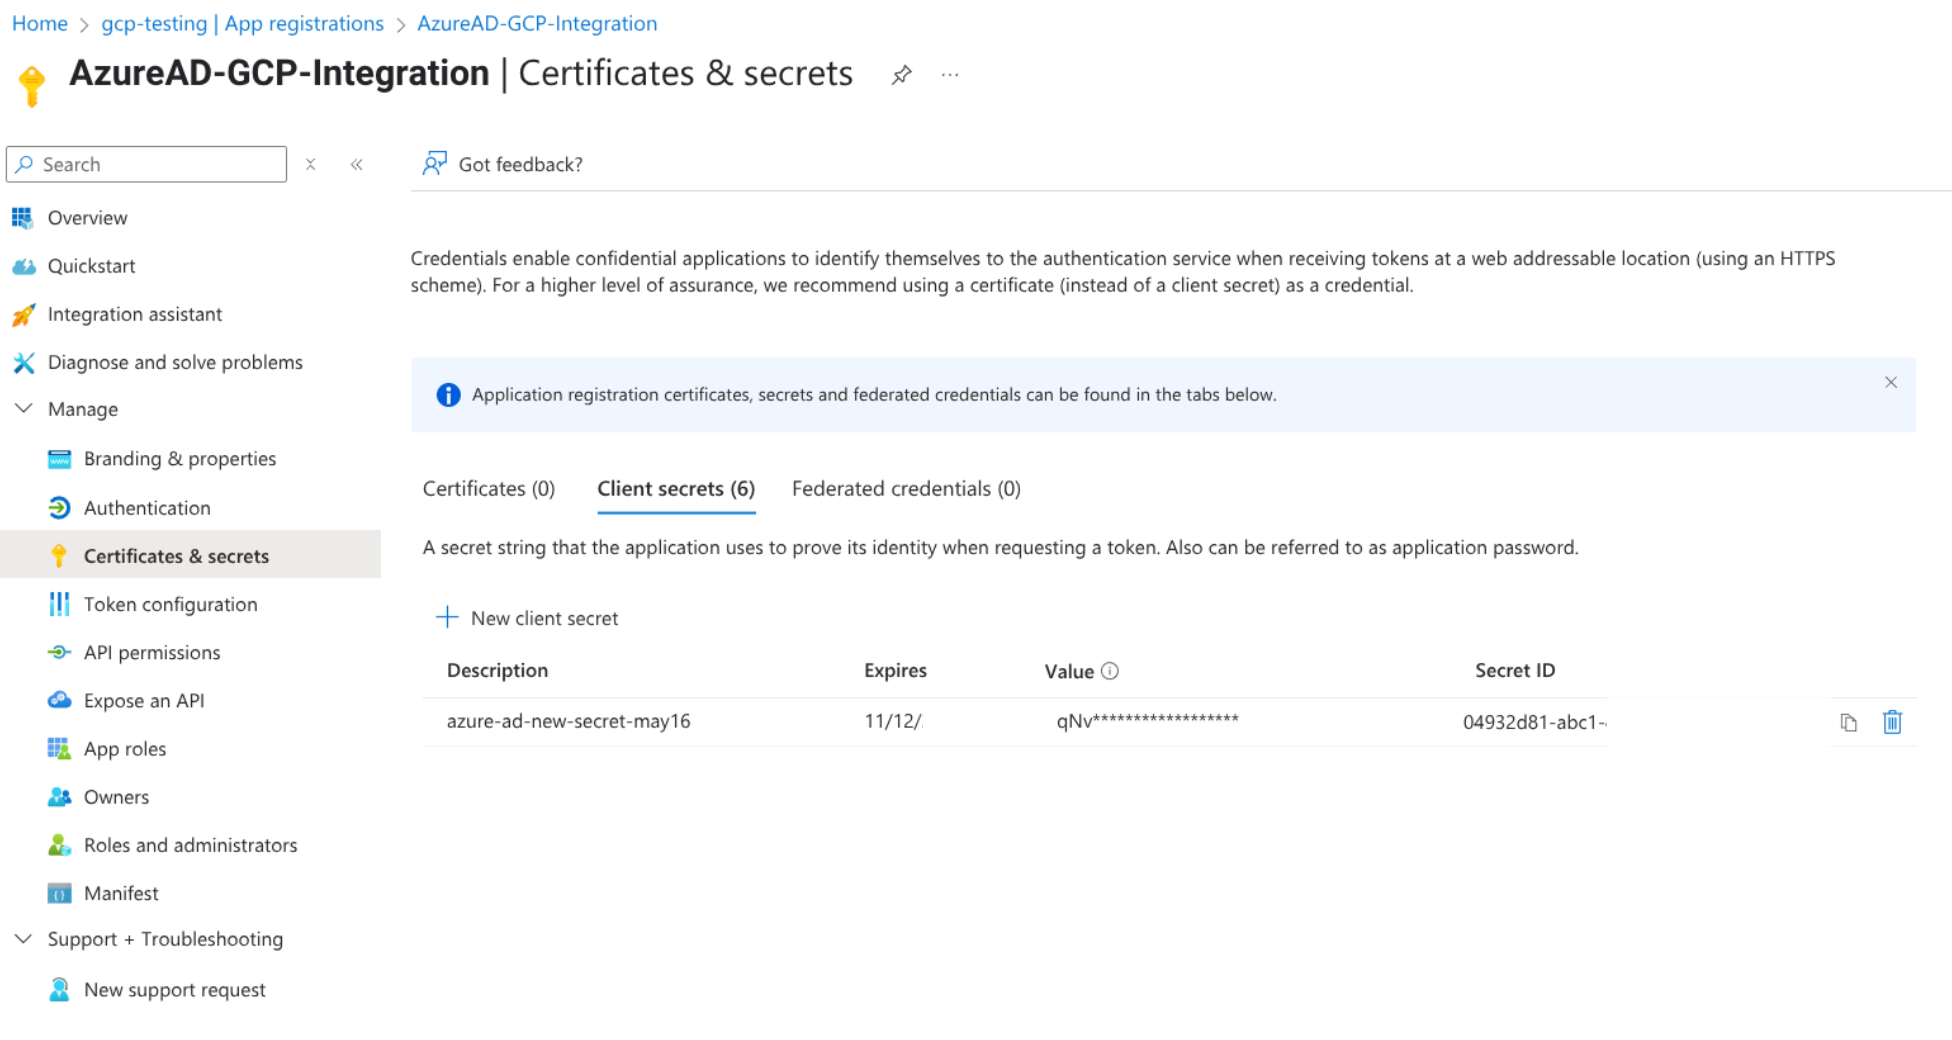
Create client secret:
- Navigate to Certificates & secrets.
- Click New client secret and specify a duration.
- Save the client secret and copy the client secret value for later use.
Configure the minimum permissions required for the application
- On your registered application window, click API permissions.
Under Configured permissions, select Microsoft Graph and configure the following permissions:
User.ReadUser.Read.All (Application)
If you want to ingest
profileCardAttributes, then configure the following permissions:People.Read.All (Application)PeopleSettings.Read.All (Application)PeopleSettings.Read.All (Delegated)
Grant admin consent for all the added permissions. An administrator's consent is required to use client credentials in the authentication flow.
Minimum permissions
The following table lists the minimum permissions that you require to create an Entra ID connector:
| Permission | Usage reason | Description |
|---|---|---|
User.Read |
Data ingestion | Read organization details during connection establishment. |
User.Read.All (Application) |
Data ingestion | Read all users in the organization. |
People.Read.All (Application) |
Data ingestion | Read all the relevant people information, such as contacts, for all users in an organization. |
PeopleSettings.Read.All (Application) |
Data ingestion | Read user configurations for all the users in the organization, such as profileCardSettings. |
PeopleSettings.Read.All (Delegated) |
Data ingestion | Read user configurations for all the users in the organization, such as profileCardSettings. |
Create an Entra ID data store
To use the Google Cloud console to sync data from Entra ID to Gemini Enterprise , follow these steps:
In the Google Cloud console, go to the Gemini Enterprise page.
In the navigation menu, click Data Stores.
Click Create Data Store.
On the Select a data source page, scroll or search for Entra ID to connect your third-party source.
Under
Authentication settings , enter the client ID and client secret.Under
Advanced options :- If needed, click Enable Static IP Addresses. After creating the connector, you need to allowlist registered static IPs in order for sync runs to succeed.
- To enable the connector to fetch extension properties, which are used to add a custom property to a directory object, select the Enable Extension Properties checkbox.
If you want to filter ingested user information, provide a custom SQL filter. The filter must be a valid SQL string.
Keys in the filter string must correspond to the following fields:
Id(the user's object ID in Microsoft Entra ID)employeeTypeonPremisesSyncEnabledaccountEnabled
The following are examples of valid SQL filters:
id = 'abc' AND accountEnabled = true employeeType='E' AND onPremisesSyncEnabled= trueIn the Azure Tenant field, enter the Azure tenant ID that you obtained when you created an Entra ID application.
To apply a rate limit on the queries that the connector sends to the Entra ID instance, in the Max QPS field, specify the maximum queries per second. The default value is 80 QPS.
Click Continue.
Under
Choose entities you want to sync :- Click User Profiles.
To filter the data based on
Idfor data ingestion, click Filter, and then do the following:- To specify data to be included in the search index, select Include in the index and then specify the filter string in the Id field.
- To specify data to be excluded from the search index, select Exclude from the index and then specify the filter string in the Id field.
- Select the Full sync frequency.
- Click User Profiles.
To filter the data based on
Click
Continue .In Configure your data connector, select a region for your data store.
Enter a name for your data connector.
Click Create. Gemini Enterprise creates your data store and displays your data stores on the Data Stores page.
If you selected Enable Static IP Addresses under Advanced options, view the registered static IP addresses for the connector and add them to your allowlist for Entra ID.
- Go to the Data Stores page and click your connector name to see details about it on its Data page.
- In the Static IPs field, click View and confirm IPs.
- Copy the static IP addresses for the connector.
- In the Microsoft Entra administrator center, add the static IP addresses to a named or trusted location within an existing conditional access policy. For more information, see Conditional Access: Network assignment.
Check the connector state
To check the status of your ingestion, go to the Data Stores page and click your connector name to see details about it on its Data page. The
Connector state changes from Creating to Running when it begins to synchronize data. When ingestion is complete, the state changes to Active to indicate that the connection to your data source is set up and awaiting the next scheduled synchronization.Depending on the size of your data, ingestion can take several minutes or several hours.
When the connector state changes to Active, navigate to the
Entity tab.Click the userprofiles entity.
Check the number of ingested documents and verify that it matches the number of users in Entra ID.
| Vertex AI schema field name | Entra ID attribute name |
|---|---|
name.displayName |
Display Name |
name.familyName |
Last Name |
name.givenName |
First Name |
name.username |
User Principal Name |
email.value |
|
employeeId |
Employee Id |
personId |
|
employeeType |
Employee type |
hireDate |
Employee Hire Date |
department |
Department |
organizations.jobTitle |
Job title |
organizations.location |
Office Location |
Phone |
Business phone |
managers.email, managers.personId |
Not a direct attribute (management chain from immediate manager to top-level manager) |
directManager.personId |
Not a direct attribute (manager's personId) |
displayphoto.imagebinary.data |
Base64-encoded profile picture |
If the Entra ID app has the required permissions to ingest custom attributes, it ingests up to 15 profile card attributes per record. By default, the custom attributes are not searchable.
Configure searchable attributes
To make the custom attributes searchable, do the following:
- In the userprofiles page, navigate to the Schema tab.
- Click Edit.
Deselect the attributes, such as address, from being retrievable, searchable, and indexable, then click Save.
The Edit button remains inactive for a few minutes before reactivating.
When the Edit button is in Active state, click Edit.
Select the retrievable, searchable, and indexable boxes for the required custom attributes.
Enable search.
Click Save.
Test the search engine
After configuring your search engine, test its capabilities to verify whether it returns accurate results based on user access.
Enable web app:
- Go to the app integration configurations and toggle to Enable the web app.
Test web app:
Click Open next to the web app link and sign in as a user.
Verify that search results are restricted to items accessible by the user.
Preview people search results
In the search app, navigate to Preview and start searching within the console when using Google IdP.
- Alternatively, navigate to the provided link and sign in with your IdP to start searching.
- The search results appear as people cards, displaying user details such as Name, Job title, Email, and Profile picture.
Click a people card to view a detailed profile page, which includes the following:
- Name
- Profile picture
- Job title
- Department
- Management chain
- Direct reports
If custom attributes (profile card properties) are ingested and made indexable, searchable, and retrievable:
- Searching by a custom attribute value returns only person profiles containing those attributes.
- Custom attributes appear in search results, but can only be accessed through the API, not the Vertex Search user interface.
Configure the workforce pool for non-Google IdP without SSO
If your employees use a non-Google IdP, lack SSO with Google, or are not Google Workspace customers, set up a workforce pool as described in Configure access controls for custom data sources to enable the employee search.
The workforce pool lets you to manage and authenticate users from external identity providers, such as Azure or Okta, within Google Cloud console.
To configure your workforce pool and enable the web app for seamless user access, do the following:
Create workforce pool at the organization level in Google Cloud by following the appropriate setup manual:
Configure the workforce pool in Gemini Enterprise > Settings for the region where you create your app.
Recommended rate limits
The following table lists the recommended rate limits based on the number of users. Requests that exceed the limits are throttled.
| Quota group | Requests per second |
|---|---|
| S (Fewer than 50 users) | 105 |
| M (50-500 users) | 150 |
| L (More than 500 users) | 240 |
Known limitations
This following are the known limitations for the Entra ID connector:
- Incremental sync is not supported.
- Access Control Lists (ACLs) are not supported. All the users are accessible across the organization.
- If you add a project to a VPC Service Controls perimeter after you create
a connection, the connector sync run fails with the following error:
Connector is blocked due to the project being added to the VPC-SC perimeter. Please re-create the data store.Recreate the data store to allow it to work within the VPC Service Controls perimeter.
Error messages
The following table lists the error messages that you might get when you use the Entra ID connector:
| Error message | Description | Troubleshooting |
|---|---|---|
| Authorization_RequestDenied Insufficient privileges to complete the operation. | The user account doesn't contain the required scopes to read data. | Provide the required scopes to the user account that is used to create the connection. |
| Failed to retrieve OAuth token information | The client credential provided when configuring the connector is invalid. | Verify the following:
|
| Connector is blocked due to the project being added to the VPC-SC perimeter. Please re-create the data store. | The connector was created before the project was added to a VPC Service Controls perimeter. | Recreate the data store to allow it to work within the VPC Service Controls perimeter. |
Next steps
To attach your data store to an app, create an app and select your data store following the steps in Create an app.
To preview how your search results appear after your app and data store are set up, see Get search results.