You can set up people search for your work teams by syncing people data from Google Workspace. After the people search data store is set up and the data is ingested into the Vertex AI Search index, it enables features such as Knowledge Graph and Natural Language Processing. This improves search quality, letting you find people in your Google Workspace Directory through the web app.
For information about Google Workspace Directory, see the Google Workspace documentation:
Before you begin
Before you can set up a people search data store, you must do the following:
To enforce data source access control and secure data in Gemini Enterprise, make sure that you have configured your identity provider.
A Google Workspace administrator must enable people search on Google Workspace data:
- Sign in to the Google Admin console with an administrator account.
- Go to Directory > Directory settings.
- Turn on Contact sharing.
Sign in to the Google Cloud console with the same account that you use for Google Workspace.
If you use security controls, be aware of their limitations related to data in Google Workspace, as discussed in the following table:
Security control Note the following Data Residency (DRZ) Gemini Enterprise only guarantees data residency in Google Cloud. For information about data residency and Google Workspace, see Google Workspace compliance guidance and documentation—for example, Choose the region where data is stored and Digital sovereignty. Customer-managed encryption keys (CMEK) Your keys only encrypt data within Google Cloud. Cloud Key Management Service controls don't apply to data stored in Google Workspace. Access Transparency Access Transparency logs actions taken by Google personnel on the Google Cloud project. You'll also need to review the Access Transparency logs created by Google Workspace. For more information, see Access Transparency log events in the Google Workspace Admin Help documentation.
Before creating the people data store, you need to set up a service account and domain-wide delegation.
Set up the service account
Verify that you have the permissions you need to create a service account. See Required roles.
Create a service account in a Google Cloud project within the organization.
Optional: Skip the Grant this service account access to project (optional) step.
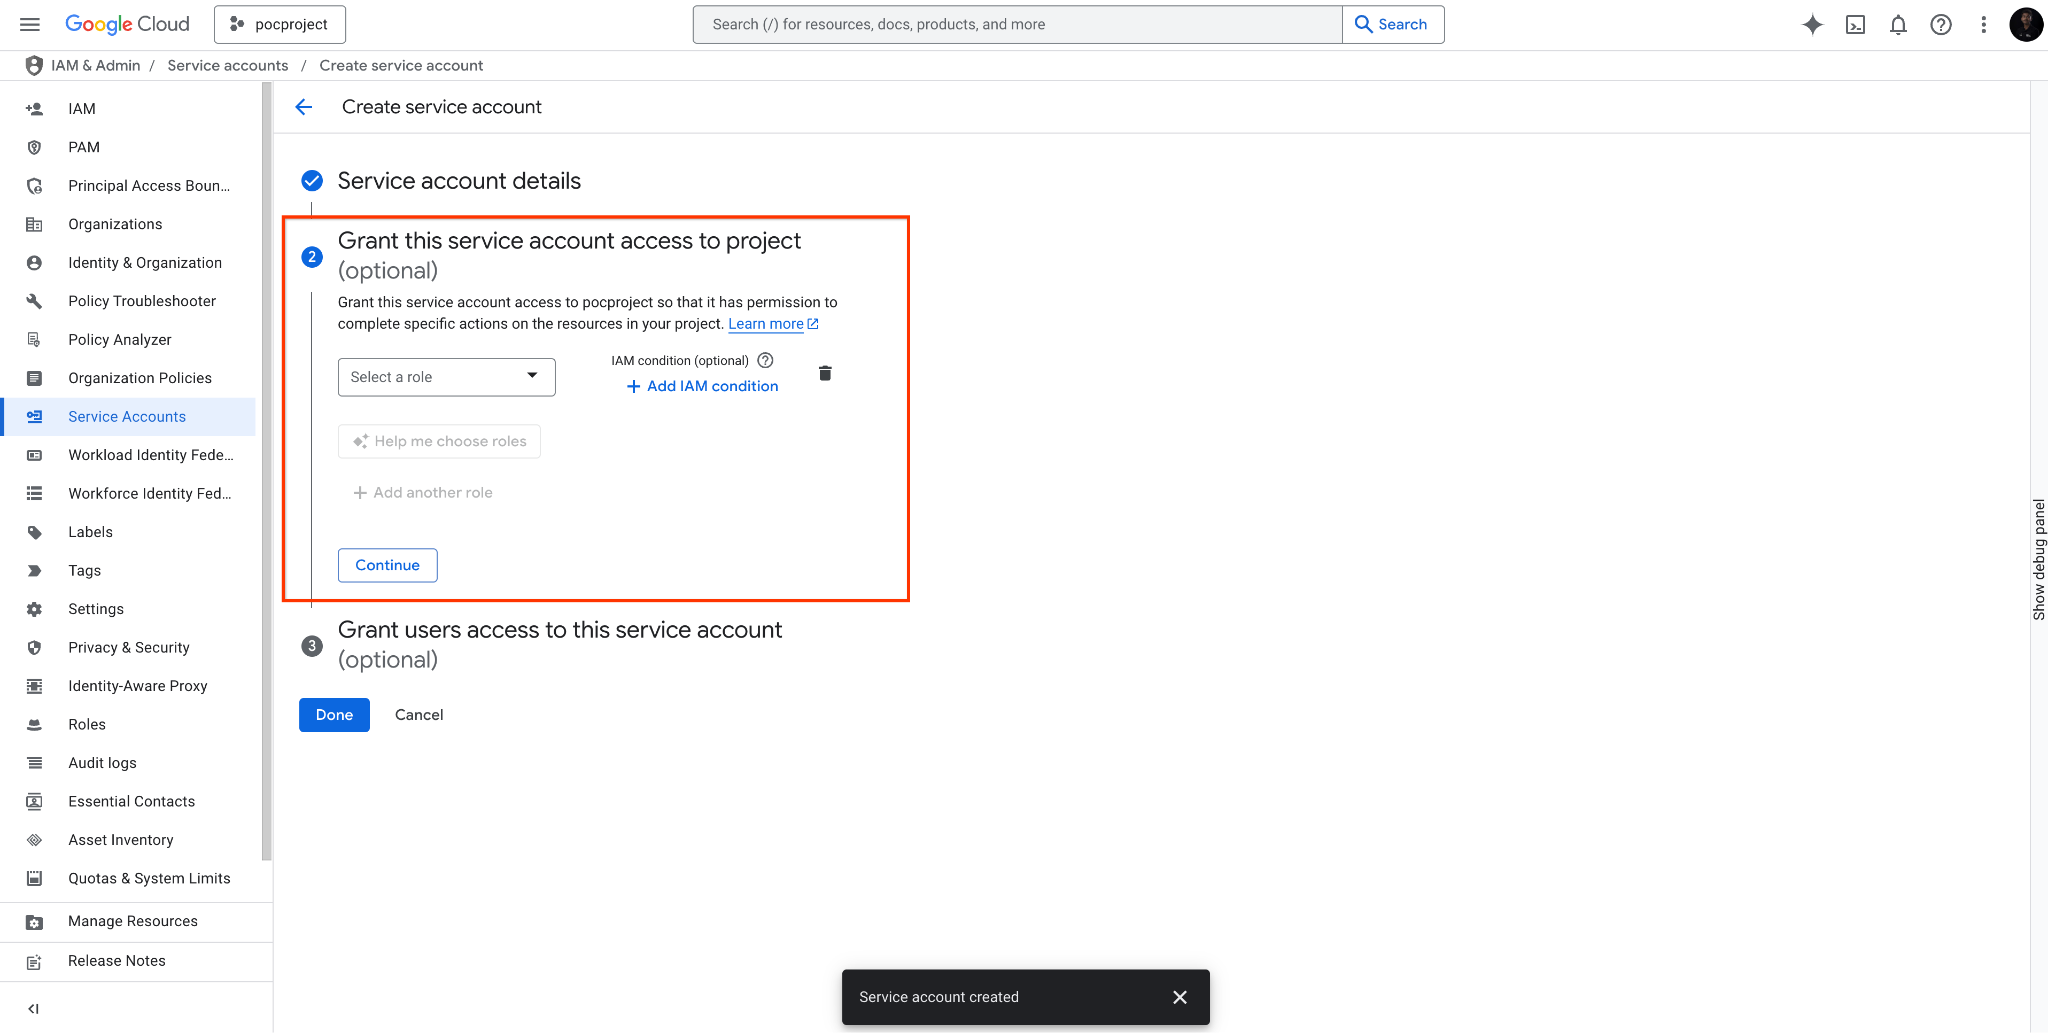
Skip the Grant this service account access to project (optional) step. Grant the Discovery Engine service account (
service-PROJECT_NUMBER@gcp-sa-discoveryengine.iam.gserviceaccount.com) access as a Service account token creator (roles/iam.serviceAccountTokenCreator), and click Save.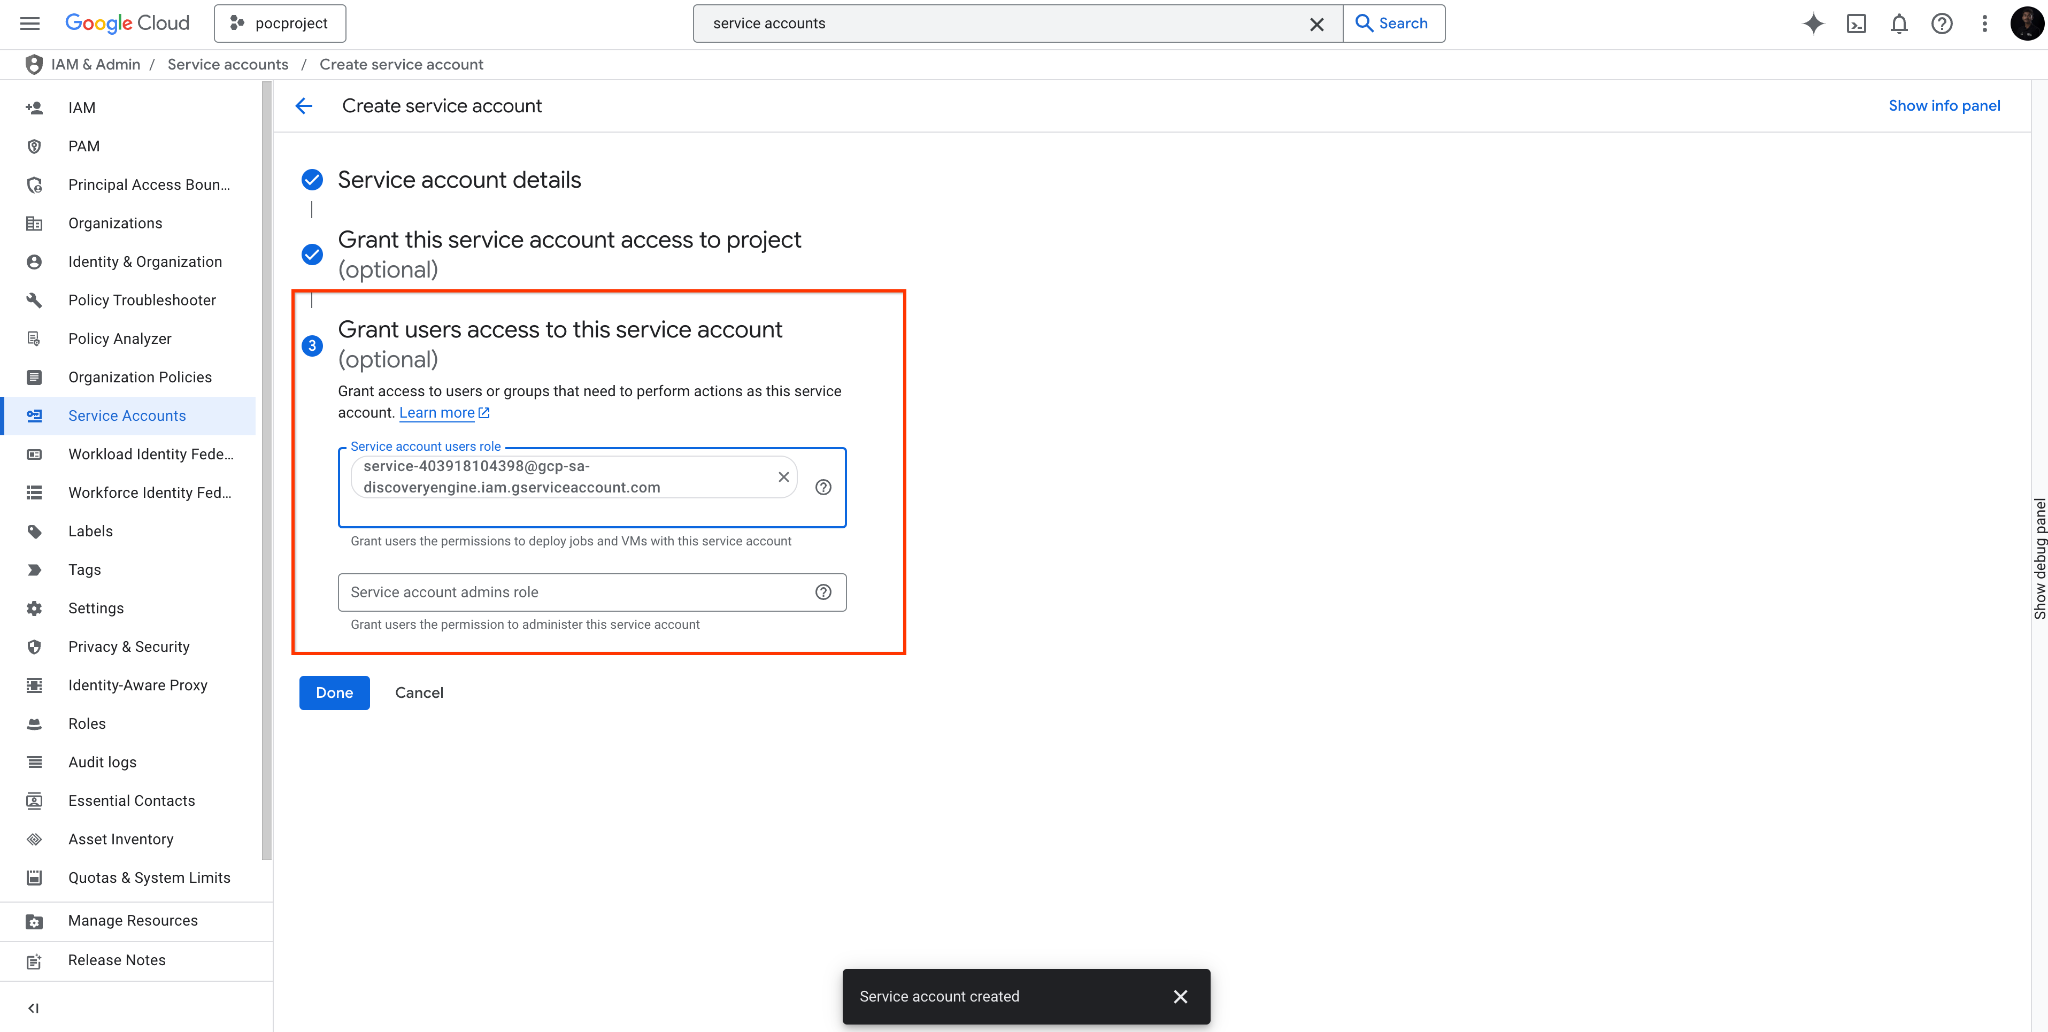
Grant the Discovery Engine service account access. After the service account is created, click the Details tab of the service account, and click Advanced settings.
Copy the client ID for domain-wide delegation.
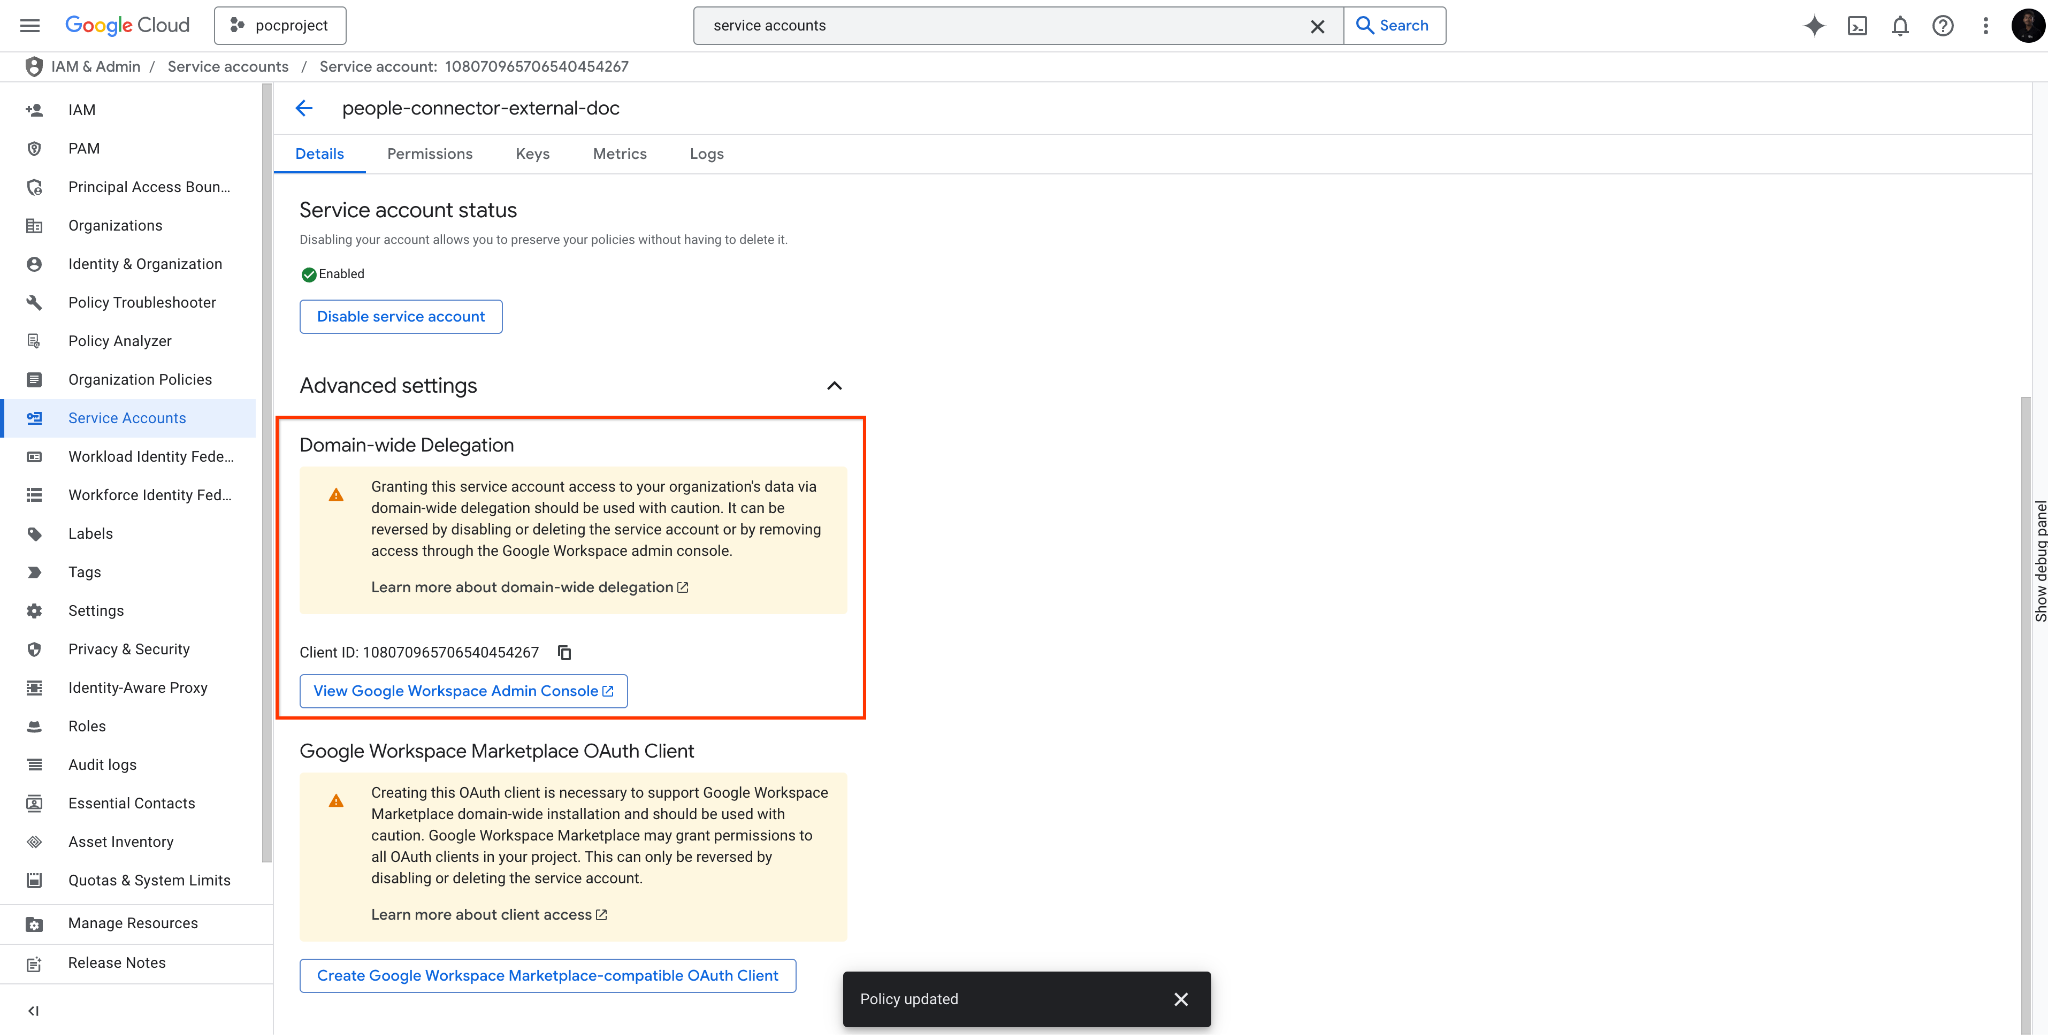
Copy the client ID.
Set up domain-wide delegation
- Sign in to the Google administrator workspace.
- Navigate to Security > Access and data control > API controls.
Click Manage domain wide delegation.
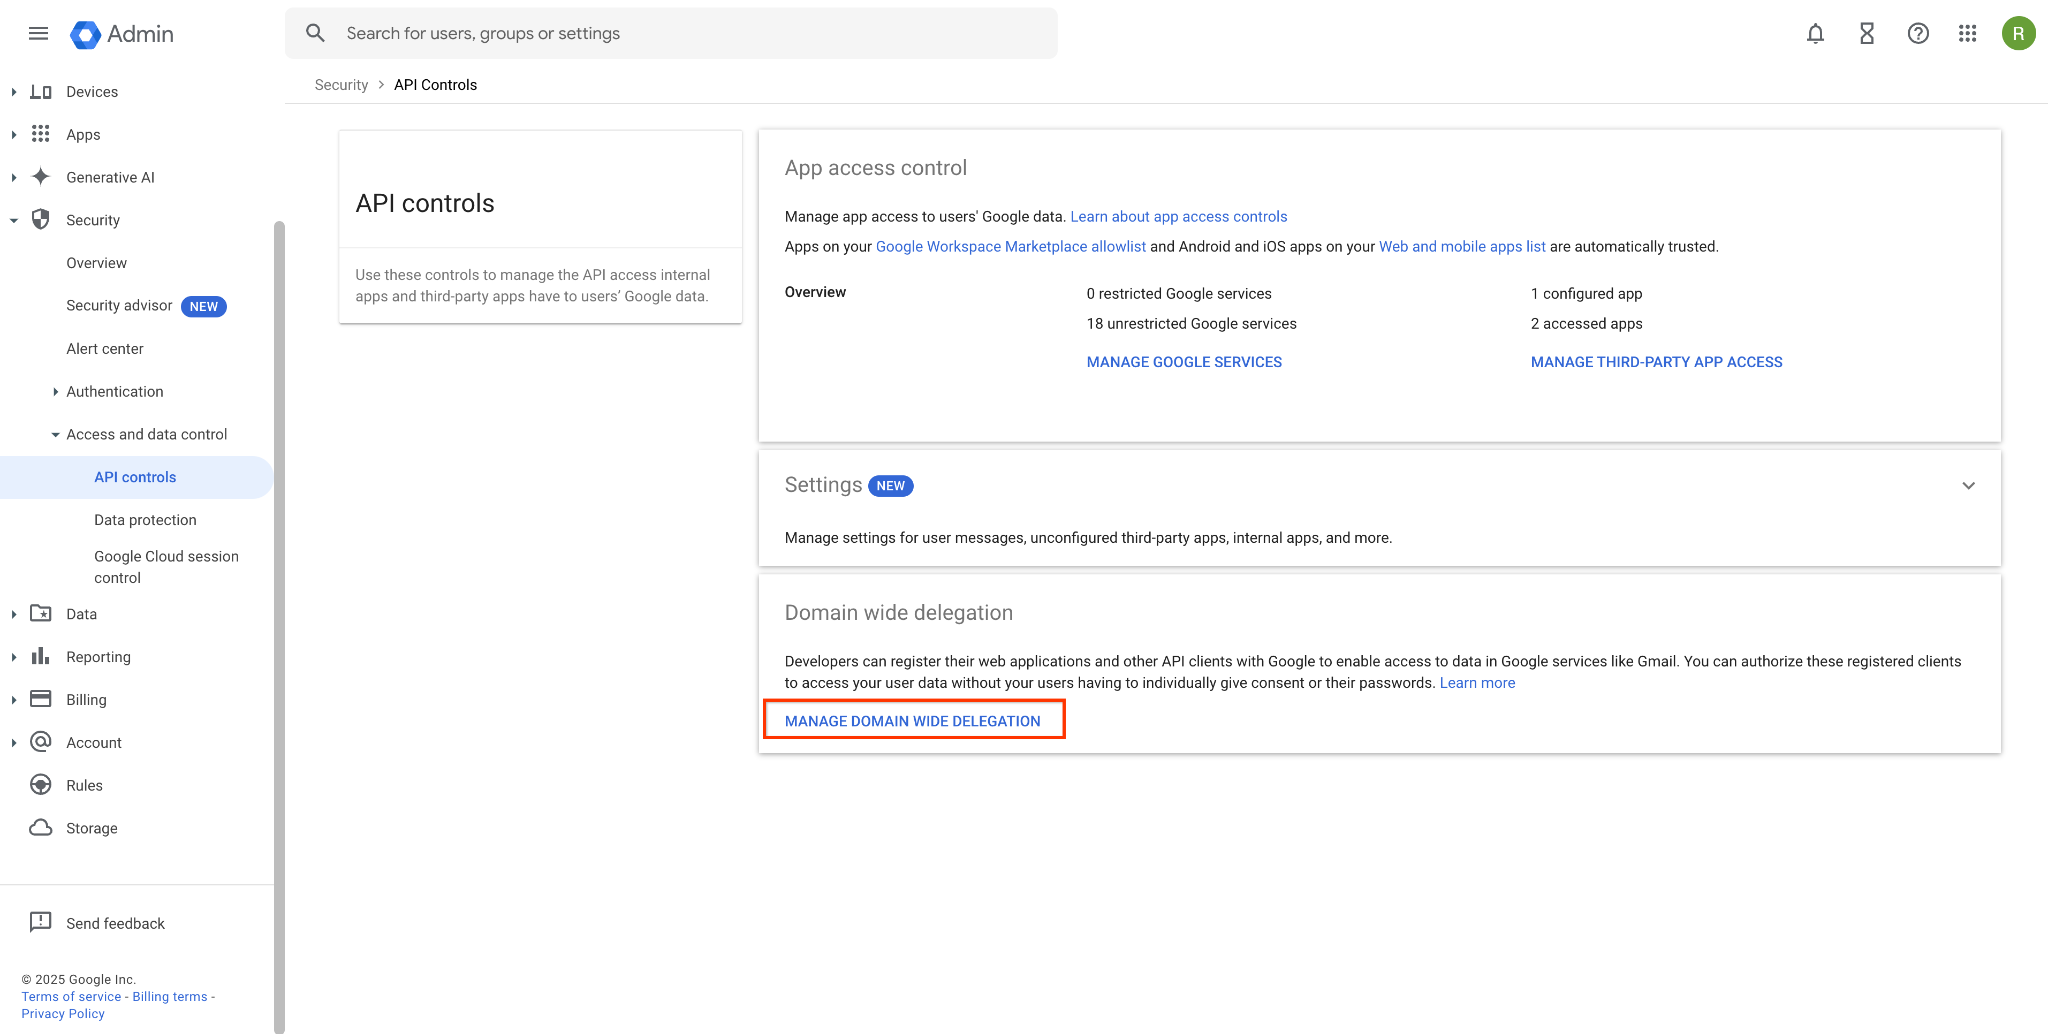
Click Manage domain wide delegation. Click Add new.
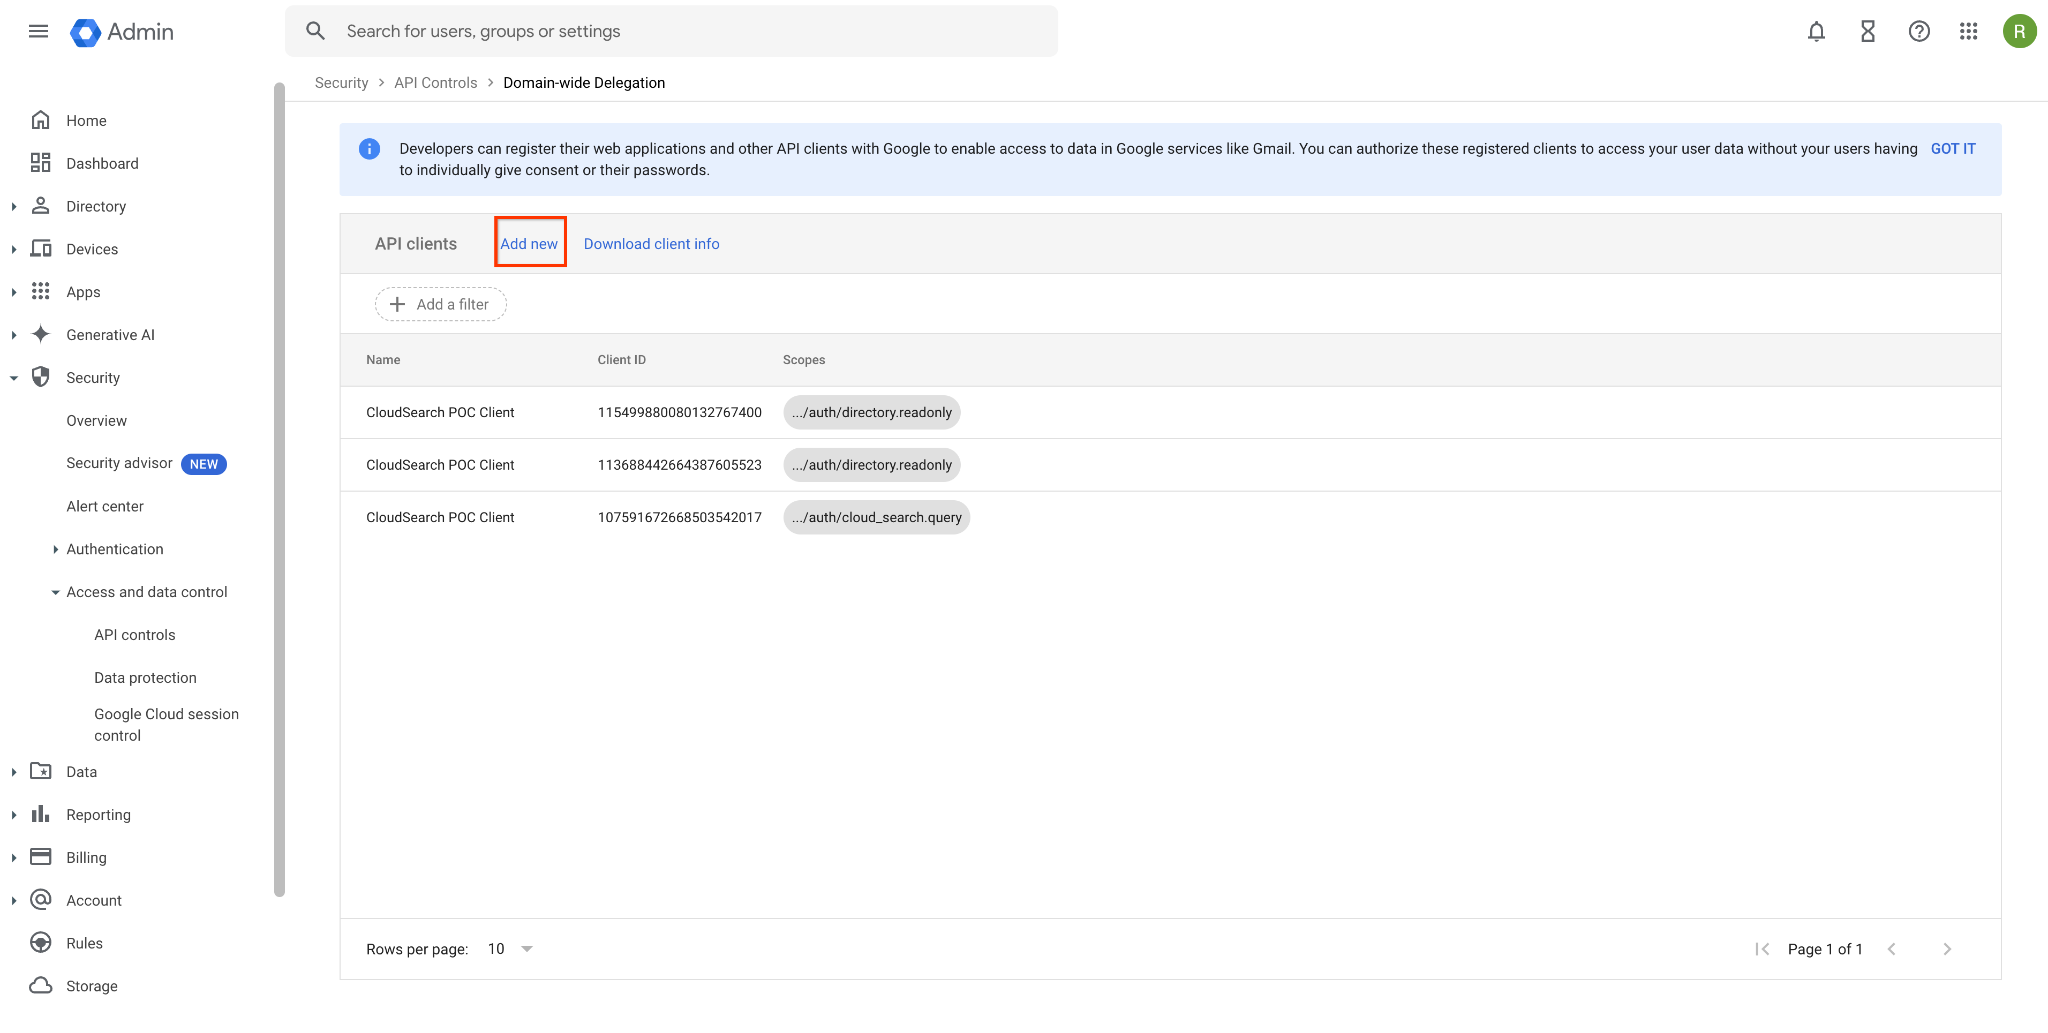
Click Add new. In the Add a new client ID dialog, do the following:
- Client ID: Enter the client ID.
- OAuth scopes: Enter
https://www.googleapis.com/auth/directory.readonly. - Click Authorize.
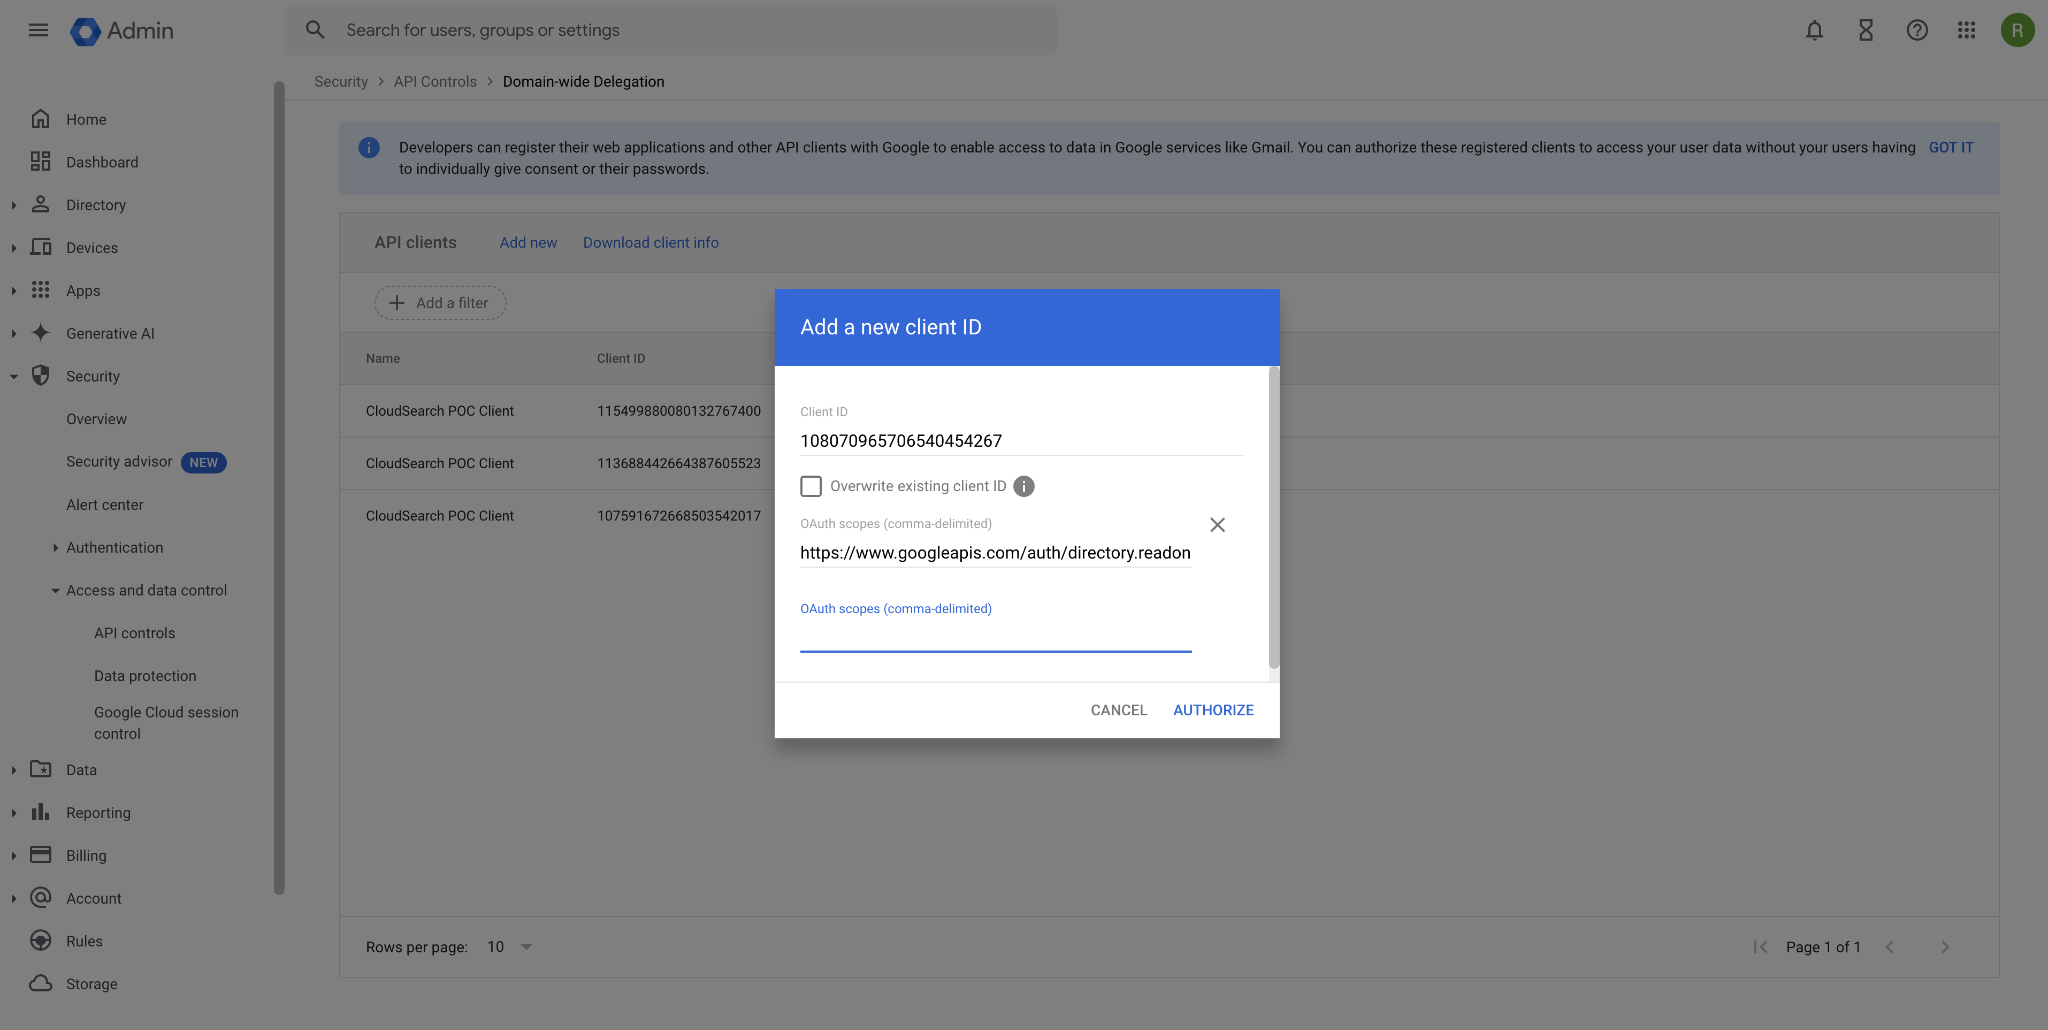
Configure the domain-wide delegation settings.
Configure custom attributes
If you have custom people data (also known as custom attributes) and want the custom attribute data to appear in search results, do the following:
Sign in to the Google administrator workspace.
Click Directory > Users > More options > Manage custom attributes.
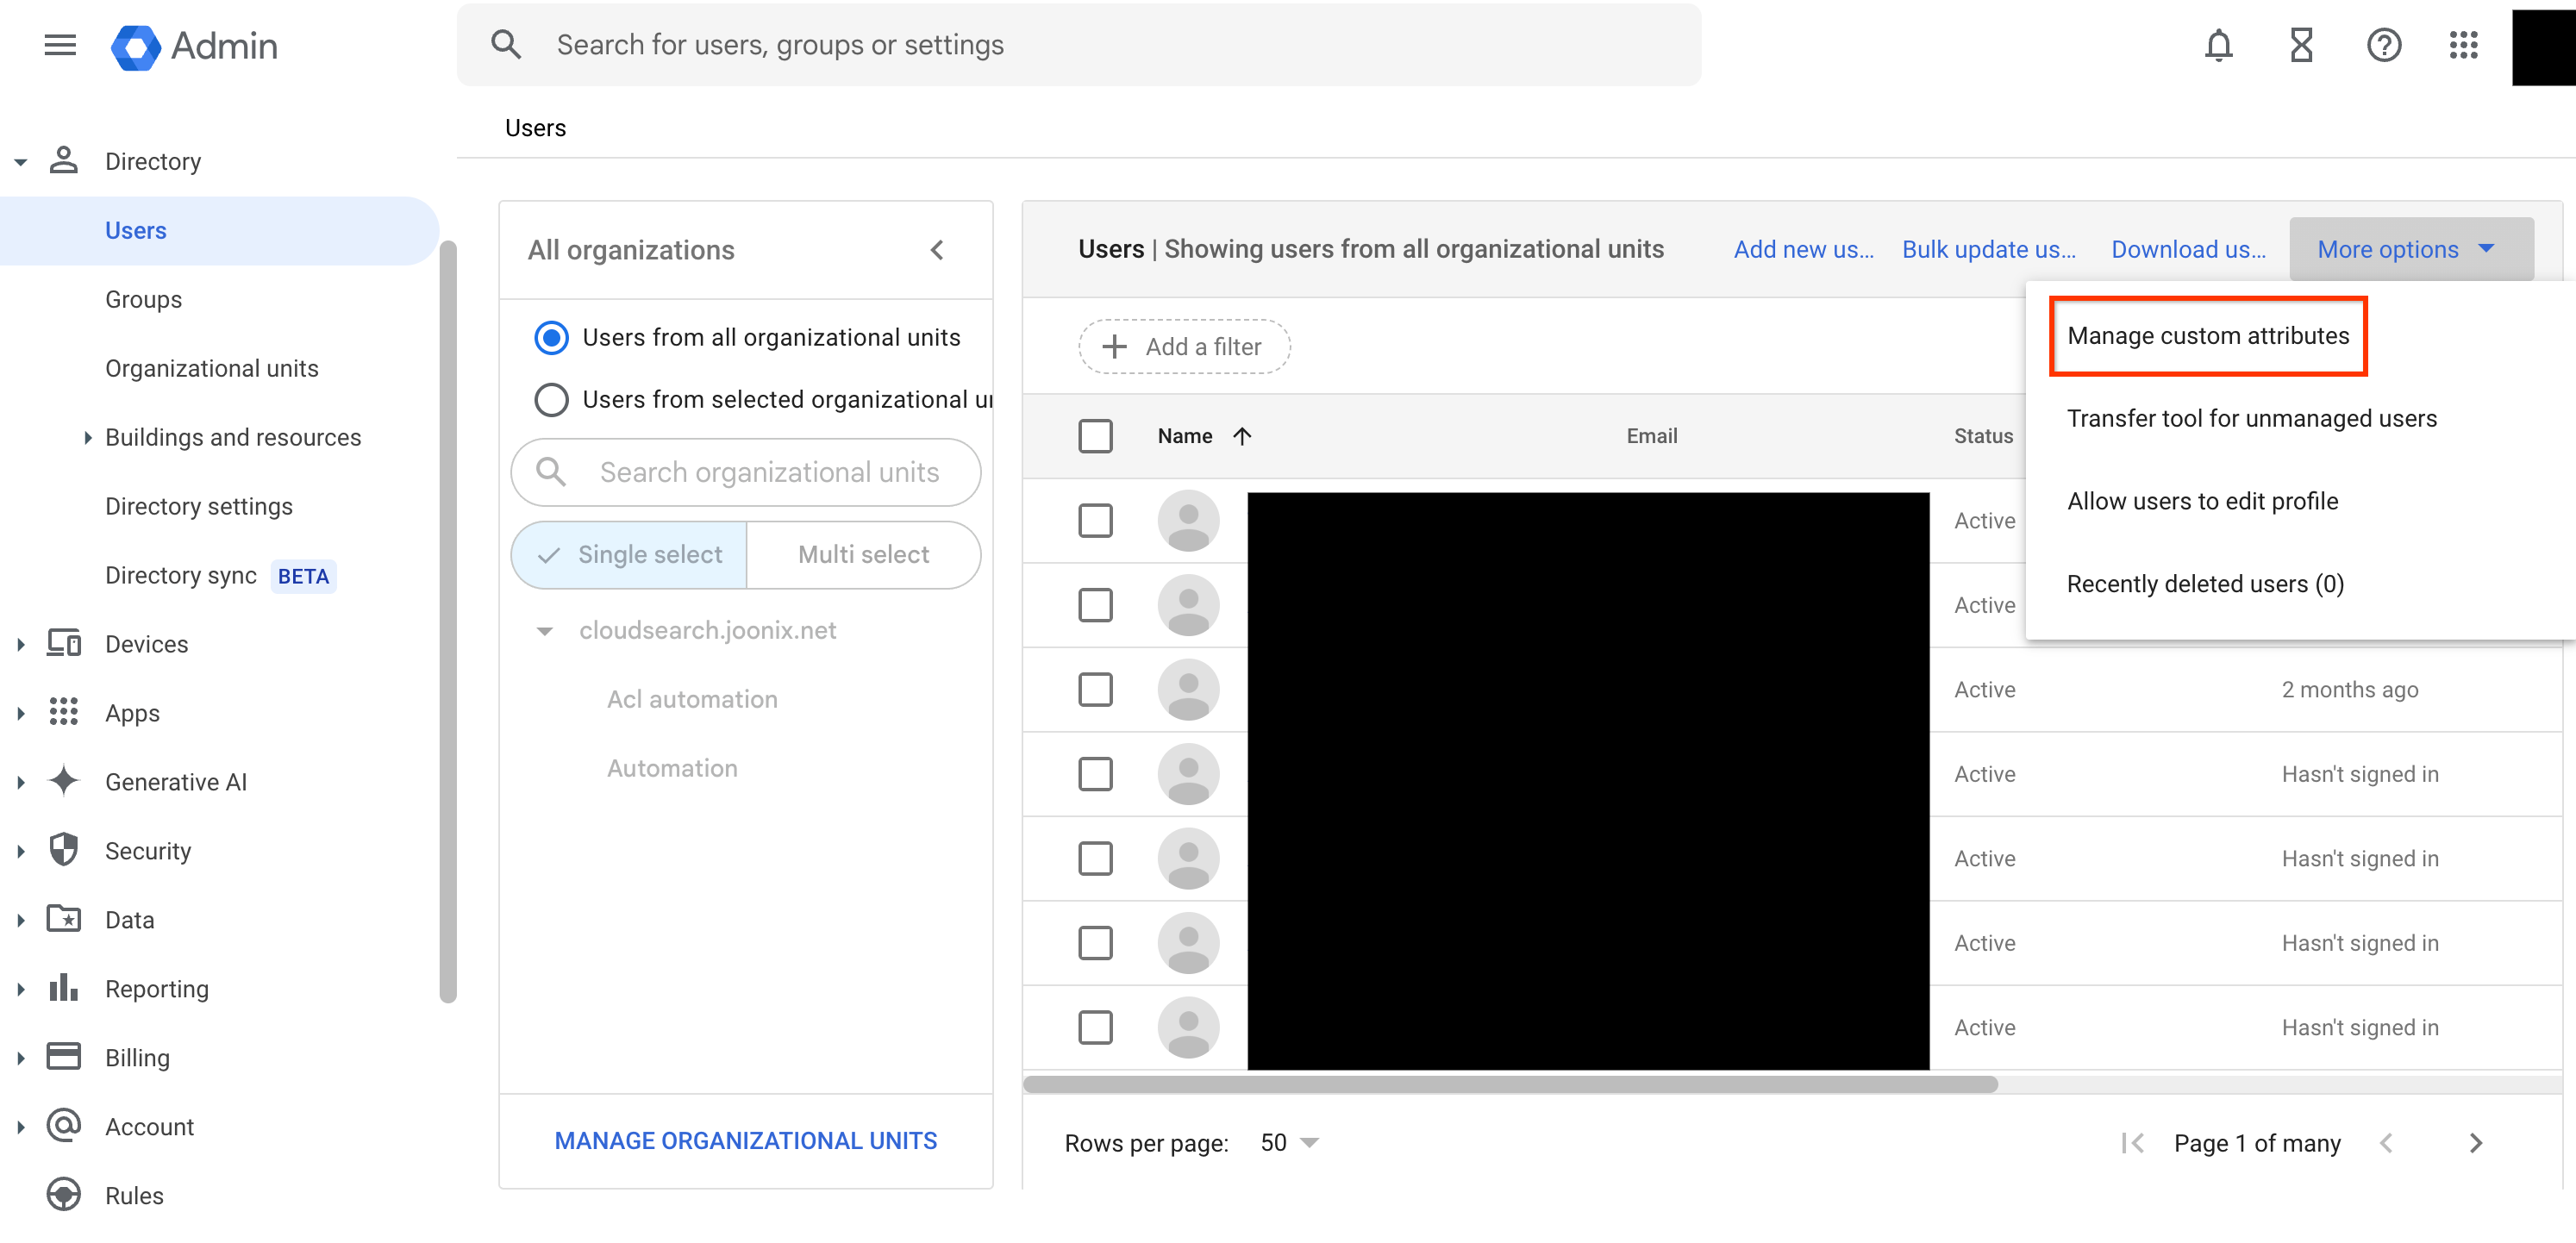
Click Manage custom attributes. To make the custom attribute searchable, set Visibility for the attribute to Visible to organization.
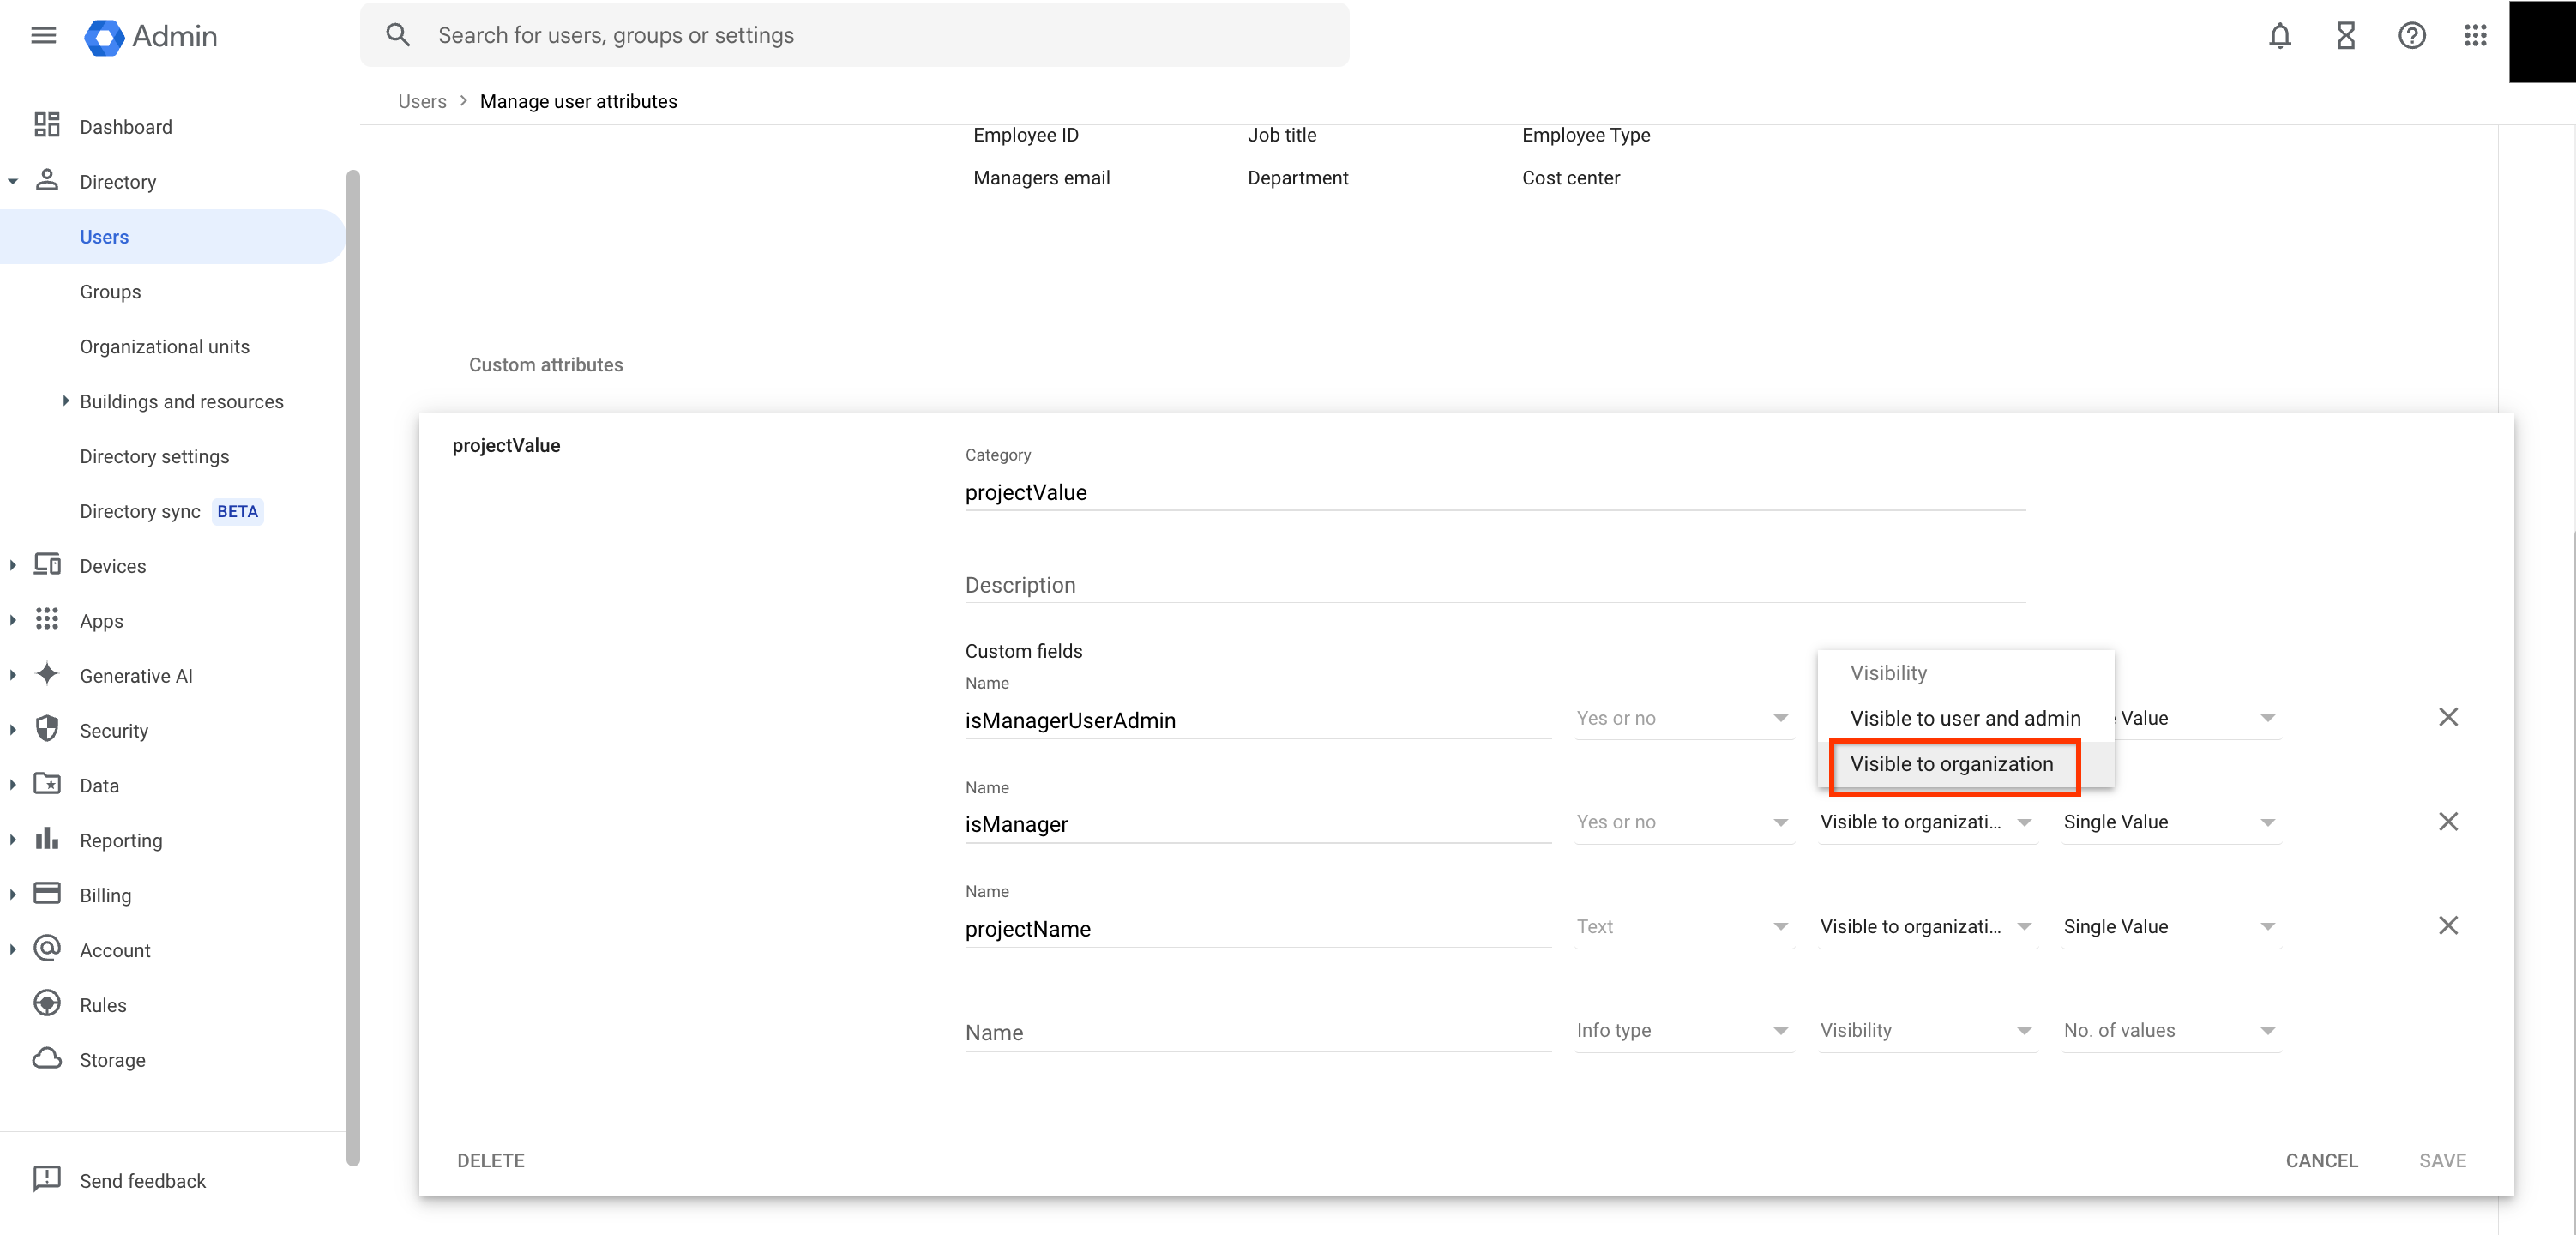
Set the visibility of the custom attribute to Visible to organization to make it searchable.
Connect using OAuth
Connecting with OAuth offers an alternative to domain-wide delegation for authenticating your people search connector. This method requires you to create an OAuth client to authorize the connector to access your organization's directory data. The following steps guide you through creating the client, setting up the connector, and updating the credentials.
Create an OAuth client
Navigate to the Google Cloud console and search for
Credentials.Click Create Credentials.
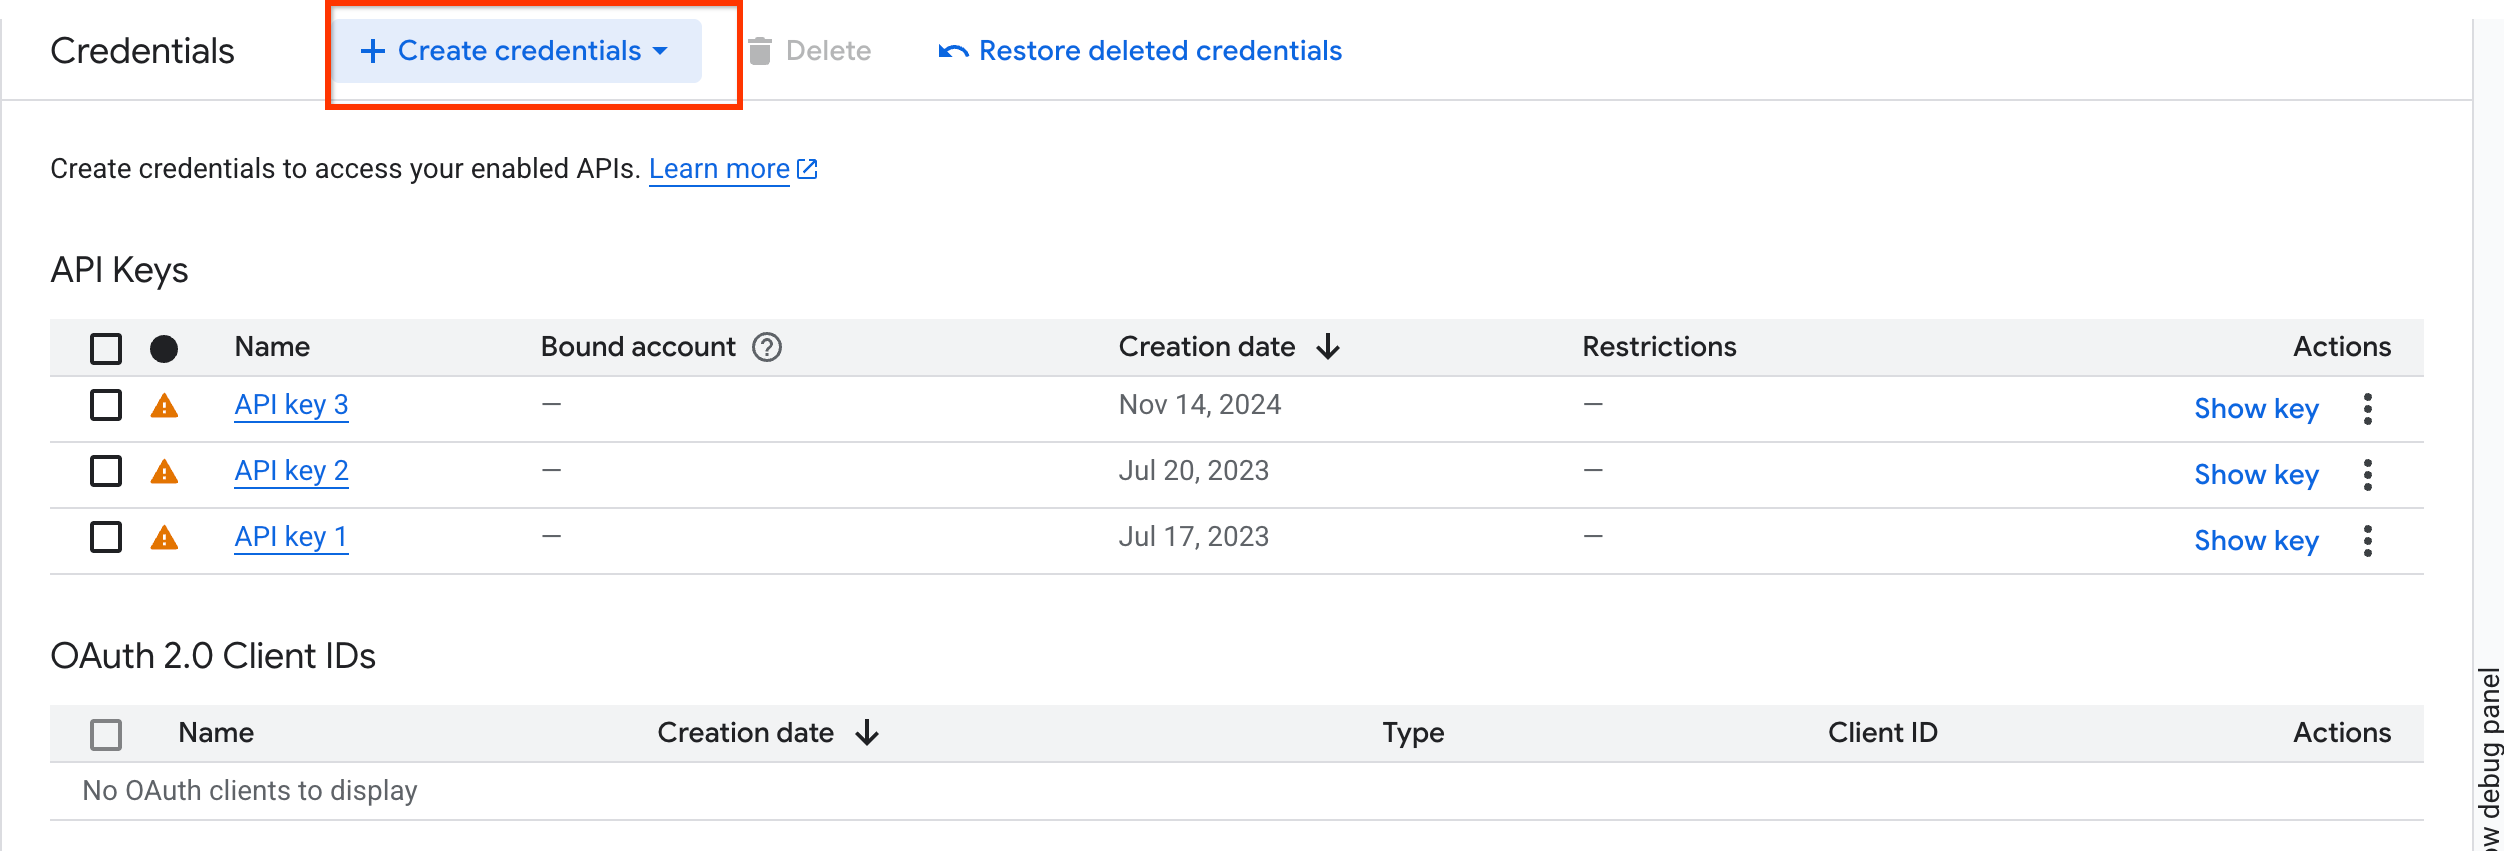
Create credentials. Select OAuth client ID from the drop-down menu.
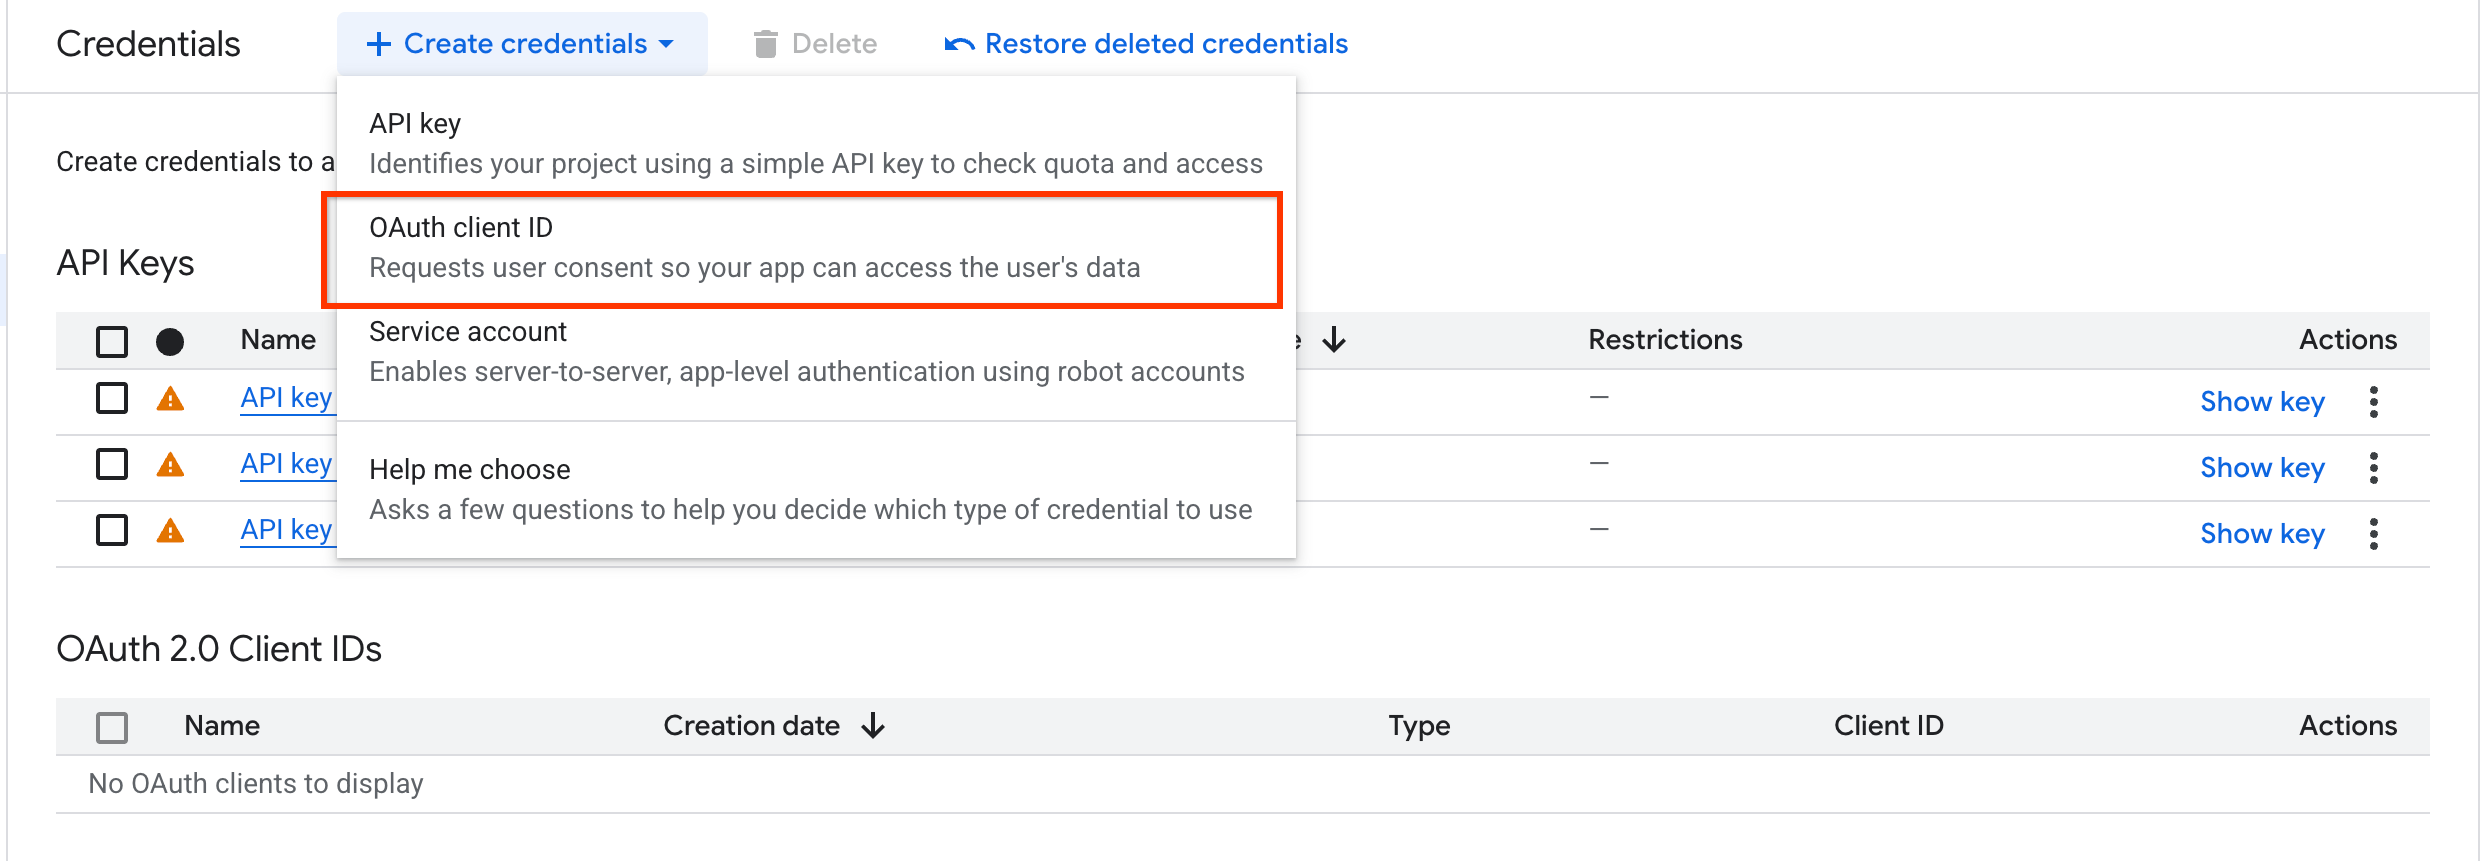
Select the OAuth client ID. Select Web application from the Application type drop-down menu.
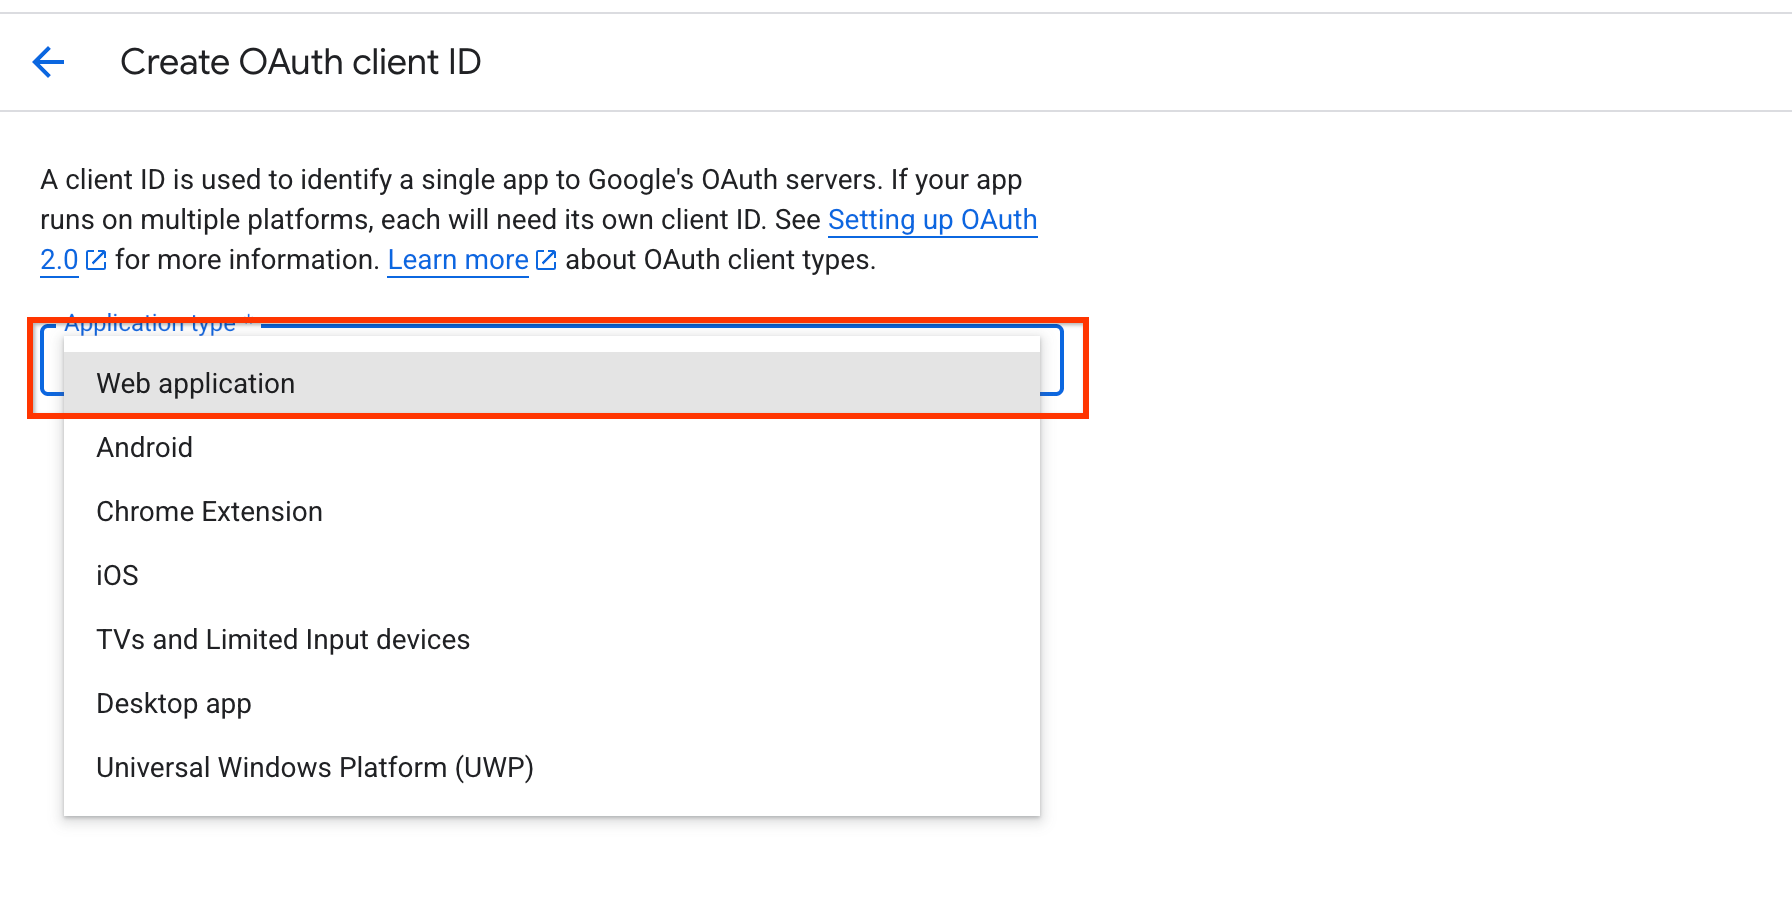
Select the web application option. Add a name for the OAuth client ID and enter the authorized redirect URI as
https://vertexaisearch.cloud.google.com/oauth-redirect.Click Create and save the credentials.
Create a people search data store
To connect your people data to Gemini Enterprise, follow these steps:
Console
In the Google Cloud console, go to the Gemini Enterprise page.
Go to the Data Stores page.
Click Create Data Store.
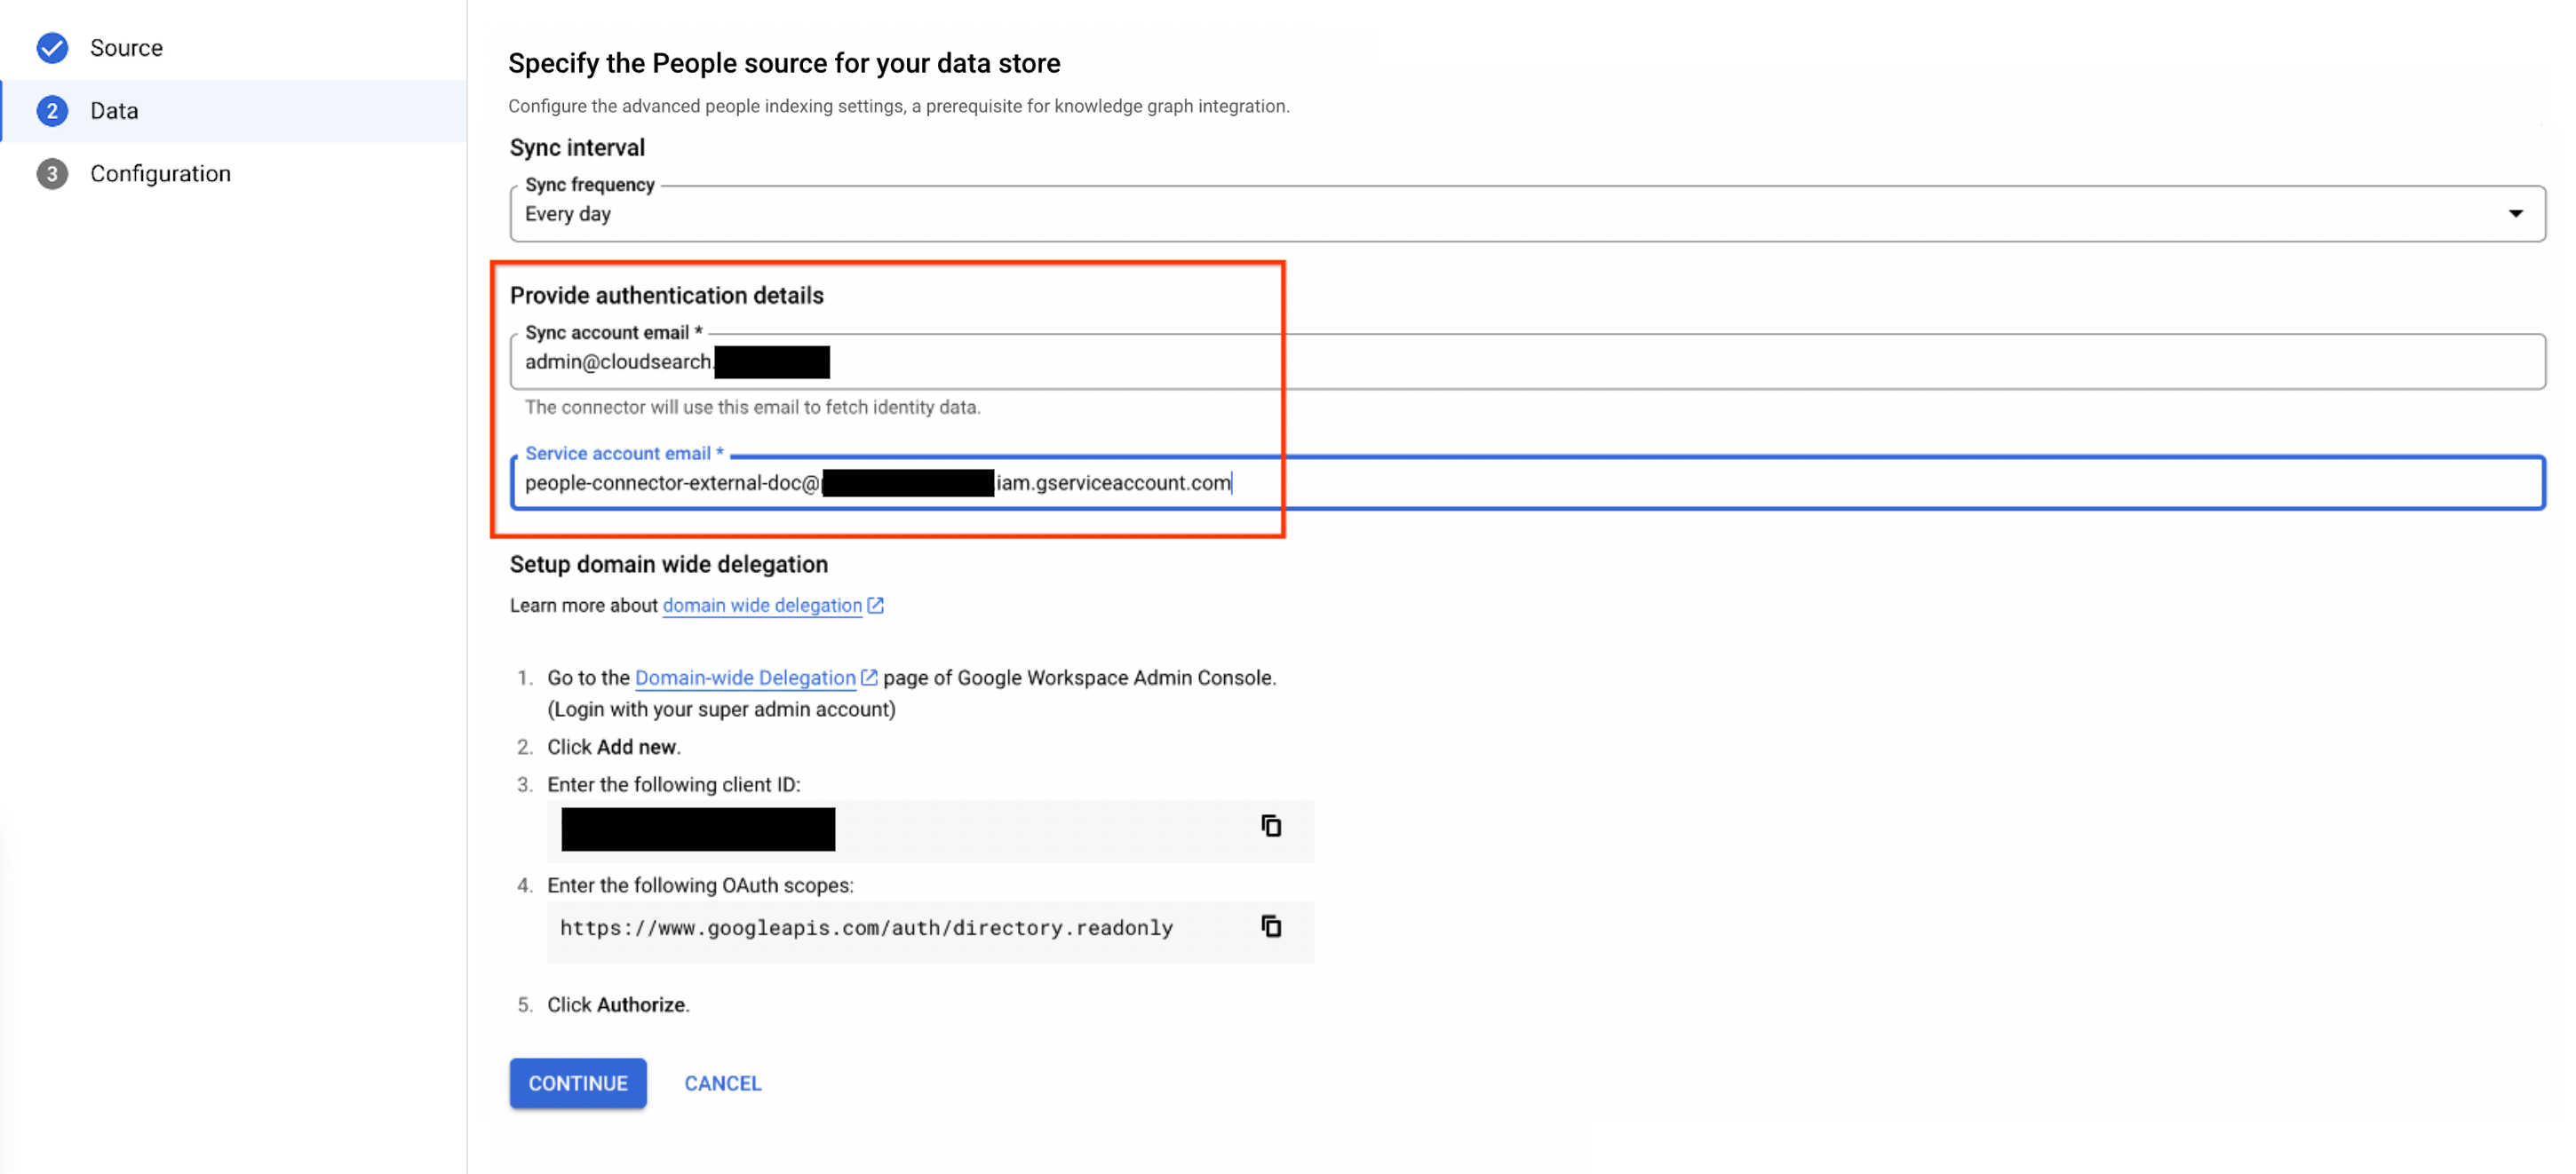
On the Select a data source page, click People search.

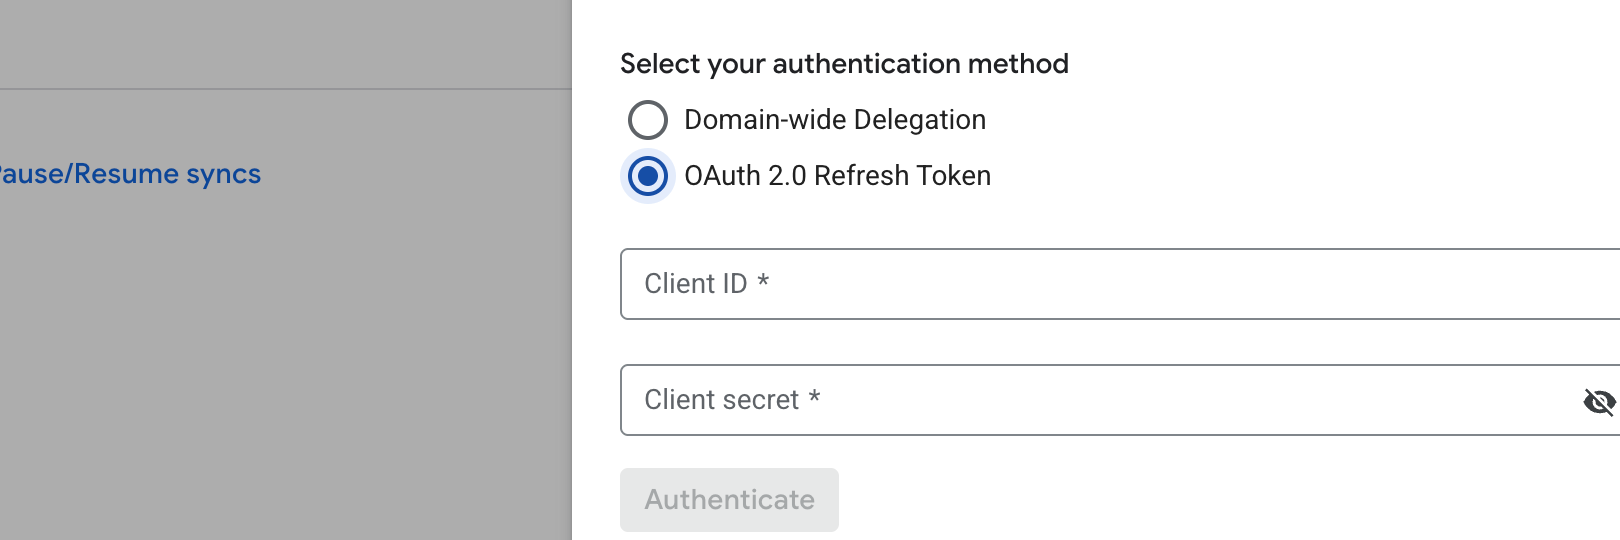
Select the People Search data store. Configure the authentication details:
You can authenticate using either an OAuth 2.0 refresh token or domain-wide delegation.
Using an OAuth 2.0 refresh token:
Select OAuth 2.0 refresh token and add the client ID and client secret you created in the previous steps.
Click the Authenticate button to give consent for the scope
https://www.googleapis.com/auth/directory.readonly.Provide a name for the connector and click Create.
Using domain-wide delegation:
Select Domain-wide delegation.
Enter the service account email and the private key that you generated.
Click Continue.
Update the connector credentials:
You must update your client credentials if your OAuth refresh token has expired, or if you want to switch credential flows for ingesting documents. This process is necessary when you switch from domain-wide delegation to OAuth, or from OAuth back to domain-wide delegation.
Navigate to the People Search connector.
Click Re-authenticate.

Click the Re-authenticate button. Choose the credential flow that you want to use.
Click the credential flow. Add the new credentials and click Authenticate.
Enter the email address of the account that fetches the people data. If you prefer not to use an administrator account, you can use an alternate account that has access to the organization's directory data.
Enter the service account email you created previously.
Click Continue.
Configure the authentication details. Choose a region for your data store.
In the Your data store name field, enter a name for your data store.
Click Create.
Syncing might take several minutes to hours, depending on data size.
Error messages
The following table describes error messages that you might encounter when syncing people data by using data indexing. This table includes gRPC error codes and suggested troubleshooting steps.
| Error Code (gRPC) | Error Message | Description | Troubleshooting |
|---|---|---|---|
| 9 (Failed precondition) | Authentication failed: Service account misconfigured. Ensure that the Discovery Engine service account has the service account token creator role and that the domain wide delegation (DWD) service account auth scope is set up correctly on Google Cloud Admin. For more information, see https://cloud.google.com/gemini/enterprise/docs/ connect-people#failed-precondition-1. All documents have been deleted from Gemini Enterprise. | This error occurs when the Discovery Engine service account lacks the service account token creator role, or the domain-wide delegation (DWD) service account lacks the correct auth scope. | Verify that the Discovery Engine service account has the service account token creator role as described in the Set up the service account section and verify that the DWD service account auth scope is set up correctly on Google Cloud Admin as described in the Set up domain-wide delegation section. Regrant the missing service account permissions. |
| 9 (Failed precondition) | Zero results fetched after full sync. All documents have been deleted from Gemini Enterprise. | This error occurs when contact sharing is disabled in directory settings of the Admin console. | Verify that you turned on contact sharing to enable people search on Google Workspace data as described in the Before you begin section. |
| 3 (Invalid argument) | Failed to exchange signed JWT for access token. Google Workspace account has been deleted. All documents have been deleted from Gemini Enterprise. | This error occurs when the Google Workspace account is deleted. | Create a new connector with an active Google Workspace account. |
| 3 (Invalid argument) | GAIA id not found. Authentication failed. | This error occurs when the user account is incorrect. | Verify that the user account exists and enter the correct credentials. |
| 8 (Resource exhausted) | The quota for the project exceeded. Increase the document quota for the project. | This error occurs when the project quota is exceeded. | Increase the document quota for the project. For more information, see Quotas. |
| 13 (Internal error) | Internal error encountered. | This error occurs when there is an internal error. | Contact the support team. |