Auf dieser Seite wird beschrieben, wie Sie mit dem VM-Screenshot-Tool einen Screenshot aus einer VM-Instanz erstellen.
Wenn Sie einen Screenshot von einer VM erstellen, können Sie Fehler bei einer VM beheben, auf die sonst nicht zugegriffen werden kann. Auf eine VM kann beispielsweise nicht zugegriffen werden, wenn sie gestartet wird oder ein beschädigtes Image-Image verwendet wird.
Windows-basierte Betriebssysteme
Mithilfe von VM-Screenshots können Sie Probleme mit fehlgeschlagenen RDP-Verbindungen zu Windows-VMs beheben, indem Sie feststellen, ob die Instanz erfolgreich gestartet wurde. Informationen zur Fehlerbehebung bei RDP-Verbindungen finden Sie unter Fehlerbehebung bei RDP.
Hinweise zum Datenschutz bei Remote-Desktop-Clients
Das VM-Screenshot-Tool verwendet den Anzeigeadapter der VM, um einen Screenshot der lokalen Konsolensitzung über einen Remote Desktop-Client zu erstellen. Wenn Sie in der lokalen Konsolensitzung einen Screenshot erstellen, können darin vertrauliche Informationen vom Desktop oder vom Browser des Nutzers erfasst werden.
Wenn Sie befürchten, dass vertrauliche Informationen im Rahmen eines Screenshots offengelegt werden, konfigurieren Sie den entsprechenden Remote-Desktop-Client so, dass er die lokale Konsolensitzung nicht verwendet:
Chrome Remote Desktop: Wenn Sie Chrome Remote Desktop verwenden, müssen Sie den Curtain-Modus aktivieren, damit keine Verbindung mit der lokalen Konsolensitzung hergestellt wird.
Microsoft RDP: RDP-Clients stellen über Windows Remote Desktop Services (RDS) eine Verbindung her. Mit Windows RDS können RDP-Clients auswählen, ob eine neue Konsolensitzung gestartet oder eine Verbindung zur vorhandenen Sitzung hergestellt werden soll. Dadurch können sich Auswirkungen auf den Datenschutz ergeben. Informationen zum Anpassen von RDS, damit keine Verbindung mit der lokalen Konsolensitzung hergestellt wird, finden Sie unter Unterstützte Einstellungen für Remote Desktop-RDP-Dateien.
Bevor Sie Screenshots mit dem Google-Support teilen, sollten Sie sie auf vertrauliche Informationen prüfen.
Hinweise
- Virtuelle Anzeigen auf Ihrer VM aktivieren
-
Richten Sie die Authentifizierung ein, falls Sie dies noch nicht getan haben.
Bei der Authentifizierung wird Ihre Identität für den Zugriff auf Google Cloud -Dienste und APIs überprüft. Zum Ausführen von Code oder Beispielen aus einer lokalen Entwicklungsumgebung können Sie sich so bei Compute Engine authentifizieren:
Select the tab for how you plan to use the samples on this page:
Console
When you use the Google Cloud console to access Google Cloud services and APIs, you don't need to set up authentication.
gcloud
-
Installieren Sie die Google Cloud CLI. Initialisieren Sie die Google Cloud CLI nach der Installation mit dem folgenden Befehl:
gcloud initWenn Sie einen externen Identitätsanbieter (IdP) verwenden, müssen Sie sich zuerst mit Ihrer föderierten Identität in der gcloud CLI anmelden.
- Set a default region and zone.
REST
Wenn Sie die REST API-Beispiele auf dieser Seite in einer lokalen Entwicklungsumgebung verwenden möchten, verwenden Sie die Anmeldedaten, die Sie der gcloud CLI bereitstellen.
Installieren Sie die Google Cloud CLI. Initialisieren Sie die Google Cloud CLI nach der Installation mit dem folgenden Befehl:
gcloud initWenn Sie einen externen Identitätsanbieter (IdP) verwenden, müssen Sie sich zuerst mit Ihrer föderierten Identität in der gcloud CLI anmelden.
Weitere Informationen finden Sie in der Dokumentation zur Google Cloud -Authentifizierung unter Für die Verwendung von REST authentifizieren.
Beschränkungen
Die Instanz muss den Lebenszyklusstatus
RUNNINGhaben.Die maximale Rate für die Aufnahme von Screenshots beträgt 20 pro Sekunde, was dem API-Ratenlimit entspricht.
Du kannst keinen Screenshot erstellen, während ein Screenshot erstellt wird.
Sie können jeweils nur einen Screenshot aufnehmen.
Screenshot einer VM erstellen
Gehen Sie wie unten beschrieben vor, um einen Screenshot von einer VM zu erstellen.
Console
Rufen Sie in der Google Cloud Console die Seite VM-Instanzen auf:
Klicken Sie auf der Seite VM-Instanzen auf den Namen der VM-Instanz, aus der ein Screenshot erstellt werden soll.
Klicken Sie auf der Seite VM-Instanzdetails auf den Tab Screenshot.
Klicken Sie auf Aktualisieren, um einen Screenshot von der VM zu generieren. Wenn Sie kein virtuelles Display aktiviert haben, wird in derGoogle Cloud Console kein Screenshot angezeigt.
gcloud
Mit dem Befehl
gcloud compute
instances get-screenshot
erstellen Sie einen Screenshot von einer VM:gcloud compute instances get-screenshot VM_NAME \ --destination=JPEG_FILENAME \ --zone=ZONE
Ersetzen Sie Folgendes:
VM_NAME: Name der VM, von der ein Screenshot erstellt werden soll.JPEG_FILENAME: Optionaler Dateiname der jpeg-Datei für die Screenshotausgabe. Wenn Sie keinen Dateinamen angeben, werden die jpeg-Rohdaten an die Standardausgabe (stdout) gesendet.ZONE: Zone der VM, von der ein Screenshot erstellt werden soll.
REST
Mit der Compute Engine API können Sie mit der Anfrage
instances.getScreenshoteinen Screenshot von einer VM erstellen:GET https://compute.googleapis.com/compute/v1/projects/PROJECT/zo nes/ZONE/instances/VM_NAME/screenshot
Dabei gilt:
PROJECT: ID des Projekts mit der VM, von der ein Screenshot erstellt werden soll.ZONE: Zone mit dem Projekt.VM_NAME: Name der VM, von der ein Screenshot erstellt werden soll.
Beispiele für VM-Screenshots
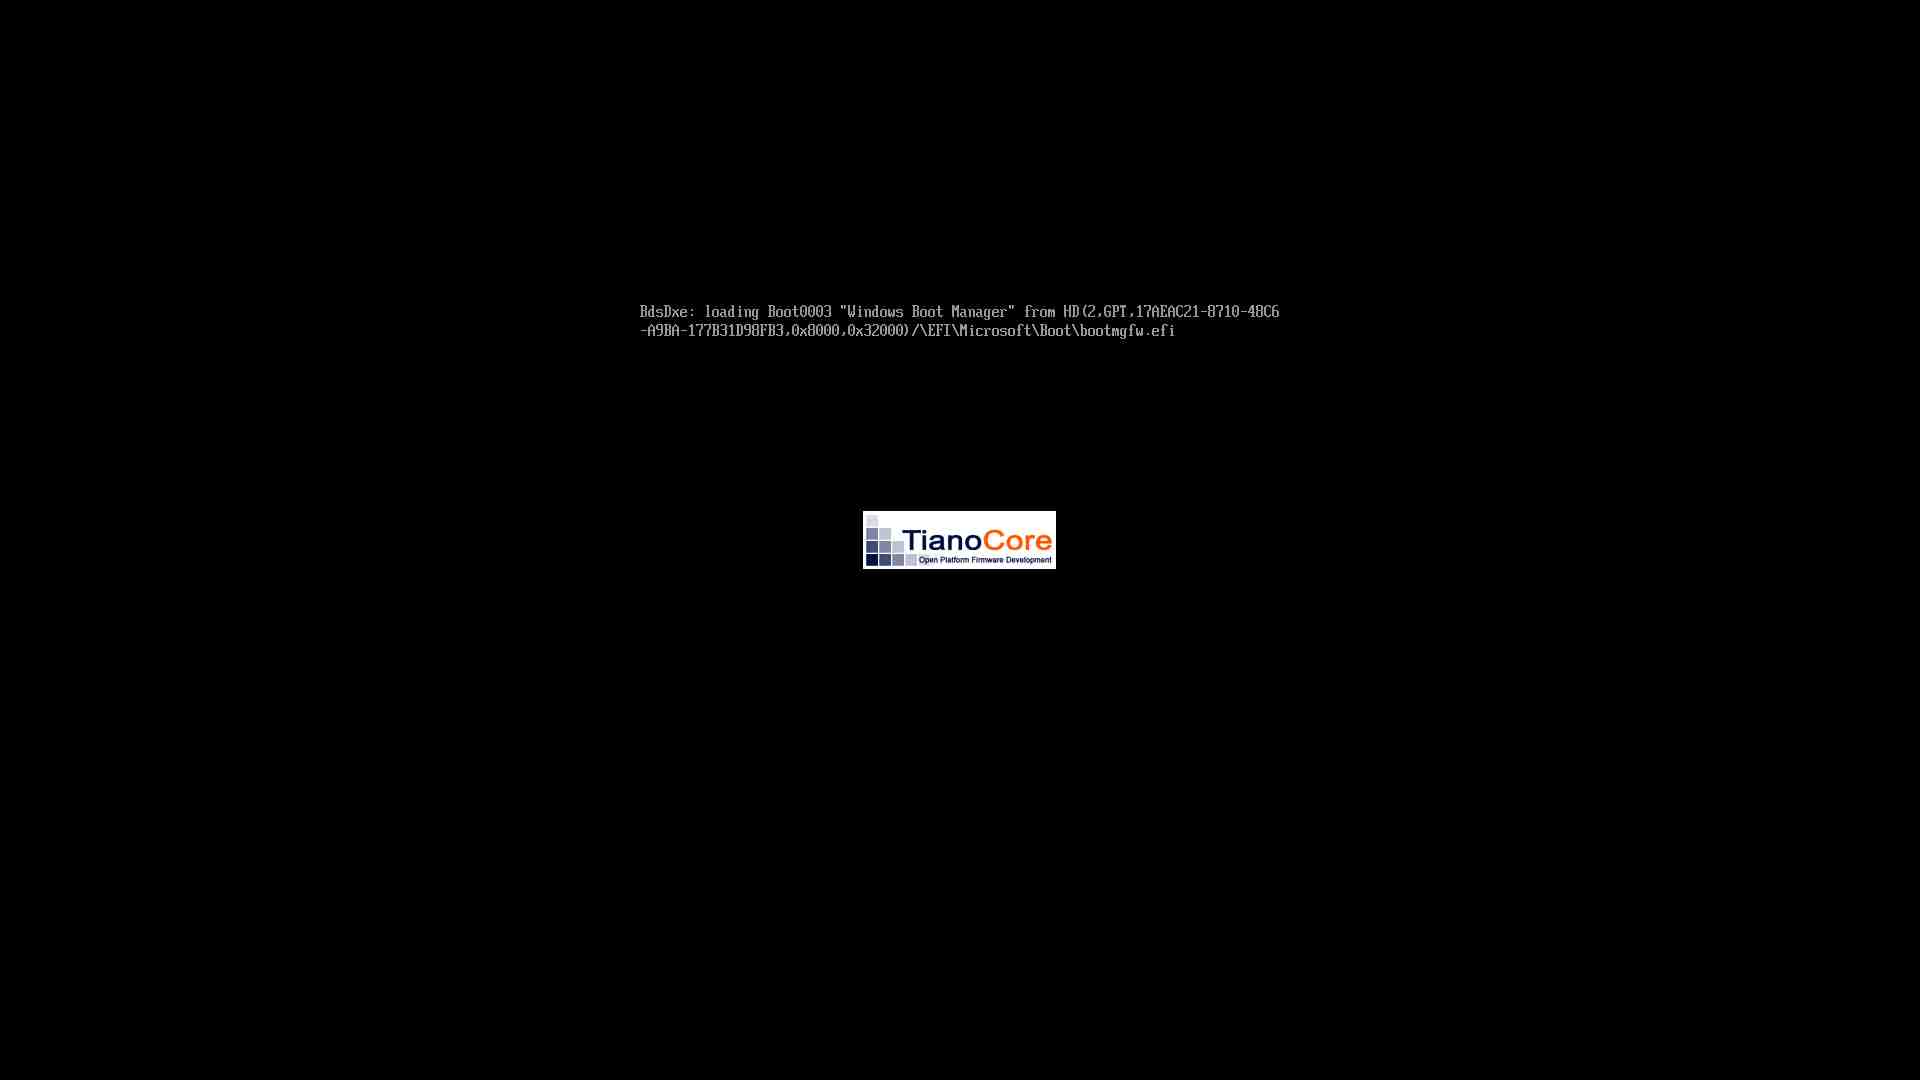
Die Compute Engine-UEFI lädt den Bootmanager
Der folgende Screenshot zeigt eine Windows Server-VM, die beim Laden des Bootmanagers nicht verfügbar ist:
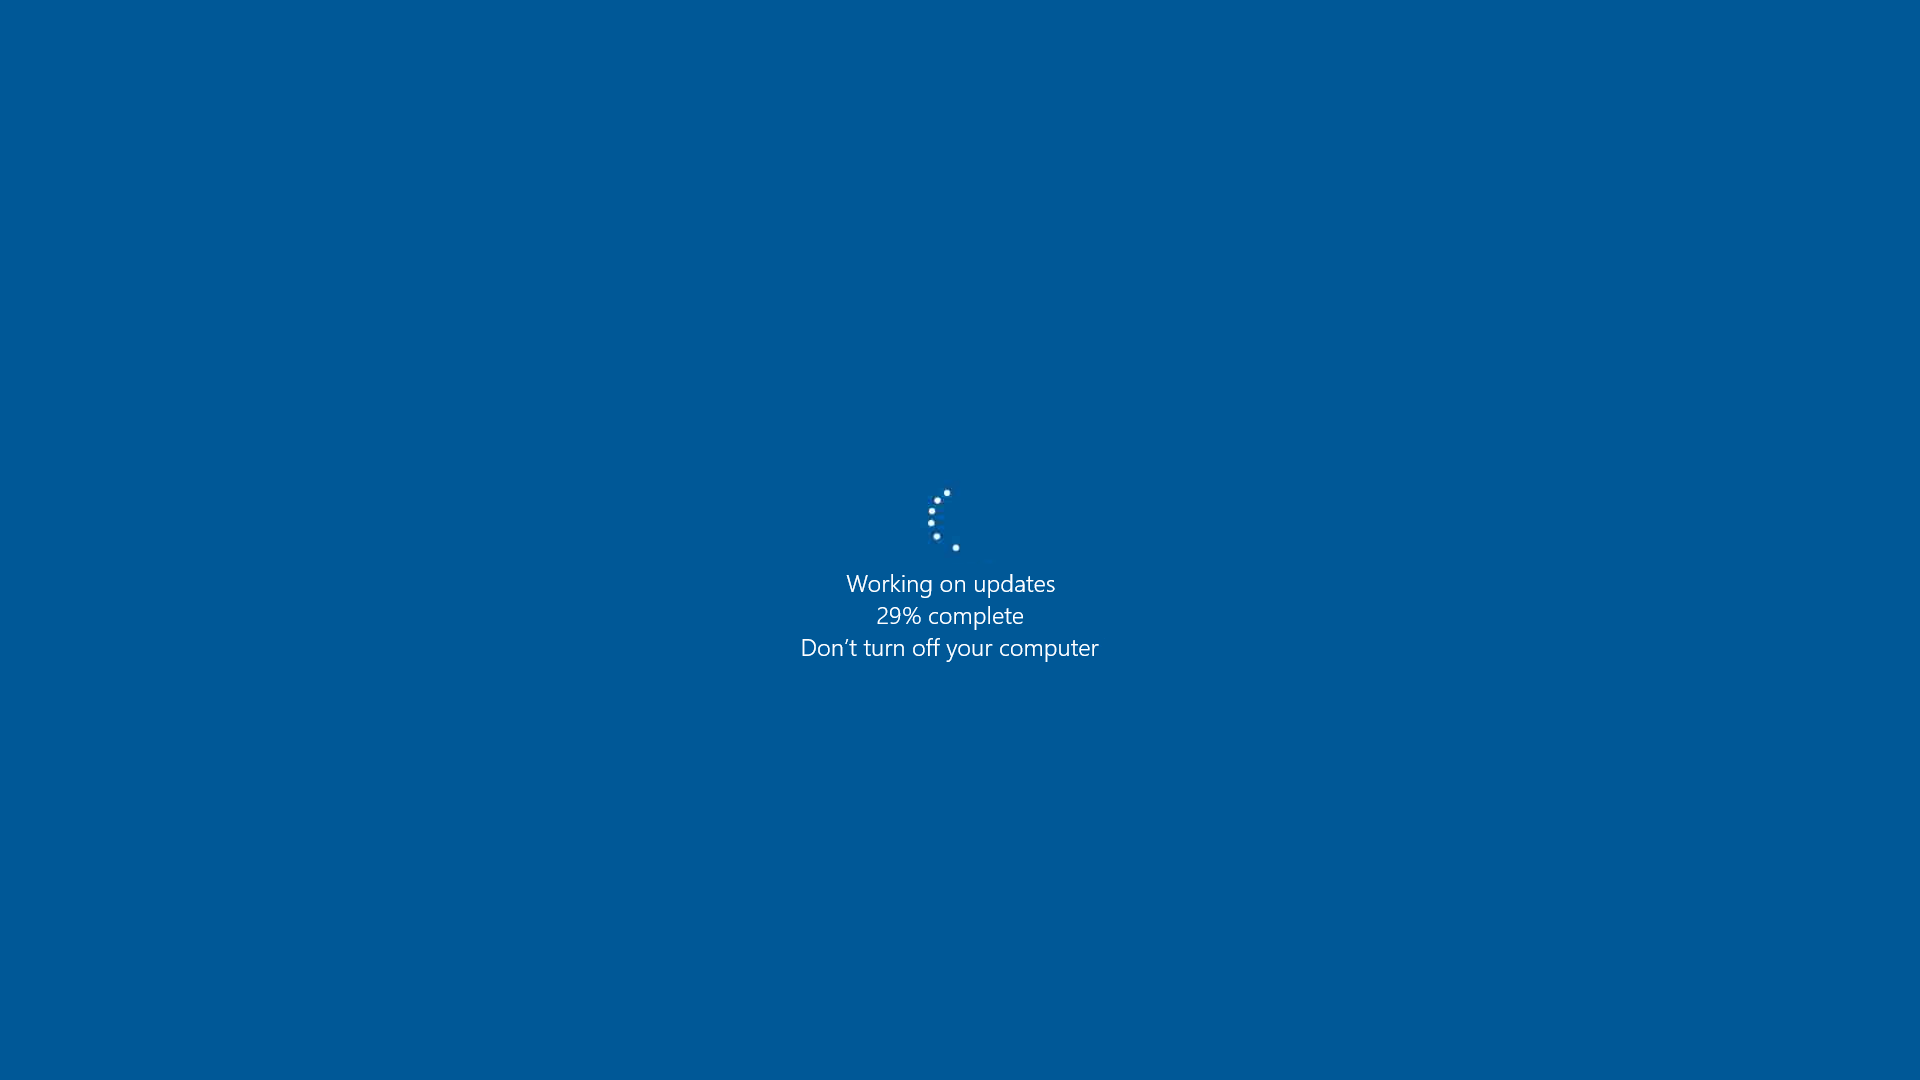
Windows Server 2016 Datacenter aktualisiert gerade
Der folgende Screenshot zeigt eine Windows Server 2016-VM, die beim Durchführen von Updates nicht verfügbar ist:
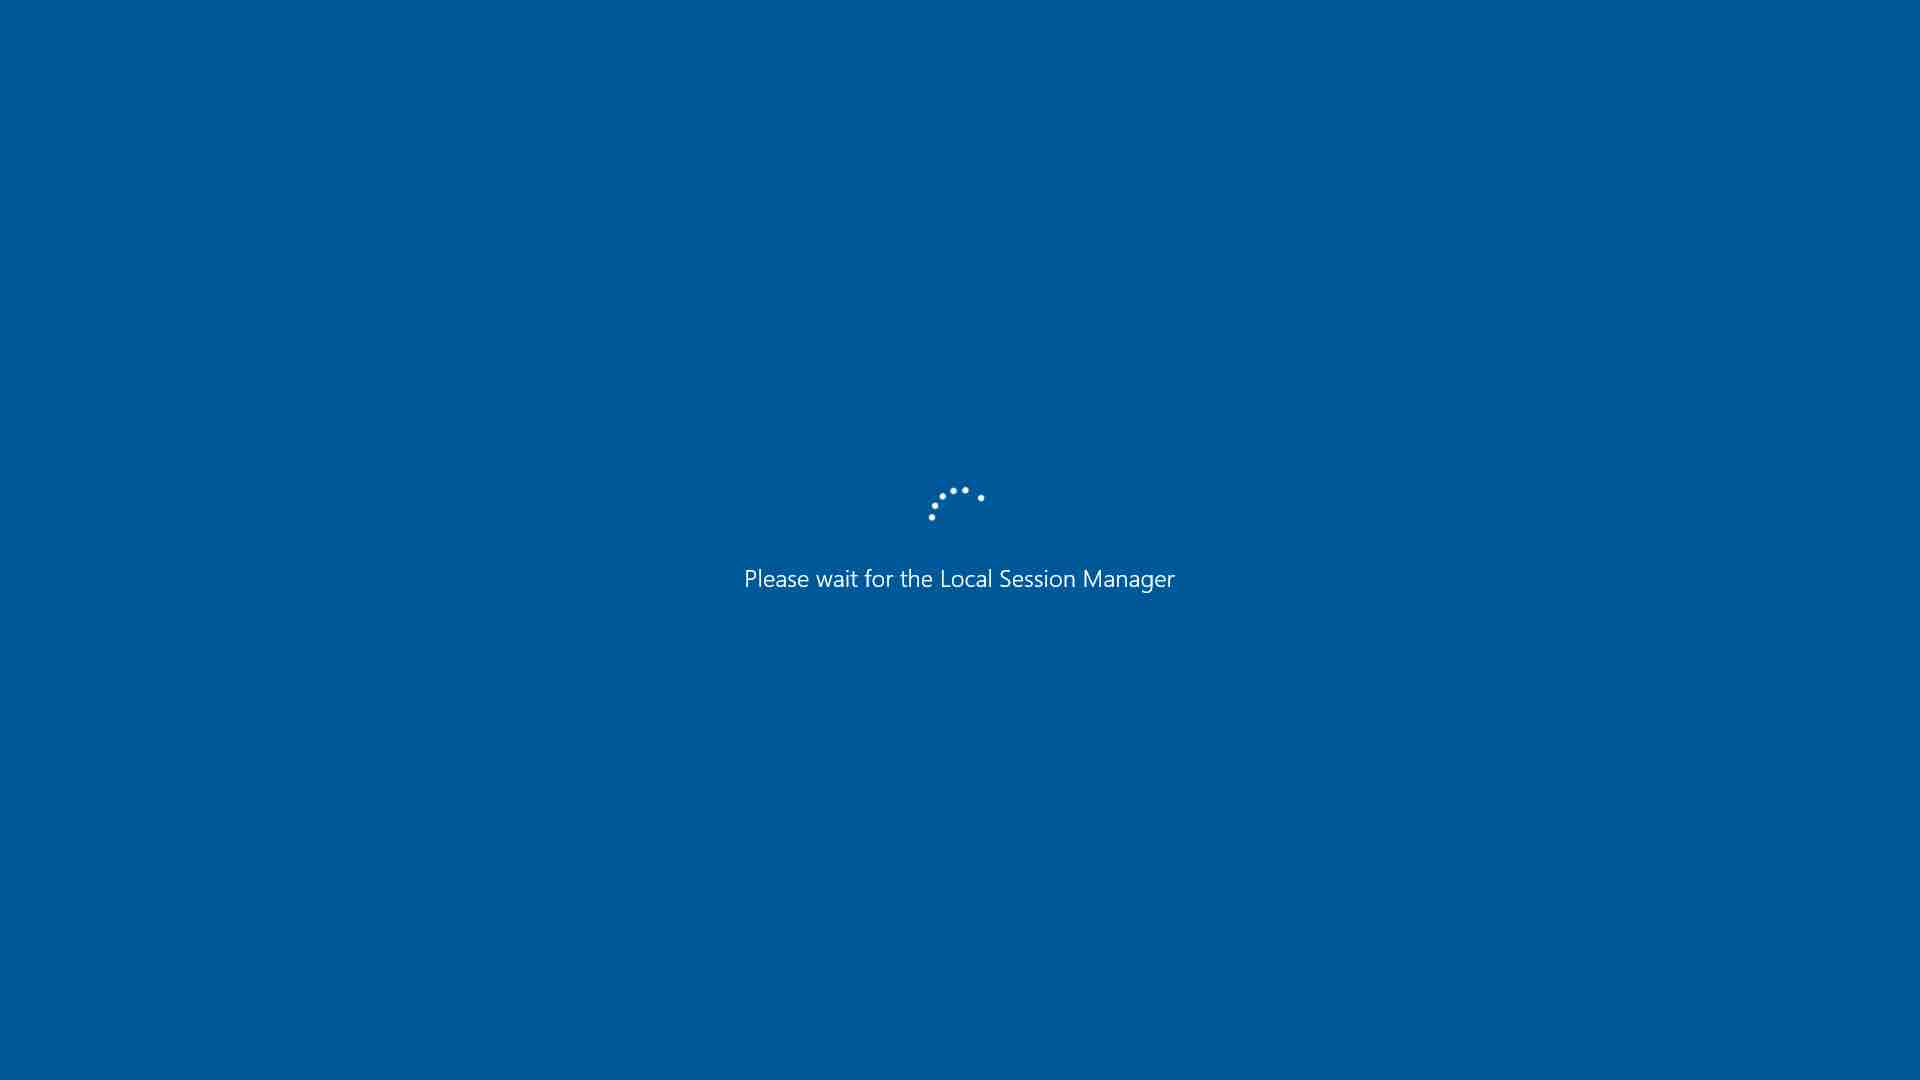
Windows Server 2016 – Systemdienste werden geladen
Der folgende Screenshot zeigt eine Windows Server 2016-VM, die beim Laden von Systemdiensten nicht verfügbar ist:
Anmeldebildschirm für Windows Server 2016 Datacenter
Der folgende Screenshot zeigt eine Windows Server 2016-VM, die den Startvorgang abgeschlossen hat und bereit ist, dass Sie sich anmelden:

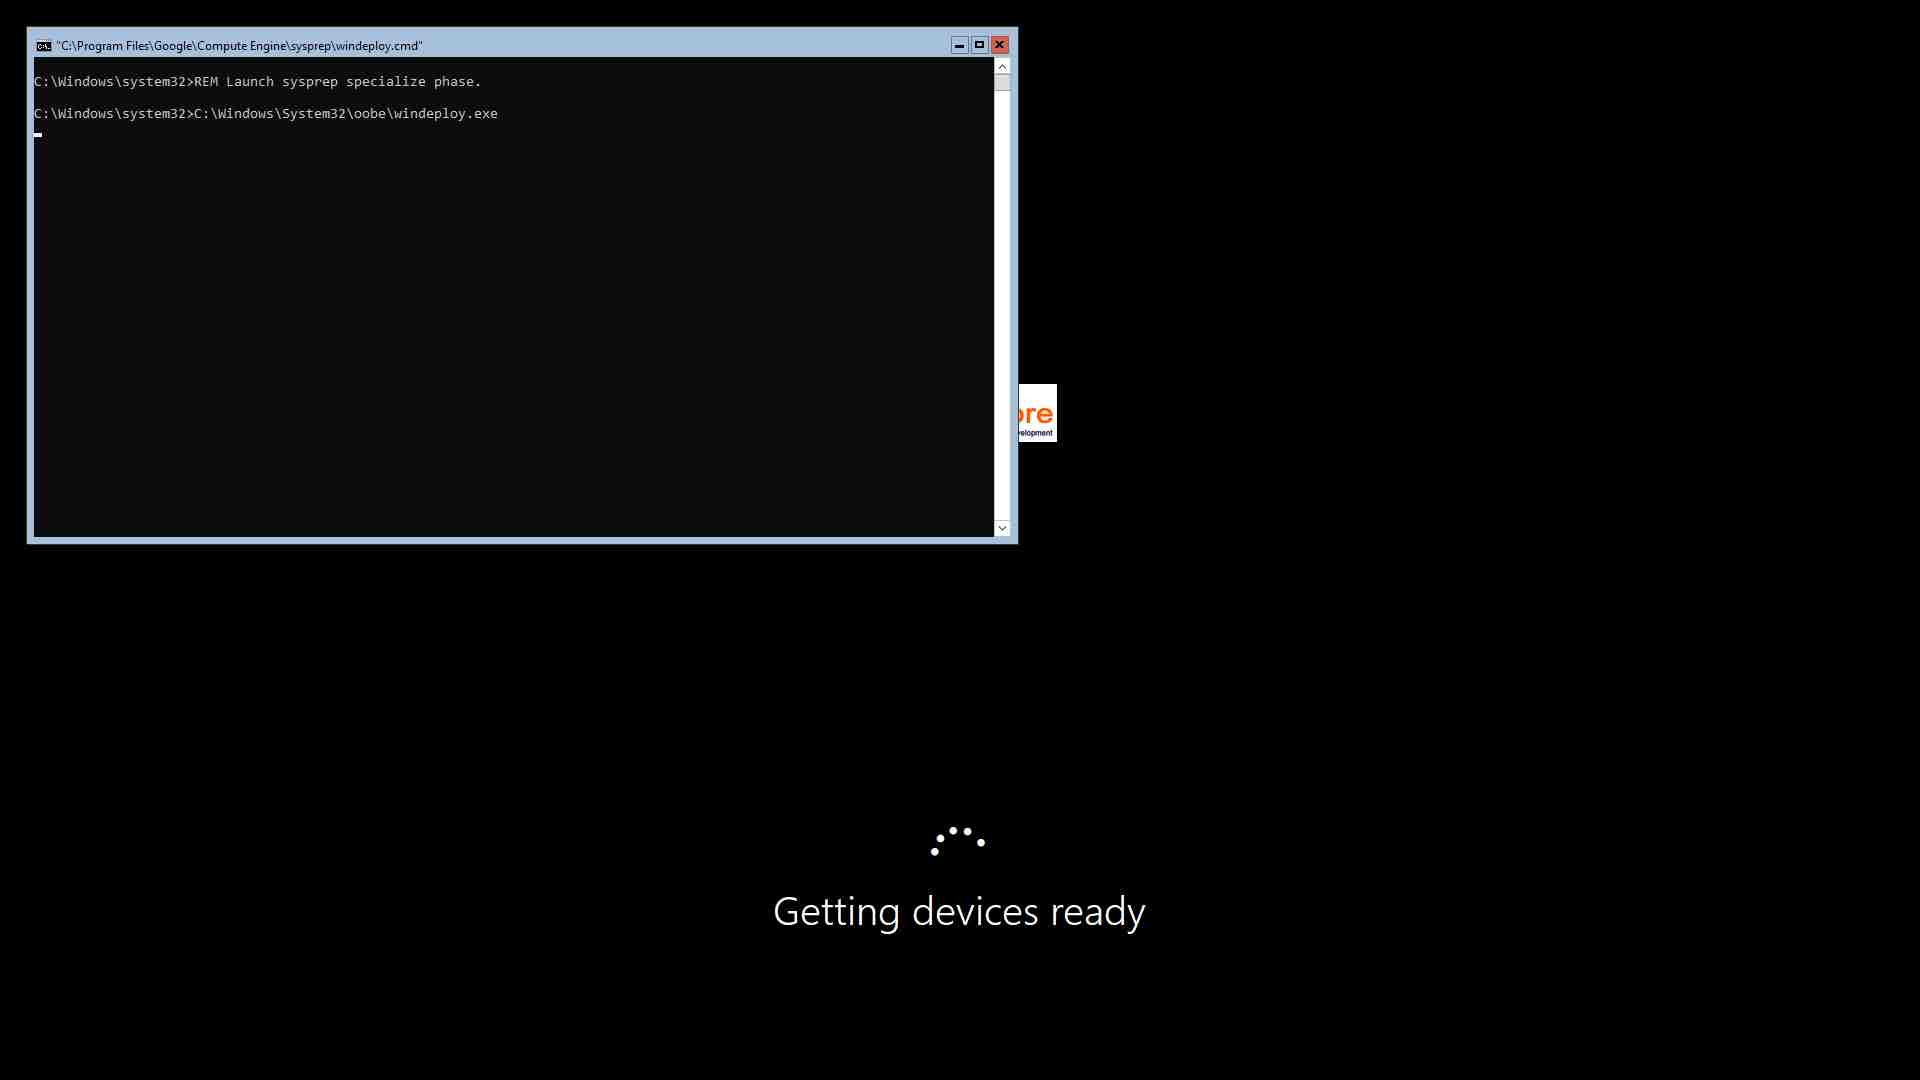
Sysprep-Prozess von Windows Server 2019 Core
Der folgende Screenshot zeigt den sysprep-Prozess einer Windows Server 2019 Core-VM-Instanz:
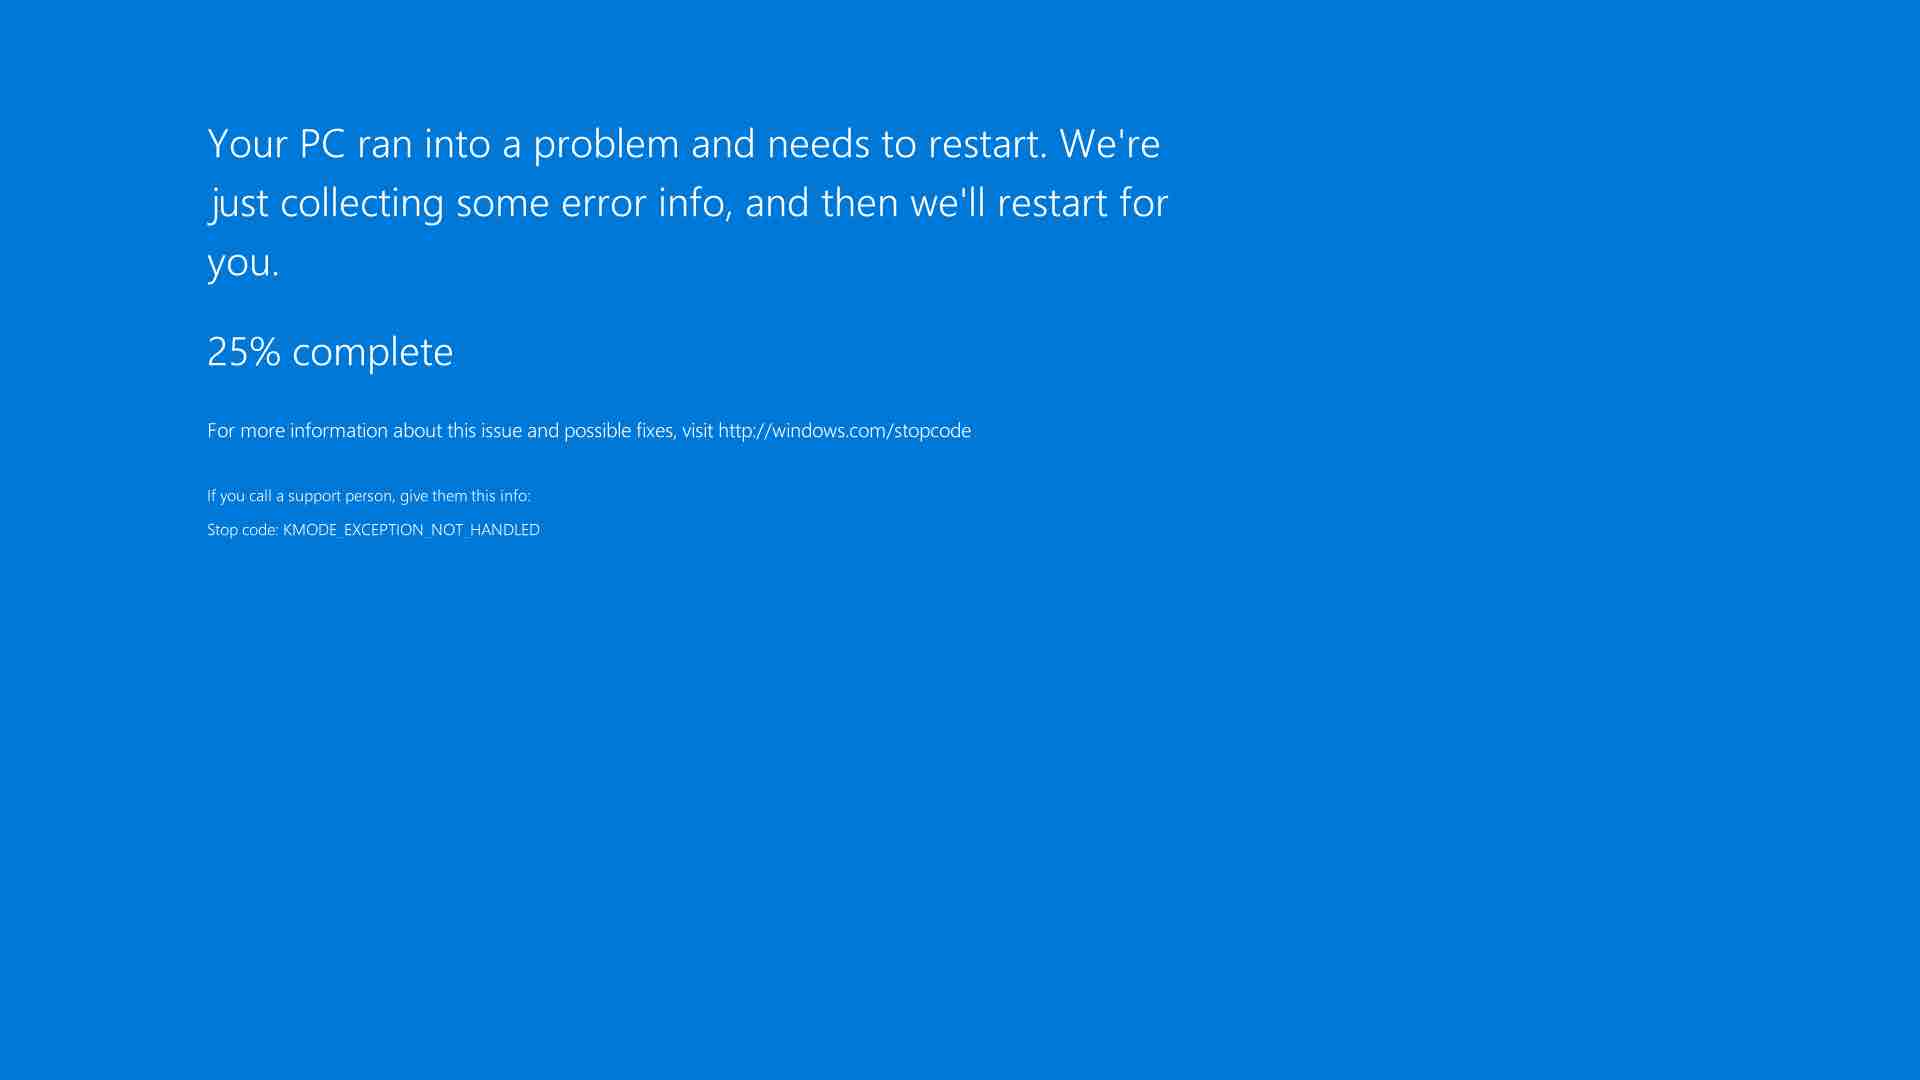
Bluescreen-Fehler in Windows Server 2016 Datacenter
Der folgende Screenshot zeigt einen Bluescreen-Fehler einer Windows Server 2016 Datacenter-VM-Instanz:
Nächste Schritte
Sofern nicht anders angegeben, sind die Inhalte dieser Seite unter der Creative Commons Attribution 4.0 License und Codebeispiele unter der Apache 2.0 License lizenziert. Weitere Informationen finden Sie in den Websiterichtlinien von Google Developers. Java ist eine eingetragene Marke von Oracle und/oder seinen Partnern.
Zuletzt aktualisiert: 2025-09-30 (UTC).
-