This tutorial describes how to directly back up a Microsoft SQL Server 2022 database to a Cloud Storage bucket, and restore it later on. Introduced in SQL Server 2022, the SQL Server backup native feature offers a seamless and cost-effective strategy for cloud-based disaster recovery and data migration.
The SQL Server backup native feature leverages the BACKUP TO URL and
RESTORE FROM URL commands that support S3-compatible object
storage, including Cloud Storage. This eliminates the need for
intermediate local storage, simplifying the backup workflow and reducing
operational overhead.
This tutorial is intended for database administrators and engineers.
Objectives
This tutorial shows you how to complete the following tasks to reach your objective:- Create a new Cloud Storage bucket
- Configure a SQL Server connector
- Back up your database
- Restore your database from the backup
Costs
In this document, you use the following billable components of Google Cloud:
To generate a cost estimate based on your projected usage,
use the pricing calculator.
When you finish the tasks that are described in this document, you can avoid continued billing by deleting the resources that you created. For more information, see Clean up.
Before you begin
For this tutorial, you need a Google Cloud project. You can create a new one, or select a project you already created:
-
In the Google Cloud console, on the project selector page, select or create a Google Cloud project.
Roles required to select or create a project
- Select a project: Selecting a project doesn't require a specific IAM role—you can select any project that you've been granted a role on.
-
Create a project: To create a project, you need the Project Creator
(
roles/resourcemanager.projectCreator), which contains theresourcemanager.projects.createpermission. Learn how to grant roles.
-
Verify that billing is enabled for your Google Cloud project.
-
In the Google Cloud console, activate Cloud Shell.
-
Ensure that Microsoft SQL Server 2022 or later is installed and running.
Make sure that both your Google Cloud project and SQL Server have the required permissions to perform backup and restoration tasks.
Make sure that the user or service account associated with access keys has permissions to create and view objects in Cloud Storage bucket.
Make sure that the SQL Server user account used to perform backup has backup database and backup log permissions.
Create a Cloud Storage bucket
You can create a Cloud Storage bucket using the Google Cloud console or using gcloud storage command.
To create Cloud Storage bucket using
the gcloud storage command, use the following
steps.
Select your Google Cloud project.
gcloud config set project PROJECT_ID
Create the bucket. To create the bucket run the
gcloud storage buckets createcommand as follows.gcloud storage buckets create gs://BUCKET_NAME --location=BUCKET_LOCATION
Replace the following:
BUCKET_NAME: with a unique name for your bucket.BUCKET_LOCATION: with the location of your bucket.
Configure S3 interoperability and create an access key
To allow SQL Server to communicate with Cloud Storage using the S3 protocol, you must enable interoperability and generate an access key using the following steps:
Navigate to your Cloud Storage settings in the Google Cloud console.
Select the Interoperability tab.
Under Access keys for your user account, click Create a key.
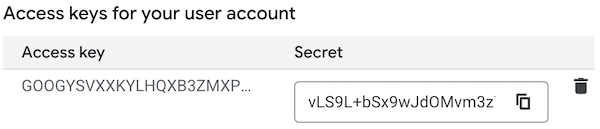
Save the generated Access key and Secret securely. You will need them in the next step.
For production environments, we recommend that you use a service account hash-based message authentication code (HMAC) key for better security and management.
Add Credentials to SQL Server
To allow SQL Server to authenticate with your Cloud Storage bucket, you must create a credential object within SQL Server to store the Cloud Storage access key and secret. To do this, run the following T-SQL command in SQL Server Management Studio (SSMS).
CREATE CREDENTIAL CREDENTIAL_NAME
WITH
    IDENTITY = 'S3 Access Key',
    SECRET = 'ACCESS_KEY:SECRET';
Replace the following:
CREDENTIAL_NAME: with a name for your credentials.ACCESS_KEY: with you access key you created in the previous section.SECRET: with the secret you created in the previous section.
IDENTITY = 'S3 Access Key' is crucial as it tells SQL Server to use the new S3 connector. The secret should be formatted as the access key, followed by a colon, and then the secret key.
Example:
CREATE CREDENTIAL sql_backup_credentials
WITH
    IDENTITY = 'S3 Access Key',
    SECRET = 'GOOGGE3SVF7OQE5JRMLQ7KWB:b31Pl8Tx1ARJfdGOsbgMFQNbk3nPdlT2UCYzs1iC';
Back up your data to Cloud Storage
With the credential in place, you can now back up your database directly to the Cloud Storage bucket using the BACKUP DATABASE command with the TO URL option. Prefix the URL with s3://storage.googleapis.com to use the S3 connector, as follows.
BACKUP DATABASE DATABASE_NAME
TO URL = 's3://storage.googleapis.com/BUCKET_NAME/FOLDER_NAME/BACKUP_FILE_NAME.bak'
WITH
    CREDENTIAL = 'CREDENTIAL_NAME',
    FORMAT,
    STATS = 10,
    MAXTRANSFERSIZE = 10485760,
    COMPRESSION;
Replace the following:
CREDENTIAL_NAMEThe name of the credential you created in step 3. For example —sql_backup_credentials.BUCKET_NAMEThe name of the bucket you created in step 1.FOLDER_NAMEThe name of the folder you want to store the backup file in.BACKUP_FILE_NAMEThe name of the backup file.
The descriptions of the backup parameters used in the command are as follows:
FORMAT: overwrites the existing backup files and creates a new media set.STATS: reports the backup progress.COMPRESSION: compresses the backup, which can reduce file size and upload time.MAXTRANSFERSIZE: recommended to avoid I/O errors with large backup files.
For more information see SQL Server back up to URL for S3-compatible object storage.
For very large databases, you can split the backup into multiple files as follows.
BACKUP DATABASE DATABASE_NAME
TO
    URL = 's3://storage.googleapis.com/BUCKET_NAME/FOLDER_NAME/BACKUP_FILE_NAME_0.bak',
    URL = 's3://storage.googleapis.com/BUCKET_NAME/FOLDER_NAME/BACKUP_FILE_NAME_1.bak'
    -- ... more files
WITH
    CREDENTIAL = 'CREDENTIAL_NAME',
    FORMAT,
    STATS = 10,
    MAXTRANSFERSIZE = 10485760,
    COMPRESSION;
Restore your data from Cloud Storage
You can restore your database directly from a backup file stored in Cloud Storage using the RESTORE DATABASE command as follows.
RESTORE DATABASE DATABASE_NAME
FROM URL = 's3://storage.googleapis.com/BUCKET_NAME/FOLDER_NAME/BACKUP_FILE_NAME.bak'
WITH
    CREDENTIAL = 'CREDENTIAL_NAME';
Replace the following:
Clean up
To avoid incurring charges to your Google Cloud account for the resources used in this tutorial:
Delete the project
- In the Google Cloud console, go to the Manage resources page.
- In the project list, select the project that you want to delete, and then click Delete.
- In the dialog, type the project ID, and then click Shut down to delete the project.
What's next
- Explore reference architectures, diagrams, and best practices about Google Cloud. Take a look at our Cloud Architecture Center.