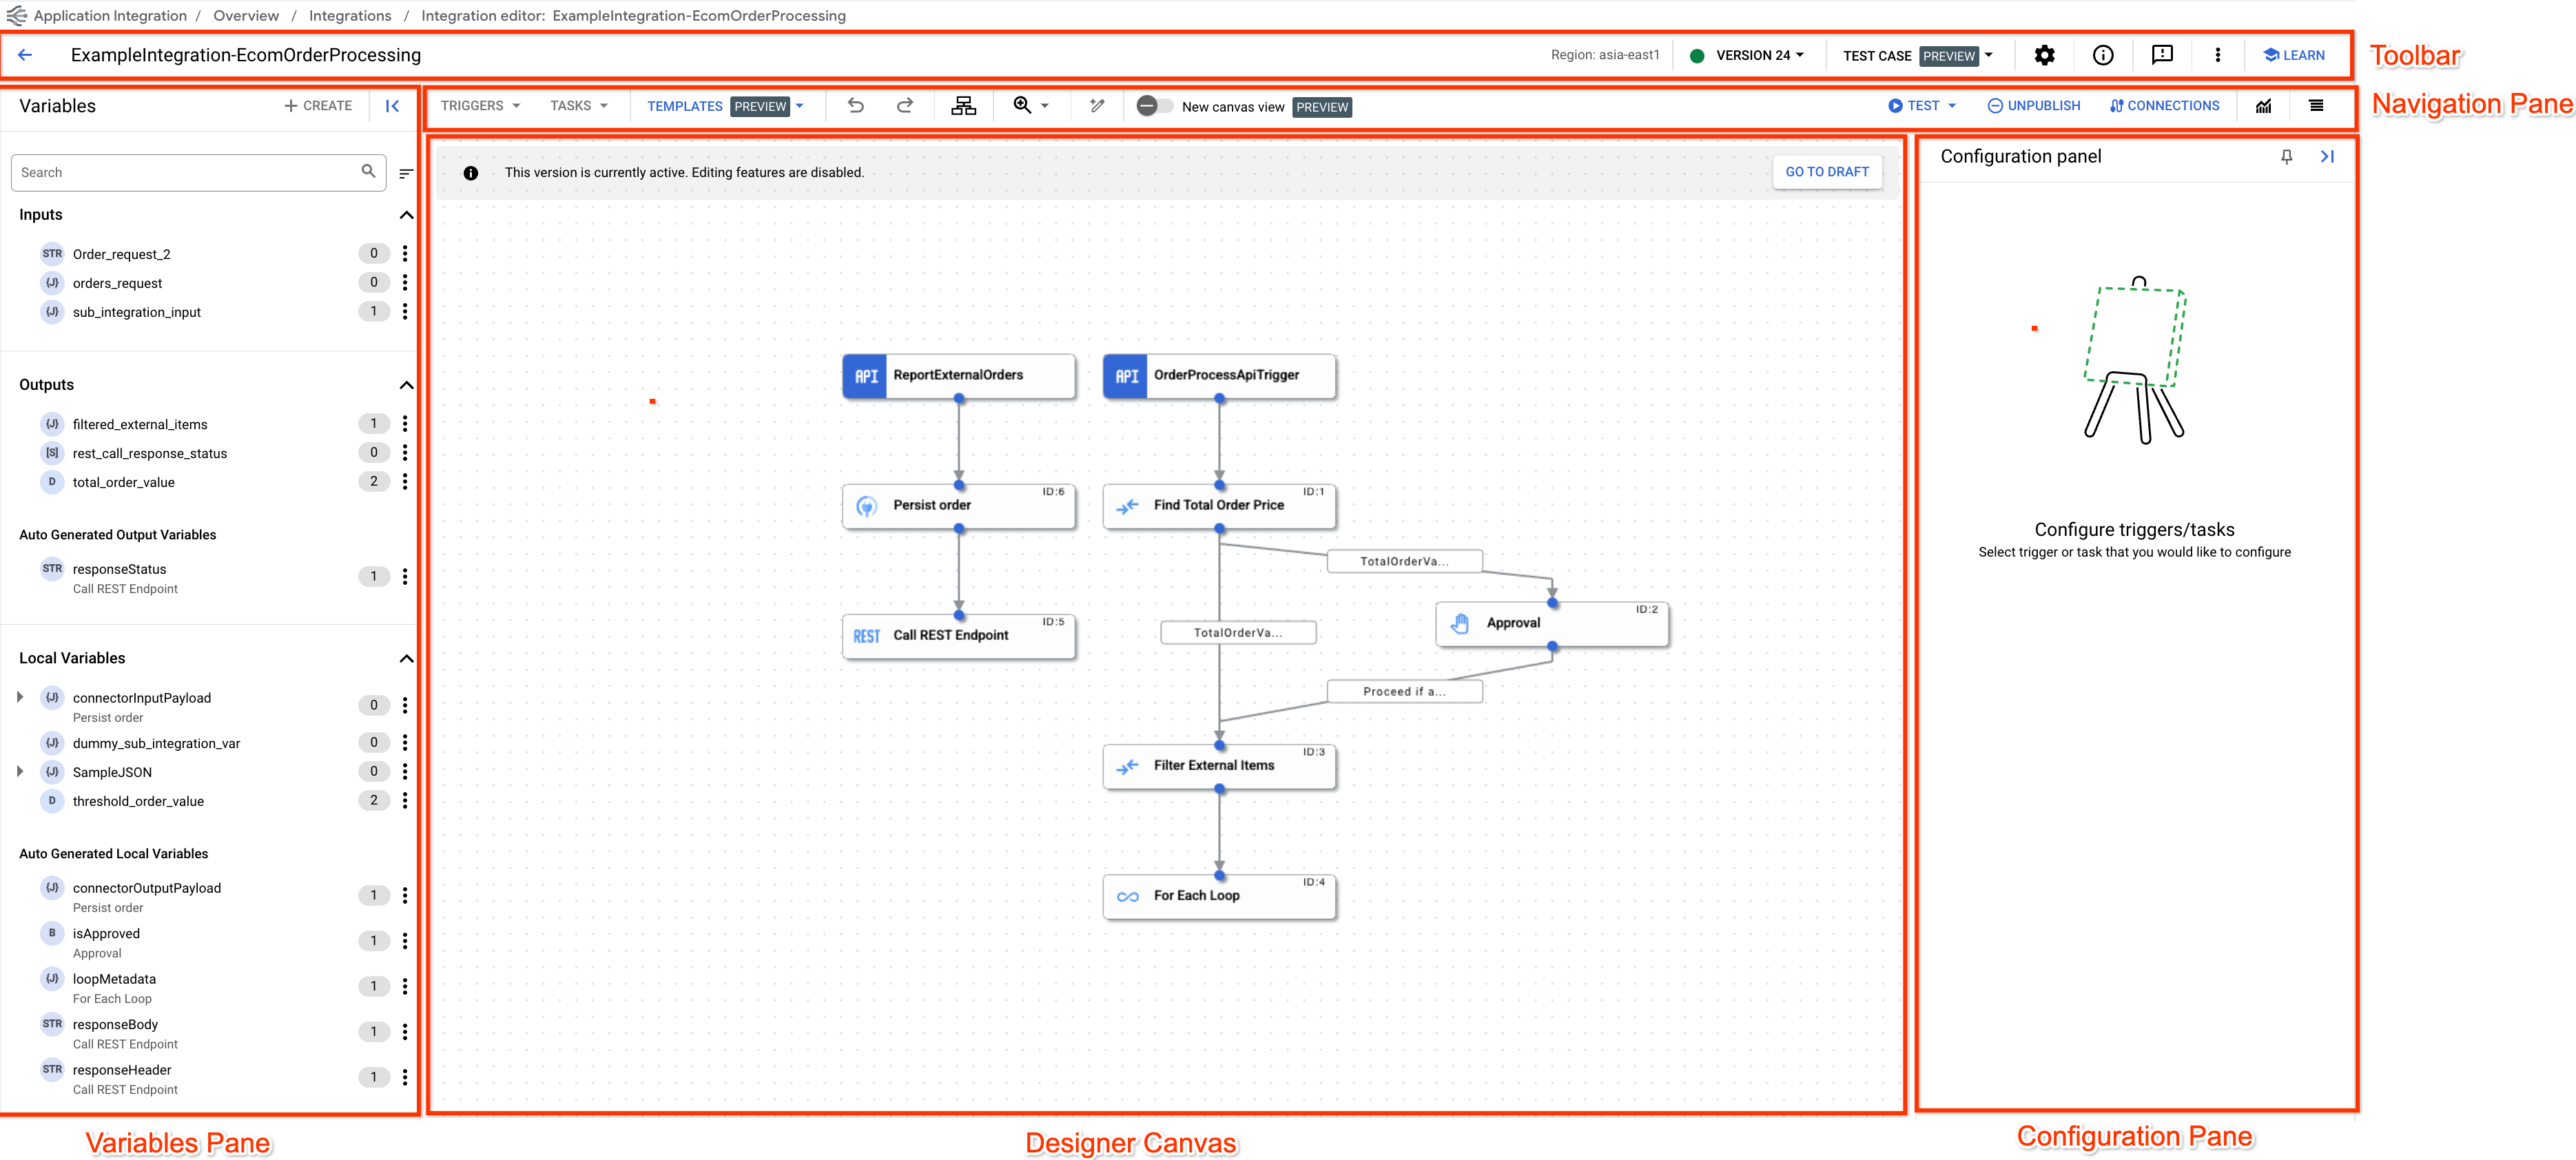
Der Integrationseditor ist eine Drag-and-drop-Oberfläche, mit der Sie den gesamten Integrationsablauf mit wenig oder ganz ohne Code entwerfen und entwickeln können. Sie können alle Ihre Integrationen im Integrationseditor erstellen, ändern und ausführen. Sie können sich den Integrationseditor als einheitlichen Arbeitsbereich für die Verwaltung Ihrer Integration vorstellen.
Application Integration bietet sofort einsatzbereite Trigger und Aufgaben, die Sie bei der schnellen Entwicklung Ihrer Integration unterstützen. Jede Aufgabe oder jedes Triggerelement ist über einen Edge zusammen mit dem jeweiligen Fork und Join verbunden.
Edges geben auch den Ablauf der Steuerung von einer Aufgabe/Trigger zu einer anderen an. Informationen zum Angeben von Bedingungen für Kanten und Aufgaben finden Sie unter Edge-Bedingungen.
Integrationseditor öffnen
So öffnen Sie die Integration im Integrationseditor:
Rufen Sie in der Google Cloud Console die Seite Application Integration auf.
Klicken Sie auf
info
, um eine Zusammenfassung der gesamten Integration an einem Ort anzusehen.
Um Aktionen wie das Löschen einer Integration, das Klonen einer Integration oder das Herunter- und Hochladen einer Integration durchzuführen und die OpenAPI-Spezifikation einer Integration aufzurufen, klicken Sie in der Symbolleiste auf das
more_vert
(Aktionsmenü).
Navigationsleiste
Mit der Designer-Navigationsleiste können Sie folgende Aktionen ausführen:
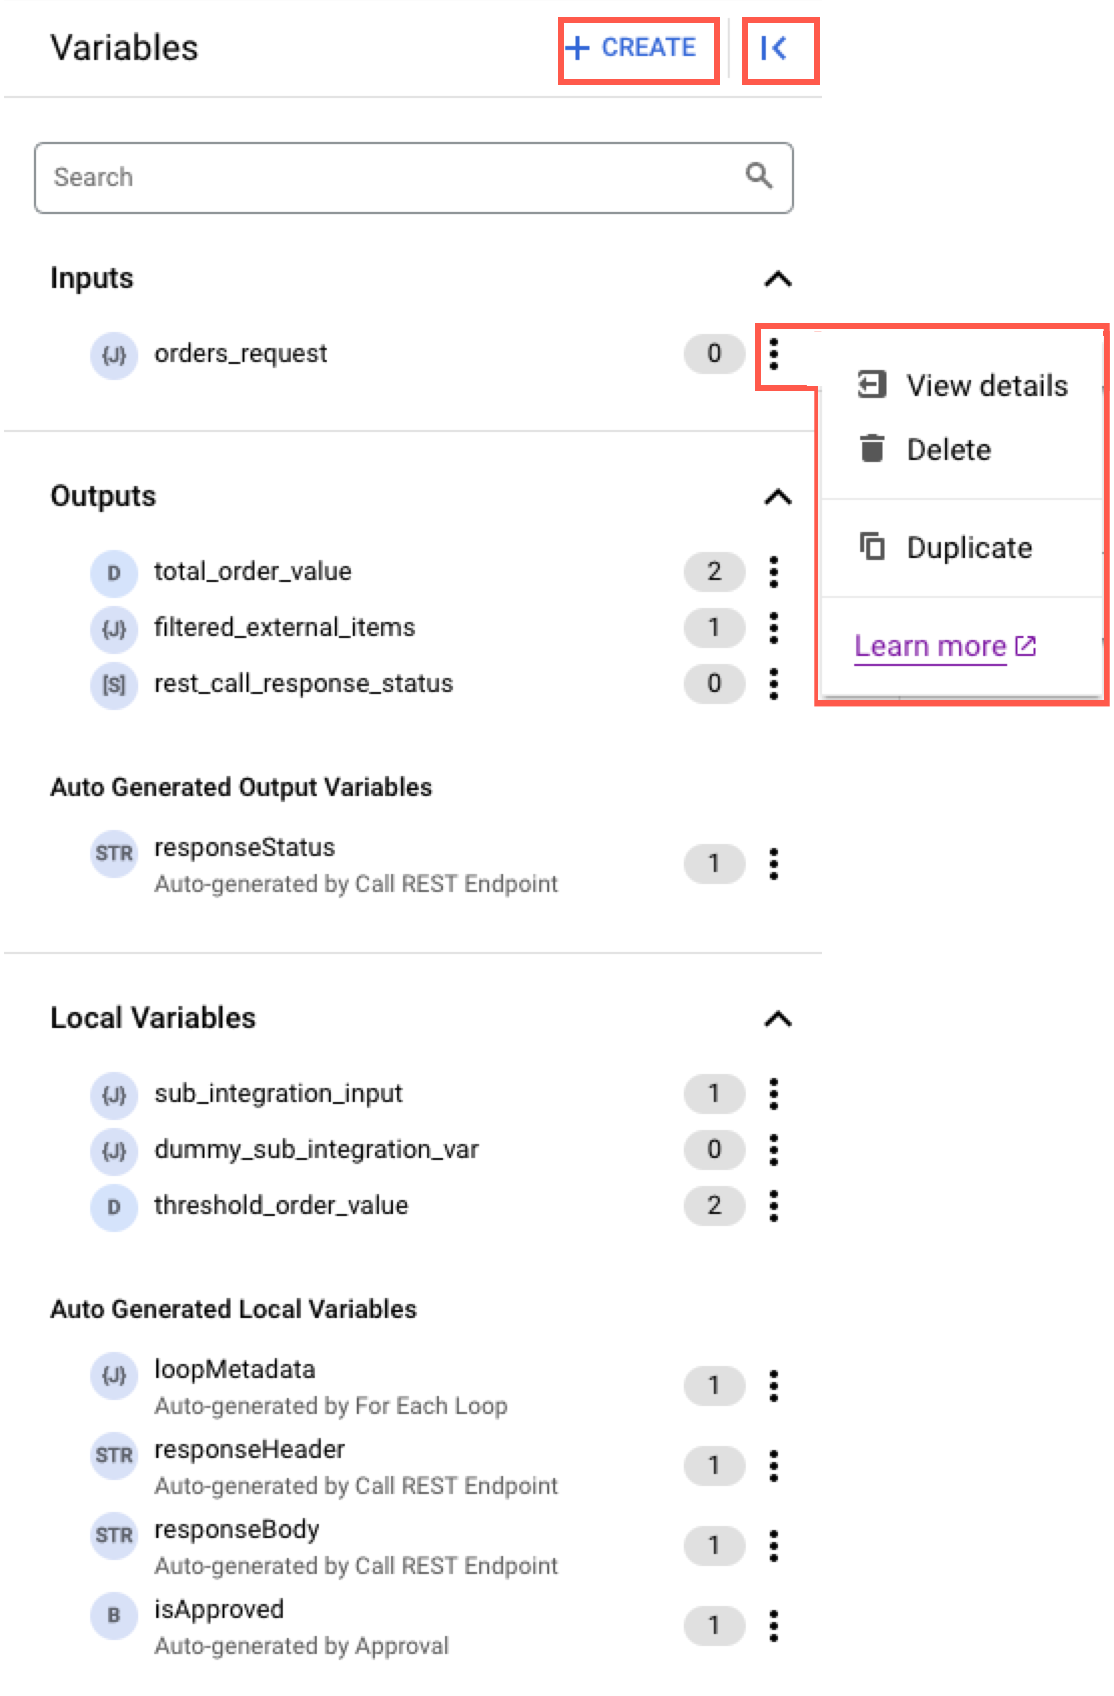
Im Bereich Variablen werden alle Integrationsvariablen und Aufgabenvariablen aufgelistet, die in der Integration verfügbar sind. Außerdem wird die Anzahl der Variablenreferenzen insgesamt innerhalb der Integration angezeigt.
Um Aktionen wie das Löschen oder Duplizieren einer Variablen auszuführen, klicken Sie neben der entsprechenden Variable auf
more_vert
(Aktionsmenü).
Weitere Informationen zu Variablen finden Sie unter Variablen.
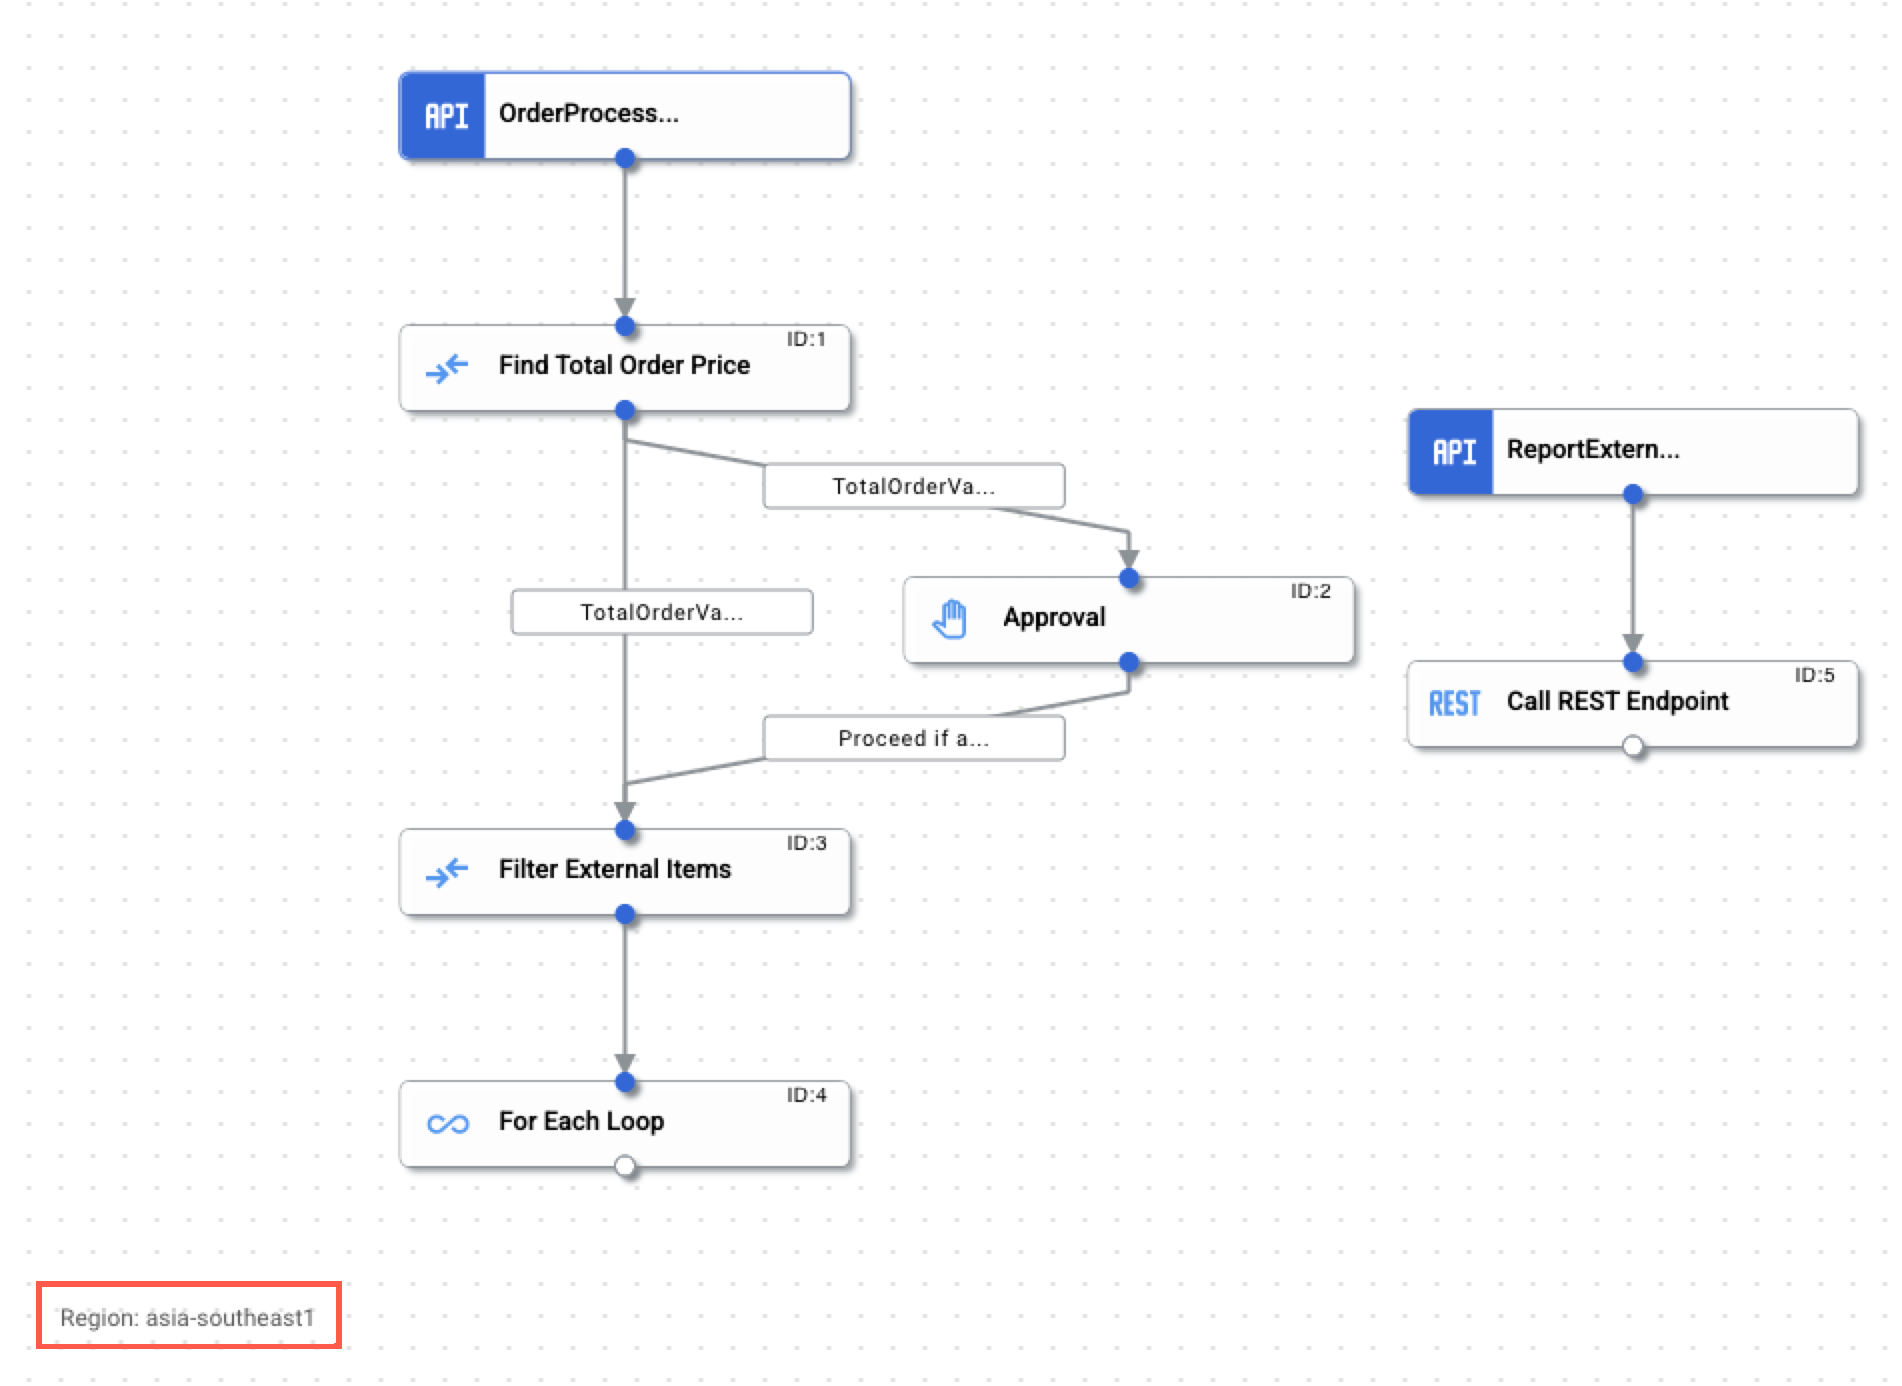
Canvas „Designer“
Der Canvas „Designer“ ist der Hintergrund, in dem Sie den Integrationsablauf entwerfen und entwickeln können.
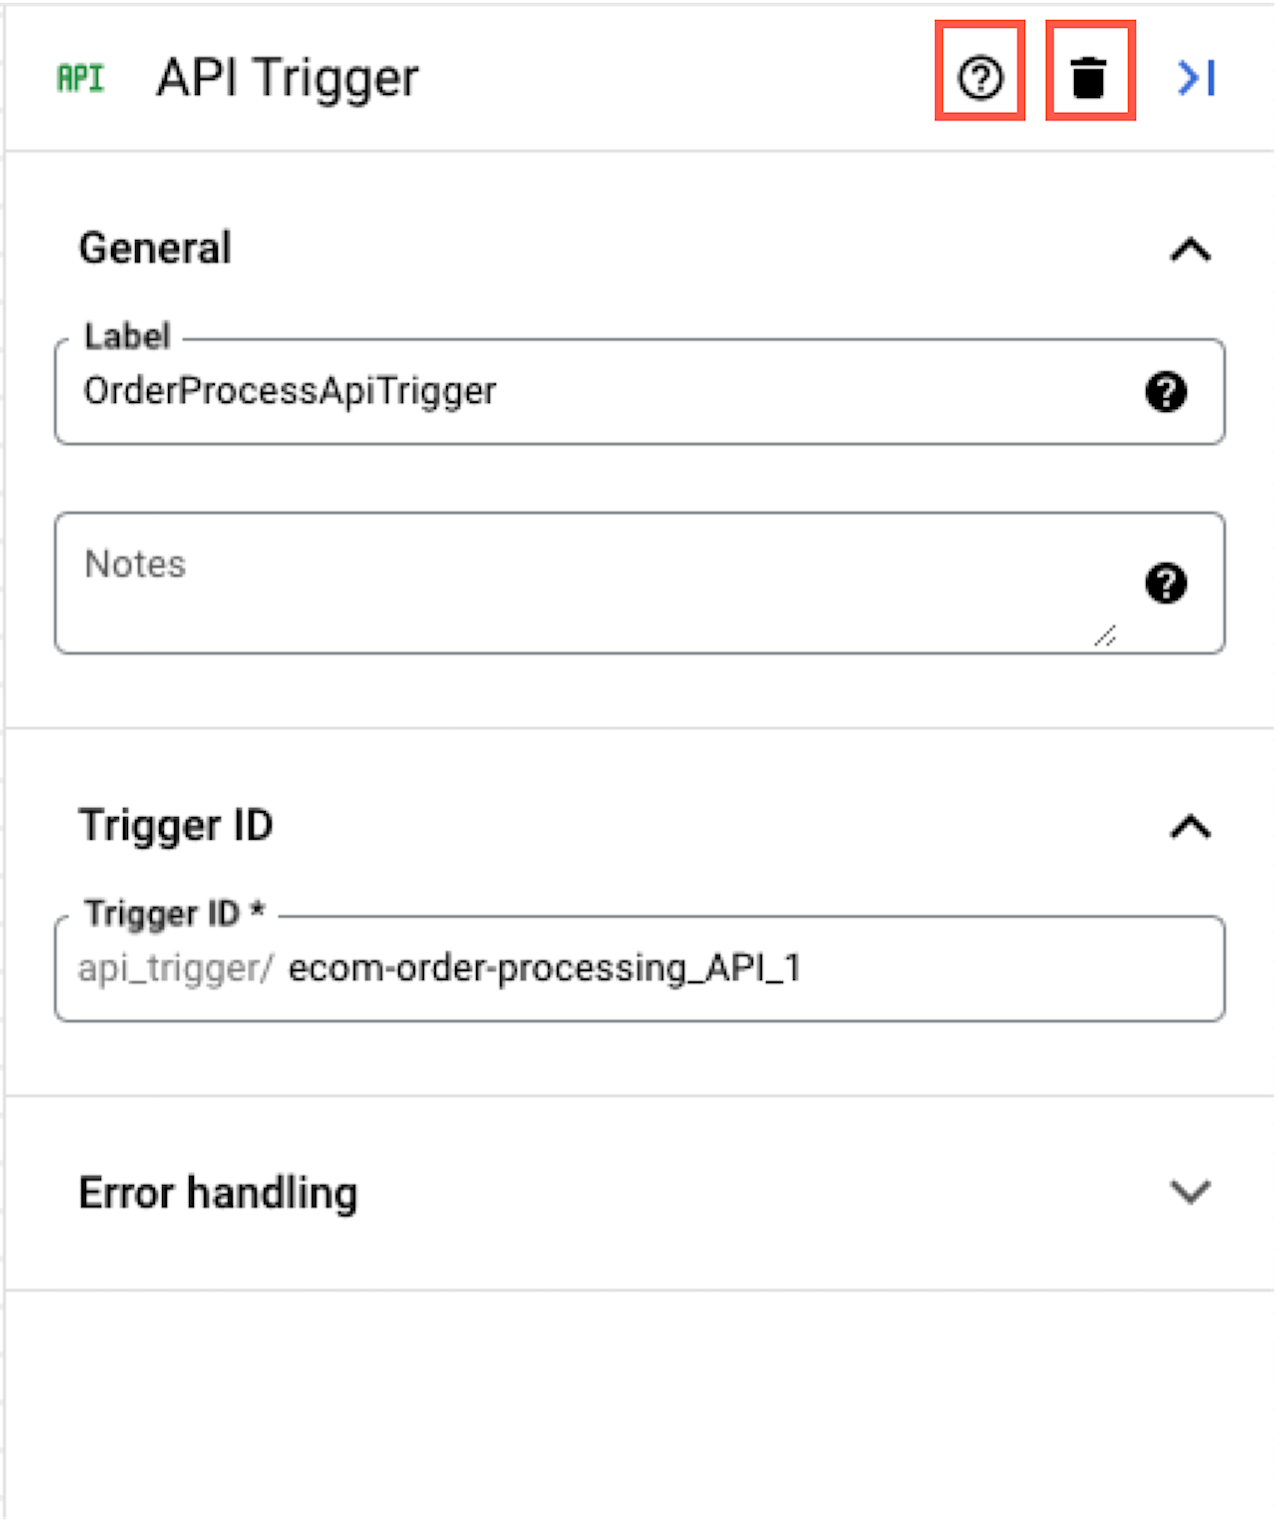
Konfigurationsbereich
Im Konfigurationsbereich werden die Konfigurationseinstellungen für jeden Trigger und die Aufgaben angezeigt, die in Ihrem Canvas „Designer“ hinzugefügt werden.
Informationen zum Konfigurieren eines Triggers oder einer Aufgabe finden Sie unter Trigger und Aufgaben.
[[["Leicht verständlich","easyToUnderstand","thumb-up"],["Mein Problem wurde gelöst","solvedMyProblem","thumb-up"],["Sonstiges","otherUp","thumb-up"]],[["Schwer verständlich","hardToUnderstand","thumb-down"],["Informationen oder Beispielcode falsch","incorrectInformationOrSampleCode","thumb-down"],["Benötigte Informationen/Beispiele nicht gefunden","missingTheInformationSamplesINeed","thumb-down"],["Problem mit der Übersetzung","translationIssue","thumb-down"],["Sonstiges","otherDown","thumb-down"]],["Zuletzt aktualisiert: 2025-09-01 (UTC)."],[[["\u003cp\u003eThe Integration editor is a drag-and-drop interface for designing, developing, modifying, and running integrations with minimal coding.\u003c/p\u003e\n"],["\u003cp\u003eApplication Integration offers built-in triggers and tasks that can be connected via edges to rapidly create integrations, and edges indicate the flow of control between elements.\u003c/p\u003e\n"],["\u003cp\u003eThe Integration editor is accessible from the Application Integration page in the Google Cloud console, either by selecting an existing integration or creating a new one.\u003c/p\u003e\n"],["\u003cp\u003eThe Integration editor's layout includes a toolbar, navigation bar, variables pane, designer canvas, and configuration pane, each serving distinct purposes in the integration design process.\u003c/p\u003e\n"],["\u003cp\u003eThe editor allows you to view connectors, execution logs and monitoring dashboard and also perform actions like cloning, downloading and uploading, and deleting integrations.\u003c/p\u003e\n"]]],[],null,["# Explore the Integration editor layout\n\nSee the [supported connectors](/integration-connectors/docs/connector-reference-overview) for Application Integration.\n\nExplore the Integration editor layout\n=====================================\n\nThe *Integration editor* is a drag-and-drop interface that lets you design and develop your entire integration flow\nwith little or no code. You can create, modify, and run all your integrations in the *Integration editor* . Overall, you can think of the *Integration editor* as a unified workspace for managing your integration.\n\n\nApplication Integration provides out-of-the-box\n[triggers](/application-integration/docs/trigger-overview) and\n[tasks](/application-integration/docs/task-overview) to further assist you in rapid\ndevelopment of your integration. Every task or trigger element is connected using an\n[edge](/application-integration/docs/edge-overview) along with its respective\n[fork and join](/application-integration/docs/forks-joins).\nEdges also indicate the flow of control from one task/trigger to another. For information on specifying conditions for edges and tasks, see\n[Edge conditions](/application-integration/docs/edge-overview#edge_condition).\n\nOpen integration editor\n-----------------------\n\n\nTo open your integration in the *Integration editor*, do the following:\n\n1. In the Google Cloud console, go to the **Application Integration** page.\n\n [Go to Application Integration](https://console.cloud.google.com/integrations)\n2. Click **Integrations** from the left navigation menu to open the **Integrations** page.\n3. Select an existing integration or create a new integration by clicking **Create integration** .\n\n\n If you are creating a new integration:\n 1. Enter a name and description in the **Create Integration** dialog.\n 2. Select a region for the integration. **Note:** The **Regions** dropdown only lists the regions provisioned in your Google Cloud project. To provision a new region, Click **Enable Region** . See [Enable new region](/application-integration/docs/enable-new-region) for more information.\n 3. Click **Create** . The newly created integration opens in the *integration editor*.\n\n\nExplore integration editor layout\n---------------------------------\n\nThe following figure shows a sample layout of the *Integration editor*.\n\n\nThe following table describes the different sections that comprise the integration editor:\n\nWhat's next\n-----------\n\n- Start a [quickstart](/application-integration/docs/quickstarts).\n- Learn about the [canvas view](/application-integration/docs/canvas-view).\n- Get a deeper understanding of the fundamental Application Integration [concepts](/application-integration/docs/concepts).\n- Learn how to add and configure the available [triggers and tasks](/application-integration/docs/all-triggers-tasks)."]]