Manage integrations
You can modify an integration by configuring tasks, triggers, or edge connections. You can also update the integration details, such as modifying the setting for masking variables in logs, Cloud Logging, local logging, and updating the service account and the description of your integration.
Integration edit locks
Integrations are design time entities that are often developed in collaboration with multiple authors. Although an integration can only be actively edited by one author at a time, teams can collaborate on an integration and track changes in state through its versions.
You can edit only a DRAFT version of the integration, and execute only the ACTIVE version of the integration. For information about different integration versions, see Integration versions.
When you open an integration, you might find a message similar to the following in the integration editor:
- If you open the integration that is being edited by another user, the following message appears in the integration editor because only one user can update the integration at a given time:
test-user@gmail.com is currently editing the integration. Edit features are temporarily disabled.
To edit the integration, click Take Over. A new version in the
DRAFTstate is created in the integration for you and the editing capability is disabled for the other users. The following figure shows the edit lock in the integration editor.
-
If you open a published integration, then the integration version is in the
ACTIVEstate. To edit the integration, click Enable Editing. A new version is created with theDRAFTstate.This version is currently active. Editing features are disabled.
To edit the integration, click Enable Editing. A new version in the
DRAFTstate is created in the integration for you. The following figure shows the edit lock in the integration editor.
Edit an integration
To view and edit an integration flow, follow these steps:
- In the Google Cloud console, go to the Application Integration page.
- In the navigation menu, click Integrations.
The Integrations page appears, listing all the integrations available in the Google Cloud project.
- Click the integration that you want to edit. This opens the integration in the integration editor.
If the integration is not in
DRAFTstate, then the integration is locked for editing. For information about edit locks, see Integration edit locks.
Delete integrations
To delete an integration, perform the following steps:
- In the Google Cloud console, go to the Application Integration page.
- Click Integrations from the left navigation menu to open the Integrations page.
- Do any one of the following steps in the Integrations List page:
- For the existing integration that you want to delete, click Actions.
- Select Delete in the drop-down menu.
A confirmation dialog appears.
- Click the existing integration that you want to delete.
This opens the integration in the integration editor.
- In the designer toolbar, click (Actions menu) and select Clone integration > Delete all versions.
A confirmation dialog appears.
- Click Delete to permanently delete the integration.
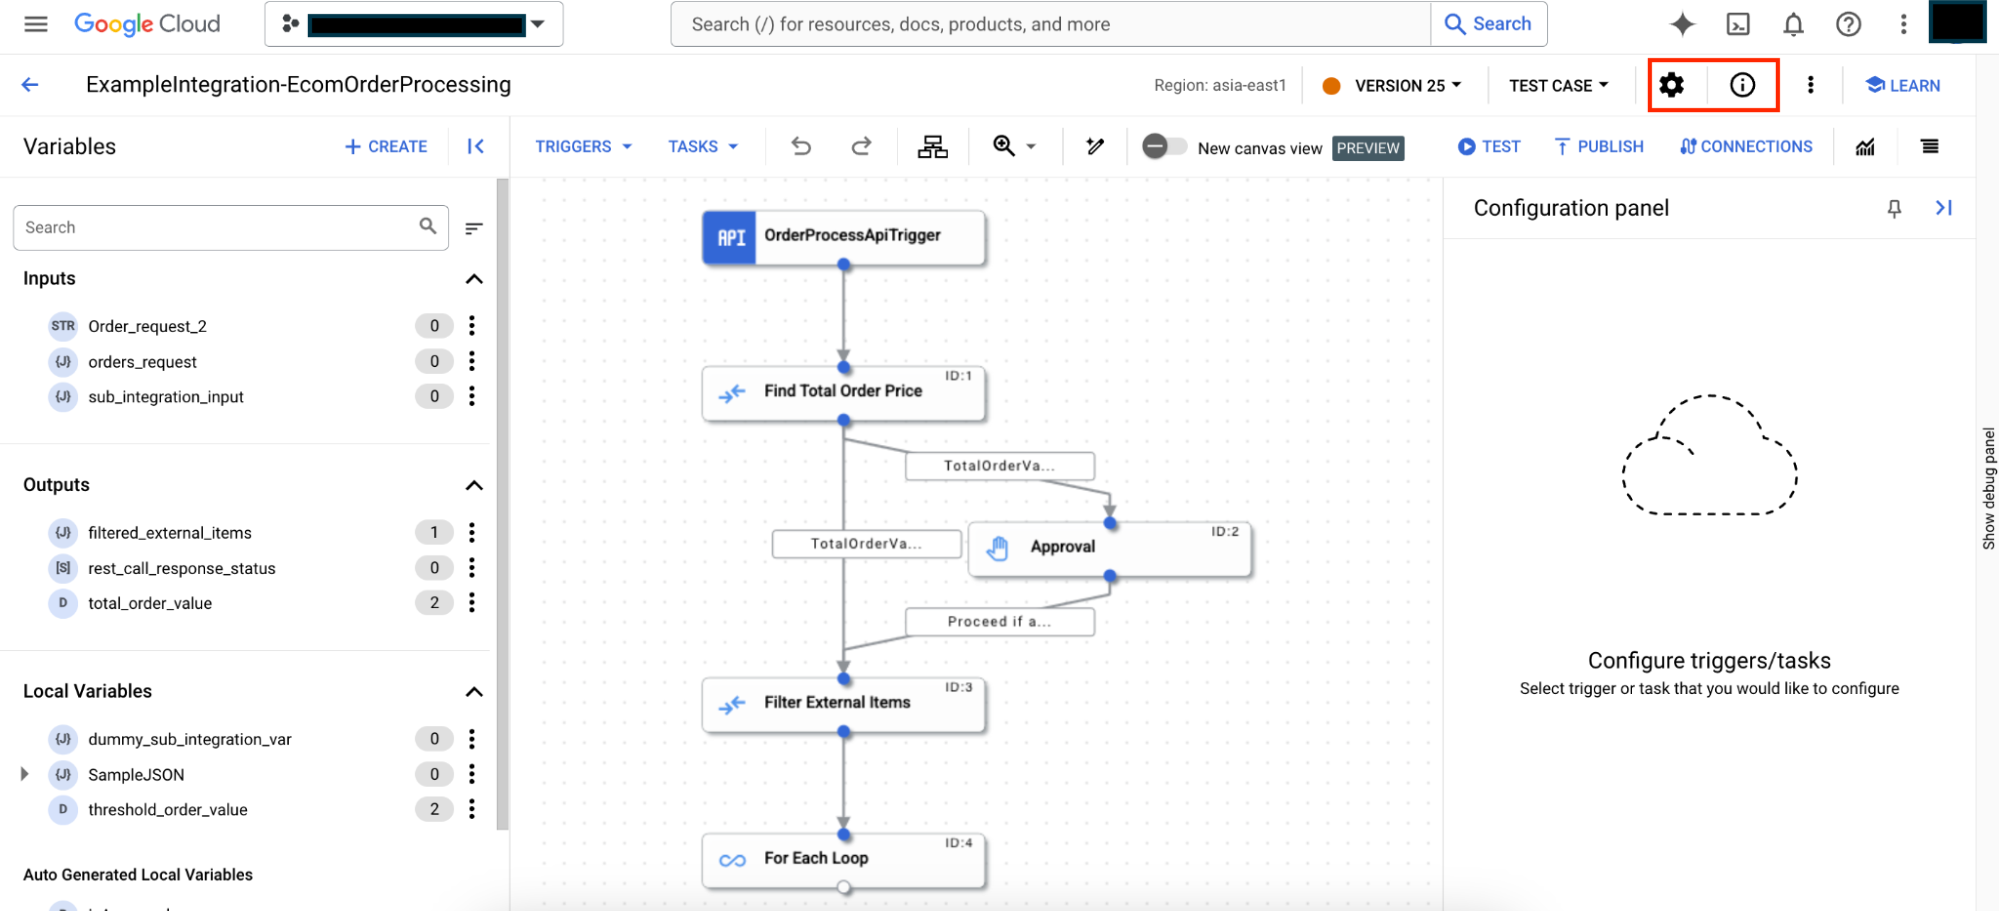
Manage integration details
You can view the integration summary and update settings for your integration. The following image shows the Integration settings and Integration information icons on the Application Integration editor toolbar:
View integration details
To view the details of an integration, open the integration in the integration editor and click (Integration information) in the designer toolbar. The following image shows the integration details:


The integration summary includes the following information:
- Integration name: The name of the integration.
- Version: The current version of the integration along with the version name (if any). For information about versioning, see Versions.
- Publish status: The publish status of the current version of the integration; Published or Unpublished.
- Total versions: The count of the total number of integration versions created for the integration.
- Last modified: The date and time when the current integration version was last edited or modified.
- Last modified by The name of the user who last edited or modified the integration version.
- Region: The regional location where the integration was created.
- Description: The integration description. To generate integration description using Gemini, see Build integrations with Gemini Code Assist.
Edit integration details
To edit the details of an integration, open the integration in the integration editor and click (Integration settings) in the designer toolbar. The following image shows the Integration Settings pane:
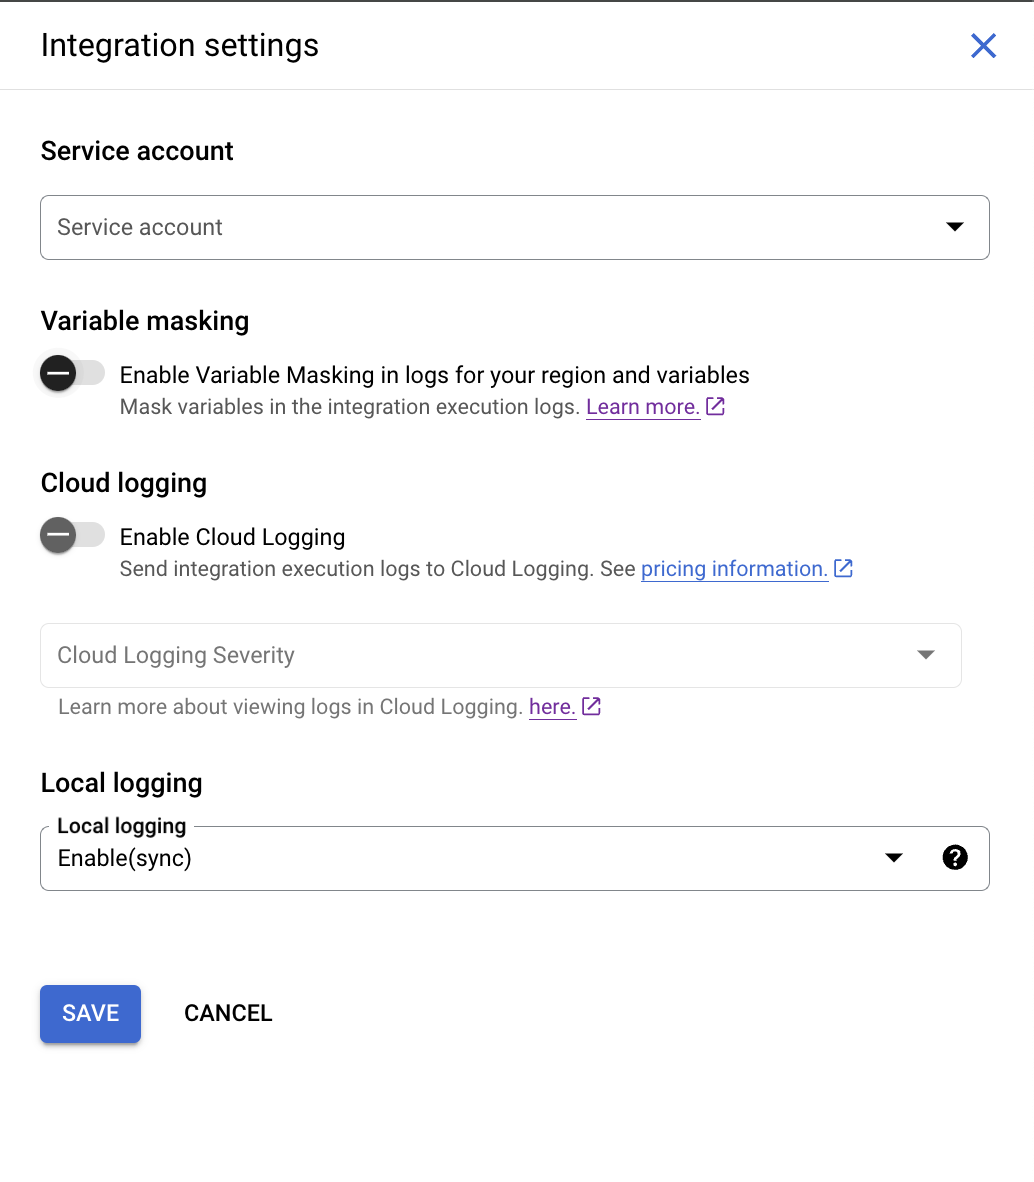
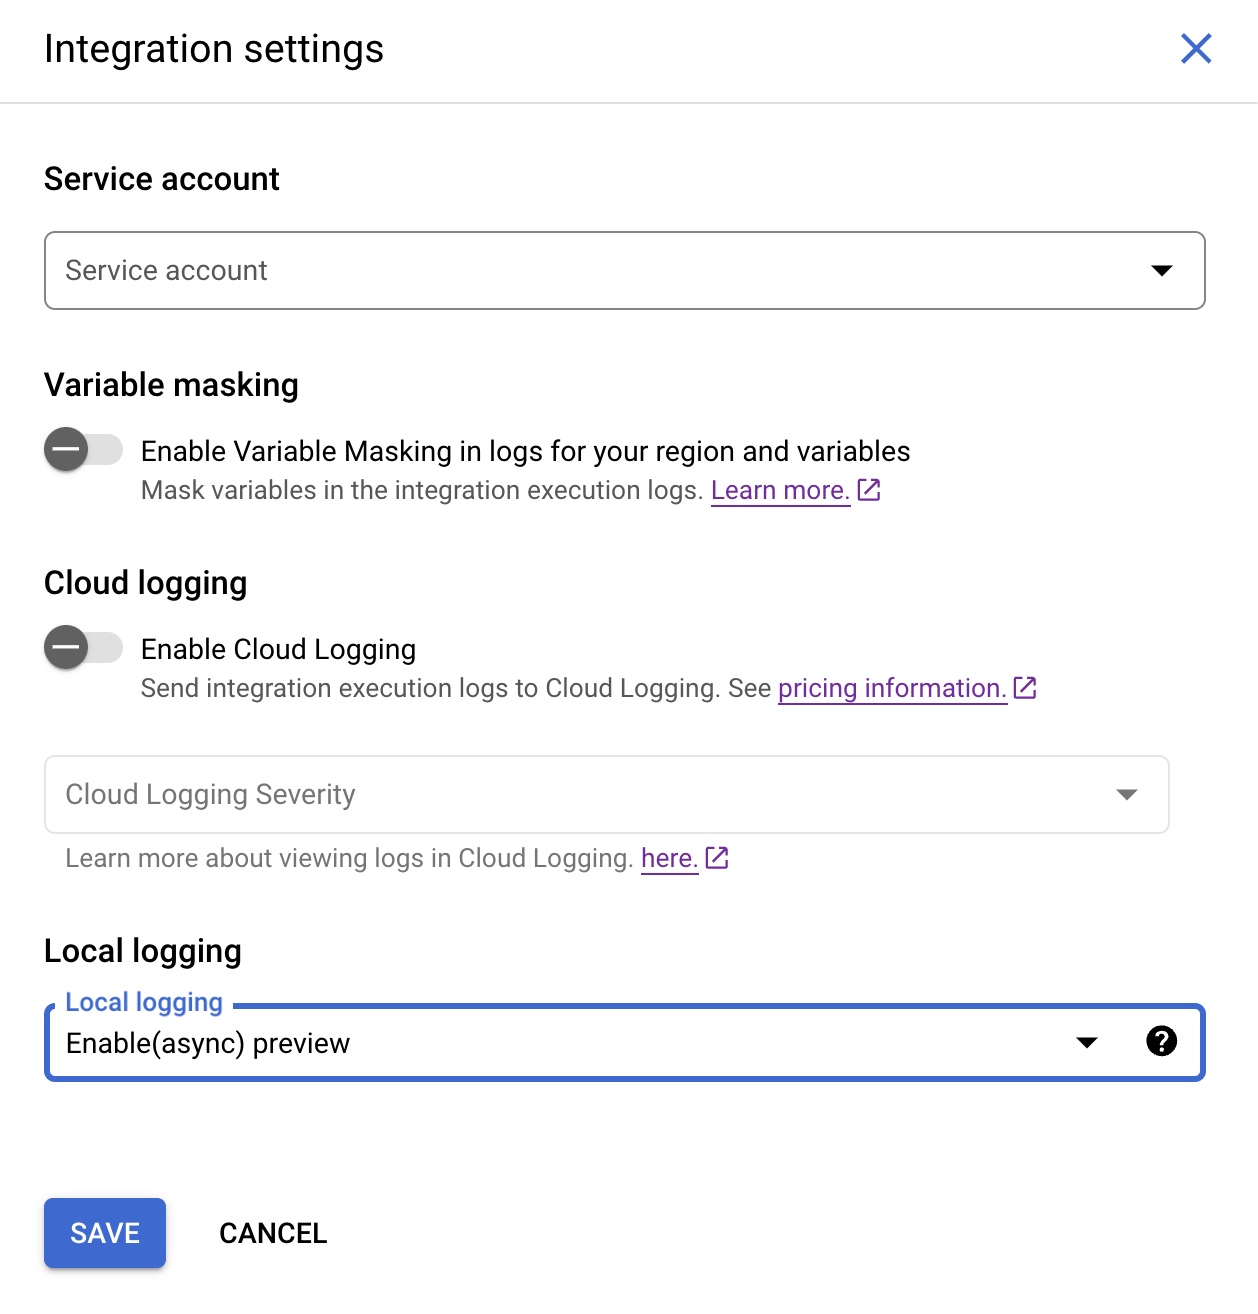
The integration summary includes the following information:
- Service account: The service account attached to the integration.
- Enable Variable Masking in logs (preview): The setting to enable masking of variables in the integration execution logs. If you enable masking for your integration, ensure that you have also enabled masking at the region and the variable levels.
For information about masking, see Mask sensitive data in logs.
- Enable Cloud Logging: The setting to enable or disable Cloud Logging. For more information, see View logs in Cloud Logging.
- Local logging: The setting to enable or disable saving integration's data or metadata during its execution. By default, local logging is set to Enable(async). In this mode, the integration takes a relatively lesser time to execute when compared to the Enable(sync) mode, because Application Integration writes the log data asynchronously during the integration execution. However, this mode doesn't guarantee the generation of logs for all the executions. In rare cases–such as a physical server failure–it's possible that logs aren't generated for an integration execution. For more information, see Local logging.
What's next
- Learn how to test and publish integrations.
- Learn how to create an integration.
- Learn how to clone integrations.
- Learn about logs in Application Integration.