Informationen zu den unterstützten Connectors für Application Integration.
Edges und Edge-Bedingungen
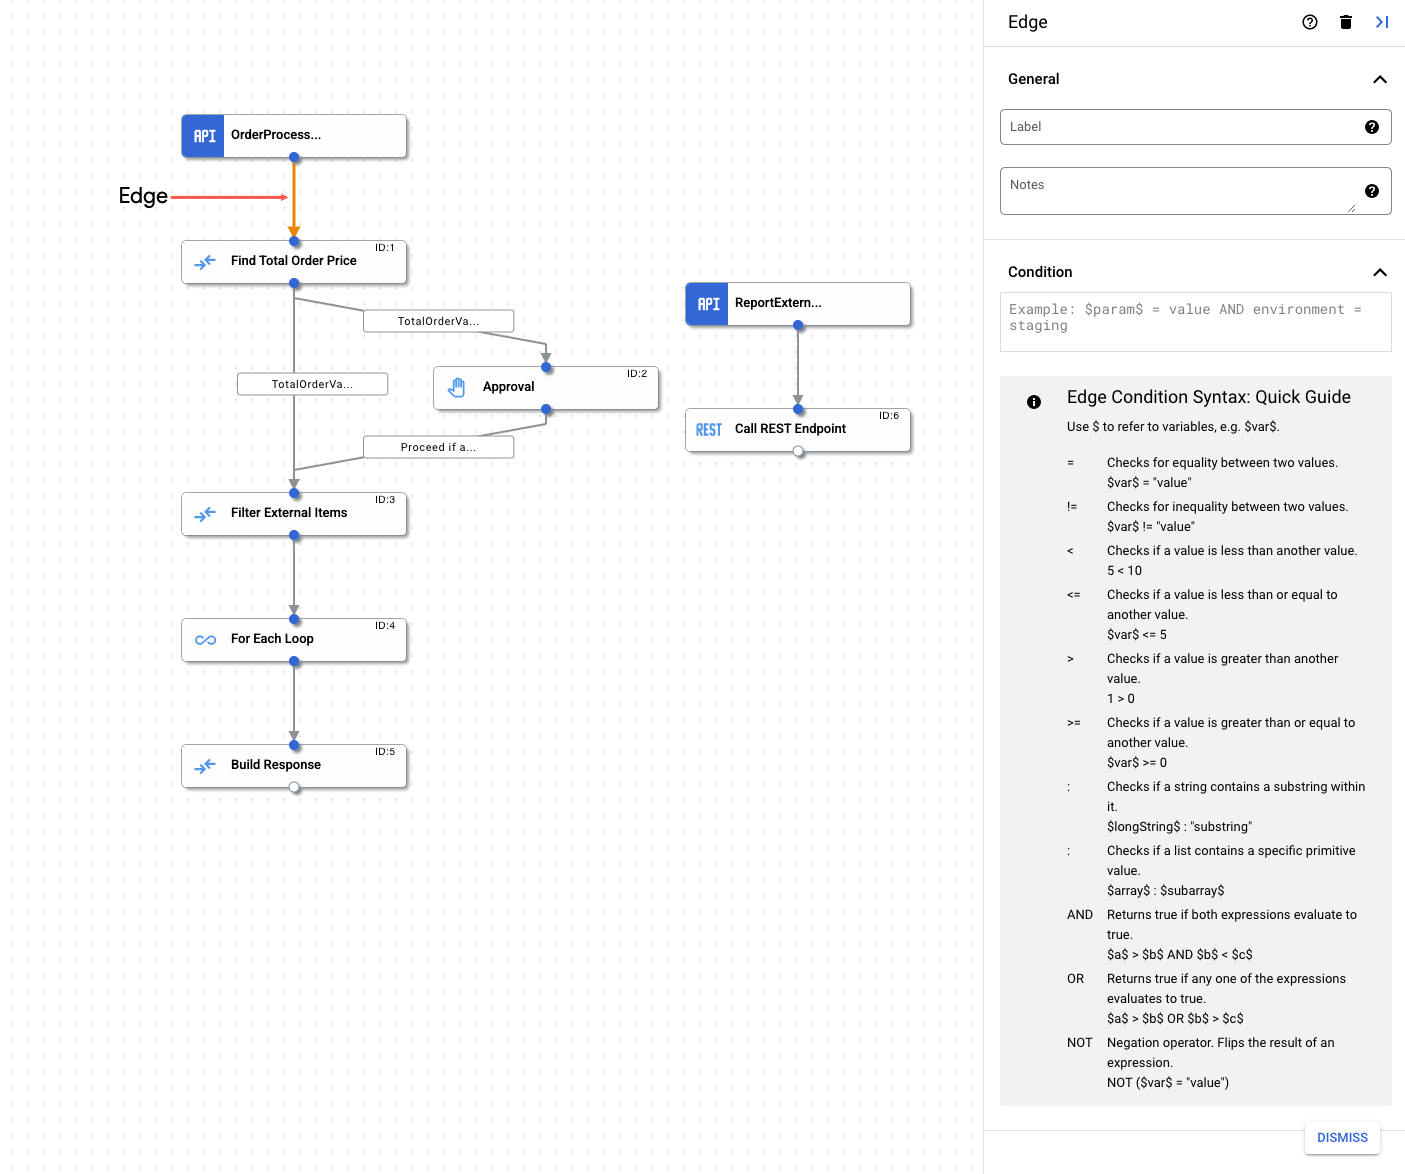
Edge
Ein Edge ist eine Verbindung zwischen zwei Elementen in einer Integration. Die Verbindung gibt die Richtung des Steuerungsablaufs von einem Element(Aufgabe oder Trigger) zu einem anderen an. Die Verbindung kann zwischen einem Trigger und einer Aufgabe oder zwischen einer Aufgabe und einer anderen Aufgabe bestehen. Durch die Verwendung eines Edge-Netzwerks zusammen mit einem Fork und Join können Sie komplexe Verzweigungen und Bedingungen in Ihre Integration implementieren. Weitere Informationen finden Sie unter Forks und Joins.
Wenn beispielsweise ein Edge von der Aufgabe E-Mail senden zur Aufgabe Integration aufrufen vorhanden ist, bedeutet dies, dass nach der Ausführung der Aufgabe E-Mail senden die Aufgabe Integration aufrufen ausgeführt wird. Edge unterstützt auch bedingte Prüfungen. Bevor das Steuerelement zur nächsten Aufgabe weitergeleitet wird, können Sie nach einer Bedingung im Edge-Netzwerk suchen und anhand des Ergebnisses entscheiden, ob die Aufgabe ausgeführt wird oder nicht. Weitere Informationen zu den unterstützten bedingten Prüfungen finden Sie unter Edge-Bedingungen.


Edge-Bedingungen
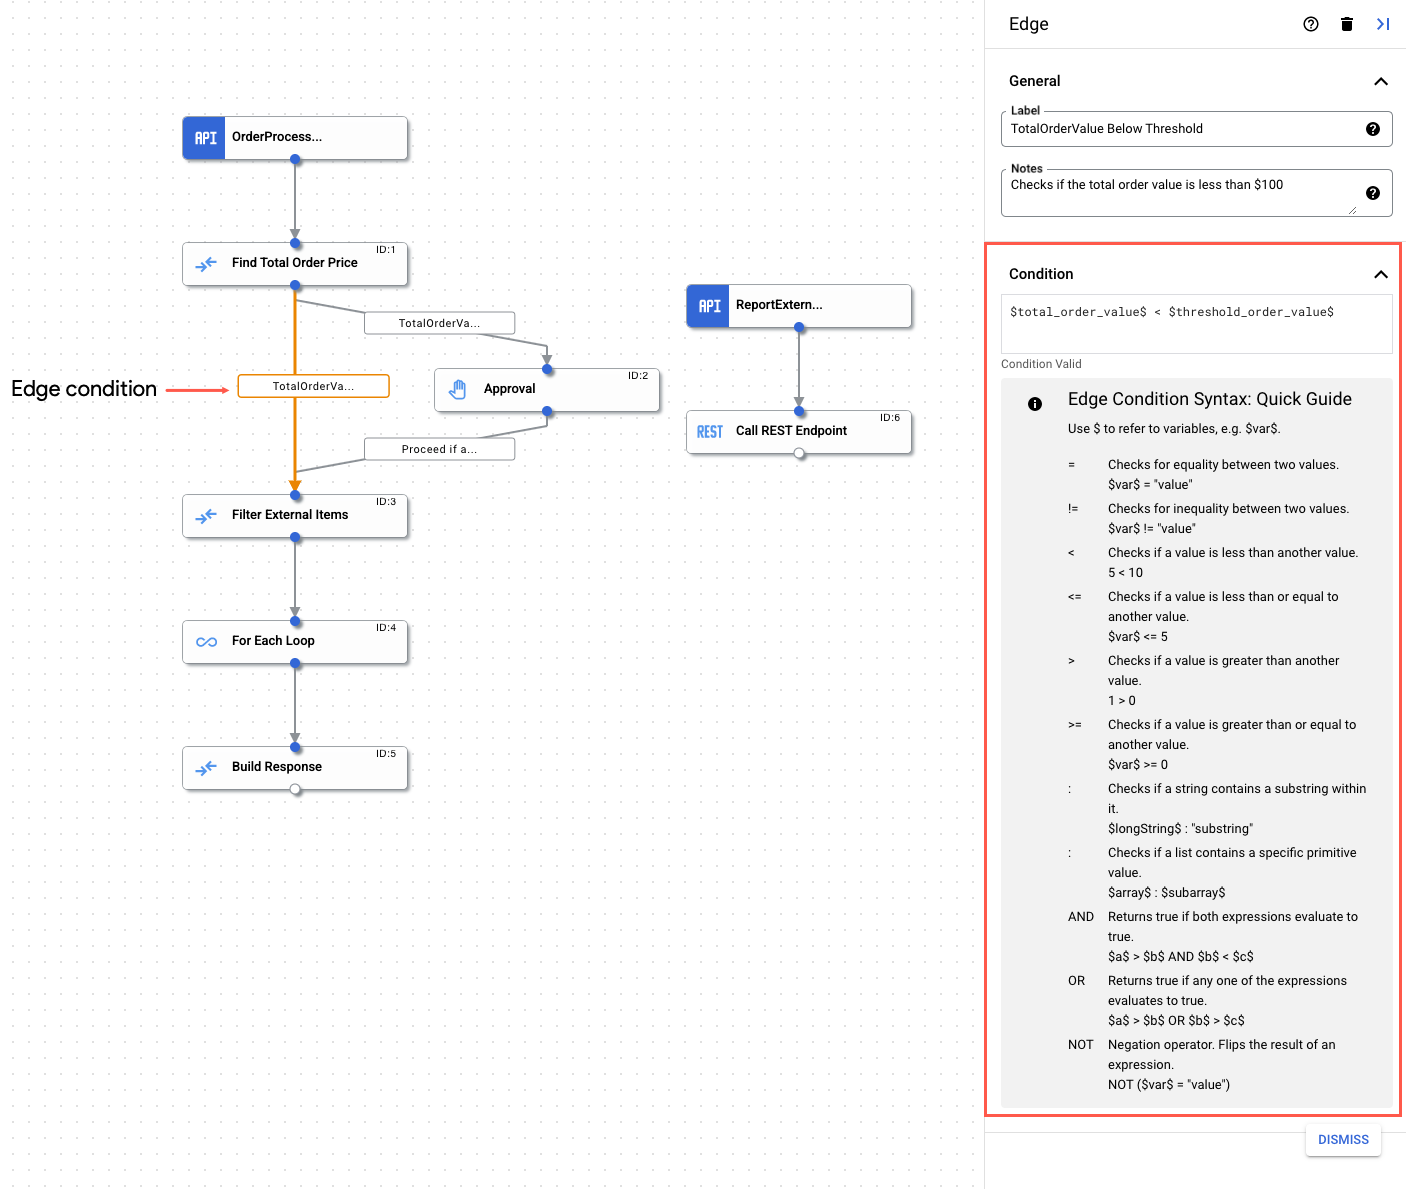
Mit Edge-Bedingungen können Sie die Bedingungen angeben, die erfüllt sein müssen, damit die Steuerung über eine Integration an die durch die Edge verbundene Aufgabe übergeben wird. Die Aufgabe wird nur dann ausgeführt, wenn die angegebenen Bedingungen erfüllt sind. Edge-Bedingungen sind in Fällen nützlich, in denen es mehrere eingehende Edges für eine Aufgabe gibt, wobei jede Edge vor der Aufgabenerfüllung auf bestimmte Bedingungen prüft.
Führen Sie die folgenden Schritte aus, um Edge-Bedingungen anzugeben:
- Rufen Sie in der Google Cloud Console die Seite Application Integration auf.
- Klicken Sie im Navigationsmenü auf Integrationen.
Die Seite Integrationen wird angezeigt. Dort sind alle Integrationen aufgeführt, die im Google Cloud-Projekt verfügbar sind.
- Wählen Sie eine vorhandene Integration aus oder klicken Sie auf Integration erstellen, um eine neue zu erstellen.
Wenn Sie eine neue Integration erstellen, gehen Sie so vor:
- Geben Sie im Bereich Integration erstellen einen Namen und eine Beschreibung ein.
- Wählen Sie eine Region für die Integration aus.
- Wählen Sie ein Dienstkonto für die Integration aus. Sie können die Details des Dienstkontos einer Integration jederzeit im Bereich Integrationsübersicht in der Symbolleiste für Integrationen ändern oder aktualisieren.
- Klicken Sie auf Erstellen. Die neu erstellte Integration wird im Integrationseditor geöffnet.
- Klicken Sie in der Navigationsleiste des Integrationseditors auf Aufgaben, um eine Liste der verfügbaren Aufgaben und Verbindungen aufzurufen.
- Wählen Sie eine Integration aus oder erstellen Sie eine
- Klicken Sie im Integrationseditor auf den Edge-Punkt, um den Edge-Konfigurationsbereich zu öffnen.
- Edge konfigurieren:
- Label (optional): Fügen Sie einen benutzerdefinierten Namen für das Edge hinzu.
- Bedingung: Legen Sie mithilfe der unterstützten Operatoren und Funktionen eine Edge-Bedingung fest.


Unterstützte Operatoren
In der folgenden Tabelle werden die für Edge-Bedingungen unterstützten Operatoren beschrieben.
| Operator | Beschreibung | Beispiel |
| = | Prüft zwei Werte auf Gleichheit | $var$ = "value" |
| != | Prüft zwei Werte auf Ungleichheit | $var$ != "value" |
| < | Prüft, ob ein Wert kleiner als ein anderer Wert ist | 5 < 10 |
| <= | Prüft, ob ein Wert kleiner oder gleich einem anderen Wert ist | $var$ <= 5 |
| > | Prüft, ob ein Wert größer als ein anderer Wert ist | 1 > 0 |
| >= | Prüft, ob ein Wert größer oder gleich einem anderen Wert ist | $var$ >= 0 |
| : | Prüft, ob ein String einen Teilstring enthält, oder prüft, ob eine Liste einen bestimmten einfachen Wert enthält |
|
| UND | Prüft zwei Ausdrücke und gibt "true" zurück, wenn beide Ausdrücke als wahr ausgewertet werden. | $a$ > $b$ AND $b$ < $c$ |
| ODER | Prüft zwei Ausdrücke und gibt "true" zurück, wenn einer der Ausdrücke als wahr ausgewertet wird. | $a$ > $b$ OR $b$ < $c$ |
| NOT | Negationsoperator. Spiegelt das Ergebnis eines Ausdrucks. | NOT($var$ = "value") |
Unterstützte Funktionen
In der folgenden Tabelle werden die unterstützten Funktionen beschrieben, die für die Verwendung in Edge-Bedingungen verfügbar sind.
| Funktion | Beschreibung |
exists(VARIABLE)
|
Prüft, ob eine bestimmte Variable vorhanden ist |
does_not_exist(VARIABLE)
|
Prüft, ob eine bestimmte Variable nicht vorhanden ist |
is_empty(VARIABLE)
|
Prüft, ob eine bestimmte Variable eine Liste ist UND leer ist. Unterstützt Arrayvariablentypen mit Ausnahme von JSON-Arrays. |
is_not_empty(VARIABLE)
|
Prüft, ob eine bestimmte Variable eine Liste ist UND nicht leer ist. Unterstützt Arrayvariablentypen mit Ausnahme von JSON-Arrays. |
Kontingente und Limits
Weitere Informationen zu allen Kontingenten und Limits finden Sie unter Kontingente und Limits.
Nächste Schritte
- Alle Aufgaben und Trigger.
- Hier erfahren Sie, wie Sie eine Integration testen und veröffentlichen.
- Weitere Informationen zur Fehlerbehandlung.
- Weitere Informationen zu Ausführungslogs der Integration.

