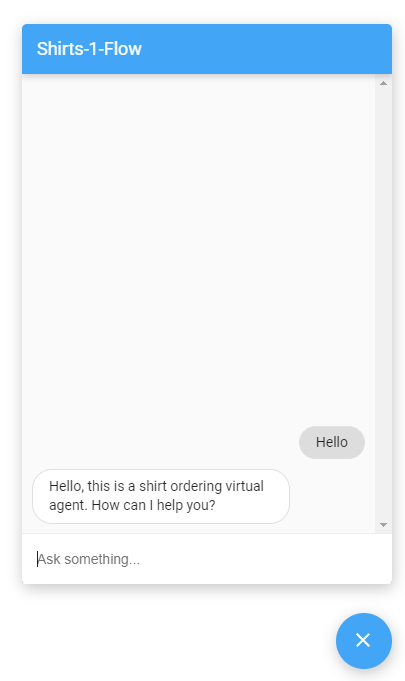
[[["易于理解","easyToUnderstand","thumb-up"],["解决了我的问题","solvedMyProblem","thumb-up"],["其他","otherUp","thumb-up"]],[["很难理解","hardToUnderstand","thumb-down"],["信息或示例代码不正确","incorrectInformationOrSampleCode","thumb-down"],["没有我需要的信息/示例","missingTheInformationSamplesINeed","thumb-down"],["翻译问题","translationIssue","thumb-down"],["其他","otherDown","thumb-down"]],["最后更新时间 (UTC):2025-08-18。"],[[["\u003cp\u003eThis guide details how to use the Dialogflow CX Messenger integration to create a text-based chat interface for your agent.\u003c/p\u003e\n"],["\u003cp\u003eSetting up the integration requires you to have already completed agent setup, flow basics, and general setup steps, and it also requires billing to be enabled.\u003c/p\u003e\n"],["\u003cp\u003eThe process involves navigating the Dialogflow CX console, selecting your agent, and configuring the Dialogflow CX Messenger integration for unauthenticated access.\u003c/p\u003e\n"],["\u003cp\u003eYou can embed the chat interface by pasting the provided HTML code into the \u003ccode\u003e<body>\u003c/code\u003e of your website, and modify some settings according to your preferences.\u003c/p\u003e\n"],["\u003cp\u003eOnce embedded, users can interact with the agent via a chat icon that will appear in the lower right corner of the page.\u003c/p\u003e\n"]]],[],null,["# Interactions with an integration\n\nWith an\n[integration](/dialogflow/cx/docs/concept/integration),\nend-user interactions are handled for you.\nYou just need to build an agent, optionally implement a webhook,\nand configure the integration.\n\nThis guide shows you how to use the\n[Dialogflow CX Messenger](/dialogflow/cx/docs/concept/integration/dialogflow-messenger)\nintegration to provide a simple text chat user interface\nfor your agent.\n\nBefore you begin\n----------------\n\nIf you don't plan on using an integration, you can skip this quickstart.\n\nYou should do the following before reading this guide:\n\n1. Read [flow basics](/dialogflow/cx/docs/basics).\n2. Perform [setup steps](/dialogflow/cx/docs/quick/setup).\n3. Perform steps in the [Build an agent using flows](/dialogflow/cx/docs/quick/build-agent) quickstart guide. Steps below continue working on the same agent. If you no longer have that agent, you can [download the agent](/static/dialogflow/cx/docs/data/agent-shirts-1-flow.zip) and [restore it](/dialogflow/cx/docs/concept/agent#export).\n\nSetup\n-----\n\n| **Note:** The steps below create an integration that allows unauthenticated agent query access. See the [Dialogflow CX Messenger documentation](/dialogflow/cx/docs/concept/integration/dialogflow-messenger) for instructions to create an authenticated integration.\n\n\n| **Note:** Make sure [billing is enabled](/dialogflow/cx/docs/quick/setup#billing) on your project before testing the integration.\n\nTo set up unauthenticated access to your Dialogflow CX Messenger agent:\n\n1. Go to the [Dialogflow CX console](https://dialogflow.cloud.google.com/cx/projects).\n2. Choose your Google Cloud project.\n3. Select your agent.\n4. Select the **Manage** tab.\n5. Click **Integrations** in the left sidebar menu.\n6. Click **Connect** on **Dialogflow CX Messenger**.\n7. A configuration dialog opens.\n8. If the integration was previously setup for this agent, you will see embeddable HTML code. Regardless of whether you want what authenticated or unauthenticated, click the **Disable...** button at the bottom of the dialog, so you can reconfigure the settings in the next step.\n9. Select an **Environment**.\n10. Select **Unauthenticated API**.\n11. Select a style.\n12. Optionally restrict domain access.\n13. Click **Enable the unauthenticated API**.\n14. The dialog will show the embeddable HTML code that can be embedded on your website. Copy this code.\n15. Click **Done**.\n\n\u003cbr /\u003e\n\nEmbed\n-----\n\n\nPaste the embed code you copied above in a webpage on your website.\nThe `\u003cscript\u003e` and `\u003cdf-messenger\u003e` HTML elements\nshould be in the `\u003cbody\u003e` element of your page.\n\nIf you are using an authenticated integration,\nset the `oauth-client-id` attribute for `\u003cdf-messenger\u003e`\nto your Oauth client id. And if you want to use end-users' identities for [tool\nauthentication](/dialogflow/cx/docs/concept/playbook/tool#openapi_tool_api_authentication),\nset the `access-token-name` attribute with any name you like.\nThen use Bearer Token with value `$session.params.`\u003cvar class=\"edit\" label=\"the access token name you set\" translate=\"no\"\u003eACCESS_TOKEN_NAME\u003c/var\u003e\nfor tool authentication.\n\nUpdate any other attributes that require updating.\n\nTo allow for responsive layouts,\nalso add the following to your `\u003chead\u003e` element: \n\n \u003cmeta name=\"viewport\" content=\"width=device-width, initial-scale=1\"\u003e\n\n\u003cbr /\u003e\n\nOnce embedded,\nyou can interact with your agent through the webpage\nby clicking the chat icon in the lower right corner.\n\nCustomize\n---------\n\nYou can customize the appearance and behavior of this user interface\nin many ways.\nSee the\n[Dialogflow CX Messenger documentation](/dialogflow/cx/docs/concept/integration/dialogflow-messenger)\nfor more information."]]