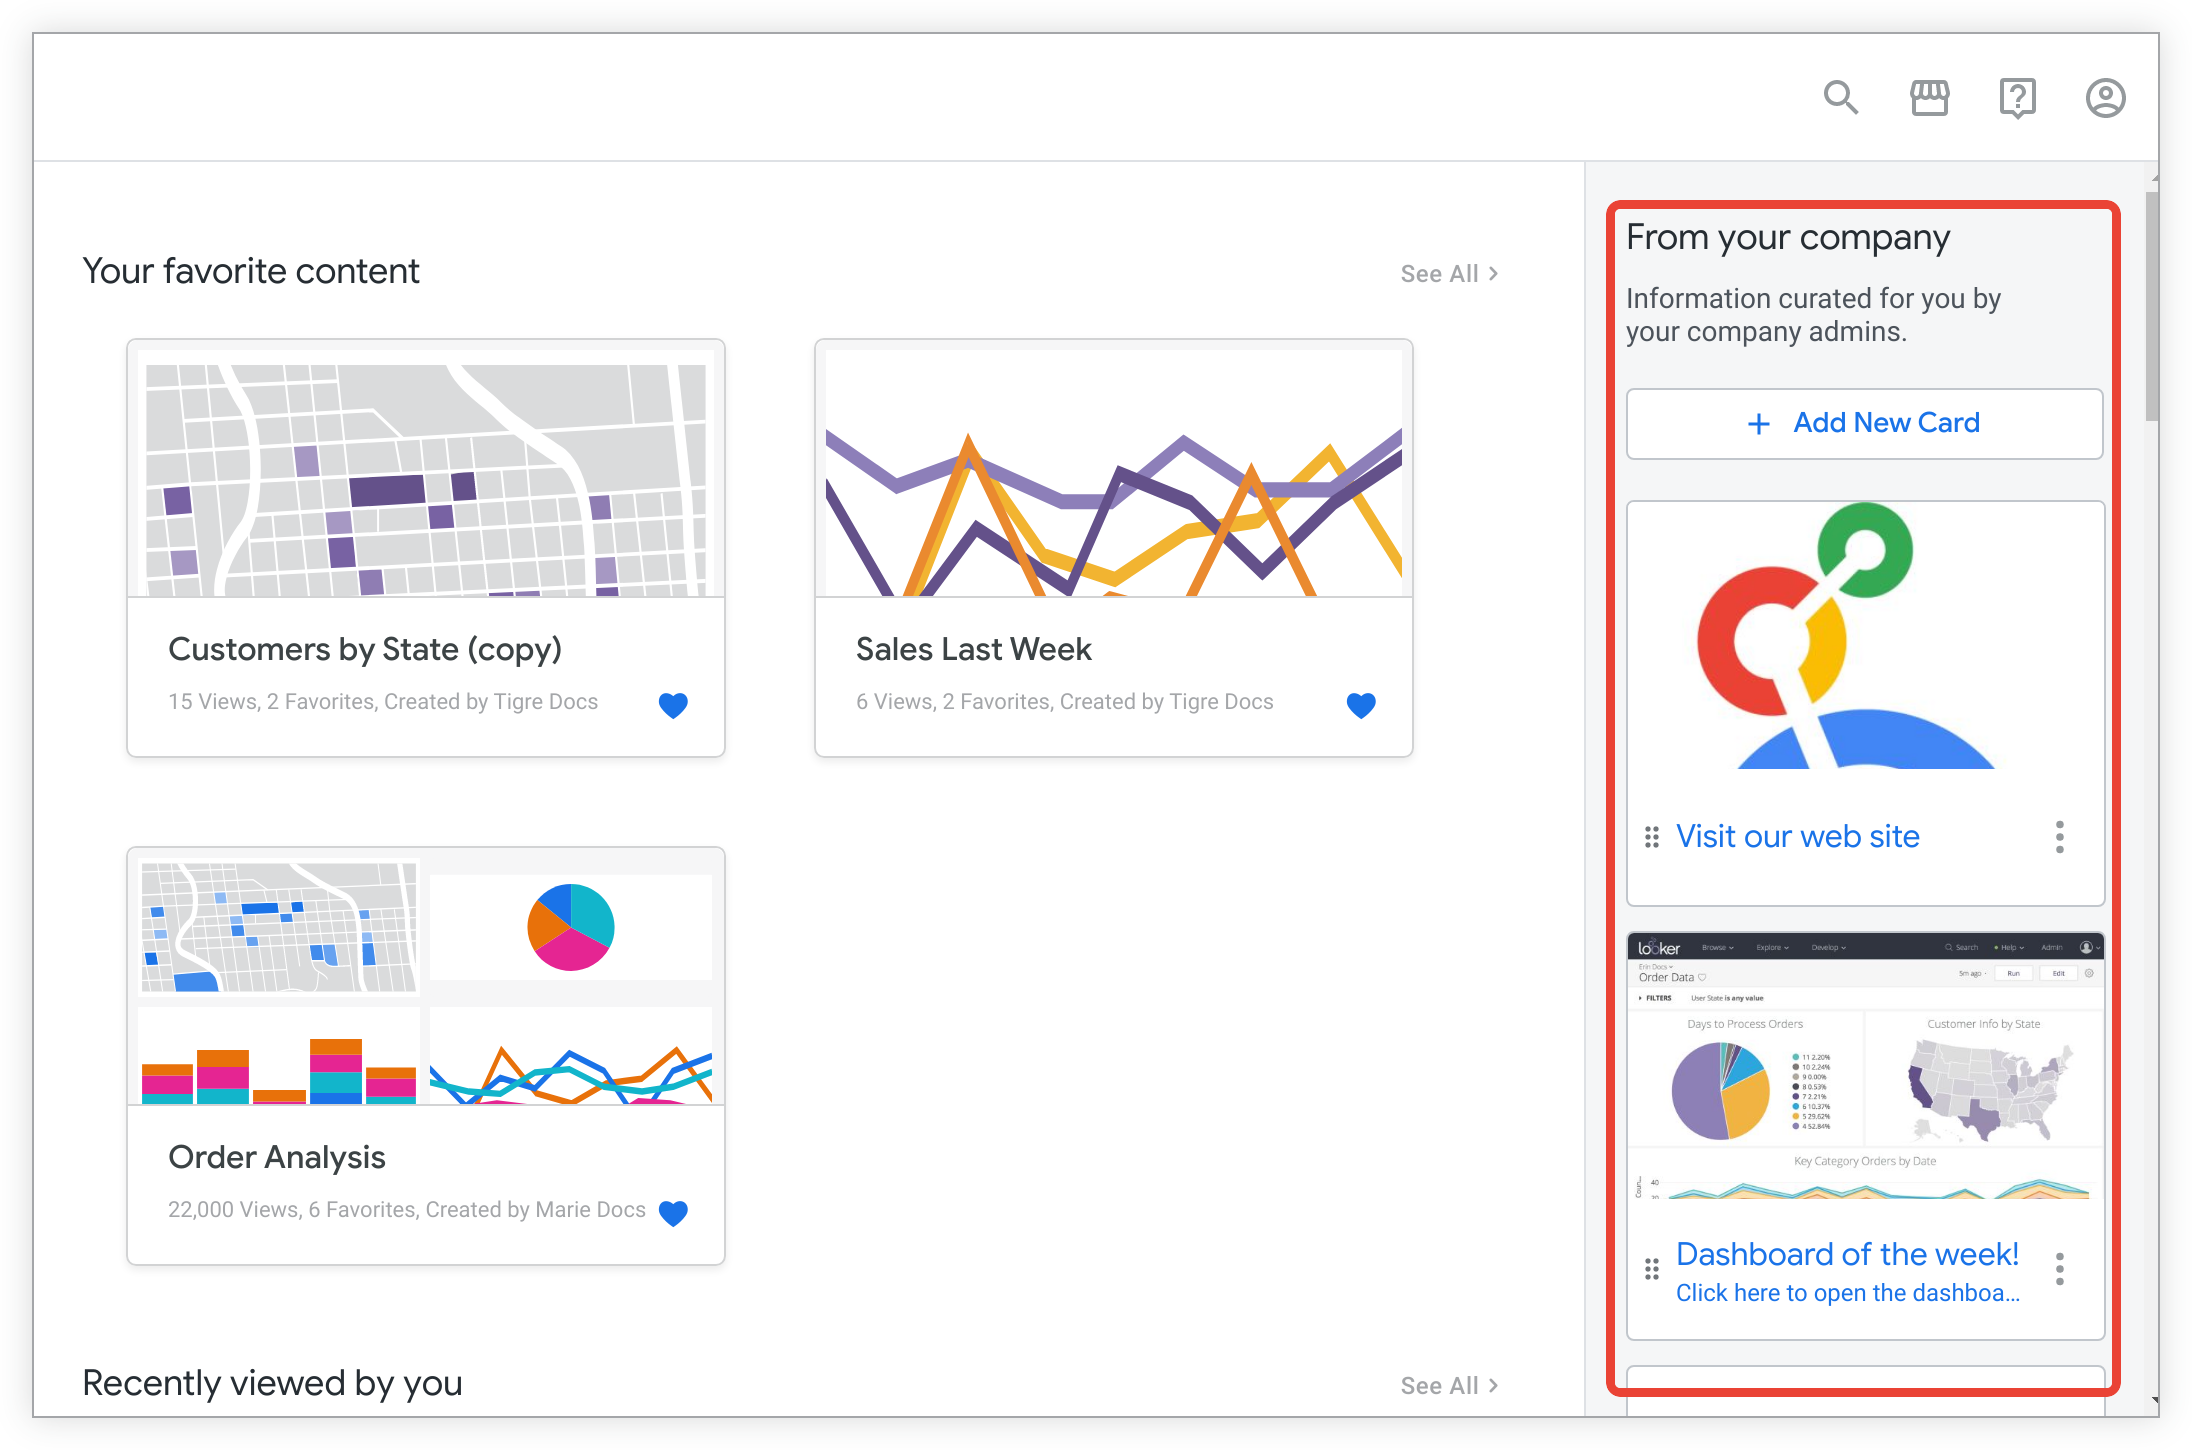
If the announcement sidebar has been closed, it can be re-opened by selecting Welcome Guide from the Help menu in the Looker header.
Admins and users who have the manage_homepage permission can add or edit the sidebar. Before content is added to the sidebar, non-admin users will see the pre-built homepage without the sidebar. Admins and users who have the manage_homepage permission will see prompts to add content to the sidebar.
Adding a card
At the top of the sidebar, click + Add New Card.
Under Title, enter a title for the card. The title appears as header text that is always visible on the card. Titles that are more than 25 characters long may not display properly %mdash; the end may be cut off.
Optionally, enter the following:
Description: Text that appears after the title on the card. The Description field has a 250-character limit.
Link: URL that opens in a new browser tab when a user clicks on the card. Enter the full URL, including the https:// or http://. The URL path does not appear to the user, but the card title and text will appear blue if the card is a link or will appear black if the card is not a link. You can also use the Description field to add a text description of the link target, such as its title.
Upload Image: Click the Upload Image button to upload an image that appears in the card.
When your new card is finished, click Create.
Editing a card
Click the three-dot Content Card Menu icon on the card you would like to edit, and select Edit.
Optionally, edit the following:
Title: Bold text that is always visible on the card
Description: Text that appears after the title on the card
Link: URL that opens in a new browser tab when a user clicks on the card
Optionally, click the trash bin icon to delete the card's image. If you want to upload a new image, click Upload Image to navigate to and upload a new image for the card.
Select Save to save the card.
Changing a sidebar title or description
Hover over the sidebar title or description to reveal the Edit pencil icon. Click the Edit pencil icon.
Select the existing title or description and replace it with a new sidebar title or description.
To save changes, click the Done checkmark icon.
Rearranging cards
Click and drag the six-dot Drag handle icon in the bottom left of a card to move the card's order in the sidebar.
Deleting a card
Click the three-dot Content Card Menu icon on the card that you would like to edit, and select Delete.
[[["Easy to understand","easyToUnderstand","thumb-up"],["Solved my problem","solvedMyProblem","thumb-up"],["Other","otherUp","thumb-up"]],[["Hard to understand","hardToUnderstand","thumb-down"],["Incorrect information or sample code","incorrectInformationOrSampleCode","thumb-down"],["Missing the information/samples I need","missingTheInformationSamplesINeed","thumb-down"],["Other","otherDown","thumb-down"]],["Last updated 2025-08-25 UTC."],[],[],null,["# Making announcements to your users\n\nIf your company uses the [Looker pre-built homepage](/looker/docs/2512/finding-content#viewing_content_on_your_homepage), admins or users who have the [`manage_homepage` permission](/looker/docs/2512/admin-panel-users-roles#manage_homepage) can share text, links, and images with all Looker users in the right-hand announcement sidebar:\n\nIf the announcement sidebar has been closed, it can be re-opened by selecting **Welcome Guide** from the **Help** menu in the Looker header.\n\nAdmins and users who have the [`manage_homepage` permission](/looker/docs/2512/admin-panel-users-roles#manage_homepage) can add or edit the sidebar. Before content is [added to the sidebar](#adding_a_new_card), non-admin users will see the pre-built homepage without the sidebar. Admins and users who have the [`manage_homepage` permission](/looker/docs/2512/admin-panel-users-roles#manage_homepage) will see prompts to add content to the sidebar.\n| **Note:** For Looker (Google Cloud core) instances, the [**Discover** sidebar](/looker/docs/2512/finding-content#viewing_content_on_your_homepage) appears instead of the announcement sidebar until the user closes the **Discover** sidebar by clicking the **Close** close icon. Once the **Discover** sidebar is closed, the announcement sidebar appears.\n\n\nAdding a card\n-------------\n\n1. At the top of the sidebar, click **+ Add New Card**.\n2. Under **Title**, enter a title for the card. The title appears as header text that is always visible on the card. Titles that are more than 25 characters long may not display properly %mdash; the end may be cut off.\n3. Optionally, enter the following:\n - **Description** : Text that appears after the title on the card. The **Description** field has a 250-character limit.\n - **Link** : URL that opens in a new browser tab when a user clicks on the card. Enter the full URL, including the `https://` or `http://`. The URL path does not appear to the user, but the card title and text will appear blue if the card is a link or will appear black if the card is not a link. You can also use the **Description** field to add a text description of the link target, such as its title.\n - **Upload Image** : Click the **Upload Image** button to upload an image that appears in the card.\n4. When your new card is finished, click **Create**.\n\n\nEditing a card\n--------------\n\n1. Click the three-dot **Content Card Menu** icon on the card you would like to edit, and select **Edit**.\n2. Optionally, edit the following:\n - **Title**: Bold text that is always visible on the card\n - **Description**: Text that appears after the title on the card\n - **Link**: URL that opens in a new browser tab when a user clicks on the card\n3. Optionally, click the trash bin icon to delete the card's image. If you want to upload a new image, click **Upload Image** to navigate to and upload a new image for the card.\n4. Select **Save** to save the card.\n\n\nChanging a sidebar title or description\n---------------------------------------\n\n1. Hover over the sidebar title or description to reveal the **Edit** pencil icon. Click the **Edit** pencil icon.\n2. Select the existing title or description and replace it with a new sidebar title or description.\n3. To save changes, click the **Done** checkmark icon.\n\n\nRearranging cards\n-----------------\n\nClick and drag the six-dot **Drag handle** icon in the bottom left of a card to move the card's order in the sidebar.\n\n\nDeleting a card\n---------------\n\n1. Click the three-dot **Content Card Menu** icon on the card that you would like to edit, and select **Delete**.\n2. To confirm the deletion, click **Confirm**.\n\n\nLinking to Markdown documents\n-----------------------------\n\nYou can write documentation, announcements, or information for [Looker projects](/looker/docs/2512/how-project-works) using [GitHub-flavored Markdown](https://guides.github.com/features/mastering-markdown/) and link to the [documentation files](/looker/docs/2512/other-project-files#document_files) in the sidebar.\n\n\nUsers with develop privileges can navigate to and obtain the URL for a Markdown document by following these steps:\n\n1. [Navigate to the project](/looker/docs/2512/accessing-project-files).\n2. Select the name of the document (or [create a new document](/looker/docs/2512/other-project-files#creating_documentation_files)).\n3. From the document menu, select **View Document**.\n4. From the new browser window, copy the URL for the document.\n5. Paste the Markdown file URL into the **Link** field of a sidebar card.\n\nNow, users can click that sidebar card and Looker will open the document in a new browser tab."]]