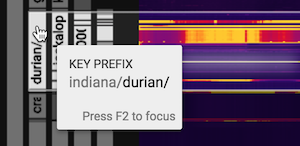
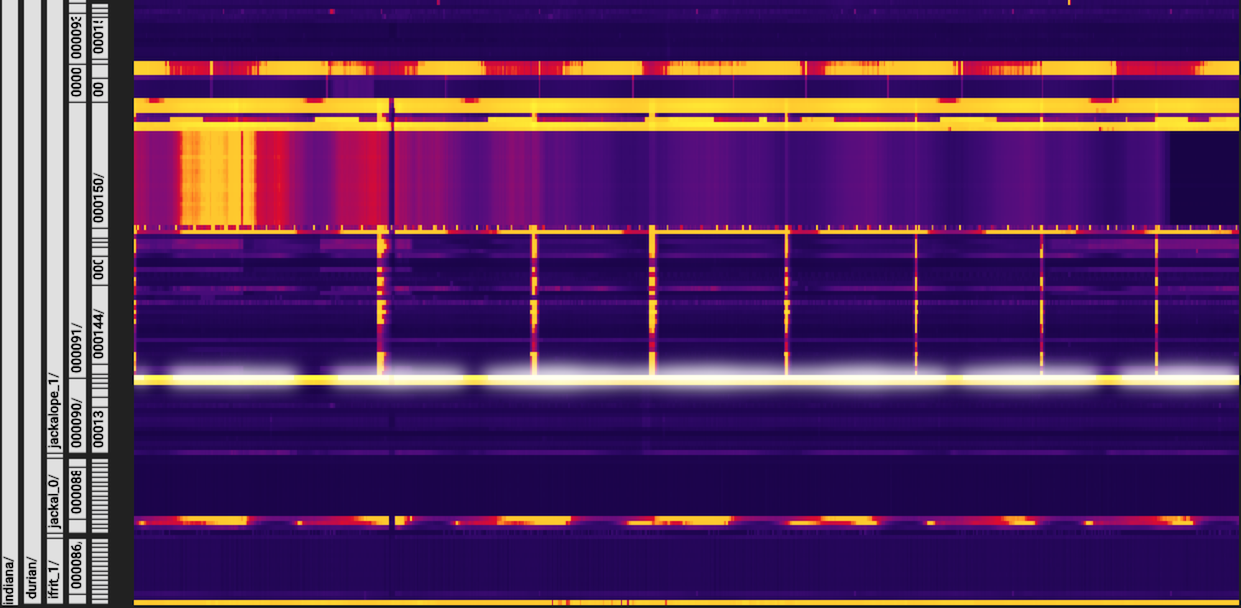
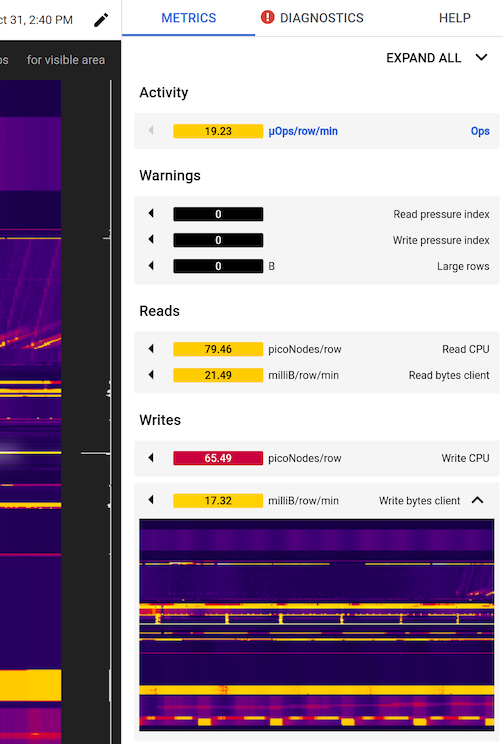
[[["易于理解","easyToUnderstand","thumb-up"],["解决了我的问题","solvedMyProblem","thumb-up"],["其他","otherUp","thumb-up"]],[["很难理解","hardToUnderstand","thumb-down"],["信息或示例代码不正确","incorrectInformationOrSampleCode","thumb-down"],["没有我需要的信息/示例","missingTheInformationSamplesINeed","thumb-down"],["翻译问题","translationIssue","thumb-down"],["其他","otherDown","thumb-down"]],["最后更新时间 (UTC):2025-08-27。"],[[["\u003cp\u003eKey Visualizer helps identify Bigtable performance issues by analyzing heatmaps, which use colors to represent value intensities.\u003c/p\u003e\n"],["\u003cp\u003eYou can review diagnostic messages above the heatmap to gain insights into any issues detected with your Bigtable usage patterns.\u003c/p\u003e\n"],["\u003cp\u003eThe brightness of the heatmap colors can be adjusted to better visualize patterns, with brighter colors representing high values and darker colors representing low values relative to the specific usage.\u003c/p\u003e\n"],["\u003cp\u003eUsers can zoom in on specific time periods or row key ranges within the heatmap to examine issues more closely, as well as drill down into data for specific groups of row keys.\u003c/p\u003e\n"],["\u003cp\u003eKey Visualizer allows switching between different metrics, viewing multiple metrics simultaneously to compare them, and pinning tooltip details for in-depth analysis.\u003c/p\u003e\n"]]],[],null,["# Explore heatmaps\n================\n\nThis page describes how to analyze the heatmap in a Key Visualizer scan so you\ncan identify the source of a Bigtable performance issue.\n\n\nBefore you read this page, you should be familiar with the\n[overview of Key Visualizer](/bigtable/docs/keyvis-overview).\nYou may also want to:\n\n- Learn how to [open a Key Visualizer scan](/bigtable/docs/keyvis-getting-started#viewing-scan).\n- See examples of common [patterns in Key Visualizer heatmaps](/bigtable/docs/keyvis-patterns).\n\nReview diagnostic messages\n--------------------------\n\nIf Key Visualizer identifies an issue with your Bigtable usage\npatterns, the Key Visualizer scan will include diagnostic messages above the\nheatmap. Click on one of the diagnostic messages for detailed information about\nthe issue.\n\nFor descriptions of each diagnostic message, see [Key Visualizer diagnostic\nmessages](/bigtable/docs/keyvis-diagnostics).\n\nAdjust brightness\n-----------------\n\nKey Visualizer heatmaps use dark colors to indicate normal or low values, and\nbright colors to indicate high values. If the colors in a heatmap are too bright\nor too dark, it might be difficult to see important patterns for a metric.\n\nKeep in mind that for most metrics, Key Visualizer identifies which values are\n\"high\" and \"low\" based entirely on your usage of that table. For example, if you\nperform 20 reads per second in a specific row range and 1 read per second in\nother row ranges, Key Visualizer will use a bright color for that specific row\nrange, even though 20 reads per second is a low number for\nBigtable. The [**Warnings** metrics](/bigtable/docs/keyvis-metrics#warnings) and\n[**Performance** metrics](/bigtable/docs/keyvis-metrics#performance) are exceptions to this\nrule---if these metrics appear in bright colors, then Key Visualizer has\nidentified a potential problem.\n\nTo adjust the colors that are used for different values, use the **+ / -**\nbuttons on either side of the **Adjust Brightness**\n*brightness_6*\nicon. When you increase the brightness, you lower the range of values that each\ncolor represents; when you lower the brightness, you increase the range of\nvalues.\n\nZoom in on time periods and row key ranges\n------------------------------------------\n\nWhen you open a heatmap, it displays values for the entire time period included\nin the scan, as well as the entire range of row keys in your table. If you\nnotice an issue during a specific time period, or in a specific range of row\nkeys, you can zoom in to examine the issue more closely.\n\nThere are several ways to zoom in or out:\n\n- Scroll up or down within the heatmap.\n- Click the **Rectangular Zoom** *crop* button, then click and drag to select an area to enlarge.\n- Press and hold the `Shift` key, then click and drag to select an area to enlarge.\n- Return to the previous area of the heatmap by pressing the `Backspace` or `Delete` key.\n- Zoom out to view the entire table by clicking the **Reset Zoom** *zoom_out_map* button or pressing the `R` key.\n\nDrill down by row key prefix\n----------------------------\n\n\nRow keys are often composed of a hierarchy of values, with each value separated by a delimiter. For\nexample, the row key `memusage#1423523569918` contains an identifier for all rows that\ncapture memory usage, followed by a timestamp that identifies a specific set of data within that\ngroup.\nKey Visualizer automatically recognizes this type\nof row key and breaks it down into a hierarchy, which helps you drill down into\nthe data for specific ranges of row keys more quickly.\n\nTo drill down into the heatmap's data for a group of row keys that share a\ncommon prefix:\n\n1. Move the cursor over one of the levels in the row-key hierarchy that appears\n to the left of the heatmap.\n\n Key Visualizer highlights the area of the heatmap that shows this level of\n the hierarchy. It also shows the key prefix for all of the row keys at this\n level.\n\n2. Click the level of the row-key hierarchy that you want to examine.\n\n Key Visualizer zooms in on this level of the hierarchy.\n\n3. Click another level of the row-key hierarchy to zoom in further, or press the\n `Backspace` or `Delete` key to return to the previous area.\n\nPin details about a metric\n--------------------------\n\nAs you move your cursor over a heatmap, Key Visualizer displays a tooltip that\ncontains details about the metric that is under the cursor. You can pin this\ntooltip in place by clicking on the heatmap. Pinned tooltips show more detail\nabout the metric. Pinning a tooltip also makes it easier to take a screenshot of\nthe tooltip or copy information from the tooltip.\n\nSwitch metrics\n--------------\n\nBy default, when you open a Key Visualizer scan, it displays the **Ops** metric,\nwhich gives you an overview of your usage pattern for the table. You can switch\nto a different metric at any time by clicking the **Metric** drop-down list\nabove the heatmap, then clicking the metric you want to view. If an item in the\nlist is disabled, the value of that metric was always zero.\n\nFor descriptions of each metric, see [Key Visualizer Metrics](/bigtable/docs/keyvis-metrics).\n\nSwitch key format\n-----------------\n\nBy default, keys are displayed as serialized bytes. This means that printable\ncharacters display as ASCII characters, or text. Non-printable characters are\ndisplayed as a series of backslashes followed by three-digit numbers. Each\nnumber represents the octal representation of a byte.\n\nFor example, a key that contains both printable and non-printable bytes might\nlook like this:\n\n\\\\360q\\\\364\\\\031\\\\253\\\\735\\\\223xdf\\\\272\\\\022\\\\362\\\\251bn\\\\101\n\nYou can choose to view keys in hexadecimal format instead of text format:\n\n1. Click the **Settings** button.\n2. Under **Preferences** , choose **Hexadecimal**.\n3. Click **OK**.\n\nFind connections between different metrics\n------------------------------------------\n\nYou can view multiple metrics at the same time in Key Visualizer when you want\nto compare metrics or find correlations between metrics. For example, you might\nwant to see if hotspots on your **Ops** heatmap correlate with any hotspots on\nyour **Latency** heatmap, which might indicate that the number of operations\nwithin a [key bucket](/bigtable/docs/keyvis-overview#key-buckets) was causing increased latency.\n\nTo view multiple metrics and their values at the same time, click `Multimetric`\nnear the top right corner. A list of metrics appears in a pane to the right of\nthe scan.\n\nTo examine several metrics at once, use the following tools in the multimetric\npane:\n\n- To show or hide miniature heatmaps for all metrics, click `Expand All` or\n `Collapse All` at the top right.\n\n- To show an individual metric's heatmap, click the metric name.\n\n- To hide an individual metric's heatmap, click the metric name again.\n\n- To display a metric's heatmap in the main window, click the solid arrow at\n the left edge of the metric's title bar.\n\n- Hover over a miniature heatmap to see corresponding activity in the main view.\n\nTo compare different metrics for a key bucket at the same point in time, you can\npin a value in a scan, then switch to a different metric at the same point in\ntime:\n\n1. Point to a position of interest on the large heatmap in the main window.\n2. Click to pin the tooltip. The values in the side pane stay fixed to the key bucket and point in time you've pinned.\n3. To display a metric in the large heatmap, click the solid arrow on the left for that metric. The tooltip in the main window shows you the full details for that metric.\n\nWhat's next\n-----------\n\n- Learn to recognize [common patterns in heatmaps](/bigtable/docs/keyvis-patterns).\n- Read about the [metrics you can view in a heatmap](/bigtable/docs/keyvis-metrics).\n- Understand the [diagnostic messages that Key Visualizer can\n display](/bigtable/docs/keyvis-diagnostics).\n- Learn more about [row keys that contain multiple\n values](/bigtable/docs/schema-design#multi-value-row-key)."]]