See the supported connectors for Application Integration.
Connectors task
The Connectors task lets you quickly and securely connect to the various Google Cloud services and other business applications from your integration using the out-of-the-box connectors available in Integration Connectors.
For the list of all the supported connectors for Application Integration, see Connector reference.Before you begin
- Make sure that you have the Connectors Admin (
roles/connectors.admin) IAM role granted on your Google Cloud project. For information about granting roles, see Manage access. - Learn about the general concepts of Integration Connectors.
- To connect to Google Cloud services and other business applications using a connector, ensure that you have attached a user-managed service account to your integration. If your integration does not have user-managed service account configured, then by default the default service account (
service-PROJECT_NUMBER@gcp-sa-integrations.iam.gserviceaccount.com) is used for authentication. - Ensure that your service account has the required IAM role. For information about granting roles to a service account, see Manage access to service accounts.
Add a Connectors task
To add the Connectors task in your integration, do the following:
- In the Google Cloud console, go to the Application Integration page.
- In the navigation menu, click Integrations.
The Integrations page appears listing all the integrations available in the Google Cloud project.
- Select an existing integration or click Create integration to create a new one.
If you are creating a new integration:
- Enter a name and description in the Create Integration pane.
- Select a region for the integration.
- Select a service account for the integration. You can change or update the service account details of an integration any time from the Integration summary pane in the integration toolbar.
- Click Create. The newly created integration opens in the integration editor.
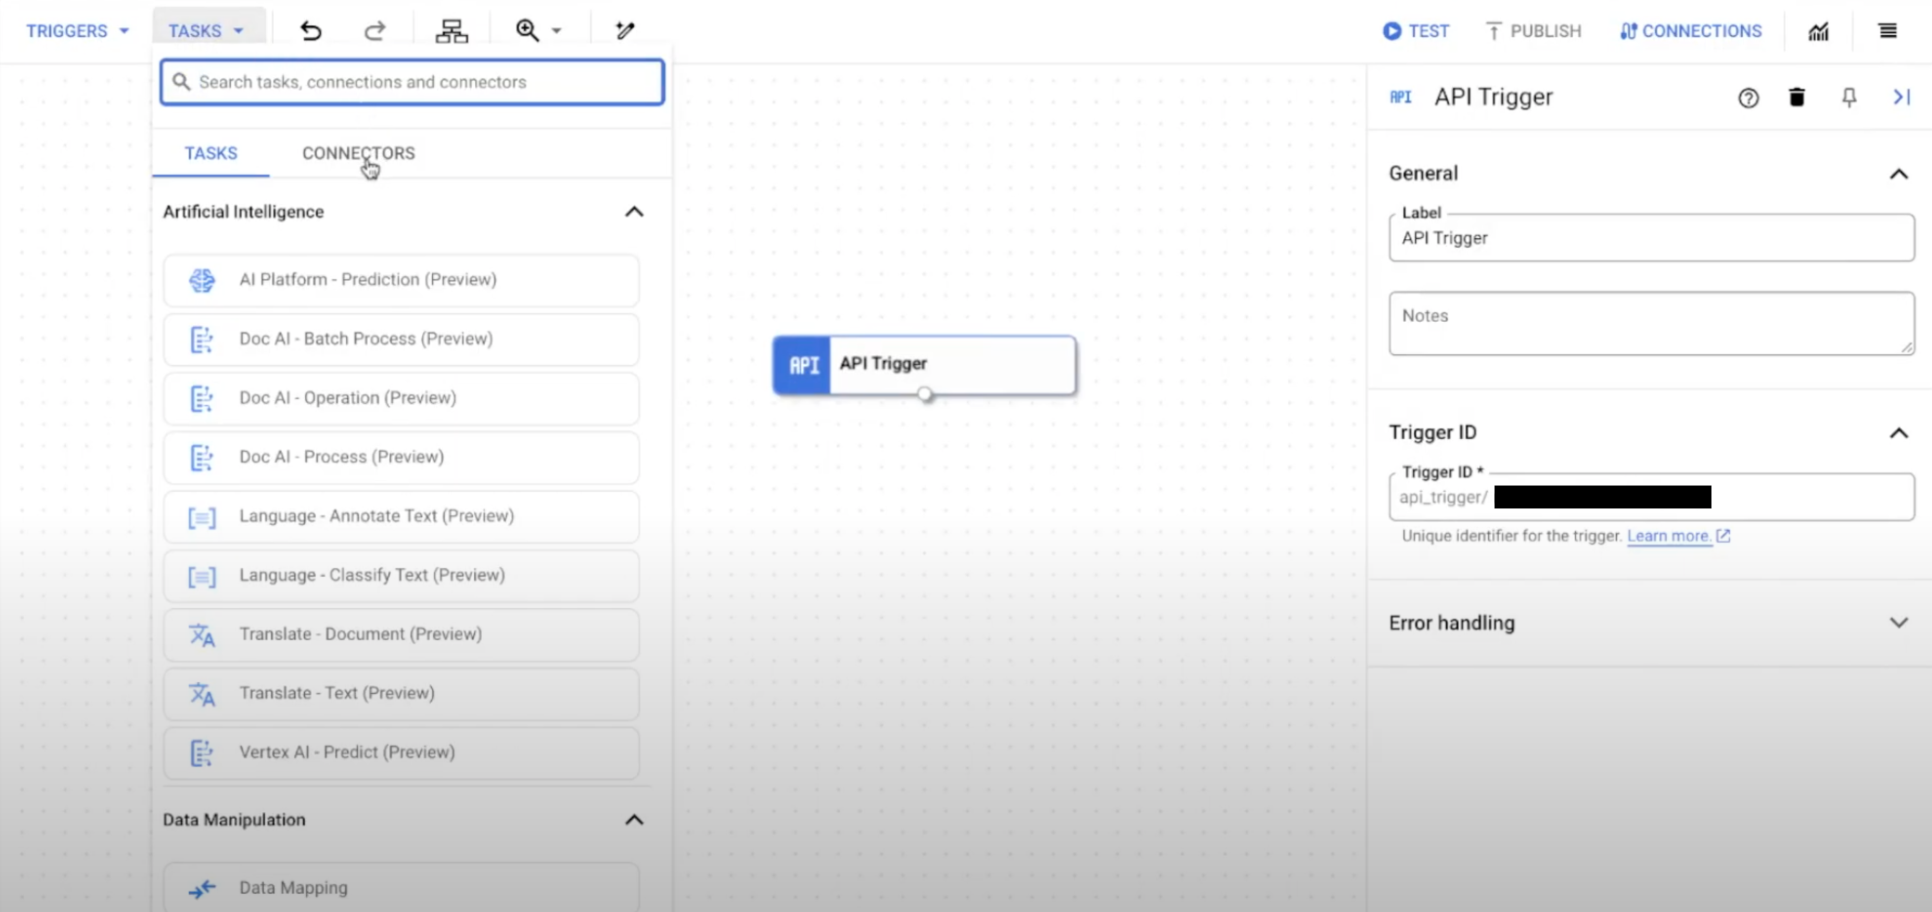
- In the integration editor navigation bar, click Tasks to view the list of available tasks and connectors.
- If you want to configure a new connection, click and place the Connectors element in the integration editor. Then, click Configure connector to configure the connection.
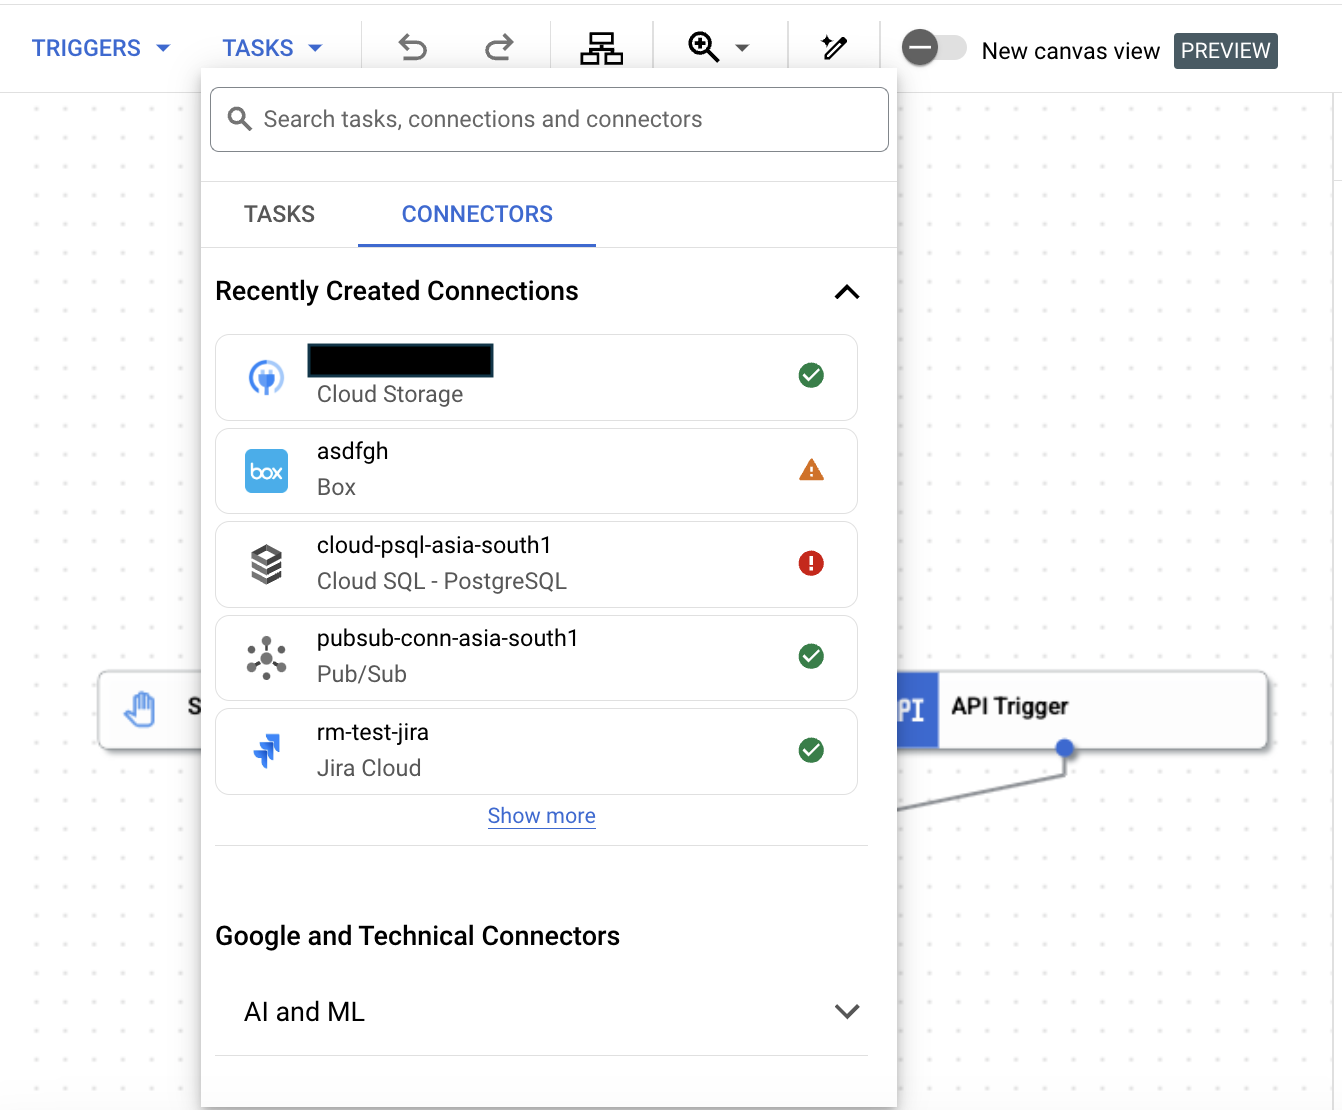

- If you have an existing connection, then click the Connectors tab to view the recently created connections. You can also search for a connector, connection, or task by entering the name in the Search field.
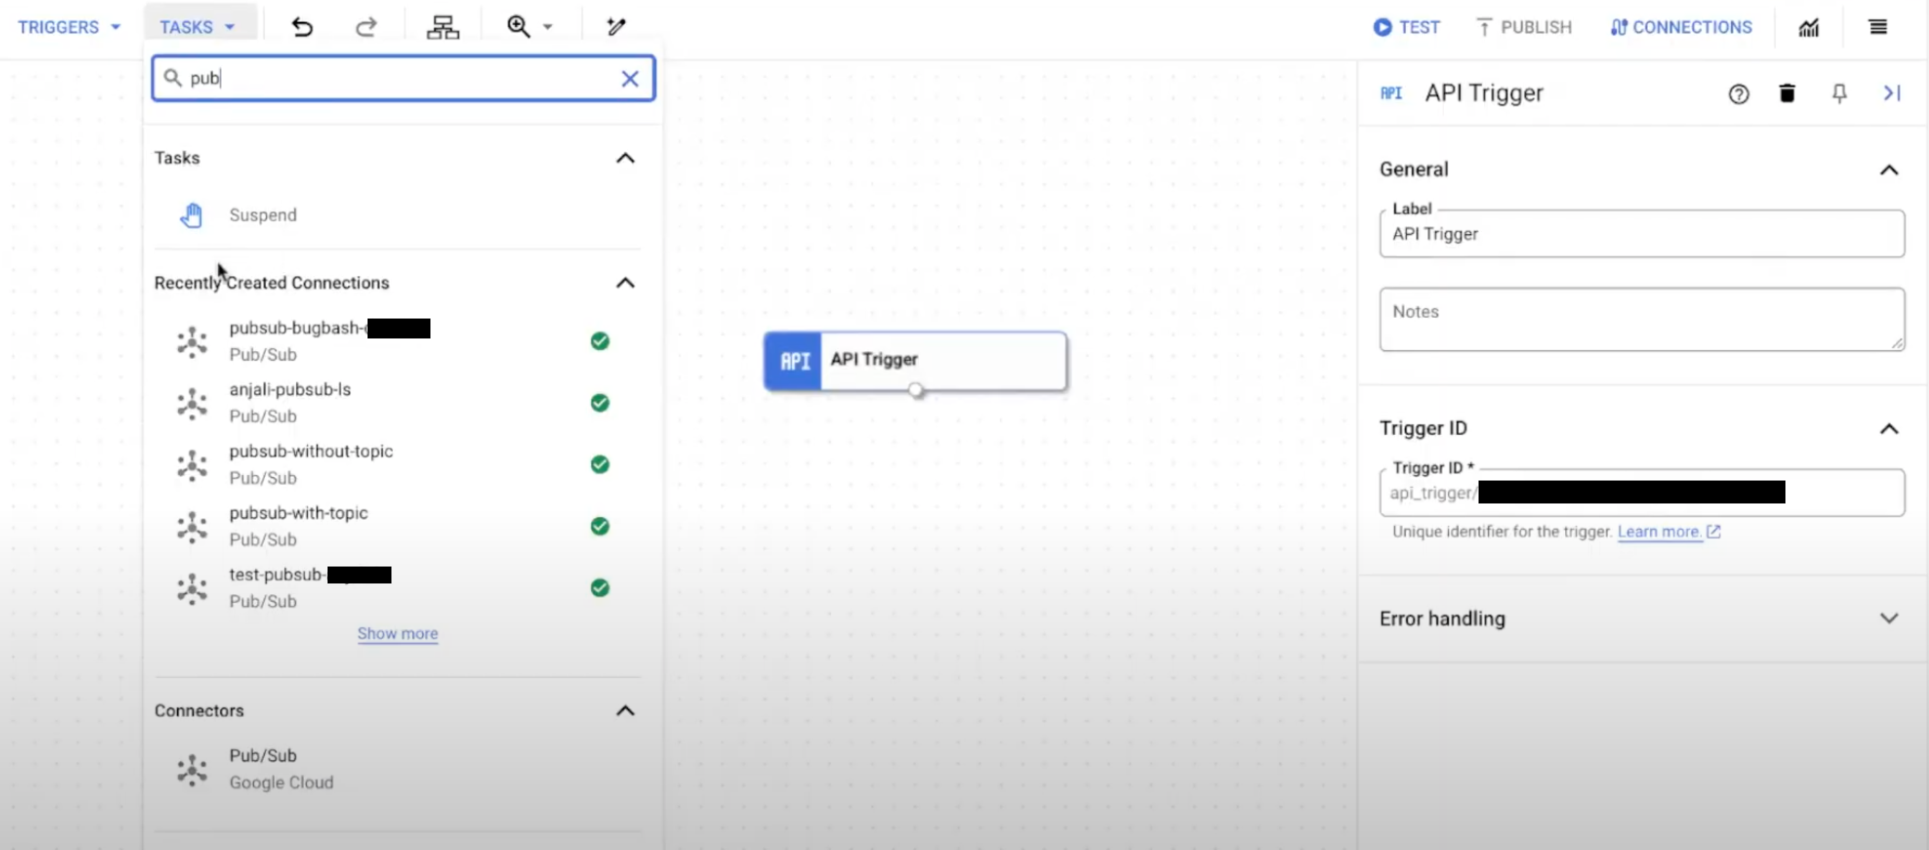
- Click and place the configured Connectors element in the integration editor. For information about how to configure a connector task, see Configure the Connectors task.
Configure the Connectors task
To configure a Connectors task, do the following:
- Click the Connectors task element on the designer to view the Connectors task
configuration pane.
Optionally, click to rename the task name.
- Click Configure connector.
- You can either select an existing connection in the region or create an new connection. To configure an existing connection, complete the following steps in the Connectors Task Editor page.
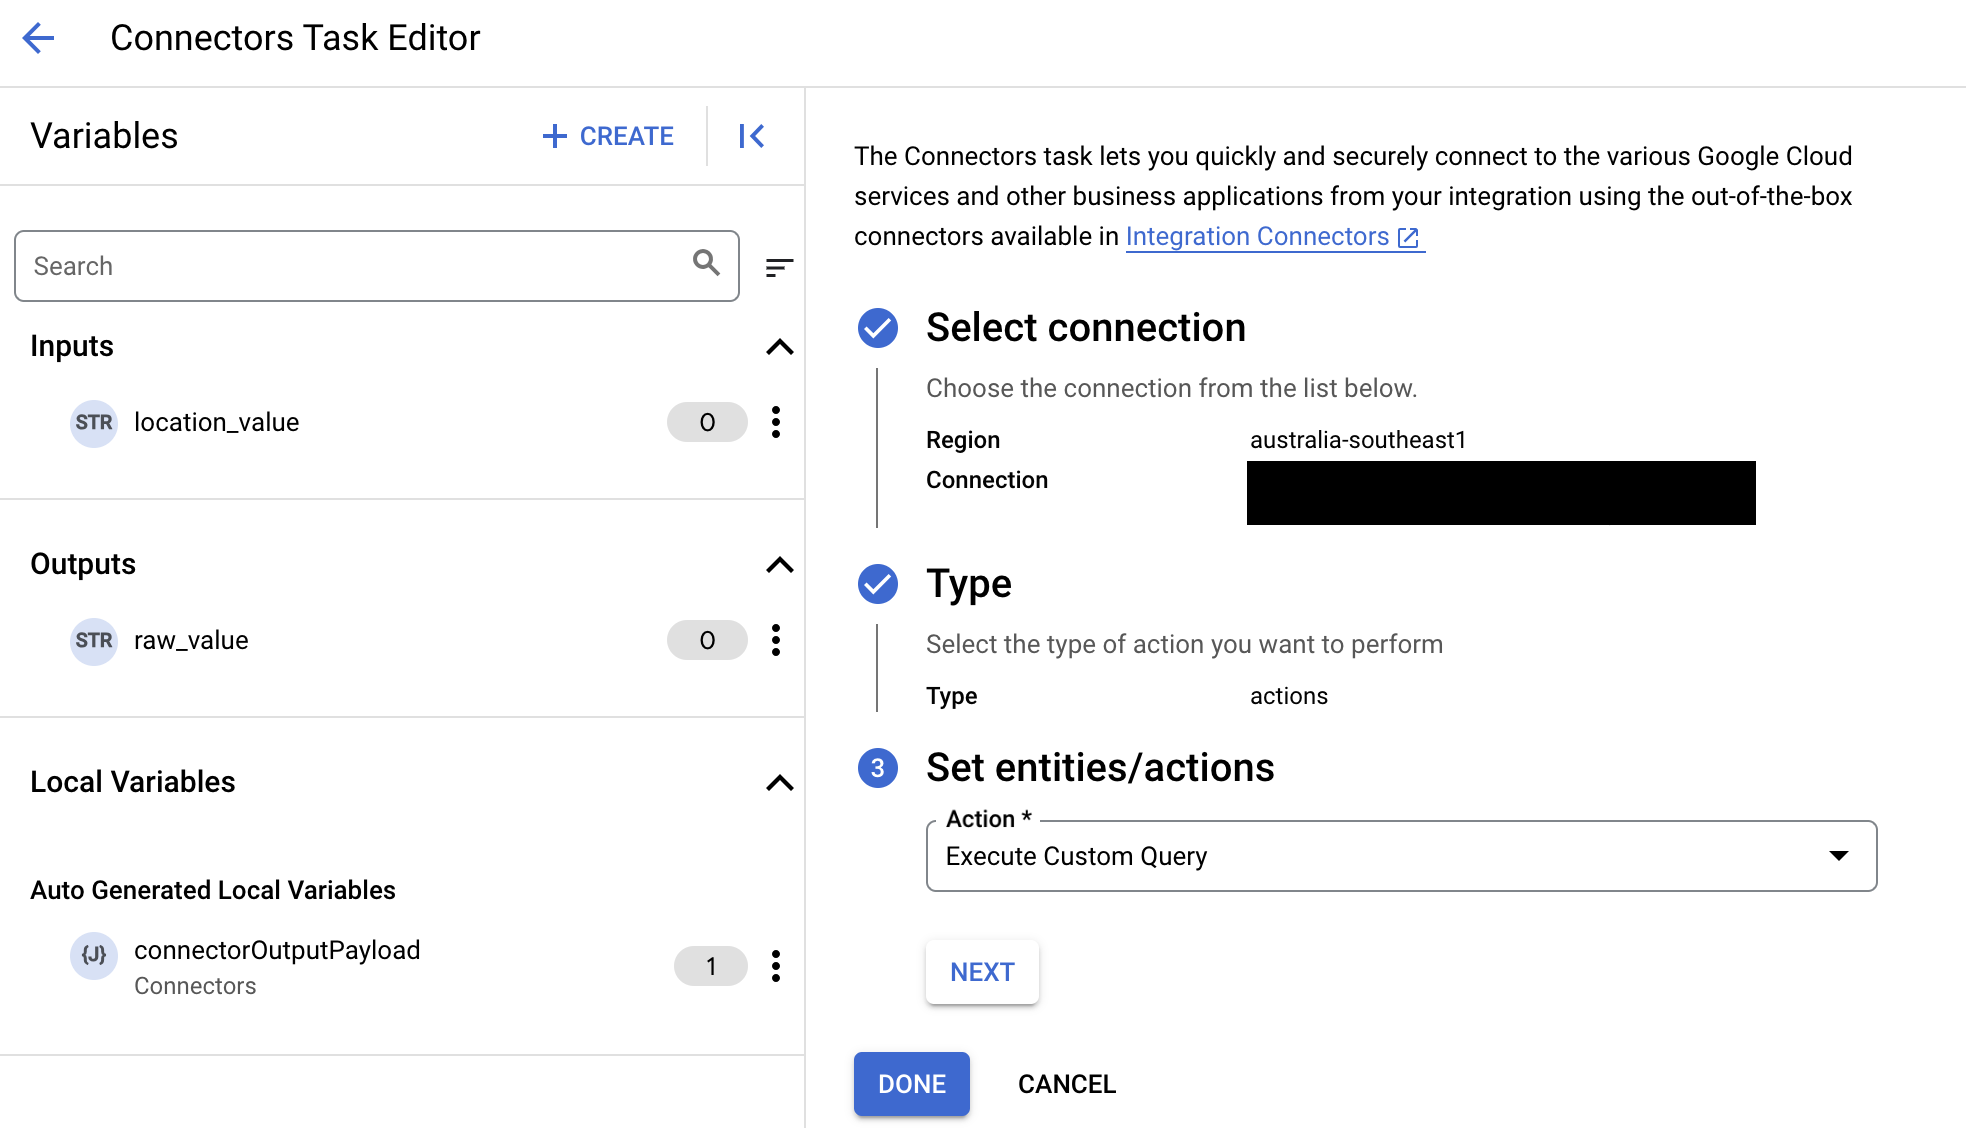
The following image shows a sample layout of the Connectors Task Editor page.
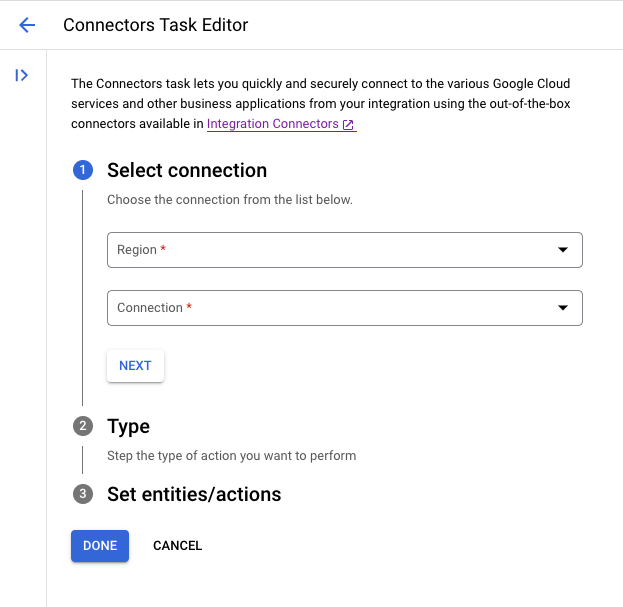

- In the Select connection section, select the region of the connection.
- Choose an existing connection from the list of available connections in the selected region.
- Click Next.
- From the Type list, select Entities or Actions.
- If you select Entities, the list of supported entities for the connection is displayed in the Set entities/actions section. Select an entity followed by the Operation that you'd want to perform on that entity.
- If you select Actions, the list of supported actions for the connection is displayed in the Set entities/actions column. Select an action for the connection. The supported entities and actions are based on the connector type. For the list of all the supported connectors for Application Integration, see Connector reference. To view the supported actions and entities for a connector, view the specific connector documentation.
If the connector supports custom SQL query, you can select the Execute custom query option from the Actions list. For information about how to add custom SQL query for your connector, see Action: Execute custom SQL query.
- Click Done to complete the connection configuration and close the pane.
Configure task input and output variables
The Connectors task configuration pane displays Task Input and Task Output variables that are automatically generated based on the Entity and Operation or Action selected in the Configure connector task dialog. These variables are configurable and are accessible as inputs to the current task or as outputs to subsequent tasks, or conditionals in the current integration.
To configure the Task Input or Task Output variables, click the respective variable to open the Configure Variable pane and perform the following steps:
- Enter the variable value in the Default Value field.
- (Optional) Select Use as an input to integration or Use as an output to integration.
- Click Save.
For more information about the input and output parameters of the Connectors task, see Entity operations.
Configure authentication override
To enable the connection to accept different backend authentication dynamically during runtime, ensure that in Integration Connectors, you have selected the Enable Authentication Override option for your connection.
To configure the authentication override, do the following:
- Click the connectors task element on the designer to view the Connectors task configuration pane.
- Expand the Task input section. The End user credentials field is set to a
dynamicAuthConfigvariable.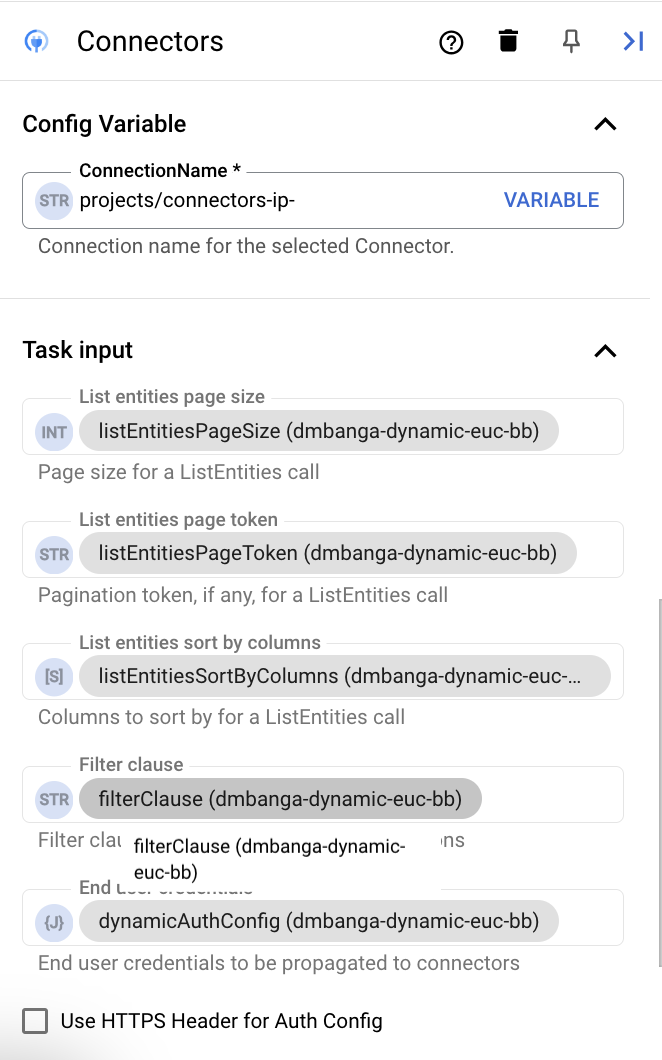

Then, do the following:
- Click the
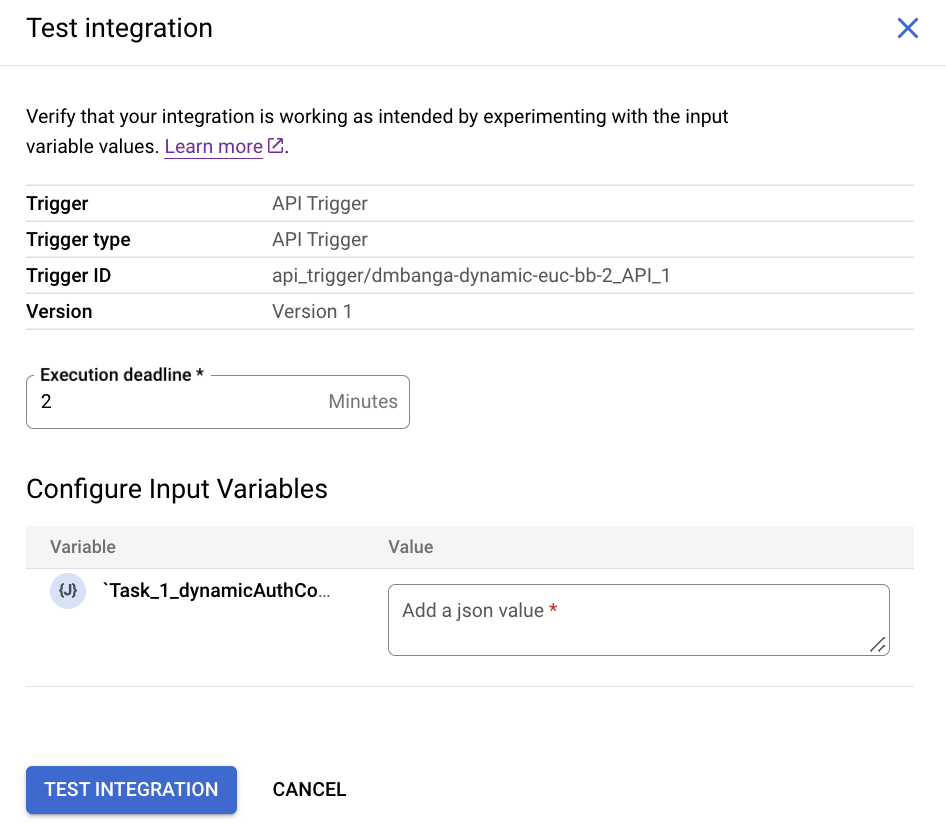
dynamicAuthConfigvariable. The Edit variable pane appears.For overriding the authentication, you must provide the authentication values when you test the integration.
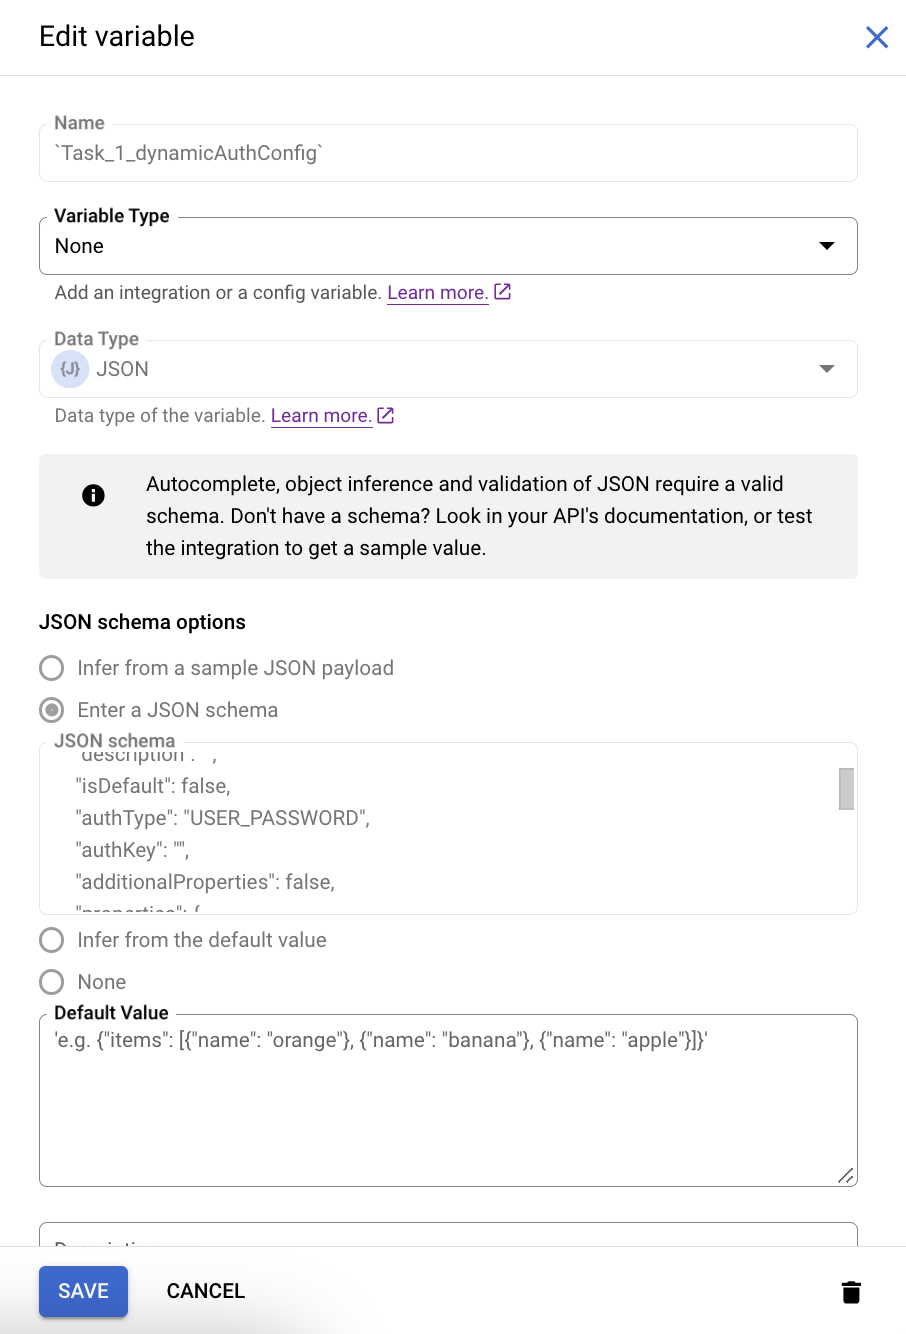

To do so, follow these steps:
- From the Variable type list, select Input to Integration.
- In the JSON schema options, you can verify the authentication type configured for the connection. Use this schema to override the authentication value when you test the integration.

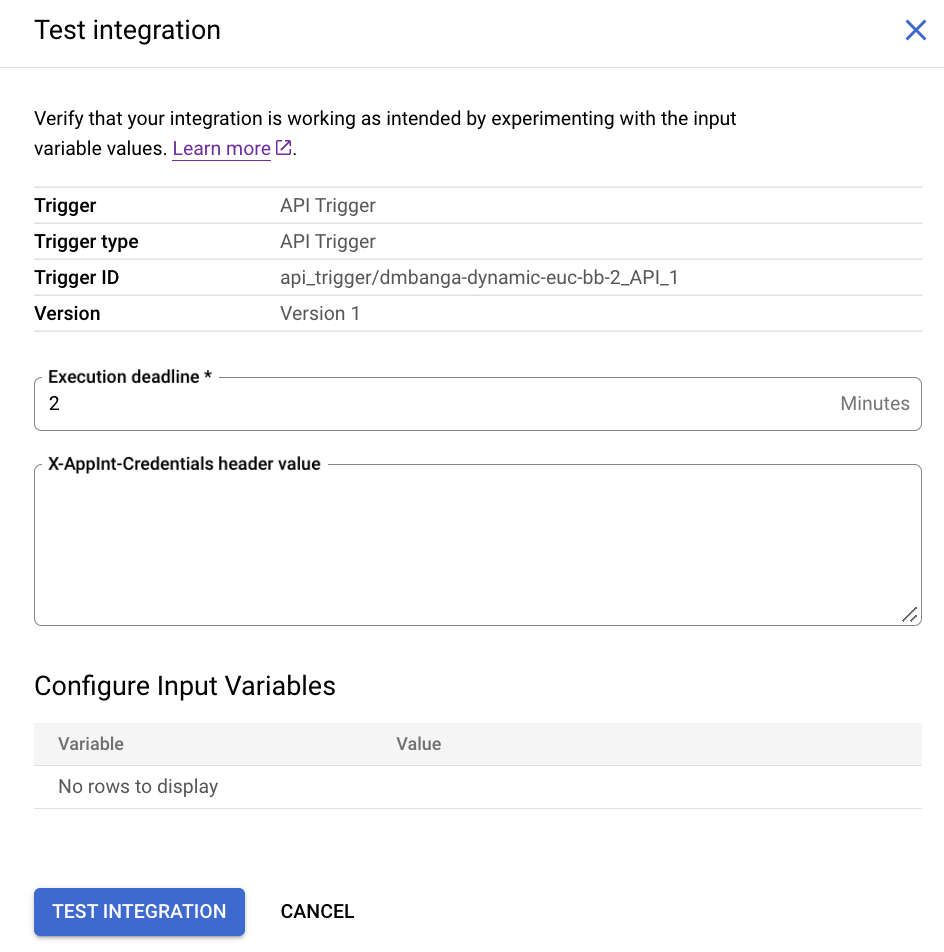
Alternatively, you can pass the authentication as the HTTP header by selecting the Use HTTPS Header for Auth Config checkbox in the Task input section of the Connectors task configuration pane.

- Click the
Entity operations and actions
You can perform CRUD (Create, Read, Update, Delete) operations on the entities of a connector. Each of these entity operations has a different set of input and output parameters. The following table lists the input and output parameters of the various entity operations.
| Operation name | Input parameters | Output parameters |
|---|---|---|
| List |
|
|
| Get | entityId | connectorOutputPayload |
| Create | connectorInputPayload | connectorOutputPayload |
| Update |
|
connectorOutputPayload |
| Delete |
|
N/A |
Input parameters
The following table describes the input parameters for the various entity operations.
| Parameter name | Data type | Description |
|---|---|---|
| entityId | String | A unique identifier of the row that you want to access. Normally, the For example, to get a specific row from a MySQL table, the
|
| connectorInputPayload | JSON | The actual data to be added or updated in an entity. The following example shows the
JSON snippet of a row data to be added in a table:
{
"employee_first_name": "John",
"employee_emailID": "test-05@test.com"
}
In this example, |
| filterClause | String | Restricts the result of the operations based on a condition. For more information about adding a filter clause, see Add a filter for an operation. |
| listEntitiesPageSize | Integer |
Specifies the number of results that should be returned in a page. A page is a logical grouping of the records in a result set. The concept of a page is useful when you are expecting a large number of records in the result set. If the result set is large, the Connectors task might fail, as there is a limit on the data size that the Connectors task can process. By breaking down the result set into smaller chunks, you can avoid this issue. For example, if you are expecting 1000 records in your result set, you can set
the |
| listEntitiesPageToken | String | A page identifier (token) that lets you access a specific page. You can get the value of a page token from the |
| listEntitiesSortByColumns | String array | Column name by which you want to sort the result set.
|
Output parameters
The following table describes the output parameters for the various entity operations.
| Parameter name | Data type | Description |
|---|---|---|
| connectorOutputPayload | JSON | The output of an operation in JSON format. |
| listEntitiesNextPageToken | String |
A system generated identifier for a page. You can think of the token as a pointer by which you can access a particular page of the result set. If you have broken down your
result set into multiple pages by setting the For example, consider you have set the If your result set has a large number of pages, you can consider using the
While Loop task
to get the next page and use the Data Mapping
task to automatically assign page token values to the
|
Filter clause for entity operations
You can restrict the records that are processed by the Connectors task using the Filter clause variable that is available as a Task Input. For example, in case of a delete
operation, you can add a filter clause to delete records with a specific orderId.
Filter clause can be applied only for the following entity operations:
- List
- Delete
- Update
When you select any of these operations, the Task Input section of the Connectors task displays the Filter clause field automatically.
Add a filter clause
To add a filter clause, perform the following steps:
- Click the Connectors task element on the designer to view the Connectors task configuration pane.
- Expand the Task Input section and click the filterClause(Connectors) string variable.
The Configure Variable dialog appears.
- Enter the filter clause (following the clause syntax) in the Default Value field.
- Click Save.
Filter clause syntax and examples
A filter clause has the following format:
FIELD_NAME CONDITION FILTER_VALUE
Examples
OwnerId = '0053t000007941XAAQ'
PoNumber < 2345
OrderNumber = 00110 AND StatusCode = 'Draft'
TotalAmount > 2500
ShippingPostalCode = 94043 OR ShippingPostalCode = 77002
Use of variables in filter clause
You can't directly use an integration variable in a filter clause. If you want to use an integration variable, you must first configure a Data Mapping task to create a mapping between the integration variable and the filter clause.The following table shows a sample mapping between an integration variable and the filterClause(Connectors) variable:
| Input | Output |
|---|---|
PRIMARY_KEY_ID = ' .CONCAT(INTEGRATION_VARIABLE) .CONCAT(') |
filterClause(Connectors) |
PRIMARY_KEY_ID = ' is entered as a Value in the input row.
Action: Execute custom SQL query
To create a custom query, follow these steps:
- Follow the detailed instructions to add a connectors task.
- When you configure the connector task, in the type of action you want to perform, select Actions.
- In the Action list, select Execute custom query, and then click Done.

- Expand the Task input section, and then do the following:
- In the Timeout after field, enter the number of seconds to wait till the query executes.
Default value:
180seconds. - In the Maximum number of rows field, enter the maximum number of rows to be returned from the database.
Default value:
25. - To update the custom query, click Edit Custom Script. The Script editor dialog opens.
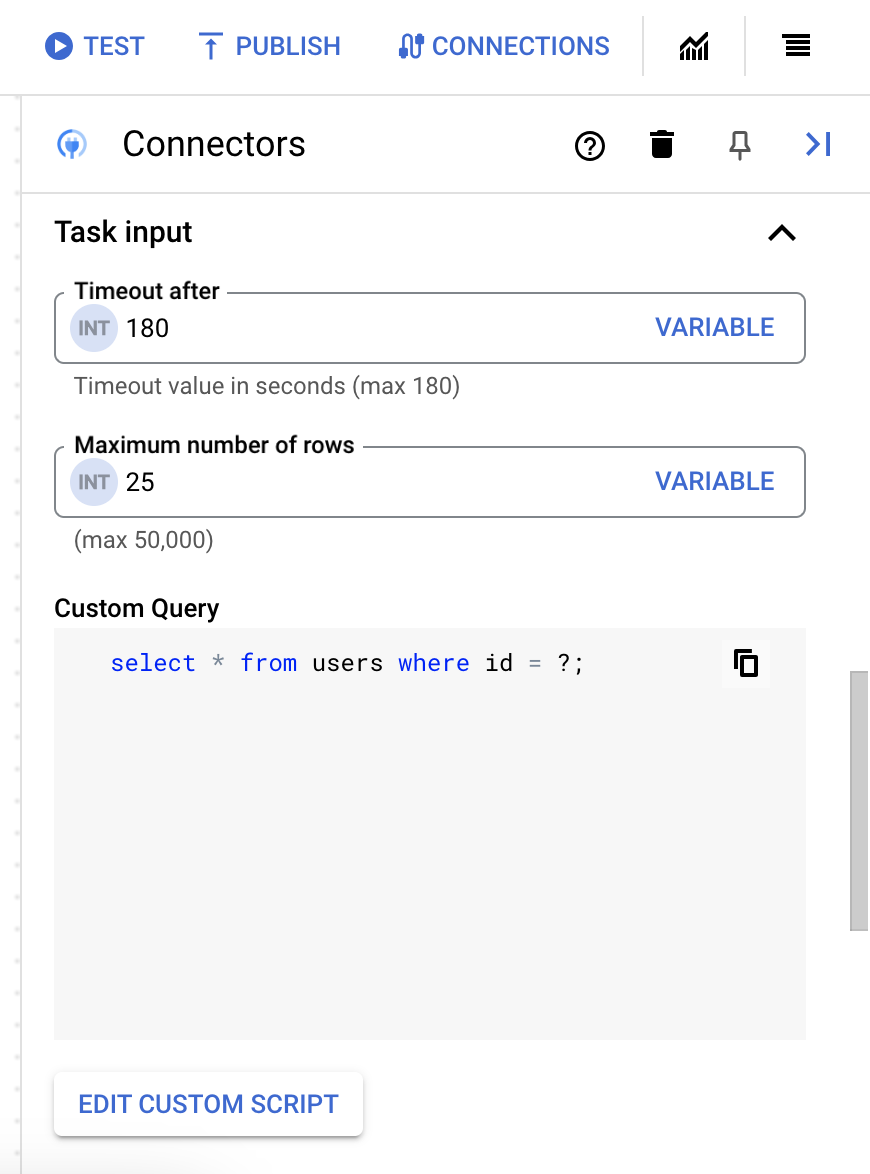

- In the Script editor dialog, enter the SQL query and click Save.
You can use a question mark (?) in a SQL statement to represent a single parameter that must be specified in the query parameters list. For example, the following SQL query selects all rows from the
Employeestable that matches the values specified for theLastNamecolumn:SELECT * FROM Employees where LastName=?
- If you've used question marks in your SQL query, you must add the parameter by clicking + Add Parameter Name for each question mark. While executing the integration, these parameters replace the question marks (?) in the SQL query sequentially. For example, if you have added three question marks (?), then you must add three parameters in order of sequence.
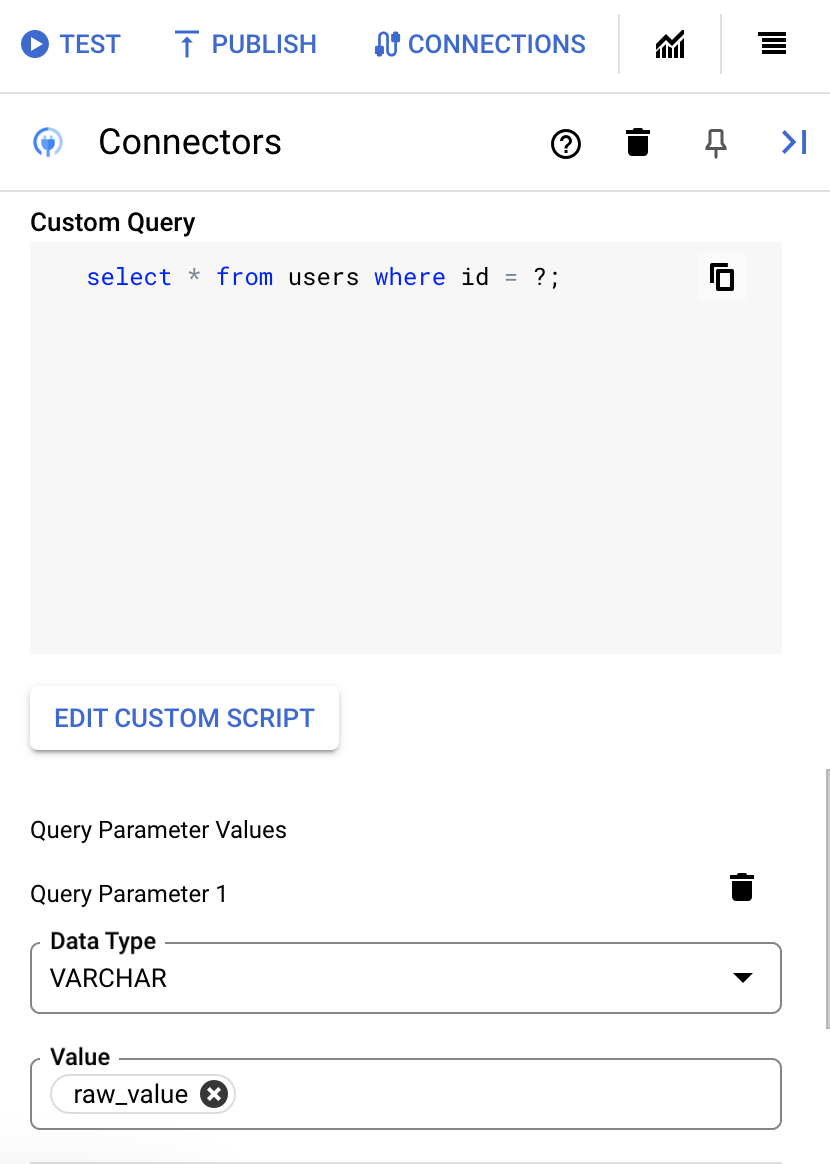

To add query parameters, do the following:
- From the Type list, select the data type of the parameter.
- In the Value field, enter the value of the parameter.
- To add multiple parameters, click + Add Query Parameter.
The Execute custom query action does not support array variables.
- In the Timeout after field, enter the number of seconds to wait till the query executes.
Schema refresh
All entities and actions will have a schema associated with them. For example, an action schema will have the parameter details such as; the parameter names, and its corresponding data type. The schema (metadata) for entities and actions is fetched by the connection at runtime from your backend. If there are any updates to the schema, such updates won't be automatically reflected in your existing connections; you must manually refresh the schema. To view the updated schema in your existing connector tasks, follow these steps:- In Integration Connectors, open the Connection details page of the connection, and then click Refresh connection schema.
- In Application Integration, you must reconfigure your existing connector task for the same connection.
Inline connection creation
You can use the Connectors task to directly create a new connection in Integration Connectors.
Before you begin
Create new connection
To create a new connection from Application Integration, perform the following steps:
- Click the Connectors task element on the designer to view the Connectors task configuration pane.
- Click Configure connector.
The Connectors Task Editor page appears.
- Skip the Region field.
- Click Connection and select the Create Connection option from the drop-down menu.
- Complete the following steps in the Create Connection pane:
- In the Location step, choose the location for the connection.
- Click Region and select a location from the drop-down list.
- Click Next.
- In the Connection Details step, provide details about the connection:
- Connector: Select the type of connector that you want to create from the drop down list. For information about the list of supported connectors, see All Integration Connectors.
- Connector version: Choose an available version of the selected Connector type from the drop down list.
- Connection Name: Enter a name for the Connection instance.
- (Optional) Enter a Description for the connection instance.
- (Optional) Check Enable Cloud Logging to store the log data of the connection instance.
- Service Account: Select a service account that has the required roles.
- (Optional) Click Advanced settings to configure the connection node settings.
For more information, see the respective connection documentation in Integration Connectors.
- (Optional) Click + ADD LABEL to add a label to the connection in the form of a key/value pair.
- Click Next.
-
In the Authentication step, provide the authentication details for the connection.
- The Authentication methods populated during this step are based on the type of connection being created.
Different connection types use different authentication methods. For more information, see the Configure authentication section of the respective connection documentation in Integration Connectors.
- Click Next.
- The Authentication methods populated during this step are based on the type of connection being created.
- Review: Review your connection and authentication details.
- Click Create.
- In the Location step, choose the location for the connection.
Best practices
- For information about the usage limits that apply to the Connectors task, see Usage limits.
- For information about how to troubleshoot a failed Connectors task, see Use logs to troubleshoot and trace connector failures.
Error handling strategy
An error handling strategy for a task specifies the action to take if the task fails due to a temporary error. For information about how to use an error handling strategy, and to know about the different types of error handling strategies, see Error handling strategies.
Pricing
The Cloud Pub/Sub trigger and Salesforce trigger don't require you to create a connector. However, if you use the Connectors task to connect to Pub/Sub or Salesforce, then you are billed for the connector usage. For information about pricing, see Application Integration pricing.
Quotas and limits
For information about quotas and limits, see Quotas and limits.
What's next
- Learn about all tasks and triggers.
- Learn how to test and publish an integration.
- Learn about error handling.
- Learn about integration execution logs.
