Halaman ini menjelaskan cara menambahkan fungsi penelusuran ke situs menggunakan widget penelusuran.
Sebelum memulai
Sebelum menambahkan widget penelusuran ke halaman web, pastikan untuk mengonfigurasi widget penelusuran, dimulai dengan Mengonfigurasi hasil untuk widget penelusuran. Perhatikan bahwa Anda tidak dapat menyesuaikan gaya widget penelusuran di halaman web Anda.
Prosedur
Prosedur untuk menambahkan widget penelusuran ke halaman web Anda berbeda-beda, bergantung pada jenis otorisasi yang Anda pilih:
Token otorisasi: Widget menggunakan token JWT atau OAuth yang disediakan oleh codebase Anda. Anda harus memiliki server sendiri yang dapat digunakan untuk membuat token. Token auth digunakan untuk melakukan panggilan API atas nama pengguna atau akun layanan. Saat membuat token auth, gunakan cakupan OAuth
https://www.googleapis.com/auth/cloud-platform.Untuk interaksi server-ke-server dengan akun layanan: Lihat Menggunakan OAuth 2.0 untuk Aplikasi Server ke Server dalam dokumentasi otorisasi.
Untuk aplikasi web JavaScript: Lihat OAuth 2.0 untuk Aplikasi Web Sisi Klien dalam dokumentasi otorisasi.
Akses publik: Widget tidak akan membatasi siapa yang dapat memperoleh hasil dari kueri penelusuran.
Menambahkan widget yang menggunakan token otorisasi
Di konsol Google Cloud , buka halaman AI Applications.
Klik nama aplikasi yang ingin Anda edit.
Klik Integration.
Klik tab Widget.
Pilih JWT atau berbasis OAuth sebagai jenis otorisasi widget.
Tentukan nama domain untuk halaman widget:
Masukkan nama domain untuk halaman tempat widget akan muncul.
Misalnya, jika Anda akan menyalin widget ke halaman
example.com/ai.htmldancymbal.example.com/search.html, masukkanexample.comsebagai domain. Jika Anda hanya ingin widget berfungsi di halaman di subdomain, masukkancymbal.example.com.Jika Anda ingin menguji widget di localhost, masukkan
localhost.Klik Tambahkan.
Ulangi langkah 6 untuk setiap domain tempat widget akan muncul.
Klik Simpan.
Salin cuplikan kode yang diberikan di bagian Salin kode berikut ke aplikasi web Anda.
Opsional: Lakukan perubahan berikut untuk menyesuaikan perilaku widget penelusuran:
Untuk membuka hasil dari web di tab baru, tambahkan kode berikut ke cuplikan kode yang disalin. Secara default, hasil dari dokumen tidak terstruktur akan terbuka di tab baru, sedangkan hasil dari web akan terbuka di halaman yang sama dengan widget.
anchorsTarget="_blank"Contoh:
<gen-search-widget configId="..." anchorsTarget="_blank"></gen-search-widget>Untuk menyesuaikan teks placeholder di dalam kotak penelusuran, tambahkan kode berikut ke cuplikan kode yang disalin:
placeholder="CUSTOM_PLACEHOLDER"Contoh:
<gen-search-widget configId="..." placeholder="Start your search here"></gen-search-widget>Untuk selalu menampilkan widget tanpa pemicu, tambahkan kode berikut ke cuplikan kode yang disalin:
alwaysOpenedContoh:
<gen-search-widget alwaysOpened></gen-search-widget>
Di codebase Anda, buat token otorisasi.
Untuk meneruskan token otorisasi ke widget Anda, gunakan cuplikan kode kedua, "
// Set authorization token", yang disediakan di bagian Salin kode berikut ke aplikasi web Anda dan ganti teks<JWT or OAuth token provided by you backend>dengan token otorisasi Anda.Atur token baru secara berkala dengan mengulangi langkah sebelumnya sebelum token saat ini kedaluwarsa.
Menambahkan widget yang memiliki akses publik
Di konsol Google Cloud , buka halaman AI Applications.
Klik nama aplikasi yang ingin Anda edit.
Untuk akses publik, pastikan aplikasi penelusuran tidak dikaitkan dengan penyimpanan data apa pun di bagian kontrol akses.
Klik Integration.
Klik tab Widget.
Pilih Akses Publik sebagai jenis otorisasi widget.
Tentukan nama domain untuk halaman widget:
Masukkan nama domain untuk halaman tempat widget akan muncul.
Misalnya, jika Anda akan menyalin widget ke halaman
example.com/ai.htmldancymbal.example.com/search.html, masukkanexample.comsebagai domain. Jika Anda hanya ingin widget berfungsi di halaman di subdomain, masukkancymbal.example.com.Jika Anda ingin menguji widget di localhost, masukkan
localhost.Klik Tambahkan.
Ulangi langkah 6 untuk setiap domain tempat widget akan muncul.
Klik Simpan.
Salin cuplikan kode yang diberikan di bagian Salin kode berikut ke aplikasi web Anda.
Opsional: Lakukan perubahan berikut untuk menyesuaikan perilaku widget penelusuran:
Untuk membuka hasil dari web di tab baru, tambahkan kode berikut ke cuplikan kode yang disalin. Secara default, hasil dari dokumen tidak terstruktur akan terbuka di tab baru, sedangkan hasil dari web akan terbuka di halaman yang sama dengan widget.
anchorsTarget="_blank"Contoh:
<gen-search-widget configId="..." anchorsTarget="_blank"></gen-search-widget>Untuk menyesuaikan teks placeholder di dalam kotak penelusuran, tambahkan kode berikut ke cuplikan kode yang disalin:
placeholder="CUSTOM_PLACEHOLDER"Contoh:
<gen-search-widget configId="..." placeholder="Start your search here"></gen-search-widget>Untuk selalu menampilkan widget tanpa pemicu, tambahkan kode berikut ke cuplikan kode yang disalin:
<gen-search-widget alwaysOpened></gen-search-widget>
Tempelkan cuplikan kode ke halaman web Anda.
Contoh widget akses publik yang disematkan
Untuk melihat widget penelusuran yang disematkan di halaman web publik, lihat Coba Vertex AI Search.
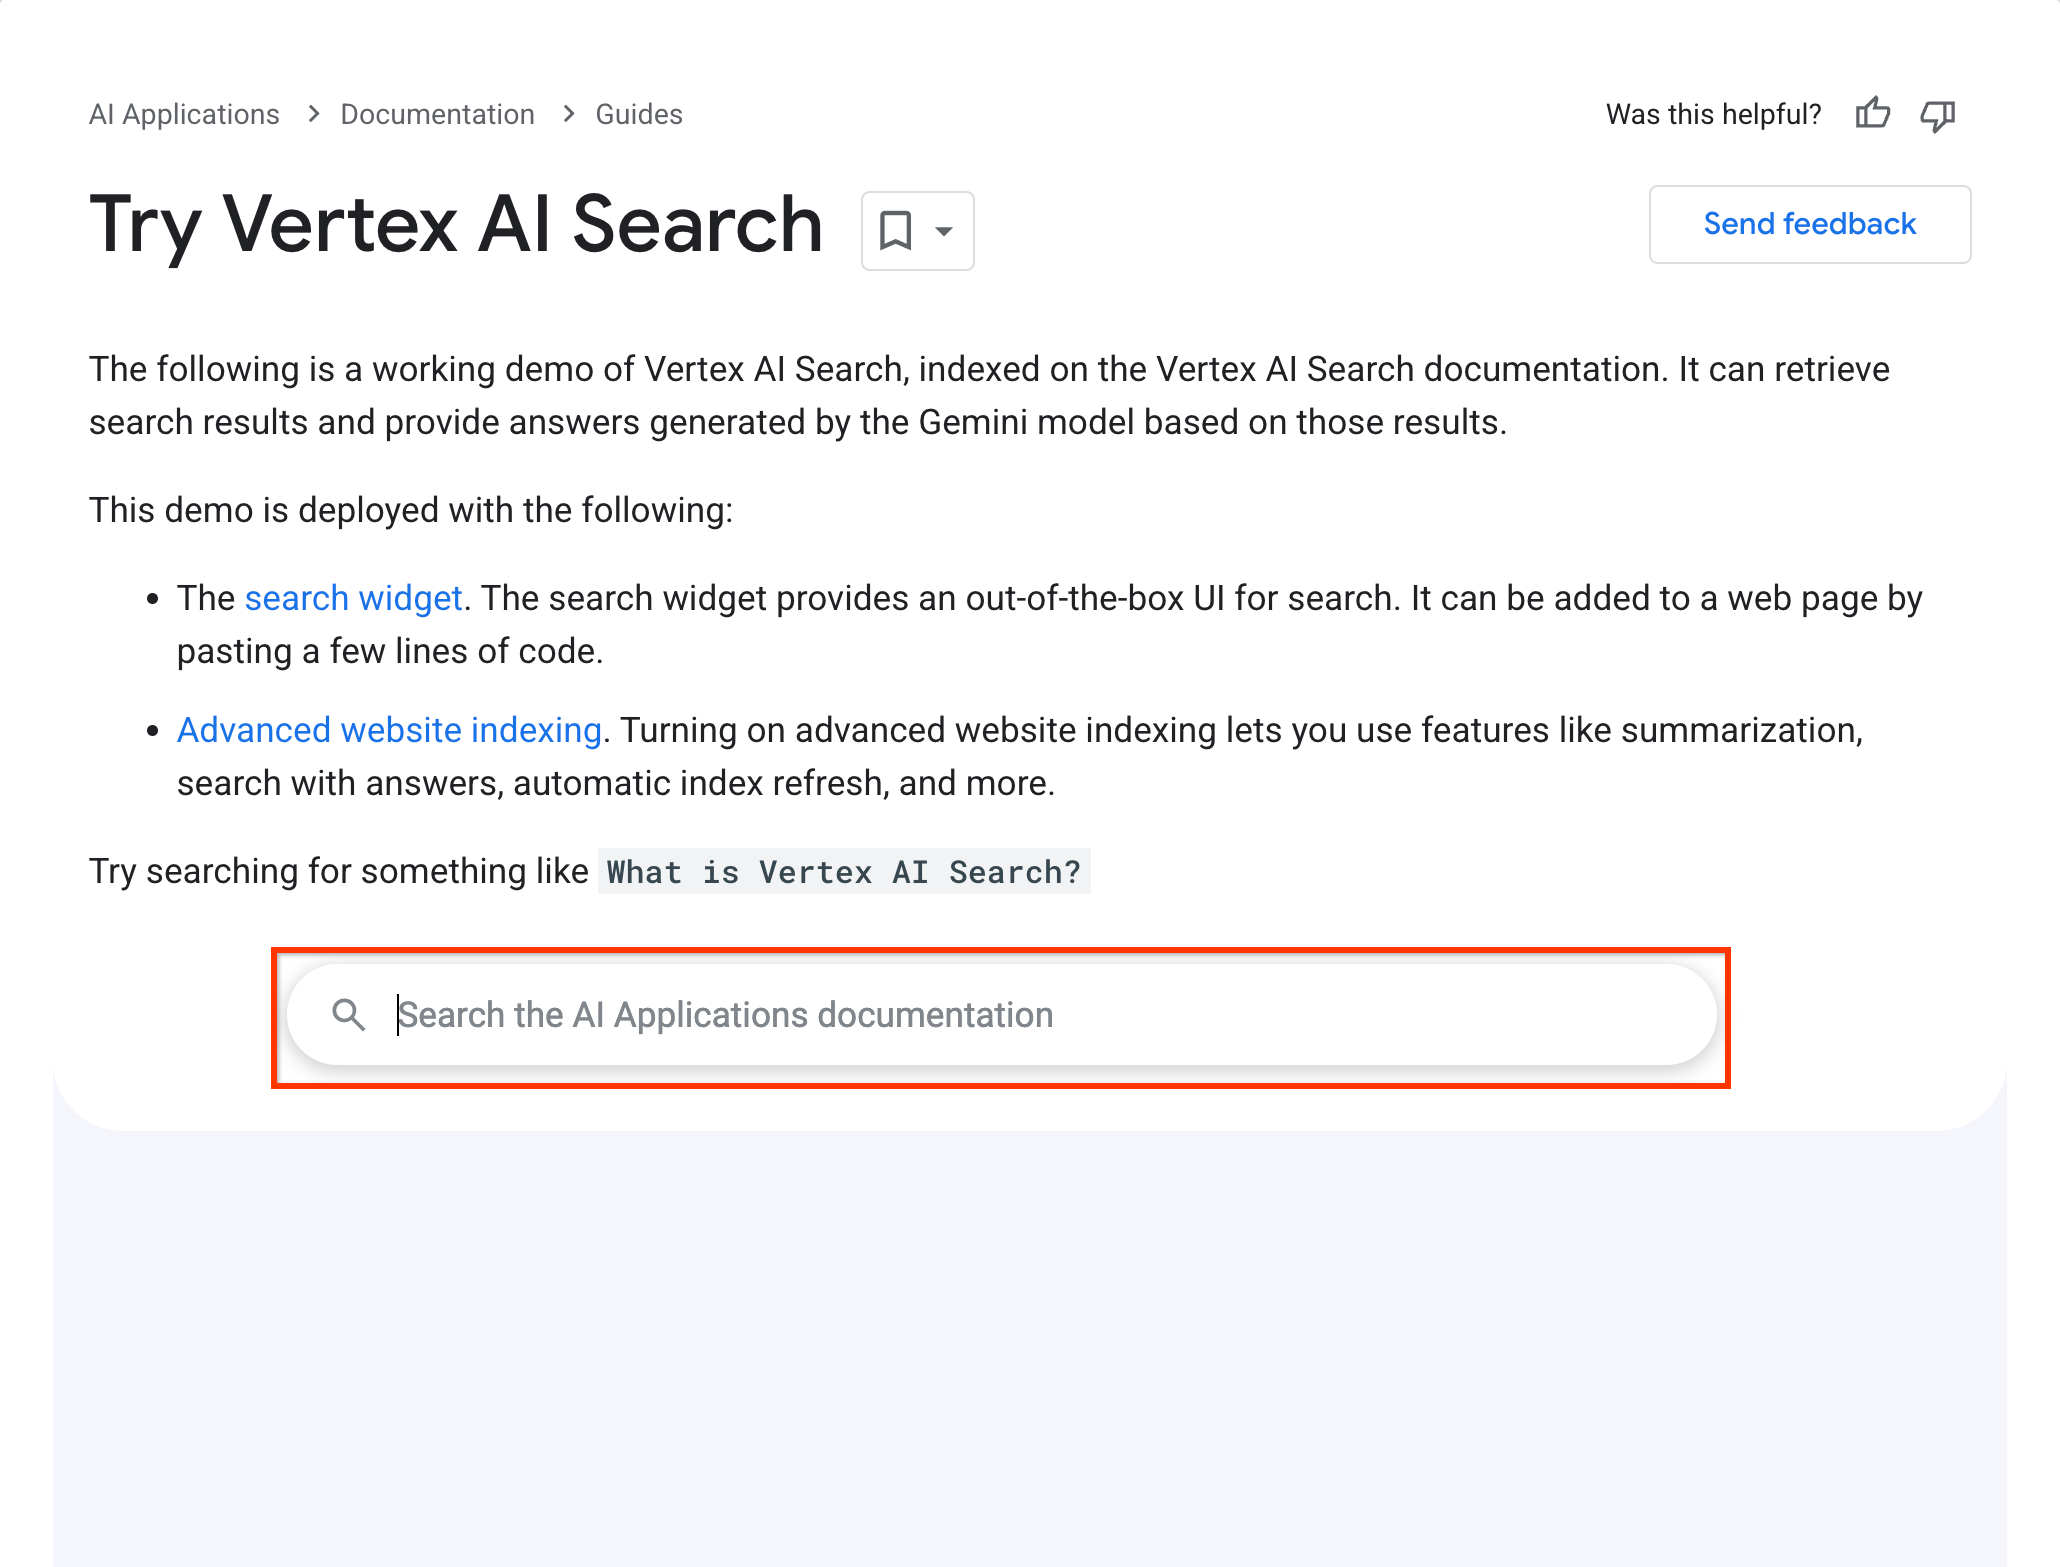
Widget penelusuran ini berfungsi dengan konfigurasi berikut:
  <gen-search-widget
    configId="123456"
    anchorsTarget="_blank"
    placeholder="Search the AI Applications documentation"
    alwaysOpened>
  </gen-search-widget>