Tetap teratur dengan koleksi
Simpan dan kategorikan konten berdasarkan preferensi Anda.
Dengan
integrasi,
interaksi pengguna akhir akan ditangani untuk Anda.
Anda hanya perlu membuat agen, menerapkan fulfillment,
dan mengonfigurasi integrasi.
Panduan ini menunjukkan cara menggunakan integrasi Dialogflow Web Demo untuk menyediakan antarmuka pengguna chat teks sederhana bagi agen Anda.
Sebelum memulai
Jika tidak berencana menggunakan integrasi,
Anda dapat melewati panduan memulai ini.
Anda harus melakukan hal berikut sebelum membaca panduan ini:
Lakukan langkah-langkah dalam
panduan memulai
Mem-build agen.
Langkah-langkah di bawah ini akan melanjutkan pekerjaan pada agen yang Anda mulai dalam panduan tersebut.
Jika tidak lagi memiliki agen tersebut, Anda dapat mendownload
build-agent-quickstart.zip
dan
mengimpor file.
Setelah diaktifkan, jendela dialog akan memberikan hal berikut:
URL ke halaman web tempat integrasi dihosting.
Link ke setelan agen,
yang dapat digunakan untuk menyesuaikan beberapa aspek halaman web.
Kode HTML untuk menyematkan agen di situs Anda.
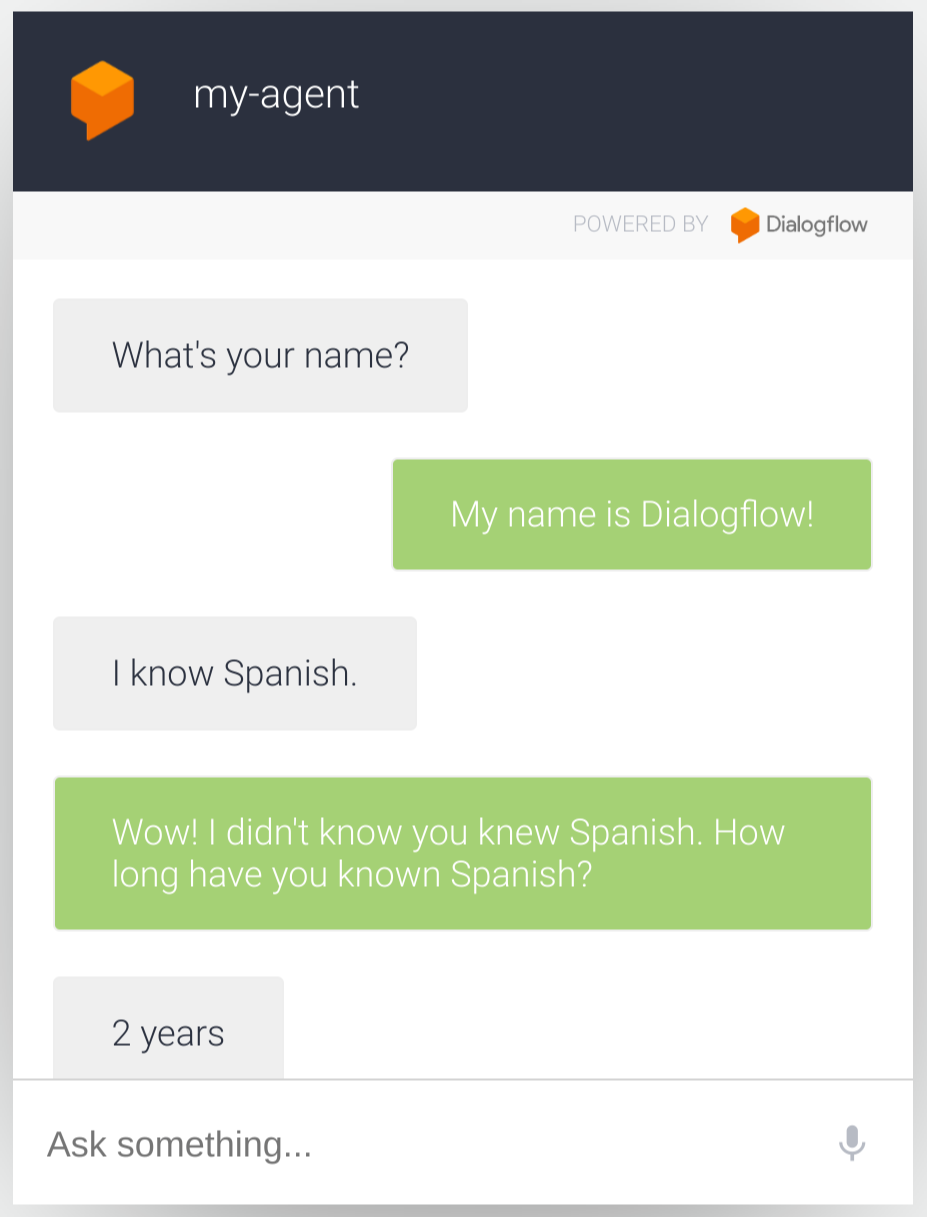
Berinteraksi dengan agen
Buka halaman web agen menggunakan link yang disediakan.
Halaman ini menyediakan antarmuka chat teks.
Ketik What's your name?, lalu tekan enter.
Agen akan merespons dengan respons yang Anda konfigurasi di quickstart sebelumnya.
[[["Mudah dipahami","easyToUnderstand","thumb-up"],["Memecahkan masalah saya","solvedMyProblem","thumb-up"],["Lainnya","otherUp","thumb-up"]],[["Sulit dipahami","hardToUnderstand","thumb-down"],["Informasi atau kode contoh salah","incorrectInformationOrSampleCode","thumb-down"],["Informasi/contoh yang saya butuhkan tidak ada","missingTheInformationSamplesINeed","thumb-down"],["Masalah terjemahan","translationIssue","thumb-down"],["Lainnya","otherDown","thumb-down"]],["Terakhir diperbarui pada 2025-08-18 UTC."],[[["\u003cp\u003eThis guide explains how to use the Dialogflow Web Demo integration to create a text chat interface for your agent.\u003c/p\u003e\n"],["\u003cp\u003eUsing an integration such as the Dialogflow Web Demo handles end-user interactions, allowing you to focus on building the agent and implementing fulfillment.\u003c/p\u003e\n"],["\u003cp\u003eBefore using this guide, you should have completed the Dialogflow basics, setup steps, and the "Build an agent" quickstart guide.\u003c/p\u003e\n"],["\u003cp\u003eYou can enable the Web Demo integration via the Integrations section of the Dialogflow ES console, and it provides a URL and embeddable HTML code.\u003c/p\u003e\n"],["\u003cp\u003eOnce enabled, the Web Demo integration allows you to interact with your agent through a simple text chat interface on a provided web page.\u003c/p\u003e\n"]]],[],null,["# Quickstart: Interactions with an integration\n\nWith an\n[integration](/dialogflow/docs/integrations),\nend-user interactions are handled for you.\nYou just need to build an agent, implement fulfillment,\nand configure the integration.\n\nThis guide shows you how to use the\n[Dialogflow Web Demo](/dialogflow/docs/integrations/web-demo)\nintegration to provide a simple text chat user interface\nfor your agent.\n\nBefore you begin\n----------------\n\nIf you don't plan on using an integration,\nyou can skip this quickstart.\n\nYou should do the following before reading this guide:\n\n1. Read [Dialogflow basics](/dialogflow/docs/basics).\n2. Perform [setup steps](/dialogflow/docs/quick/setup).\n3. Perform steps in the [Build an agent](/dialogflow/docs/quick/build-agent) quickstart guide. Steps below continue working on the agent you started in that guide. If you no longer have that agent, you can download [`build-agent-quickstart.zip`](/static/dialogflow/es/docs/data/build-agent-quickstart.zip) and [import the file](/dialogflow/docs/agents-settings#export).\n\nEnable the integration\n----------------------\n\nTo enable the integration:\n\n1. Go to the [Dialogflow ES console](https://dialogflow.cloud.google.com).\n2. Select your agent.\n3. Click **Integrations** in the left sidebar menu\n4. Enable the **Web Demo** integration.\n\nOnce enabled, a dialog window provides the following:\n\n- A URL to a web page where the integration is hosted.\n- A link to agent settings, which can be used to customize some aspects of the web page.\n- HTML code to embed your agent in your website.\n\nInteract with your agent\n------------------------\n\nOpen the agent's web page using the provided link.\nThis page provides a text chat interface.\nType `What's your name?` and press enter.\nThe agent responds with the response you configured in prior quickstarts."]]