Some products and features are in the process of being renamed. Generative playbook and flow features are also being migrated to a single consolidated console. See the details.
Stay organized with collections
Save and categorize content based on your preferences.
With an
integration,
end-user interactions are handled for you.
You just need to build an agent, optionally implement a webhook,
and configure the integration.
This guide shows you how to use the
Dialogflow CX Messenger
integration to provide a simple text chat user interface
for your agent.
Before you begin
If you don't plan on using an integration, you can skip this quickstart.
You should do the following before reading this guide:
If the integration was previously setup for this agent,
you will see embeddable HTML code.
Regardless of whether you want what authenticated or unauthenticated,
click the Disable... button at the bottom of the dialog,
so you can reconfigure the settings in the next step.
Select an Environment.
Select Unauthenticated API.
Select a style.
Optionally restrict domain access.
Click Enable the unauthenticated API.
The dialog will show the embeddable HTML code
that can be embedded on your website.
Copy this code.
Click Done.
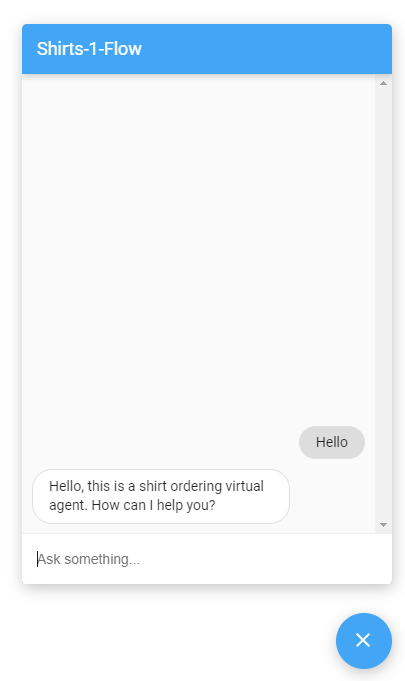
Embed
Paste the embed code you copied above in a webpage on your website.
The <script> and <df-messenger> HTML elements
should be in the <body> element of your page.
If you are using an authenticated integration,
set the oauth-client-id attribute for <df-messenger>
to your Oauth client id. And if you want to use end-users' identities for tool
authentication,
set the access-token-name attribute with any name you like.
Then use Bearer Token with value $session.params.ACCESS_TOKEN_NAME
for tool authentication.
Update any other attributes that require updating.
To allow for responsive layouts,
also add the following to your <head> element:
[[["Easy to understand","easyToUnderstand","thumb-up"],["Solved my problem","solvedMyProblem","thumb-up"],["Other","otherUp","thumb-up"]],[["Hard to understand","hardToUnderstand","thumb-down"],["Incorrect information or sample code","incorrectInformationOrSampleCode","thumb-down"],["Missing the information/samples I need","missingTheInformationSamplesINeed","thumb-down"],["Other","otherDown","thumb-down"]],["Last updated 2025-08-07 UTC."],[[["\u003cp\u003eThis guide details how to use the Dialogflow CX Messenger integration to create a text-based chat interface for your agent.\u003c/p\u003e\n"],["\u003cp\u003eSetting up the integration requires you to have already completed agent setup, flow basics, and general setup steps, and it also requires billing to be enabled.\u003c/p\u003e\n"],["\u003cp\u003eThe process involves navigating the Dialogflow CX console, selecting your agent, and configuring the Dialogflow CX Messenger integration for unauthenticated access.\u003c/p\u003e\n"],["\u003cp\u003eYou can embed the chat interface by pasting the provided HTML code into the \u003ccode\u003e<body>\u003c/code\u003e of your website, and modify some settings according to your preferences.\u003c/p\u003e\n"],["\u003cp\u003eOnce embedded, users can interact with the agent via a chat icon that will appear in the lower right corner of the page.\u003c/p\u003e\n"]]],[],null,["# Interactions with an integration\n\nWith an\n[integration](/dialogflow/cx/docs/concept/integration),\nend-user interactions are handled for you.\nYou just need to build an agent, optionally implement a webhook,\nand configure the integration.\n\nThis guide shows you how to use the\n[Dialogflow CX Messenger](/dialogflow/cx/docs/concept/integration/dialogflow-messenger)\nintegration to provide a simple text chat user interface\nfor your agent.\n\nBefore you begin\n----------------\n\nIf you don't plan on using an integration, you can skip this quickstart.\n\nYou should do the following before reading this guide:\n\n1. Read [flow basics](/dialogflow/cx/docs/basics).\n2. Perform [setup steps](/dialogflow/cx/docs/quick/setup).\n3. Perform steps in the [Build an agent using flows](/dialogflow/cx/docs/quick/build-agent) quickstart guide. Steps below continue working on the same agent. If you no longer have that agent, you can [download the agent](/static/dialogflow/cx/docs/data/agent-shirts-1-flow.zip) and [restore it](/dialogflow/cx/docs/concept/agent#export).\n\nSetup\n-----\n\n| **Note:** The steps below create an integration that allows unauthenticated agent query access. See the [Dialogflow CX Messenger documentation](/dialogflow/cx/docs/concept/integration/dialogflow-messenger) for instructions to create an authenticated integration.\n\n\n| **Note:** Make sure [billing is enabled](/dialogflow/cx/docs/quick/setup#billing) on your project before testing the integration.\n\nTo set up unauthenticated access to your Dialogflow CX Messenger agent:\n\n1. Go to the [Dialogflow CX console](https://dialogflow.cloud.google.com/cx/projects).\n2. Choose your Google Cloud project.\n3. Select your agent.\n4. Select the **Manage** tab.\n5. Click **Integrations** in the left sidebar menu.\n6. Click **Connect** on **Dialogflow CX Messenger**.\n7. A configuration dialog opens.\n8. If the integration was previously setup for this agent, you will see embeddable HTML code. Regardless of whether you want what authenticated or unauthenticated, click the **Disable...** button at the bottom of the dialog, so you can reconfigure the settings in the next step.\n9. Select an **Environment**.\n10. Select **Unauthenticated API**.\n11. Select a style.\n12. Optionally restrict domain access.\n13. Click **Enable the unauthenticated API**.\n14. The dialog will show the embeddable HTML code that can be embedded on your website. Copy this code.\n15. Click **Done**.\n\n\u003cbr /\u003e\n\nEmbed\n-----\n\n\nPaste the embed code you copied above in a webpage on your website.\nThe `\u003cscript\u003e` and `\u003cdf-messenger\u003e` HTML elements\nshould be in the `\u003cbody\u003e` element of your page.\n\nIf you are using an authenticated integration,\nset the `oauth-client-id` attribute for `\u003cdf-messenger\u003e`\nto your Oauth client id. And if you want to use end-users' identities for [tool\nauthentication](/dialogflow/cx/docs/concept/playbook/tool#openapi_tool_api_authentication),\nset the `access-token-name` attribute with any name you like.\nThen use Bearer Token with value `$session.params.`\u003cvar class=\"edit\" label=\"the access token name you set\" translate=\"no\"\u003eACCESS_TOKEN_NAME\u003c/var\u003e\nfor tool authentication.\n\nUpdate any other attributes that require updating.\n\nTo allow for responsive layouts,\nalso add the following to your `\u003chead\u003e` element: \n\n \u003cmeta name=\"viewport\" content=\"width=device-width, initial-scale=1\"\u003e\n\n\u003cbr /\u003e\n\nOnce embedded,\nyou can interact with your agent through the webpage\nby clicking the chat icon in the lower right corner.\n\nCustomize\n---------\n\nYou can customize the appearance and behavior of this user interface\nin many ways.\nSee the\n[Dialogflow CX Messenger documentation](/dialogflow/cx/docs/concept/integration/dialogflow-messenger)\nfor more information."]]