커스텀 카드 처리를 만들 때는 텍스트 응답과 커스텀 페이로드를 만들 수 있습니다. 텍스트 응답은 일반 텍스트 및 마크다운 에이전트 응답에 사용되며 커스텀 페이로드는 서식 있는 응답에 사용됩니다. 모든 응답 유형의 커스텀 페이로드 형식은 다음과 같은 기본 구조입니다.
{
  "richContent": [
    [
      {
        "type": "type-id",
        ...
      },
      {
        "type": "type-id",
        ...
      }
    ],
    [
      {
        "type": "type-id",
        ...
      },
      {
        "type": "type-id",
        ...
      }
    ]
  ]
}
richContent 값은 외부 배열 한 개와 내부 배열 여러 개를 허용합니다.
내부 배열 내 응답은 단일 시각적 카드에 결합됩니다.
외부 배열에 내부 배열이 여러 개 포함된 경우 내부 배열마다 카드가 여러 개 표시됩니다.
나머지 하위 섹션은 커스텀 페이로드에 구성할 수 있는 다양한 응답 유형을 설명합니다.
텍스트 응답
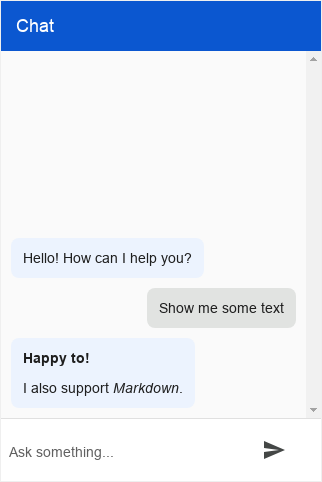
텍스트 응답은 일반 텍스트와 마크다운을 지원합니다. 다음은 몇 가지 마크다운 예시입니다.
*Italic***Bold**# Title[Link text](Link URL)테이블:
Header 1 | Header 2
-------- | --------
Cell 1   | Cell 2
정보 응답 유형
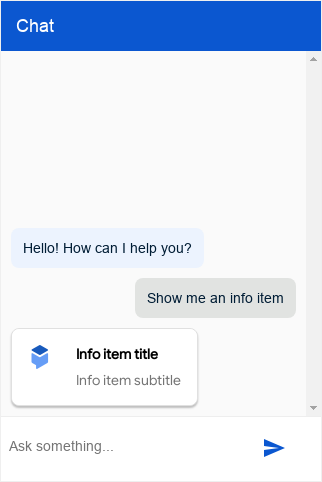
정보 응답 유형은 사용자가 클릭하거나 터치할 수 있는 간단한 타이틀 카드입니다.
다음 표에서는 필드를 설명합니다.
| 이름 | 유형 | 설명 |
|---|---|---|
type |
string |
응답 유형: 'info' |
title |
string |
카드 제목 |
subtitle |
string |
카드 자막 |
image |
object |
이미지 |
image.rawUrl |
string |
이미지의 공개 URL |
anchor |
object |
요소를 클릭할 때 따를 앵커 |
anchor.href |
string |
앵커의 URL |
anchor.target |
string |
앵커 타겟입니다. 기본값은 _blank입니다. |
예를 들면 다음과 같습니다.
{
  "richContent": [
    [
      {
        "type": "info",
        "title": "Info item title",
        "subtitle": "Info item subtitle",
        "image": {
          "rawUrl": "https://example.com/images/logo.png"
        },
        "anchor": {
          "href": "https://example.com"
        }
      }
    ]
  ]
}
설명 응답 유형
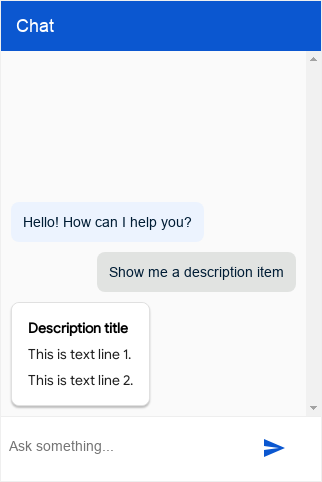
설명 응답 유형은 여러 줄로 구성된 텍스트를 포함할 수 있는 정보 카드입니다.
다음 표에서는 필드를 설명합니다.
| 이름 | 유형 | 설명 |
|---|---|---|
type |
string |
응답 유형: 'description' |
title |
string |
카드 제목 |
text |
array<string> |
각 문자열이 새 줄에 렌더링되는 문자열의 배열 |
예를 들면 다음과 같습니다.
{
  "richContent": [
    [
      {
        "type": "description",
        "title": "Description title",
        "text": [
          "This is text line 1.",
          "This is text line 2."
        ]
      }
    ]
  ]
}
이미지 응답 유형
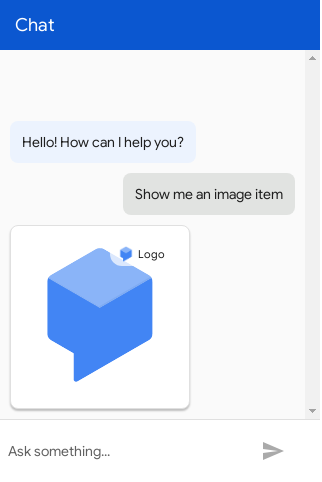
이미지 응답 유형은 사용자가 클릭하거나 터치할 수 있는 이미지 카드입니다. 응답 유형은 이미지 소스를 짧은 설명 텍스트 및 아이콘과 함께 앵커 링크로 추가할 수 있게 해주는 참조 칩을 지원합니다.
다음 표에서는 필드를 설명합니다.
| 이름 | 유형 | 설명 |
|---|---|---|
type |
string |
응답 유형: 'image' |
rawUrl |
string |
이미지의 공개 URL |
accessibilityText |
string |
이미지의 대체 텍스트 |
reference.text |
string |
참조 칩에 표시할 텍스트 |
reference.anchor.href |
string |
참조 칩의 URL |
reference.anchor.target |
string |
참조 칩에 있는 앵커의 타겟입니다. 기본값은 _blank입니다. |
reference.image.rawUrl |
string |
참조 칩에 표시할 이미지 |
예를 들면 다음과 같습니다.
{
  "richContent": [
    [
      {
        "type": "image",
        "rawUrl": "https://example.com/images/logo.png",
        "accessibilityText": "Example logo",
        "reference": {
          "text": "Logo",
          "anchor": {
            "href": "https://example.com/images/logo.png"
          },
          "image": {
            "rawUrl": "https://example.com/images/logo_small.png"
          }
        }
      }
    ]
  ]
}
다음 CSS 변수가 제공될 수 있습니다.
| 속성 | 입력 정책 | 기본값 | 설명 |
|---|---|---|---|
df-messenger-image-border-radius |
선택사항 | 8px | 이미지의 테두리 반경 |
동영상 응답 유형
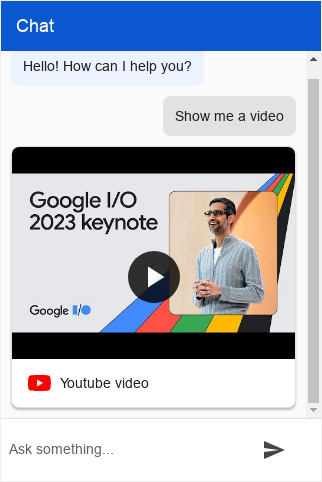
비디오 응답 유형은 메신저에서 직접 재생되는 URL의 직접 동영상이거나 동영상에 대한 링크일 수 있는 동영상 요소를 렌더링합니다.
| 이름 | 유형 | 설명 |
|---|---|---|
type |
string |
응답 유형: '동영상' |
title |
string |
동영상 제목(선택사항) |
source |
object |
동영상 소스 |
source.type |
string |
동영상 소스 유형(link 또는 raw) |
source.anchor |
object |
요소를 클릭할 때 따를 앵커 |
source.embeddedPlayer |
string |
link 유형 동영상은 플레이어의 웹페이지로 연결되는 대신 삽입될 수 있습니다. 이는 알려진 플레이어 집합에만 구현되며 youtube를 지원합니다. |
source.thumbnail |
object |
anchor에 표시할 썸네일 |
source.thumbnail.rawUrl |
string |
썸네일 URL |
source.rawUrl |
string |
raw 유형 동영상 URL |
예를 들면 다음과 같습니다.
{
  "richContent": [
    [
      {
        "type": "video",
        "source": {
          "type": "link",
          "anchor": {
            "href": "https://www.youtube.com/watch?v=cNfINi5CNbY"
          }
        }
      }
    ]
  ]
}
다음 CSS 변수가 제공될 수 있습니다.
| 속성 | 입력 정책 | 기본값 | 설명 |
|---|---|---|---|
df-messenger-video-width |
선택사항 | 자동 | 동영상 너비(max-width\: 100%로 제한) |
df-messenger-video-height |
선택사항 | 자동 | 동영상 높이 |
df-messenger-video-embed-width |
선택사항 | 560px | 삽입된 동영상의 너비(max-width\: 100%로 제한) |
df-messenger-video-embed-height |
선택사항 | 315px | 삽입된 동영상의 높이 |
df-messenger-video-border |
선택사항 | 1px solid #e0e0e0 | 동영상 테두리 |
df-messenger-video-border-radius |
선택사항 | 8px | 동영상의 테두리 반경 |
버튼 응답 유형
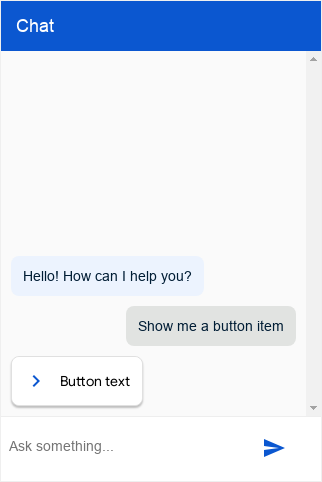
버튼 응답 유형은 사용자가 클릭하거나 터치할 수 있는 아이콘이 있는 작은 버튼입니다.
다음 표에서는 필드를 설명합니다.
| 이름 | 유형 | 설명 |
|---|---|---|
type |
string |
응답 유형: 'button' |
icon |
object |
버튼용 아이콘 |
icon.type |
string |
머티리얼 아이콘 라이브러리의 아이콘입니다. 기본 아이콘은 화살표입니다. |
icon.color |
string |
색상 16진수 코드 |
image |
object |
버튼 이미지이며 icon보다 우선 적용됩니다. |
image.rawUrl |
string |
이미지의 공개 URL |
mode |
string |
선택적으로 'blocking'으로 설정된 경우 사용자가 버튼을 클릭할 때까지 사용자 입력이 사용 중지됩니다. |
text |
string |
버튼 텍스트 |
anchor |
object |
요소를 클릭할 때 따를 앵커 |
anchor.href |
string |
앵커의 URL |
anchor.target |
string |
앵커 타겟입니다. 기본값은 _blank입니다. |
event |
object |
버튼 클릭 시 트리거되는 Dialogflow 이벤트입니다. |
예를 들면 다음과 같습니다.
{
  "richContent": [
    [
      {
        "type": "button",
        "icon": {
          "type": "chevron_right",
          "color": "#FF9800"
        },
        "mode": "blocking",
        "text": "Button text",
        "anchor": {
          "href": "https://example.com"
        },
        "event": {
          "event": ""
        }
      }
    ]
  ]
}
다음 CSS 변수가 제공될 수 있습니다.
| 속성 | 입력 정책 | 기본값 | 설명 |
|---|---|---|---|
df-messenger-button-border |
선택사항 | 없음 | 버튼 테두리 |
df-messenger-button-border-radius |
선택사항 | 8px | 버튼 테두리 반경 |
df-messenger-button-font-color |
선택사항 | #1f1f1f | 버튼 텍스트 색상 |
df-messenger-button-font-family |
선택사항 | 'Google Sans', 'Helvetica Neue', sans-serif | 버튼 글꼴 모음 |
df-messenger-button-font-size |
선택사항 | 14px | 버튼 글꼴 크기 |
df-messenger-button-padding |
선택사항 | 12px | 버튼 패딩 |
df-messenger-button-icon-spacing |
선택사항 | 12px | 버튼 아이콘과 텍스트 사이의 간격 |
df-messenger-button-icon-font-size |
선택사항 | 24px | 버튼 아이콘 크기 |
df-messenger-button-image-size |
선택사항 | 24px | 버튼 이미지 크기 |
df-messenger-button-image-offset |
선택사항 | 0 | 버튼 이미지의 오프셋. 음수 값으로 패딩을 오프셋할 수 있습니다. |
df-messenger-button-text-align |
선택사항 | 가운데 | 버튼의 텍스트 정렬 |
df-messenger-button-text-wrap |
선택사항 | normal | 여러 줄로 된 버튼을 허용하지 않으려면 nowrap 사용 |
목록 응답 유형
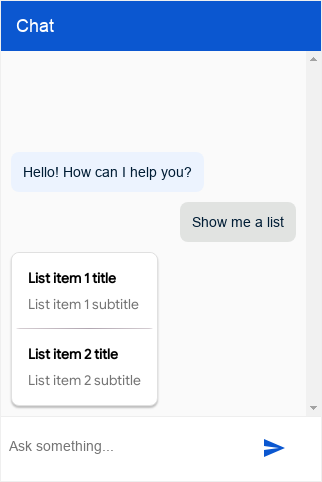
목록 응답 유형은 사용자가 선택할 수 있는 옵션이 여러 개 있는 카드입니다.
응답에는 list 및 divider 응답 유형의 배열이 포함됩니다.
다음 표에서는 list 유형을 설명합니다.
| 이름 | 유형 | 설명 |
|---|---|---|
type |
string |
응답 유형: 'list' |
title |
string |
옵션 제목 |
subtitle |
string |
옵션 자막 |
event |
object |
옵션을 클릭하면 트리거되는 Dialogflow 이벤트입니다. |
anchor |
object |
요소를 클릭할 때 따를 앵커 |
anchor.href |
string |
앵커의 URL |
anchor.target |
string |
앵커 타겟입니다. 기본값은 _blank입니다. |
image |
object |
이미지 |
image.rawUrl |
string |
이미지의 공개 URL |
다음 표에서는 divider 유형을 설명합니다.
| 이름 | 유형 | 설명 |
|---|---|---|
type |
string |
응답 유형: 'divider' |
예를 들면 다음과 같습니다.
{
  "richContent": [
    [
      {
        "type": "list",
        "title": "List item 1 title",
        "subtitle": "List item 1 subtitle",
        "event": {
          "event": ""
        }
      },
      {
        "type": "list",
        "title": "List item 2 title",
        "subtitle": "List item 2 subtitle",
        "event": {
          "event": ""
        }
      }
    ]
  ]
}
다음 CSS 변수가 제공될 수 있습니다.
| 속성 | 입력 정책 | 기본값 | 설명 |
|---|---|---|---|
df-messenger-list-padding |
선택사항 | 16px | 목록 요소의 패딩 |
df-messenger-list-inset |
선택사항 | 0 | 패딩 외에 목록 요소의 추가적인 가로 '인셋'으로 요소 간 테두리의 확장 제어 |
df-messenger-list-spacing |
선택사항 | 10px | 목록 요소 사이의 세로 공간 |
df-messenger-list-border-bottom |
선택사항 | 1px solid #e0e0e0 | 목록 요소 사이의 테두리 |
아코디언 응답 유형
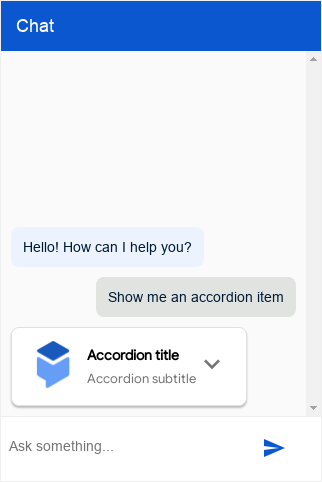
아코디언 응답 유형은 사용자가 클릭하거나 터치하여 더 많은 텍스트를 볼 수 있는 작은 카드입니다.
다음 표에서는 필드를 설명합니다.
| 이름 | 유형 | 설명 |
|---|---|---|
type |
string |
응답 유형: 'accordion' |
title |
string |
아코디언 제목 |
subtitle |
string |
아코디언 자막 |
image |
object |
이미지 |
image.rawUrl |
string |
이미지의 공개 URL |
text |
string |
아코디언 텍스트 |
예를 들면 다음과 같습니다.
{
  "richContent": [
    [
      {
        "type": "accordion",
        "title": "Accordion title",
        "subtitle": "Accordion subtitle",
        "image": {
          "rawUrl": "https://example.com/images/logo.png"
        },
        "text": "Accordion text"
      }
    ]
  ]
}
추천 칩 응답 유형
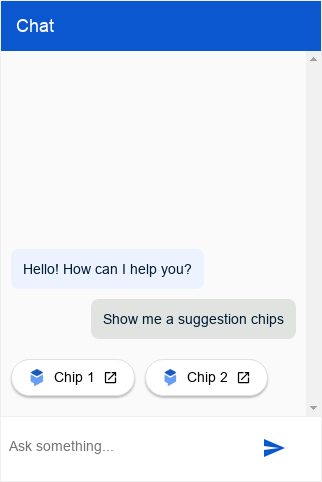
추천 칩 응답 유형은 최종 사용자에게 클릭 가능한 추천 칩 목록을 제공합니다.
다음 표에서는 필드를 설명합니다.
| 이름 | 유형 | 설명 |
|---|---|---|
type |
string |
응답 유형: 'chips' |
options |
array<object> |
옵션 객체 배열 |
options[].mode |
string |
선택적으로 'blocking'으로 설정된 경우 사용자가 칩을 클릭할 때까지 사용자 입력이 사용 중지됩니다. |
options[].text |
string |
옵션 텍스트 |
options[].image |
object |
이미지 옵션(선택사항) |
options[].image.rawUrl |
string |
옵션 이미지의 공개 URL |
options[].anchor |
object |
요소를 클릭할 때 따를 앵커(선택사항) |
options[].anchor.href |
string |
앵커의 URL |
options[].anchor.target |
string |
앵커 타겟입니다. 기본값은 _blank입니다. |
예를 들면 다음과 같습니다.
{
  "richContent": [
    [
      {
        "type": "chips",
        "options": [
          {
            "mode": "blocking",
            "text": "Chip 1",
            "image": {
              "rawUrl": "https://example.com/images/logo.png"
            },
            "anchor": {
              "href": "https://example.com"
            }
          },
          {
            "text": "Chip 2",
            "image": {
              "rawUrl": "https://example.com/images/logo.png"
            },
            "anchor": {
              "href": "https://example.com"
            }
          }
        ]
      }
    ]
  ]
}
다음 CSS 변수가 제공될 수 있습니다.
| 속성 | 입력 정책 | 기본값 | 설명 |
|---|---|---|---|
df-messenger-chips-spacing |
선택사항 | 10px | 이전 메시지의 칩 위 공백 |
df-messenger-chips-border-color |
선택사항 | #e0e0e0 | 칩의 테두리 색상 |
df-messenger-chips-border-color-hover |
선택사항 | #e0e0e0 | 마우스를 가져갈 때 칩의 테두리 색상 |
df-messenger-chips-border-radius |
선택사항 | 999px | 칩의 테두리 반경 |
df-messenger-chips-background |
선택사항 | 흰색 | 칩 배경 |
df-messenger-chips-background-hover |
선택사항 | rgba(68, 71, 70, 0.08) | 마우스를 가져갈 때 칩의 배경 |
df-messenger-chips-padding |
선택사항 | 6px 16px | 칩 패딩 |
df-messenger-chips-font-color |
선택사항 | 검은색 | 칩의 텍스트 색상 |
df-messenger-chips-font-family |
선택사항 | 'Google Sans', 'Helvetica Neue', sans-serif | 칩의 글꼴 모음 |
df-messenger-chips-font-size |
선택사항 | 14px | 칩의 텍스트 크기 |
df-messenger-chips-font-weight |
선택사항 | normal | 칩의 글꼴 두께 |
df-messenger-chips-font-weight-hover |
선택사항 | normal | 마우스를 가져갈 때 칩의 글꼴 두께 |
df-messenger-chips-box-shadow |
선택사항 | 0 2px 2px 0 rgba(0, 0, 0, 0.24) | 칩의 상자 그림자 |
df-messenger-chips-content-align |
선택사항 | flex-start | 칩에서 콘텐츠(예: 이미지)의 수직 정렬 |
df-messenger-chips-text-wrap |
선택사항 | nowrap | 여러 줄로 된 칩을 허용하려면 normal 사용 |
인용 응답 유형
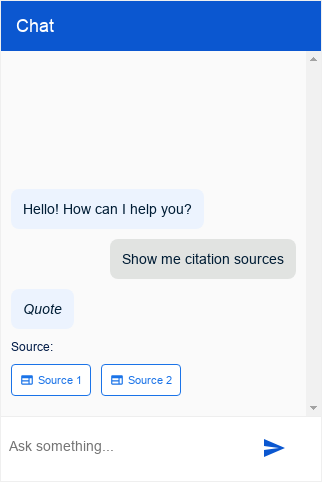
인용 응답 유형은 최종 사용자에게 클릭 가능한 인용 링크 목록을 제공합니다.
다음 표에서는 필드를 설명합니다.
| 이름 | 유형 | 설명 |
|---|---|---|
type |
string |
응답 유형: 'match_quotes' |
citations |
array<object> |
인용 객체의 배열 |
citations[].title |
string |
인용 제목 |
citations[].subtitle |
string |
인용 자막(현재 무시됨) |
citations[].anchor |
object |
요소를 클릭할 때 따를 앵커 |
citations[].anchor.href |
string |
앵커의 URL |
citations[].anchor.target |
string |
앵커 타겟입니다. 기본값은 _blank입니다. |
예를 들면 다음과 같습니다.
{
  "richContent": [
    [
      {
        "type": "match_citations",
        "citations": [
          {
            "title": "Source 1",
            "subtitle": "",
            "anchor": {
              "href": "https://example.com/1"
            }
          },
          {
            "title": "Source 2",
            "subtitle": "",
            "anchor": {
              "href": "https://example.com/2"
            }
          }
        ]
      }
    ]
  ]
}
다음 CSS 변수가 제공될 수 있습니다.
| 속성 | 입력 정책 | 기본값 | 설명 |
|---|---|---|---|
df-messenger-citations-spacing |
선택사항 | 10px | 이전 메시지에 대한 인용 위 공백 |
df-messenger-citations-message-display |
선택사항 | 블록 | 인용 위 메모 표시를 정의합니다. 허용되는 값은 block 또는 none입니다. |
df-messenger-citations-message-font-color |
선택사항 | #041e49 | 인용 위 메모의 텍스트 색상 |
df-messenger-citations-message-font-size |
선택사항 | 12px | 인용 위 메모의 텍스트 크기 |
df-messenger-citations-flex-direction |
선택사항 | 행 | 인용의 가변 방향 속성입니다. row(줄바꿈이 있는 가로) 또는 column(세로)을 사용하는 것이 좋습니다. |
df-messenger-citations-border-color |
선택사항 | #1a73e8 | 인용의 테두리 색상 |
df-messeenger-citations-border-color-hover |
선택사항 | #1a73e8 | 마우스를 가져갈 때 인용의 테두리 색상 |
df-messenger-citations-border-radius |
선택사항 | 4px | 인용의 테두리 반경 |
df-messenger-citations-padding |
선택사항 | 8px | 인용의 패딩 |
df-messenger-citations-background |
선택사항 | 흰색 | 인용의 배경 |
df-messenger-citations-background-hover |
선택사항 | rgba(68, 71, 70, 0.08) | 마우스를 가져갈 때 인용의 배경 |
df-messenger-citations-font-color |
선택사항 | #1a73e8 | 인용의 텍스트 색상 |
df-messenger-citations-font-family |
선택사항 | 'Google Sans', 'Helvetica Neue', sans-serif | 인용의 글꼴 모음 |
df-messenger-citations-font-size |
선택사항 | 11px | 인용의 텍스트 크기 |
df-messenger-citations-icon-font-size |
선택사항 | 14px | 인용 아이콘의 텍스트 크기 |
df-messenger-citations-font-weight |
선택사항 | normal | 인용의 글꼴 두께 |
df-messenger-citations-font-weight-hover |
선택사항 | normal | 마우스를 가져갈 때 인용의 글꼴 두께 |
df-messenger-citations-icon-spacing |
선택사항 | 4px | 인용에서 아이콘과 텍스트 사이의 공백 |
df-messenger-citations-box-shadow |
선택사항 | 없음 | 인용의 상자 그림자 |
파일 응답 유형
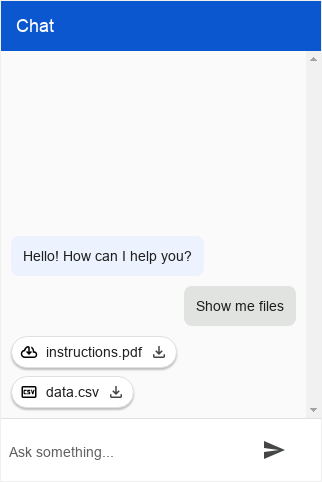
파일 응답 유형은 다운로드 가능한 링크가 포함된 파일 요소 목록을 렌더링합니다.
다음 표에서는 필드를 설명합니다.
| 이름 | 유형 | 설명 |
|---|---|---|
type |
string |
응답 유형: "files" |
files |
array<object> |
파일 객체의 배열 |
files[].name |
string |
파일 이름 |
files[].image |
object |
파일 이미지 |
files[].image.rawUrl |
string |
이미지의 파일 공개 URL |
files[].anchor |
object |
파일을 다운로드할 앵커 |
files[].anchor.href |
string |
앵커의 URL |
files[].anchor.target |
string |
앵커 타겟입니다. 기본값은 _blank입니다. |
예를 들면 다음과 같습니다.
{
  "richContent": [
    [
      {
        "type": "files",
        "files": [
          {
            "name": "instructions.pdf",
            "image": {
              "rawUrl":
                  "https://fonts.gstatic.com/s/i/short-term/release/googlesymbols/cloud_download/default/24px.svg"
            },
            "anchor": {
              "href": "https://example.com/instructions.pdf"
            }
          },
          {
            "name": "data.csv",
            "image": {
              "rawUrl":
                  "https://fonts.gstatic.com/s/i/short-term/release/googlesymbols/csv/default/24px.svg"
            },
            "anchor": {
              "href": "https://example.com/data.csv"
            }
          }
        ]
      }
    ]
  ]
}
다음 CSS 변수가 제공될 수 있습니다.
| 속성 | 입력 정책 | 기본값 | 설명 |
|---|---|---|---|
df-messenger-files-spacing |
선택사항 | 10px | 이전 메시지에 대한 파일 위 공백 |
df-messenger-files-distance |
선택사항 | 8px | 목록에 있는 파일 간 거리 |
df-messenger-files-flex-direction |
선택사항 | 행 | 파일의 가변 방향 속성. row(줄바꿈이 있는 가로) 또는 column(세로)을 사용하는 것이 좋습니다. |
df-messenger-files-background |
선택사항 | 흰색 | 파일의 배경 |
df-messenger-files-border |
선택사항 | 1px solid #e0e0e0 | 파일의 테두리 |
df-messenger-files-border-radius |
선택사항 | 999px | 파일의 테두리 반경 |
df-messenger-files-box-shadow |
선택사항 | 0 2px 2px 0 rgba(0, 0, 0, 0.24) | 파일의 상자 그림자 |
df-messenger-files-padding |
선택사항 | 6px 16px | 파일의 패딩 |
df-messenger-files-font-color |
선택사항 | #1f1f1f | 파일의 텍스트 색상 |
df-messenger-files-font-family |
선택사항 | 'Google Sans', 'Helvetica Neue', sans-serif | 파일의 글꼴 모음 |
df-messenger-files-font-size |
선택사항 | 14px | 파일의 텍스트 크기 |
df-messenger-files-font-weight |
선택사항 | normal | 파일의 글꼴 두께 |
df-messenger-files-background-hover |
선택사항 | 흰색 | 마우스를 가져갈 때 파일의 배경 |
df-messenger-files-border-hover |
선택사항 | 1px solid #e0e0e0 | 마우스를 가져갈 때 파일의 테두리 |
df-messenger-files-font-weight-hover |
선택사항 | normal | 마우스를 가져갈 때 파일의 글꼴 두께 |
df-messenger-files-image-offset |
선택사항 | 0 0 0 -8px | 왼쪽에 있는 이미지의 오프셋 |
df-messenger-files-image-size |
선택사항 | 18px | 왼쪽에 있는 이미지의 크기 |
df-messenger-files-text-spacing |
선택사항 | 8px | 왼쪽에 있는 이미지 텍스트와 오른쪽에 있는 텍스트 아이콘 간의 거리 |
df-messenger-files-icon-offset |
선택사항 | 0 -8px 0 0 | 오른쪽에 있는 다운로드 아이콘의 오프셋 |
df-messenger-files-icon-size |
선택사항 | 18px | 오른쪽에 있는 다운로드 아이콘의 크기 |
df-messenger-files-icon-font-color |
선택사항 | #444746 | 오른쪽에 있는 다운로드 아이콘의 색상 |
HTML 응답 유형
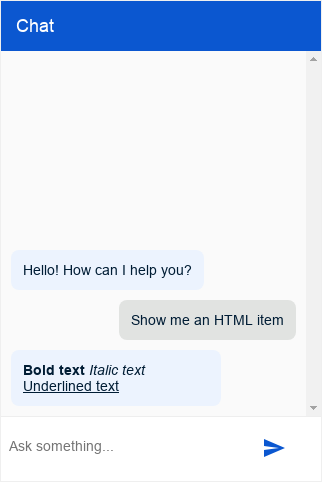
HTML 응답 유형은 최종 사용자에게 HTML 메시지를 제공합니다.
다음 표에서는 필드를 설명합니다.
| 이름 | 유형 | 설명 |
|---|---|---|
type |
string |
응답 유형: 'html' |
html |
string |
메시지의 텍스트 콘텐츠입니다. HTML을 지원합니다. |
지원되는 HTML 태그:
a- 앵커 요소(하이퍼링크 생성에 사용)b- 굵게 요소(텍스트 굵게 표시에 사용)i- 기울임꼴 요소(텍스트 기울임꼴 표시에 사용)u- 밑줄 요소(텍스트 밑줄 표시에 사용)h1- 제목 1 요소(페이지의 기본 제목에 사용)h2- 제목 2 요소(소제목에 사용)h3- 제목 3 요소(하위 부제목에 사용)p- 단락 요소(텍스트 단락 생성에 사용)br- 줄바꿈 요소(단락 내에서 줄바꿈 생성에 사용됨)table- 테이블 요소(테이블 생성에 사용)tr- 테이블 행 요소(테이블 내에서 행 생성에 사용)thead- 테이블 헤더 요소(테이블 내에서 헤더를 만드는 데 사용)th- 테이블 헤더 데이터 또는 셀 요소(테이블 헤더 행 내에서 셀을 만드는 데 사용)tbody- 테이블 본문 요소(테이블 내에서 본문을 만드는 데 사용)td- 테이블 데이터 또는 셀 요소(테이블 행 내에서 셀을 만드는 데 사용)ul- 순서가 지정되지 않은 목록 요소(글머리기호 목록 생성에 사용)ol- 순서가 지정된 목록 요소(번호 매기기 목록 생성에 사용)li- 목록 항목 요소(목록 내에서 항목 생성에 사용)img- 이미지 요소(이미지 표시에 사용,url-allowlistHTML 맞춤설정 참조)div- 컨테이너 요소span- 인라인 컨테이너 요소
예를 들면 다음과 같습니다.
{
  "richContent": [
    [
      {
        "type": "html",
        "html": "<b>Bold text</b> <i>Italic text</i> <u>Underlined text</u>"
      }
    ]
  ]
}
HTML 및 마크다운 스타일 지정
앵커 요소(HTML a 요소와 마크다운 링크)의 경우 다음 CSS 변수를 제공할 수 있습니다.
| 속성 | 입력 정책 | 기본값 | 설명 |
|---|---|---|---|
df-messenger-link-decoration |
선택사항 | 밑줄 | 링크 요소의 데코레이션 |
df-messenger-link-font-color |
선택사항 | #0b57d0 | 방문하지 않은 링크 요소의 글꼴 색상 |
df-messenger-link-visited-font-color |
선택사항 | #0b57d0 | 방문한 링크 요소의 글꼴 색상 |
df-messenger-link-hover-font-color |
선택사항 | #0b57d0 | 링크 요소 위로 마우스를 가져갈 때의 글꼴 색상 |
df-messenger-link-background |
선택사항 | 투명 | 링크 요소 배경 |
df-messenger-link-padding |
선택사항 | 0 | 링크 요소의 패딩 |
df-messenger-link-border |
선택사항 | 없음 | 링크 요소의 테두리 |
df-messenger-link-border-radius |
선택사항 | 0 | 링크 요소의 테두리 반경 |
테이블 요소(HTML table 요소 및 마크다운 테이블)의 경우 다음 CSS 변수를 제공할 수 있습니다.
| 속성 | 입력 정책 | 기본값 | 설명 |
|---|---|---|---|
df-messenger-table-font-size |
선택사항 | 14px | 테이블 요소의 텍스트 크기 |
df-messenger-table-font-color |
선택사항 | #1f1f1f | 테이블 요소의 텍스트 색상 |
df-messenger-table-align |
선택사항 | 왼쪽 | 테이블 셀의 텍스트 정렬 |
df-messenger-table-padding |
선택사항 | 0 | 테이블 셀의 패딩 |
df-messenger-table-border-collapse |
선택사항 | 별개 | 테이블의 테두리 접기 모드입니다. separate를 사용하여 border-radius를 사용 설정합니다. |
df-messenger-table-border-radius |
선택사항 | 0 | 테이블의 테두리 반경 |
df-messenger-table-header-border-radius |
선택사항 | 0 | 테이블 헤더의 테두리 반경 |
df-messenger-table-border-top |
선택사항 | 없음 | 테이블 행의 테두리 상단 |
df-messenger-table-border-top-first |
선택사항 | 없음 | 첫 번째 테이블 행의 테두리 상단 |
df-messenger-table-border-bottom |
선택사항 | 없음 | 테이블 행의 테두리 하단 |
df-messenger-table-border-bottom-last |
선택사항 | 없음 | 마지막 테이블 행의 테두리 하단 |
df-messenger-table-border-left |
선택사항 | 없음 | 테이블 셀의 테두리 왼쪽 |
df-messenger-table-border-left-first |
선택사항 | 없음 | 행에서 첫 번째 테이블 셀의 테두리 왼쪽 |
df-messenger-table-border-right |
선택사항 | 없음 | 테이블 셀의 테두리 오른쪽 |
df-messenger-table-border-right-last |
선택사항 | 없음 | 행에서 마지막 테이블 셀의 테두리 오른쪽 |
df-messenger-table-background |
선택사항 | 투명 | 테이블 행 배경 |
df-messenger-table-even-background |
선택사항 | 투명 | 짝수 테이블 행의 배경 |
df-messenger-table-odd-background |
선택사항 | 투명 | 홀수 테이블 행의 배경 |
df-messenger-table-header-font-size |
선택사항 | 14px | 테이블 헤더 요소의 텍스트 크기 |
df-messenger-table-header-font-weight |
선택사항 | 굵게 | 테이블 헤더 요소의 글꼴 두께 |
df-messenger-table-header-font-color |
선택사항 | #1f1f1f | 테이블 헤더 요소의 텍스트 색상 |
df-messenger-table-header-align |
선택사항 | 왼쪽 | 테이블 헤더 셀의 텍스트 정렬 |
df-messenger-table-header-padding |
선택사항 | 0 | 테이블 헤더 셀의 패딩 |
df-messenger-table-header-border-top |
선택사항 | 없음 | 테이블 헤더 행의 테두리 상단 |
df-messenger-table-header-border-bottom |
선택사항 | 없음 | 테이블 헤더 행의 테두리 하단 |
df-messenger-table-header-border-left |
선택사항 | 없음 | 테이블 헤더 행에서 셀의 테두리 왼쪽 |
df-messenger-table-header-border-left-first |
선택사항 | 없음 | 테이블 헤더 행에서 첫 번째 셀의 테두리 왼쪽 |
df-messenger-table-header-border-right |
선택사항 | 없음 | 테이블 헤더 행에서 셀의 테두리 오른쪽 |
df-messenger-table-header-border-right-last |
선택사항 | 없음 | 테이블 헤더 행에서 마지막 셀의 테두리 오른쪽 |
df-messenger-table-header-background |
선택사항 | 투명 | 테이블 헤더 행 배경 |
커스텀 템플릿 응답 유형
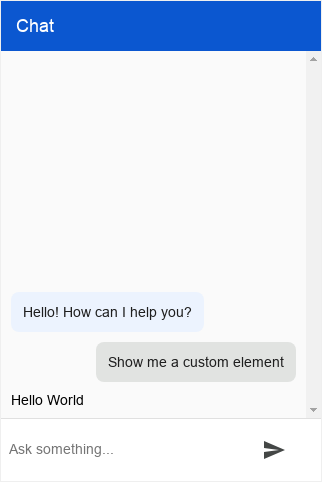
커스텀 템플릿 응답 유형은 고객 웹사이트에 정의된 커스텀 요소를 렌더링합니다. 이 요소는 카드 내에 배치되지 않으며 항상 단독으로 표시됩니다.
다음 표에서는 필드를 설명합니다.
| 이름 | 유형 | 설명 |
|---|---|---|
type |
string |
응답 유형: 'custom_template' |
name |
string |
커스텀 요소의 이름 |
payload |
Object |
커스텀 요소에 전달할 페이로드 |
예를 들면 다음과 같습니다.
{
  "richContent": [
    [
      {
        "type": "custom_template",
        "name": "custom-element-example",
        "payload": {
          "text": "Hello World"
        }
      }
    ]
  ]
}
웹사이트에서 커스텀 요소는 응답의 name 필드에 있는 정확한 이름으로 등록해야 합니다. payload 필드는 생성 후(connectedCallback 전에) dfPayload로 커스텀 요소에 전달됩니다. 필드에는 임의의 JSON이 포함될 수 있습니다. 또한 dfResponseId가 요소에 전달됩니다.
다음은 예시의 응답을 사용한 커스텀 요소의 구현 예시입니다.
class CustomElementExample extends HTMLElement {
  constructor() {
    super();
    // The `dfPayload` field will be provided before `connectedCallback` is
    // being called.
    this.dfPayload = null;
    // The `dfResponseId` field will be provided before `connectedCallback` is
    // being called.
    this.dfResponseId = null;
    // It is not strictly required but recommended to contain the custom
    // element in a shadow root.
    // https://developer.mozilla.org/en-US/docs/Web/API/ShadowRoot
    this.renderRoot = this.attachShadow({mode: 'open'});
  }

  /** Web component Lifecycle method. */
  connectedCallback() {
    const div = document.createElement('div');

    // The `.text` must match the payload's structure in `richContent.payload`.
    div.innerText = this.dfPayload.text;

    this.renderRoot.appendChild(div);
  }
}

(function() {
  // Registers the element. This name must match the name in
  // `richContent.payload`.
  customElements.define('custom-element-example', CustomElementExample);
})();
응답 유형 결합
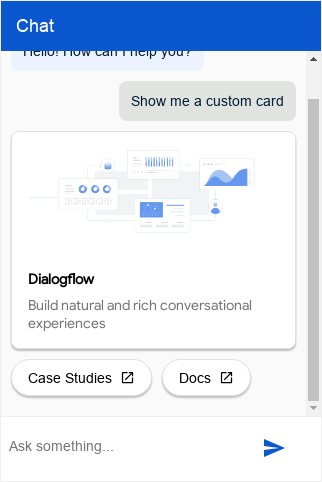
Dialogflow CX 메신저의 개별 서식 있는 메시지 요소는 니즈에 맞게 커스텀 카드를 만드는 데 사용될 수 있습니다.
다음은 fulfillment 섹션에 나열된 요소 중 일부를 사용하는 예시입니다.
{
  "richContent": [
    [
      {
        "type": "image",
        "rawUrl": "https://example.com/images/logo.png",
        "accessibilityText": "Dialogflow across platforms"
      },
      {
        "type": "info",
        "title": "Dialogflow",
        "subtitle": "Build natural and rich conversational experiences",
        "anchor": {
          "href": "https://cloud.google.com/dialogflow/docs"
        }
      },
      {
        "type": "chips",
        "options": [
          {
            "text": "Case Studies",
            "anchor": {
              "href": "https://cloud.google.com/dialogflow/case-studies"
            }
          },
          {
            "text": "Docs",
            "anchor": {
              "href": "https://cloud.google.com/dialogflow/docs"
            }
          }
        ]
      }
    ]
  ]
}
다음 CSS 변수가 제공될 수 있습니다.
| 속성 | 입력 정책 | 기본값 | 설명 |
|---|---|---|---|
df-messenger-card-background |
선택사항 | 흰색 | 커스텀 카드 배경 |
df-messenger-card-padding |
선택사항 | 16px | 커스텀 카드의 요소 패딩 |
df-messenger-card-border |
선택사항 | 1px solid #e0e0e0 | 커스텀 카드 테두리 |
df-messenger-card-border-radius |
선택사항 | 8px | 커스텀 카드 테두리 반경 |
df-messenger-card-border-top-left-radius |
선택사항 | 8px | 커스텀 카드의 왼쪽 상단 테두리 반경 |
df-messenger-card-border-top-right-radius |
선택사항 | 8px | 커스텀 카드의 오른쪽 상단 테두리 반경 |
df-messenger-card-border-bottom-left-radius |
선택사항 | 8px | 커스텀 카드의 왼쪽 하단 테두리 반경 |
df-messenger-card-border-bottom-right-radius |
선택사항 | 8px | 카드의 오른쪽 하단 테두리 반경 |
df-messenger-card-stack-border-top-left-radius |
선택사항 | 8px | 연속 커스텀 카드의 왼쪽 상단 테두리 반경이 왼쪽 상단 반경보다 우선함 |
df-messenger-card-stack-border-top-right-radius |
선택사항 | 8px | 연속 커스텀 카드의 오른쪽 상단 테두리 반경이 오른쪽 상단 반경보다 우선함 |
df-messenger-card-stack-border-bottom-left-radius |
선택사항 | 8px | 연속 커스텀 카드의 왼쪽 하단 테두리 반경이 왼쪽 하단 반경보다 우선함 |
df-messenger-card-stack-border-bottom-right-radius |
선택사항 | 8px | 연속 커스텀 카드의 오른쪽 하단 테두리 반경이 오른쪽 하단 반경보다 우선함 |
df-messenger-card-box-shadow |
선택사항 | 0 2px 2px 0 rgba(0, 0, 0, 0.24) | 커스텀 카드의 박스 그림자 |
플레이북 도구의 리치 콘텐츠
플레이북 도구를 사용하여 리치 콘텐츠를 Dialogflow CX Messenger로 전송할 수 있습니다.
1단계: 에이전트에서 addRichContent 도구 만들기
다음 데이터로 addRichContent라는 함수 도구를 만듭니다.
도구 입력:
properties: {}
type: object
도구 출력:
properties:
  status:
    type: string
  reason:
    type: string
type: object
2단계: 이 도구를 사용하는 방법을 에이전트에게 알리기
안내 및 예시로 도구 사용 방법을 에이전트에게 알립니다.
예를 들어 지침에 다음과 같은 내용을 추가하세요.
-  Greet  the  user
-  Ask  the  user  what  their  favorite  color  is.
   At  the  same  time  run  ${TOOL:  addRichContent}  to  display  buttons
   for  blue,  red,  yellow,  and  green.
-  Thank  the  user
예를 들어 다음과 같은 예시를 만듭니다.
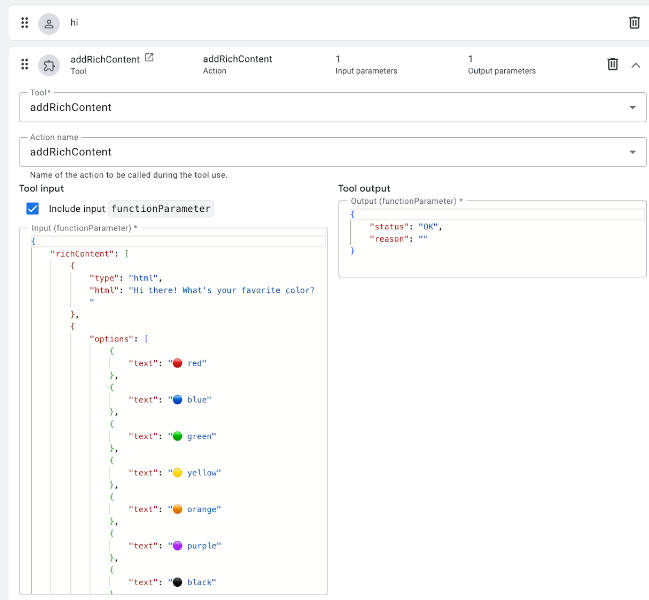
리치 콘텐츠의 구문은 흐름 기반 가상 에이전트에서 커스텀 페이로드를 반환하는 경우 사용하는 것과 동일합니다.
3단계: JavaScript 정의
df-messenger를 호스팅하는 페이지의 코드에서 df-messenger에 리치 콘텐츠를 렌더링하도록 지시하는 함수를 정의하는 JavaScript 코드를 만들어야 합니다.
또한 가상 에이전트에 필요할 때 함수를 실행할 수 있도록 df-messenger로 해당 함수를 등록해야 합니다.
dfMessenger 변수가 선언되었고 df-messenger 인스턴스를 가리키는지 확인합니다.
다음은 이 용도로 사용할 수 있는 몇 가지 예시 코드입니다.
const dfMessenger = document.querySelector('df-messenger');

function  addRichContent(customPayload)  {
  dfMessenger.renderCustomCard(customPayload.richContent);

  // add error handling

  return  Promise.resolve({  status:  "OK",  reason:  null  });
}

// substitute your own tool id

const  toolId  =  'projects/PROJECT_ID/locations/LOCATION/agents/AGENT_ID/tools/TOOL_ID'
dfMessenger.registerClientSideFunction(toolId,  addRichContent.name,  addRichContent);

