The Account page lets you configure some of your Looker user account settings. To access this page, select the Profile menu and then select Account.
This documentation page includes the following sections:
- Changing standard account settings
- Changing your email subscription settings
- Managing your API keys
- Configuring OAuth connection credentials
Changing standard account settings
The top section of the Account page shows your Looker account's settings:
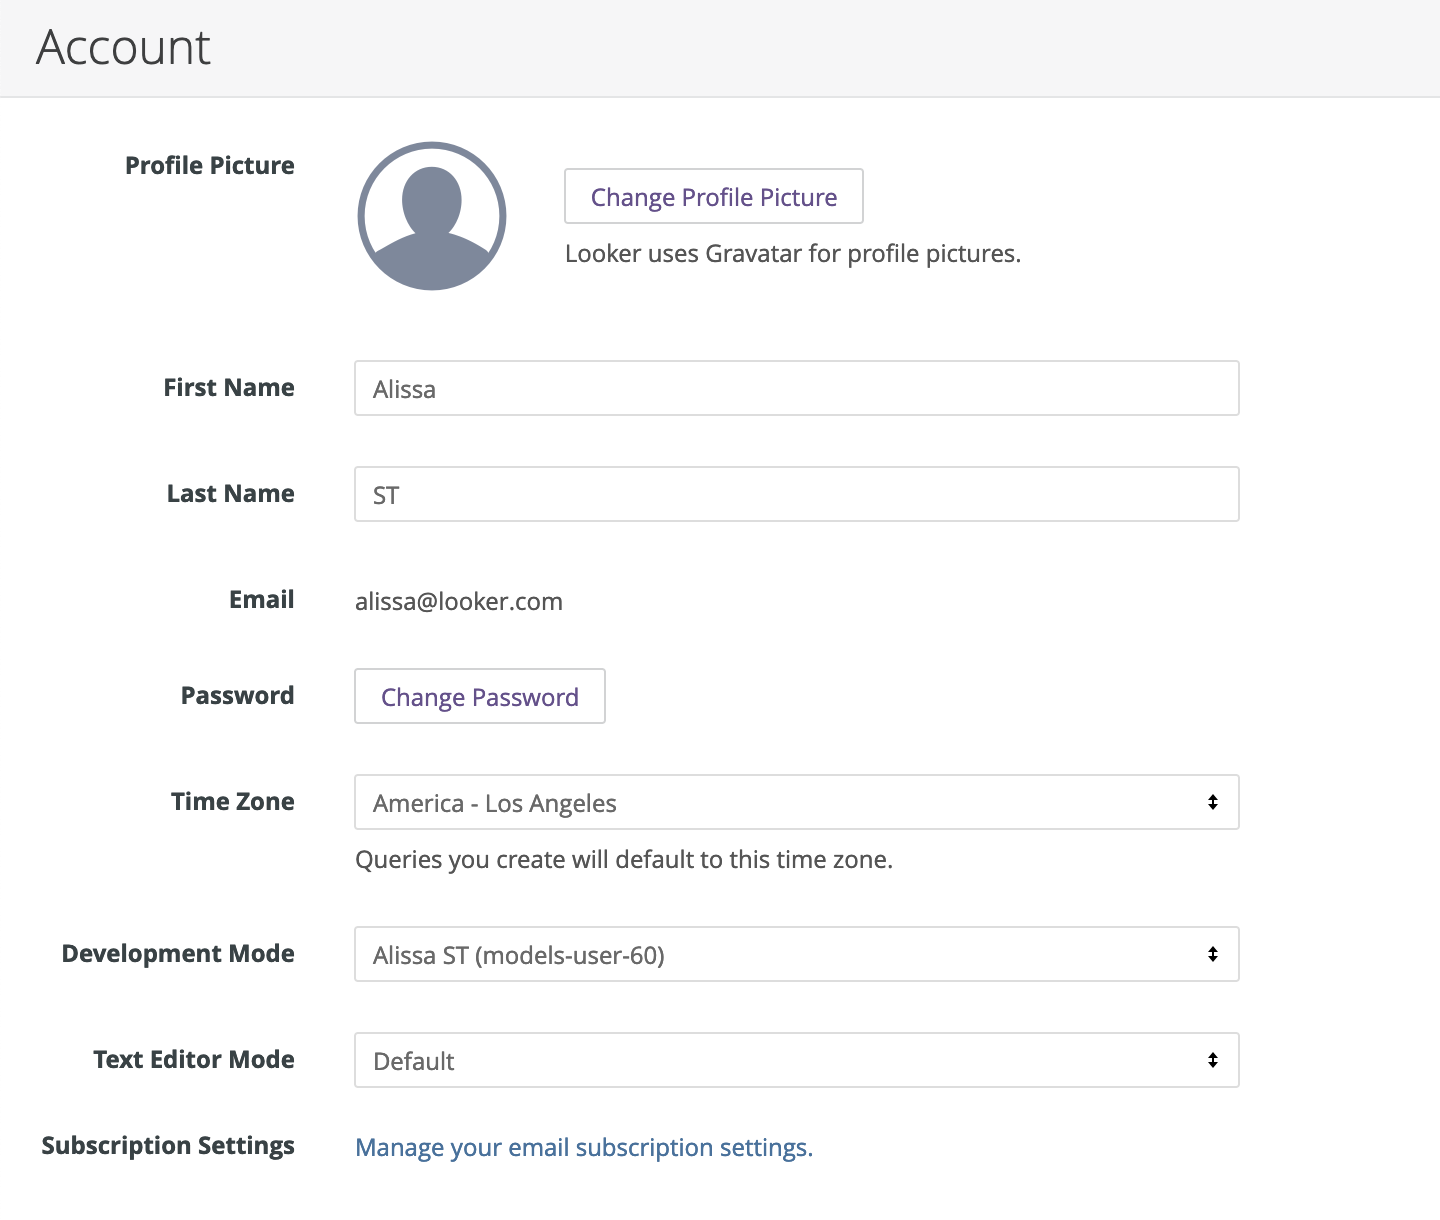
- Profile Picture: If your Looker admin has enabled it, you can use the Gravatar app to select or create an avatar for your account.
- First Name: First name that is configured on the account.
- Last Name: Last name that is configured on the account.
- Email: Email address that is associated with the Looker account (this field is not editable).
- Password: Password that is associated with the account. Select the Change Password button to set a new password.
- Time Zone: Default time zone to be used for queries for this user.
- Development Mode: The user's Git branch for LookML development. This field defaults to the branch created when the user account was created, but you can select other branches.
- Text Editor Mode: The style of text editor for the LookML IDE. You can choose from Looker's default text editor style, a Vim text editor, or an Emacs text editor.
- Subscription Settings: The types of Looker emails that the user will receive, as described in the Changing your email subscription settings section.
Changing your email subscription settings
You can manage your Looker email subscription settings. Choose whether you want to receive product and event announcements, tips and tricks, and other types of information.
You can view and update these settings in Looker's Preference Center. From the Profile section of your Looker Account page, select Manage your email subscription settings to open the preference center.
Follow these steps to update your preferences for Looker email subscriptions:
- In Preferences for, Looker fills in the email address from your account settings. If you would prefer a different email address, contact your Looker admin.
- In Content, select checkboxes for the types of emails you want to receive from Looker.
- If you want to suspend delivery of Looker emails for three months, or if you want to unsubscribe from all Looker emails, select the corresponding checkbox in Settings.
- Once you have selected your subscription settings, select Update Preferences.
When you select the Update Preferences button, Looker saves your email subscription preferences and sends you an email confirming your changes. You can return to this page to update your settings anytime by clicking the Manage your email subscription settings link on the Account page.
Managing API keys
If you are using a Looker (Google Cloud core) instance and your Looker admin has enabled API keys for you, you'll see the Manage button in the API Keys section. The Manage button opens the API Keys page, which lets you view, create, and delete your personal API keys.
An API key is used to access the Looker API. API keys are created by Looker and consist of a client ID and a client secret. Looker requires an API key to execute commands with the Looker API.
Each row in the API Keys page represents one API key and shows the following attributes for that API key:
- The client ID
- The client secret, which you can view by clicking the Show secret icon
- The date and time that the API key was created
- An optional descriptive purpose for the API key, which you can edit by clicking in the Purpose field or by clicking the Edit Purpose icon
- An option to delete the API key by clicking the Delete icon and then confirming the deletion
Click the Create New API Key button to add a new API key in a new row on the API Keys page.
Click the Use API Explorer button to open the API Explorer, where you can view and run the Looker API methods and types.
Configuring OAuth connection credentials
If your Looker instance has database connections that use OAuth, such as Snowflake or Google BigQuery, Looker displays a section for OAuth Connection Credentials.
Select Log In to enter your OAuth credentials through an OAuth interface. If you have already logged in, Looker instead displays the options Reauthorize and Log Out.
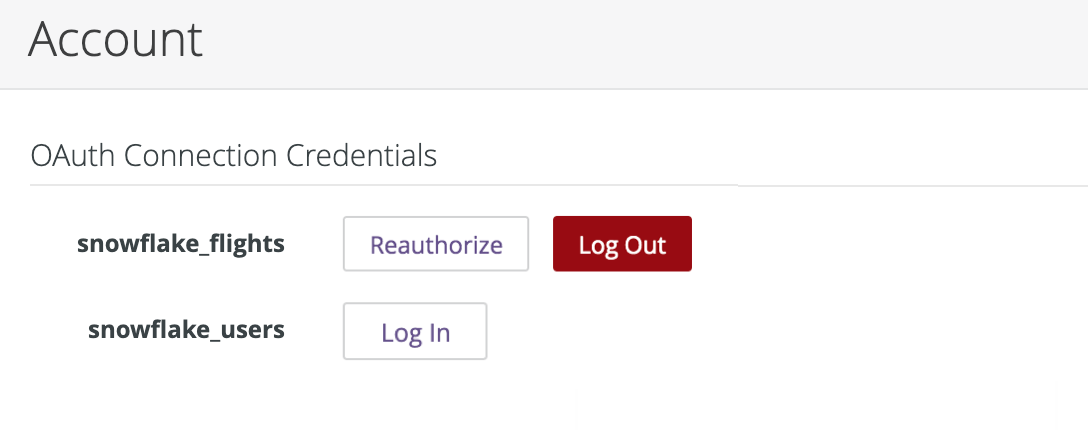
Select Reauthorize to open the OAuth login page, or select Log Out to log your Looker user account out of the OAuth session.
See the Snowflake and Google BigQuery documentation pages for more information.
Configuring integrations
If your Looker admin has integrated Slack into your instance by using the Slack App service, you must perform a one-time authentication for each Slack workspace before you can access it.
The Slack workspaces that require your authentication are listed in the Integrations section of your user Account page. Select Sign in with Slack to authenticate to a workspace.
If no Slack workspaces require your authentication, Looker displays a note in the Integrations section:
There are no installed integrations. Contact your admin to install an integration.
Once you have successfully authenticated, Looker displays the name of the Slack workspace along with options to revoke authentication.
Changing custom user settings
Your Looker admin can set up additional user attributes that help with customizing your experience in Looker. The Additional Details section displays the values of the user attributes that are configured for your Looker account. It shows a list of all user attributes, with each followed by its assigned value. If your Looker admin has set any of the user attributes to hidden, Looker won't display that value. Instead, the value will be indicated by a series of asterisks.
The Custom Value column indicates if the user attribute value is a custom value. A custom value is a value that is assigned to your user account individually, instead of a value that your account inherited from a group. If the Custom Value switch next to a user attribute is turned on, that user attribute has a custom value.
You may be able to edit some user attributes, depending on how your Looker admin has configured your account. To do so, turn on the Custom Value switch next to a user attribute, enter the value you want, and select Save.
Saving changes
After making changes to any of the options on this page, select the Save button to save your changes.