Kurzanleitung: Interaktionen mit einer Integration
Mit Sammlungen den Überblick behalten
Sie können Inhalte basierend auf Ihren Einstellungen speichern und kategorisieren.
Mit einer Integration werden Endnutzerinteraktionen für Sie abgewickelt.
Sie müssen nur einen Agent erstellen, die Auftragsausführung implementieren und die Integration konfigurieren.
In dieser Anleitung erfahren Sie, wie Sie mit der Integration von Dialogflow Web Demo eine einfache Textchat-Benutzeroberfläche für Ihren Agent bereitstellen.
Vorbereitung
Wenn Sie keine Integration verwenden möchten, können Sie diese Kurzanleitung überspringen.
Bevor Sie diese Anleitung lesen, sollten Sie mit Folgendem vertraut sein:
Die Schritte in der Kurzanleitung Agent erstellen ausführen.
Führen Sie die folgenden Schritte aus, um den Agent weiter zu bearbeiten, mit dem Sie in diesem Leitfaden begonnen haben.
Wenn Sie diesen Agent nicht mehr haben, können Sie build-agent-quickstart.zip herunterladen und die Datei importieren.
Klicken Sie im linken Seitenleistenmenü auf Integrations.
Aktivieren Sie die Integration Web Demo.
Nach der Aktivierung wird in einem Dialogfeld Folgendes angezeigt:
Ein Link zu einer Webseite, auf der die Integration gehostet wird
Ein Link zu den Agent-Einstellungen, mit dem einige Aspekte der Webseite angepasst werden können
Ein HTML-Code, um den Agent in Ihre Website einzubetten
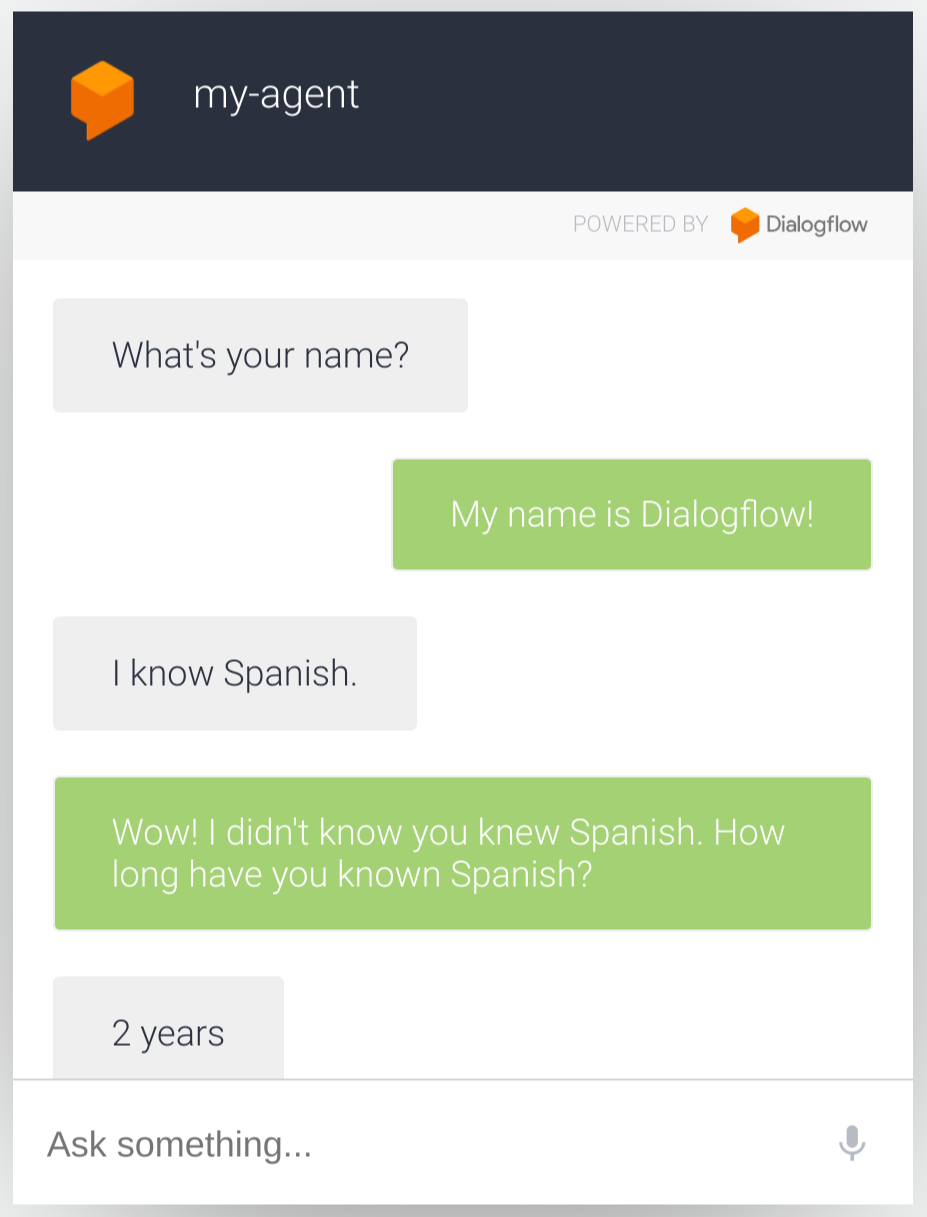
Mit dem Agent interagieren
Öffnen Sie die Webseite des Agents über den angegebenen Link.
Diese Seite bietet eine Textchat-Oberfläche.
Geben Sie What's your name? ein und drücken Sie die Eingabetaste.
Der Agent antwortet mit der Antwort, die Sie in vorherigen Kurzanleitungen konfiguriert haben.
[[["Leicht verständlich","easyToUnderstand","thumb-up"],["Mein Problem wurde gelöst","solvedMyProblem","thumb-up"],["Sonstiges","otherUp","thumb-up"]],[["Schwer verständlich","hardToUnderstand","thumb-down"],["Informationen oder Beispielcode falsch","incorrectInformationOrSampleCode","thumb-down"],["Benötigte Informationen/Beispiele nicht gefunden","missingTheInformationSamplesINeed","thumb-down"],["Problem mit der Übersetzung","translationIssue","thumb-down"],["Sonstiges","otherDown","thumb-down"]],["Zuletzt aktualisiert: 2025-08-18 (UTC)."],[[["\u003cp\u003eThis guide explains how to use the Dialogflow Web Demo integration to create a text chat interface for your agent.\u003c/p\u003e\n"],["\u003cp\u003eUsing an integration such as the Dialogflow Web Demo handles end-user interactions, allowing you to focus on building the agent and implementing fulfillment.\u003c/p\u003e\n"],["\u003cp\u003eBefore using this guide, you should have completed the Dialogflow basics, setup steps, and the "Build an agent" quickstart guide.\u003c/p\u003e\n"],["\u003cp\u003eYou can enable the Web Demo integration via the Integrations section of the Dialogflow ES console, and it provides a URL and embeddable HTML code.\u003c/p\u003e\n"],["\u003cp\u003eOnce enabled, the Web Demo integration allows you to interact with your agent through a simple text chat interface on a provided web page.\u003c/p\u003e\n"]]],[],null,["# Quickstart: Interactions with an integration\n\nWith an\n[integration](/dialogflow/docs/integrations),\nend-user interactions are handled for you.\nYou just need to build an agent, implement fulfillment,\nand configure the integration.\n\nThis guide shows you how to use the\n[Dialogflow Web Demo](/dialogflow/docs/integrations/web-demo)\nintegration to provide a simple text chat user interface\nfor your agent.\n\nBefore you begin\n----------------\n\nIf you don't plan on using an integration,\nyou can skip this quickstart.\n\nYou should do the following before reading this guide:\n\n1. Read [Dialogflow basics](/dialogflow/docs/basics).\n2. Perform [setup steps](/dialogflow/docs/quick/setup).\n3. Perform steps in the [Build an agent](/dialogflow/docs/quick/build-agent) quickstart guide. Steps below continue working on the agent you started in that guide. If you no longer have that agent, you can download [`build-agent-quickstart.zip`](/static/dialogflow/es/docs/data/build-agent-quickstart.zip) and [import the file](/dialogflow/docs/agents-settings#export).\n\nEnable the integration\n----------------------\n\nTo enable the integration:\n\n1. Go to the [Dialogflow ES console](https://dialogflow.cloud.google.com).\n2. Select your agent.\n3. Click **Integrations** in the left sidebar menu\n4. Enable the **Web Demo** integration.\n\nOnce enabled, a dialog window provides the following:\n\n- A URL to a web page where the integration is hosted.\n- A link to agent settings, which can be used to customize some aspects of the web page.\n- HTML code to embed your agent in your website.\n\nInteract with your agent\n------------------------\n\nOpen the agent's web page using the provided link.\nThis page provides a text chat interface.\nType `What's your name?` and press enter.\nThe agent responds with the response you configured in prior quickstarts."]]