Stay organized with collections
Save and categorize content based on your preferences.
This page describes how to connect Zendesk to Agentspace.
After you set up your data source and import data the first time, the data store
syncs data from that source at a frequency that you select during setup.
Before you begin
Before setting up your connection:
In addition to the third-party connector allowlist, this connector requires
that your project is added to an additional allowlist. To be added to this
allowlist, contact your Agentspace account team.
Set up access control for your data source. For information
about setting up access control, see
Use data source access control.
A Zendesk administrator must generate or obtain the
following for integrating with Agentspace:
Access token. API Token of your Zendesk instance.
Instance URI.
Create a Zendesk connector
Console
To use the Google Cloud console to sync data from Zendesk to
Agentspace, follow these steps:
In the Google Cloud console, go to the Agentspace page.
On the Select a data source page, scroll or search for Zendesk to connect your third-party source.
Enter your Zendesk authentication information and click Continue.
Select which entities to sync and click Continue.
Select the Sync frequency for Full sync
and the Incremental sync frequency for Incremental data sync.
For more information, see
Sync schedules.
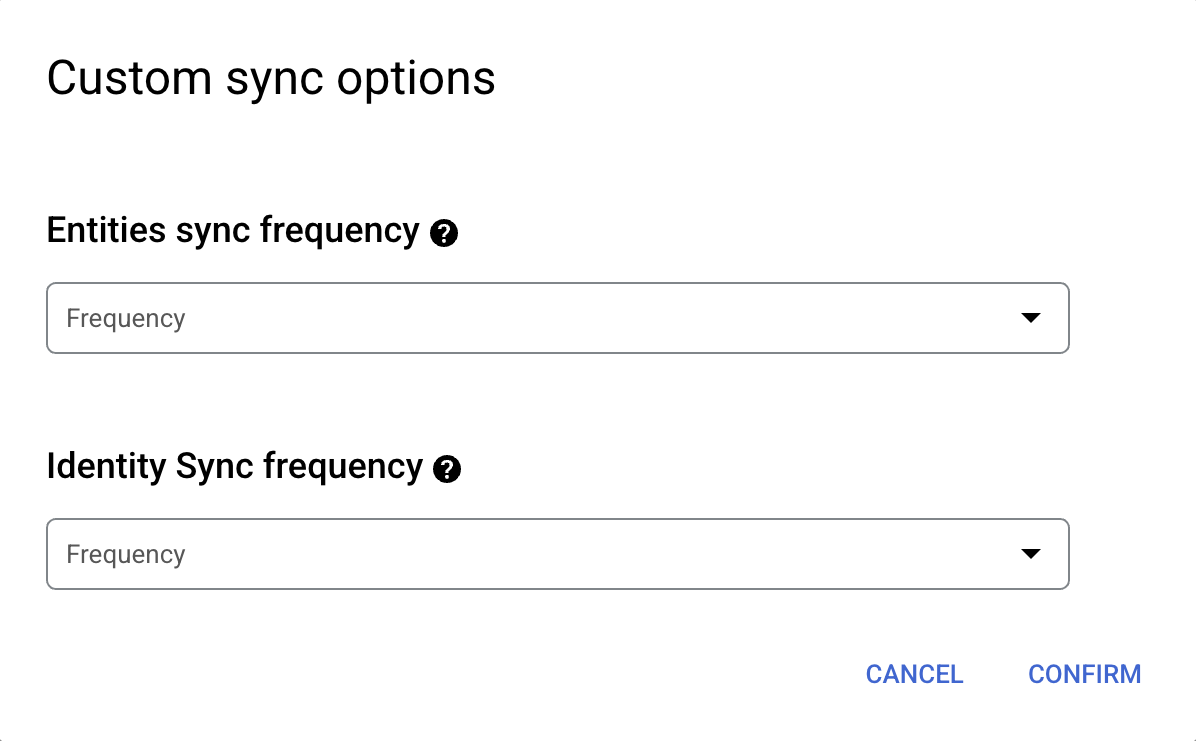
If you want to schedule separate full syncs of entity and identity data,
expand the menu under Full sync and then select Custom options.
Setting separate schedules for full entity sync and full identity sync.
Select a region for your data store.
Enter a name for your data connector.
Click Create. Agentspace creates your data store and
displays your data stores on the Data stores page.
To check the status of your ingestion, go to the Data stores page and
click your connector name to see details about it on its Data page. The
Connector state changes from Creating to Running when it starts
synchronizing data. When ingestion is complete, the state changes to
Active to indicate that the connection to your data source is set up and
awaiting the next scheduled synchronization.
Depending on the size of your data, ingestion can take several
minutes or several hours.
Next steps
To attach your connector to an app, create an app and select your connector
following the steps in
Create a search app.
To preview how your search results appear after your app is set up, see Get
search results.
[[["Easy to understand","easyToUnderstand","thumb-up"],["Solved my problem","solvedMyProblem","thumb-up"],["Other","otherUp","thumb-up"]],[["Hard to understand","hardToUnderstand","thumb-down"],["Incorrect information or sample code","incorrectInformationOrSampleCode","thumb-down"],["Missing the information/samples I need","missingTheInformationSamplesINeed","thumb-down"],["Other","otherDown","thumb-down"]],["Last updated 2025-09-03 UTC."],[],[],null,["# Connect Zendesk\n\n\u003cbr /\u003e\n\n| **Preview:** You must be on the allowlist to use this connector.\n\n\u003cbr /\u003e\n\nThis page describes how to connect Zendesk to Agentspace.\n\nAfter you set up your data source and import data the first time, the data store\nsyncs data from that source at a frequency that you select during setup.\n\nBefore you begin\n----------------\n\nBefore setting up your connection:\n\n1. In addition to the third-party connector allowlist, this connector requires\n that your project is added to an additional allowlist. To be added to this\n allowlist, contact your Agentspace account team.\n\n2. Set up access control for your data source. For information\n about setting up access control, see\n [Use data source access control](/agentspace/docs/identity).\n\n3. A Zendesk administrator must generate or obtain the\n following for integrating with Agentspace:\n\n 1. Access token. API Token of your Zendesk instance.\n 2. Instance URI.\n\nCreate a Zendesk connector\n--------------------------\n\n### Console\n\nTo use the Google Cloud console to sync data from Zendesk to\nAgentspace, follow these steps:\n\n1. In the Google Cloud console, go to the **Agentspace** page.\n\n [Agentspace](https://console.cloud.google.com/gen-app-builder/)\n2. In the navigation menu, click **Data stores**.\n\n3. Click add **Create data store**.\n\n4. On the **Select a data source** page, scroll or search for **Zendesk** to connect your third-party source.\n\n5. Enter your Zendesk authentication information and click **Continue**.\n\n6. Select which entities to sync and click **Continue**.\n\n7. Select the **Sync frequency** for **Full sync**\n and the **Incremental sync frequency** for **Incremental data sync** .\n For more information, see\n [Sync schedules](/agentspace/docs/introduction-to-connectors-and-data-stores#sync-schedules).\n\n If you want to schedule separate full syncs of entity and identity data,\n expand the menu under **Full sync** and then select **Custom options**.\n Setting separate schedules for full entity sync and full identity sync.\n8. Select a region for your data store.\n\n9. Enter a name for your data connector.\n\n10. Click **Create** . Agentspace creates your data store and\n displays your data stores on the **Data stores** page.\n\n11. To check the status of your ingestion, go to the **Data stores** page and\n click your connector name to see details about it on its **Data** page. The\n **Connector state** changes from **Creating** to **Running** when it starts\n synchronizing data. When ingestion is complete, the state changes to\n **Active** to indicate that the connection to your data source is set up and\n awaiting the next scheduled synchronization.\n\n Depending on the size of your data, ingestion can take several\n minutes or several hours.\n\n\u003cbr /\u003e\n\nNext steps\n----------\n\n- To attach your connector to an app, create an app and select your connector\n following the steps in\n [Create a search app](/agentspace/docs/create-app).\n\n- To preview how your search results appear after your app is set up, see [Get\n search results](/agentspace/docs/preview-search-results).\n\n- To enable alerts for the data store, see [Configure alerts for third-party data stores](/agentspace/docs/configure-periodic-data-alerts)."]]