This page describes how to connect Microsoft Teams to Agentspace with data federation.
About data federation
With data federation, Agentspace directly retrieves information from the third-party data sources using APIs, instead of copying the data into Agentspace. Using this approach, you can access external data sources immediately, without waiting for ingestion.
Before you begin
- Register Agentspace as an OAuth 2.0 application in
Microsoft Entra ID and collect the following credentials:
- Client ID
- Client secret
- Tenant ID
Configure these Microsoft Graph (Application) permissions with administrator consent:
Permission Type Description ChannelMessage.Read.All Delegated Read user channel messages Chat.Read Delegated Read user chat messages Add the following URLs as web callback URLs:
https://vertexaisearch.cloud.google.com/console/oauth/default_oauth.htmlhttps://vertexaisearch.cloud.google.com/oauth-redirect
Create a federated search connector with Microsoft Teams
Console
Use the following steps for Google Cloud console to perform federated search through Microsoft Teams from Agentspace.
In the Google Cloud console, go to the Agentspace page.
In the navigation menu, click Data Stores.
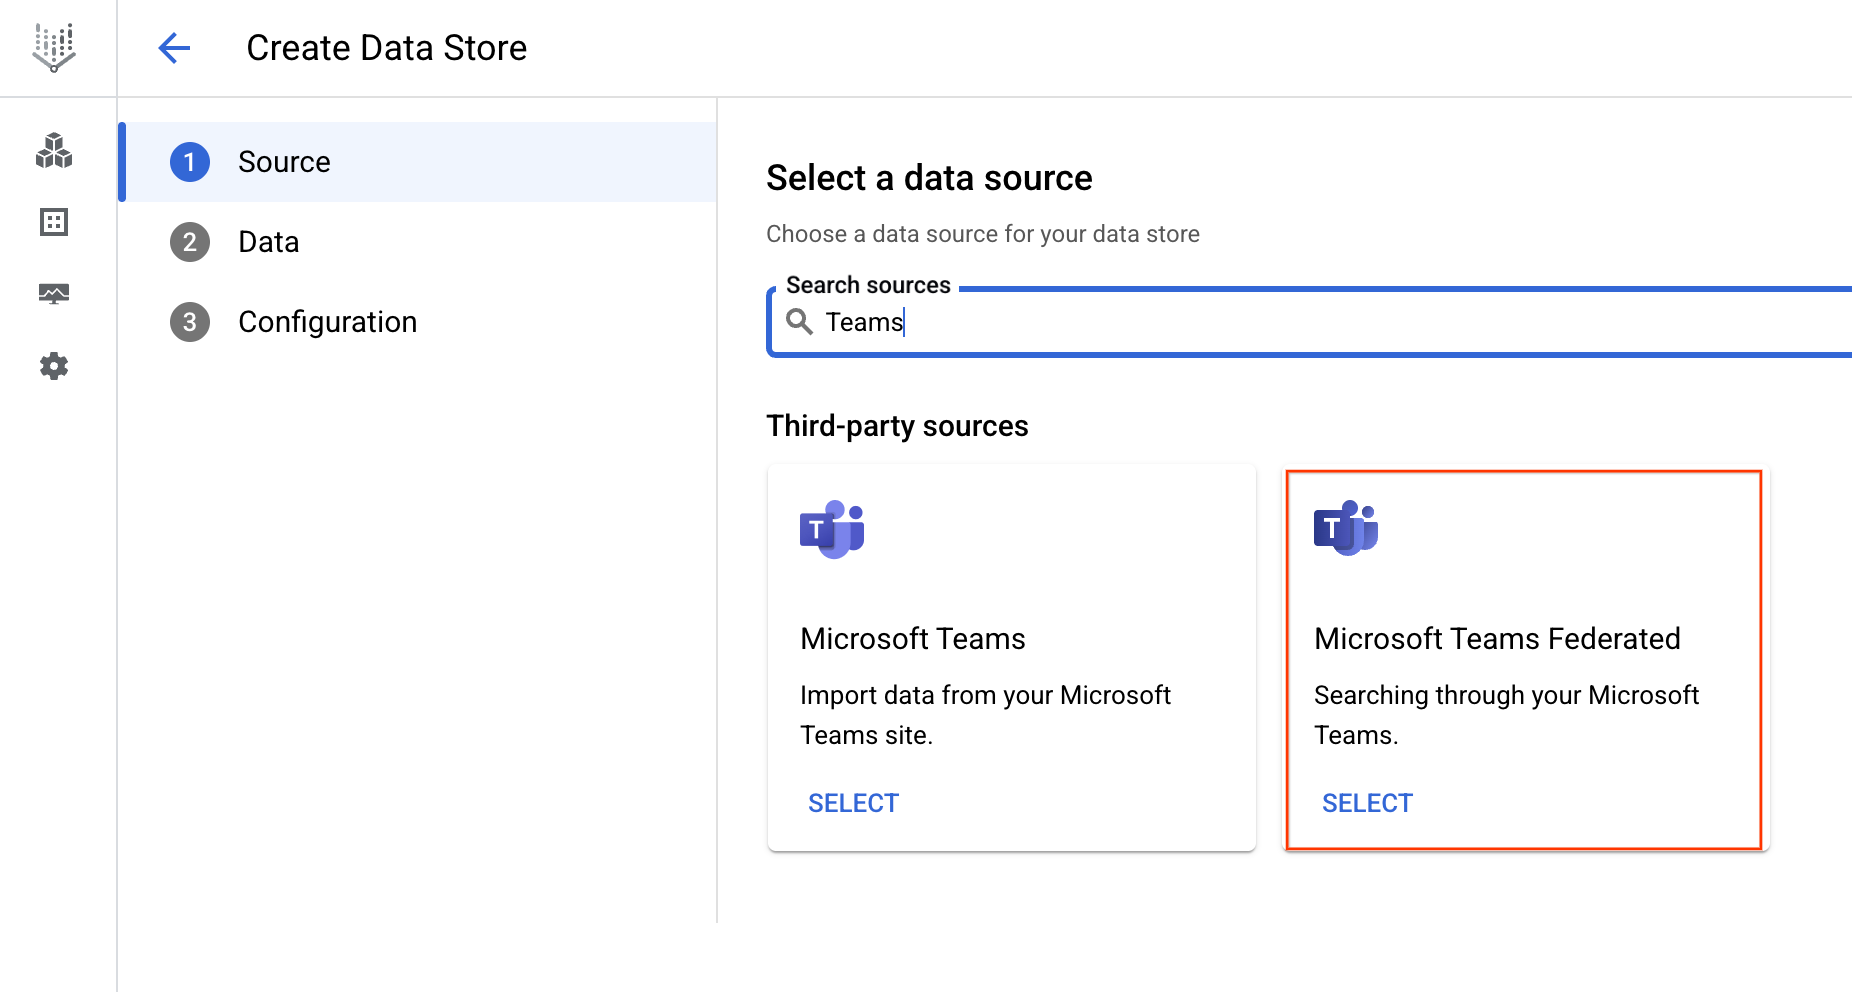
Click Create Data Store.
On the Select a data source page, scroll or search for Microsoft Teams Federated to connect your third-party source.
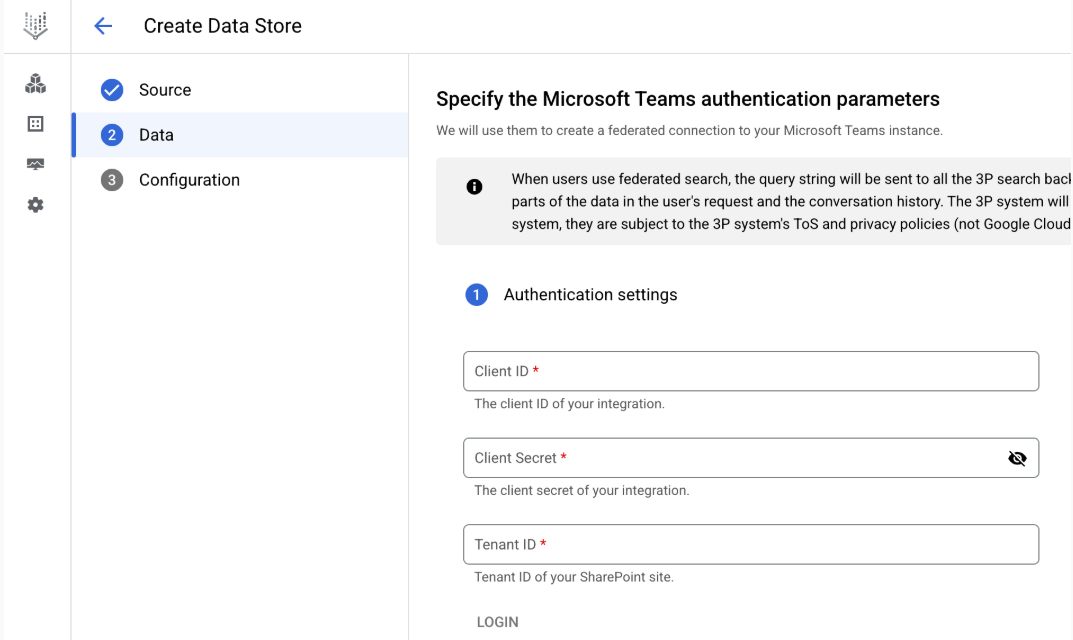
Select a data source Under Authentication settings:
- Enter the Client ID, Client secret, and Tenant ID.
- Click Authenticate.
Click Continue.
Enter the authentication information
Entities to search option is automatically skipped because the data source supports only one entity type.
Select a region for your data source.
Enter a name for your data source.
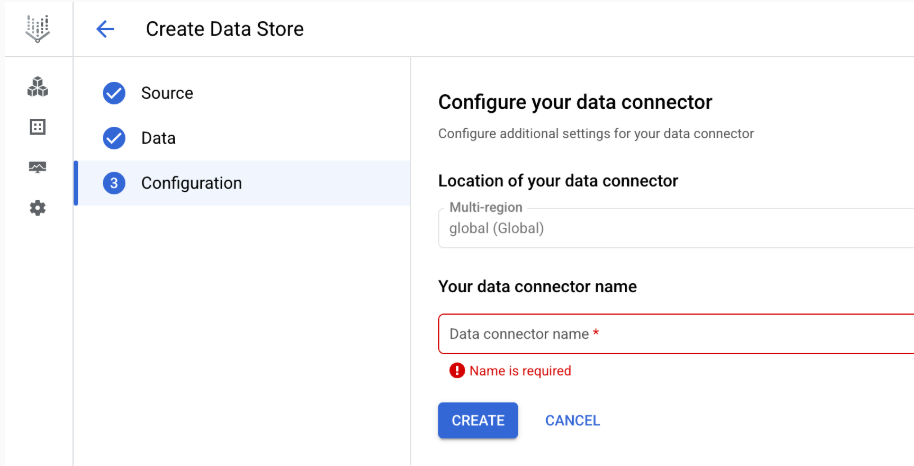
Configure your data connector Click Create. Agentspace creates your data store and displays your data stores on the Data Stores page.
Once the data store is created, go to the Data Stores page and click your data store name to see the status. If the Connector state changes from Creating to Active, the federated search connector is ready to be used.
Query execution
When you enter a search query:
A new data source appears in each user's Agentspace and should be authorized for each user before using it.
If Microsoft Teams is authorized, Agentspace sends the query to the Microsoft Teams API.
Agentspace blends the results with those from other sources and displays them.
Data handling
When using third-party federated search, your query string is sent to the third-party search backend. These third parties may associate queries with your identity. If multiple federated search data sources are enabled, the query may be sent to all of them.
Once the data reaches the third-party system, it is governed by that system's Terms of Service and privacy policies (not by Google Cloud's terms).