Artikel ini memperkenalkan tata letak layar yang dilihat pelanggan saat mereka men-deploy produk Anda, untuk produk berdasarkan paket standar yang dibuat otomatis.
Untuk melihat tampilan pelanggan secara langsung, ikuti petunjuk di Menguji produk VM.
Tampilan pelanggan untuk men-deploy paket
UI Terraform
Elemen input pelanggan standar ditampilkan di sisi kiri screenshot berikut dan mencakup zona, jenis mesin, opsi disk, dan opsi jaringan. Jika produk Anda mendukung deployment UI Terraform, pelanggan Anda dapat beralih antara UI Terraform atau Terraform CLI.
Pelanggan harus menentukan akun layanan deployment, yang
digunakan Infra Manager untuk menjalankan perintah Terraform apply.

Jika deployment pelanggan memerlukan beberapa kartu antarmuka jaringan, mereka dapat menambahkan antarmuka jaringan tambahan dengan mengklik Add network interface.
Untuk men-deploy produk, pelanggan harus mengisi kolom input, lalu mengklik Deploy.
Terraform CLI
Elemen input pelanggan standar ditampilkan di sisi kiri screenshot berikut dan menyertakan petunjuk konfigurasi akun layanan dan gcloud CLI.
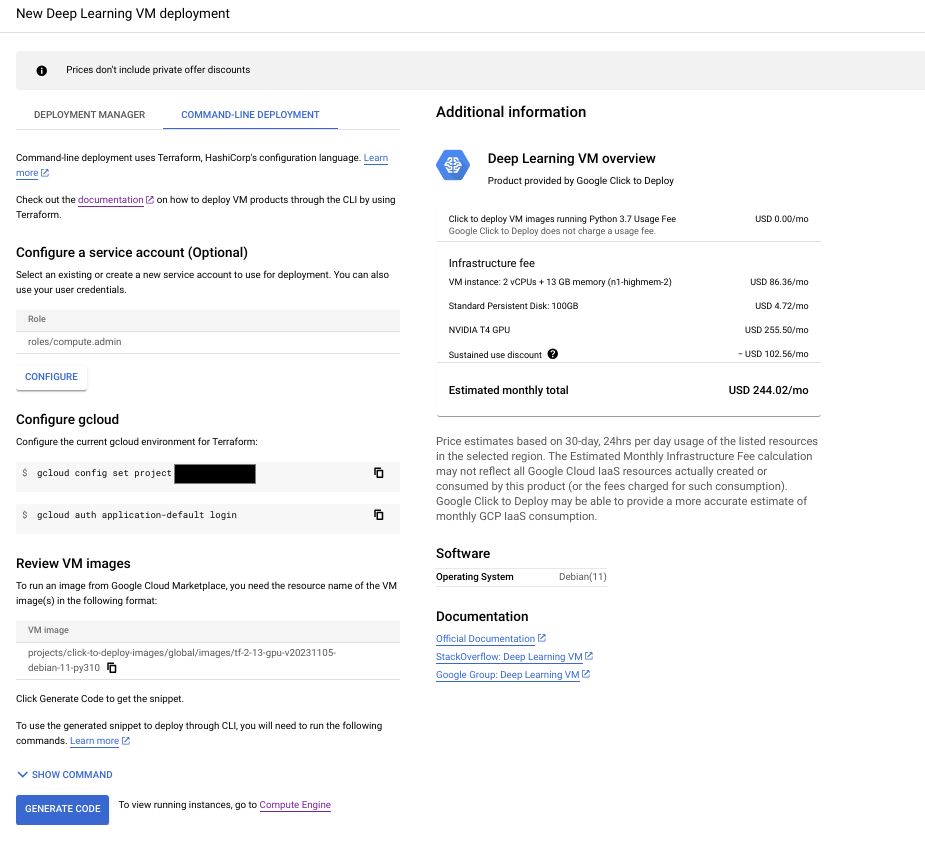
Jika Anda mengonfigurasi modul Terraform default, pelanggan akan mengklik Generate Code untuk membuat cuplikan kode. Jika Anda mengonfigurasi modul Terraform kustom untuk deployment command line, pelanggan akan mengklik Download.
Deployment Manager
Elemen input pelanggan standar ditampilkan di sisi kiri screenshot berikut dan mencakup zona, jenis mesin, opsi disk, dan opsi jaringan.
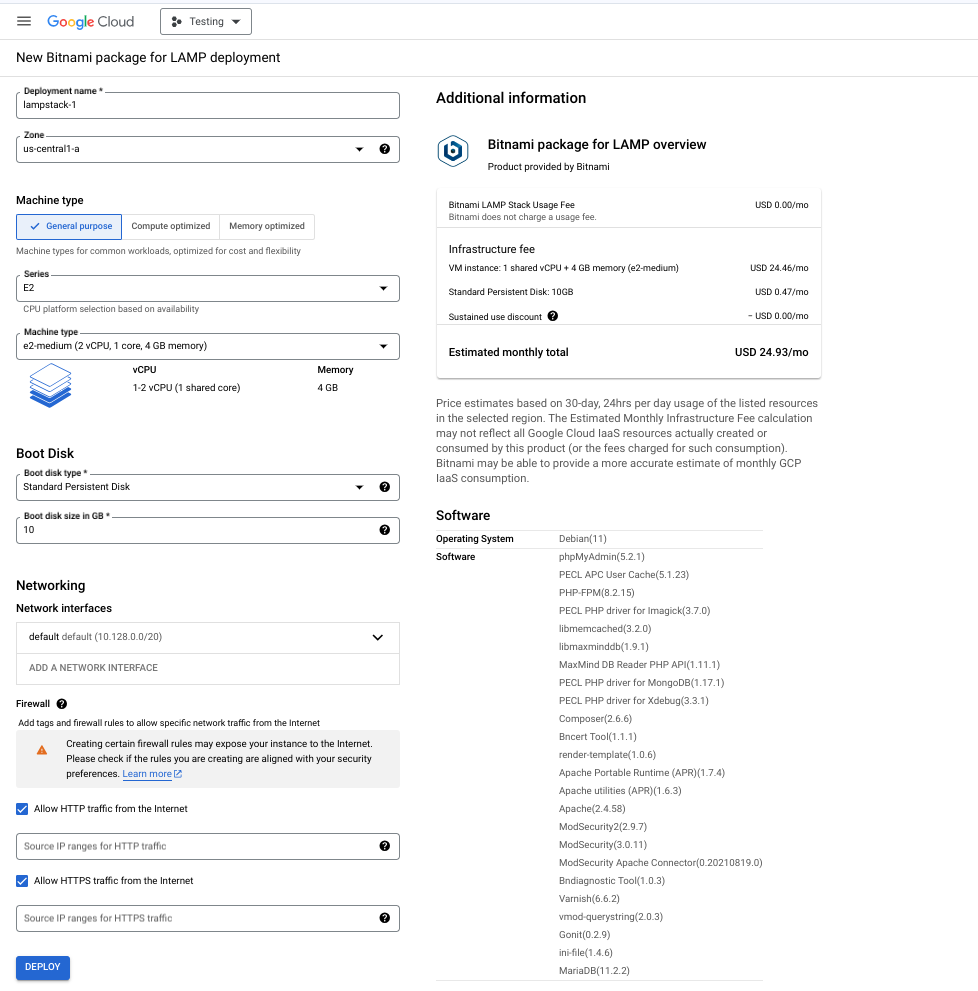
Jika deployment pelanggan memerlukan beberapa kartu antarmuka jaringan, mereka dapat menambahkan antarmuka jaringan tambahan dengan mengklik Add network interface.
Untuk men-deploy produk, pelanggan harus mengisi kolom input, lalu mengklik Deploy.
Tampilan pelanggan untuk paket yang di-deploy
UI Terraform
Gambar berikut menunjukkan tampilan produk Anda kepada pelanggan setelah mereka berhasil men-deploy-nya.
Elemen output standar ditampilkan di sisi kanan screenshot berikut dan mencakup alamat situs, sandi administrator sementara, dan informasi instance.
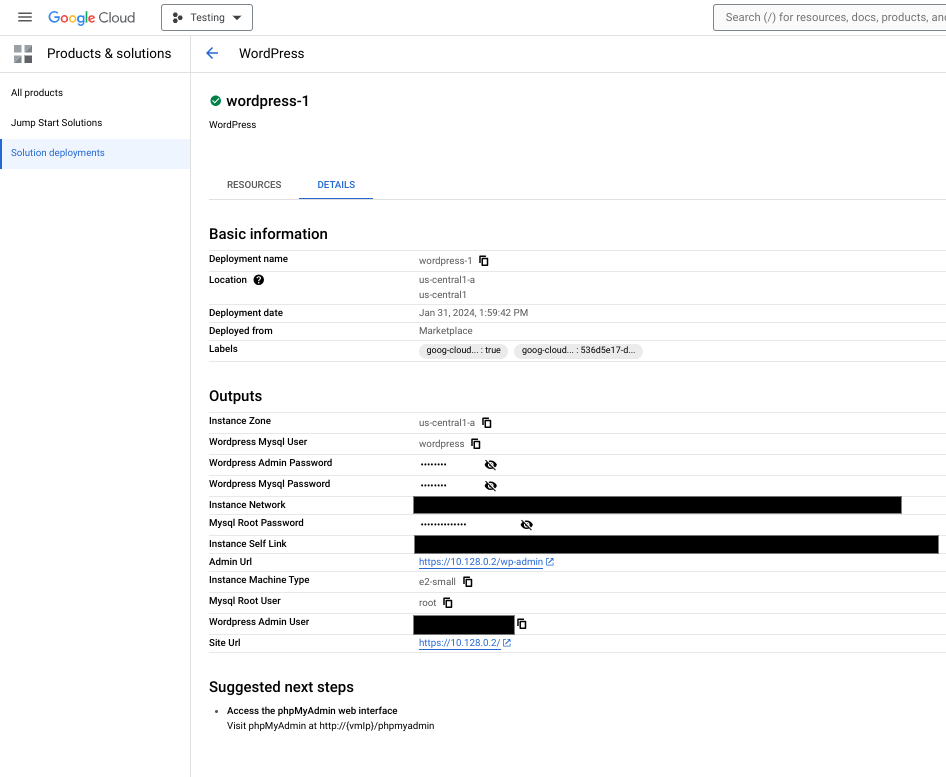
Jika deployment gagal, pelanggan dapat mengklik Lihat log untuk dialihkan ke log tugas Cloud Build yang mengaktifkan konfigurasi Terraform.
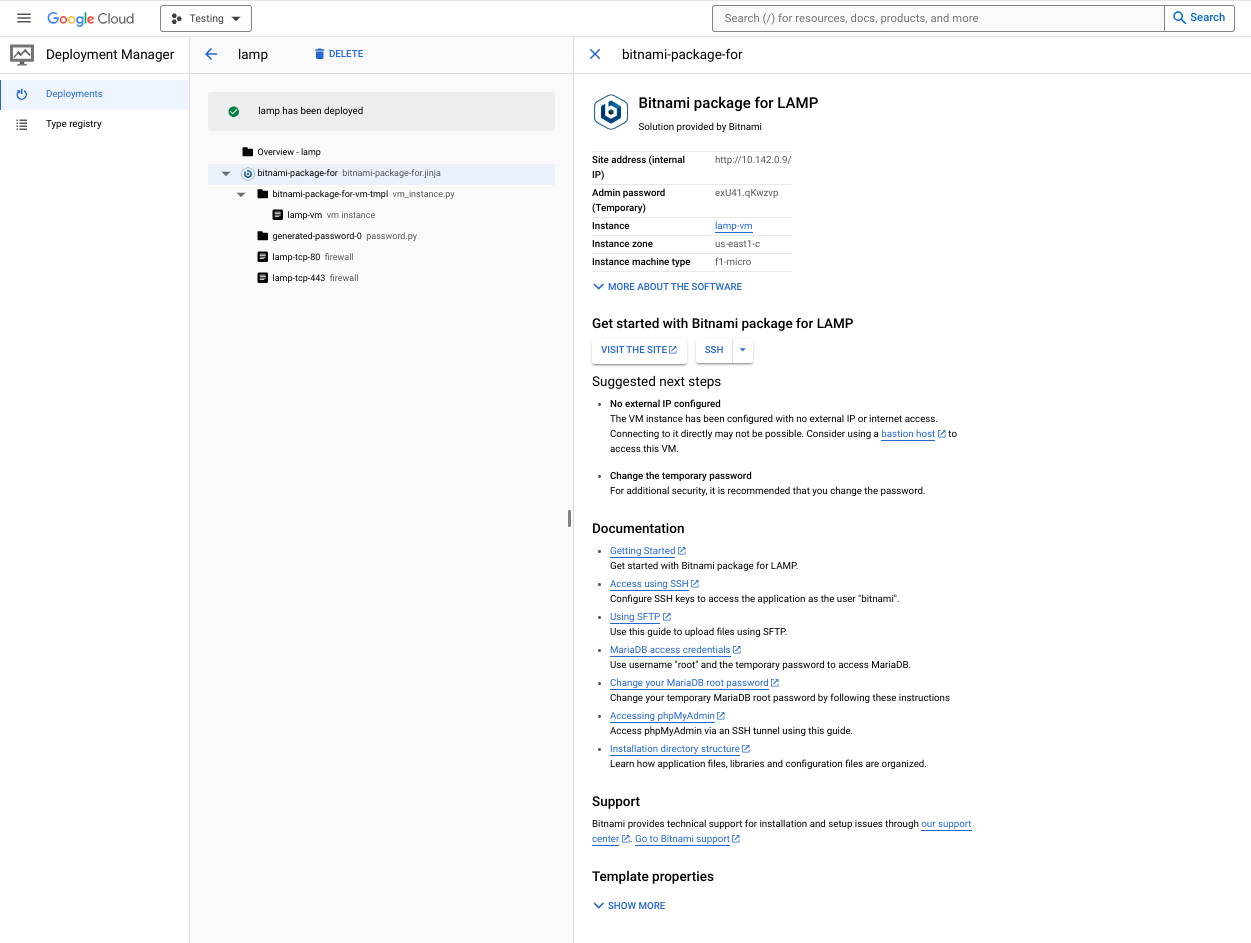
Deployment Manager
Gambar berikut menunjukkan tampilan produk Anda kepada pelanggan setelah mereka berhasil men-deploy-nya.
Elemen output standar ditampilkan di sisi kanan screenshot berikut dan mencakup alamat situs, sandi administrator sementara, dan informasi instance.