このページでは、ホストされているプロダクトと一般的な GitOps の手法のみを使用して、 Google Cloud で継続的インテグレーションとデリバリー(CI / CD)パイプラインを作成する方法について説明します。
Google のエンジニアは、長い間、構成ファイルとデプロイ ファイルをプライマリ ソースコード リポジトリに保存してきました。この手法は、Site Reliability Engineering, Chapter 8(Beyer 他 2016 年)に掲載されており、Kelsey Hightower の Google Cloud Next '17 基調講演で説明されました。
GitOps の重要な要素は「コードとしての環境」という考え方です。Git リポジトリに保存されたファイル(Kubernetes マニフェストなど)を使用してデプロイを宣言的に記述します。
このチュートリアルで作成する CI / CD パイプラインでは、commit されたコードからコンテナ イメージを自動的にビルドして Artifact Registry に格納します。さらに、Git リポジトリの Kubernetes マニフェストを更新し、そのマニフェストを使用してアプリケーションを Google Kubernetes Engine(GKE)にデプロイします。
このチュートリアルでは、2 つの Git リポジトリを使用します。
- app リポジトリ: アプリケーション自体のソースコードが含まれます。
- env リポジトリ: Kubernetes Deployment のマニフェストが含まれます。
app リポジトリに変更を push すると、Cloud Build パイプラインはテストを実施し、コンテナ イメージを構築して、Artifact Registry に push します。イメージを push した後、Cloud Build は、Deployment マニフェストを更新して env リポジトリに push します。これにより、マニフェストを GKE クラスタに適用する別の Cloud Build パイプラインがトリガーされ、正常終了した場合は、マニフェストが env リポジトリの別のブランチに格納されます。
ライフサイクルと用途が異なるため、app リポジトリと env リポジトリは別々にしておきます。app リポジトリの主なユーザーは実際の人間であり、このリポジトリは特定のアプリケーション専用です。env リポジトリの主なユーザーは自動化されたシステム(Cloud Build など)であり、このリポジトリは複数のアプリケーションで共有される場合があります。env リポジトリにはいくつかのブランチがあり、それぞれ特定の環境にマッピングし(このチュートリアルでは本番環境のみを使用します)、特定のコンテナ イメージを参照しますが、app リポジトリはこれとは異なります。
このチュートリアルを終了すると、次のことを簡単に行うことができるシステムが完成します。
- Cloud Build の履歴を確認して、失敗したデプロイと成功したデプロイを区別する。
- env リポジトリの production ブランチを確認して、現在使用されているマニフェストにアクセスする。
- 対応する Cloud Build ビルドを再実行して、以前のバージョンにロールバックする。
このチュートリアルについて
このチュートリアルでは、Cloud Source Repositories を使用して Git リポジトリをホストしていますが、GitHub、Bitbucket、GitLab などの他のサードパーティ製品でも同じ結果が得られます。
このパイプラインでは、デプロイ前に検証メカニズムは実装されません。GitHub、Bitbucket、GitLab を使用する場合は、それに応じて pull リクエストを使用するようにパイプラインを変更できます。
高度なデプロイ パターン(Blue/Green、カナリア分析、マルチクラウドなど)を実装するチームには Spinnaker をおすすめしますが、小規模な組織やプロジェクトでは CI / CD 戦略の正常完了に、それらの機能セットを必要としない場合があります。このチュートリアルでは、ツールを使用して GKE でホストされているアプリケーションに適した CI / CD パイプラインを作成する方法について説明します。
わかりやすくするため、このチュートリアルでは env リポジトリで単一の環境(本番環境)を使用しますが、必要に応じて拡張して複数の環境にデプロイすることもできます。
Cloud Source Repositories で Git リポジトリを作成する
このセクションでは、このチュートリアルで使用する 2 つの Git リポジトリ(app と env)を作成し、いくつかのサンプルコードを使用してアプリ 1 を初期化します。
Cloud Shell で、2 つの Git リポジトリを作成します。
gcloud source repos create hello-cloudbuild-app
gcloud source repos create hello-cloudbuild-env
GitHub からサンプルコードのクローンを作成します。
cd ~
git clone https://github.com/GoogleCloudPlatform/kubernetes-engine-samples
cd ~/kubernetes-engine-samples/management/gitops-style-delivery/
Cloud Source Repositories をリモートとして構成します。
PROJECT_ID=$(gcloud config get-value project)
git remote add google \
    "https://source.developers.google.com/p/${PROJECT_ID}/r/hello-cloudbuild-app"
クローンを作成したコードには Hello World アプリケーションが含まれています。
Cloud Build でコンテナ イメージを作成する
クローンを作成したコードには、次の Dockerfile が含まれています。
この Dockerfile を使用して、Cloud Build でコンテナ イメージを作成し、Artifact Registry に保存できます。
Cloud Shell で次のコマンドを使用して、最新の commit に基づいて Cloud Build ビルドを作成します。
cd ~/kubernetes-engine-samples/management/gitops-style-delivery/
COMMIT_ID="$(git rev-parse --short=7 HEAD)"
gcloud builds submit --tag="us-central1-docker.pkg.dev/${PROJECT_ID}/my-repository/hello-cloudbuild:${COMMIT_ID}" .
このコマンドを実行すると、Cloud Build はコンテナ イメージの作成によって生成されたログをターミナルにストリーミングします。
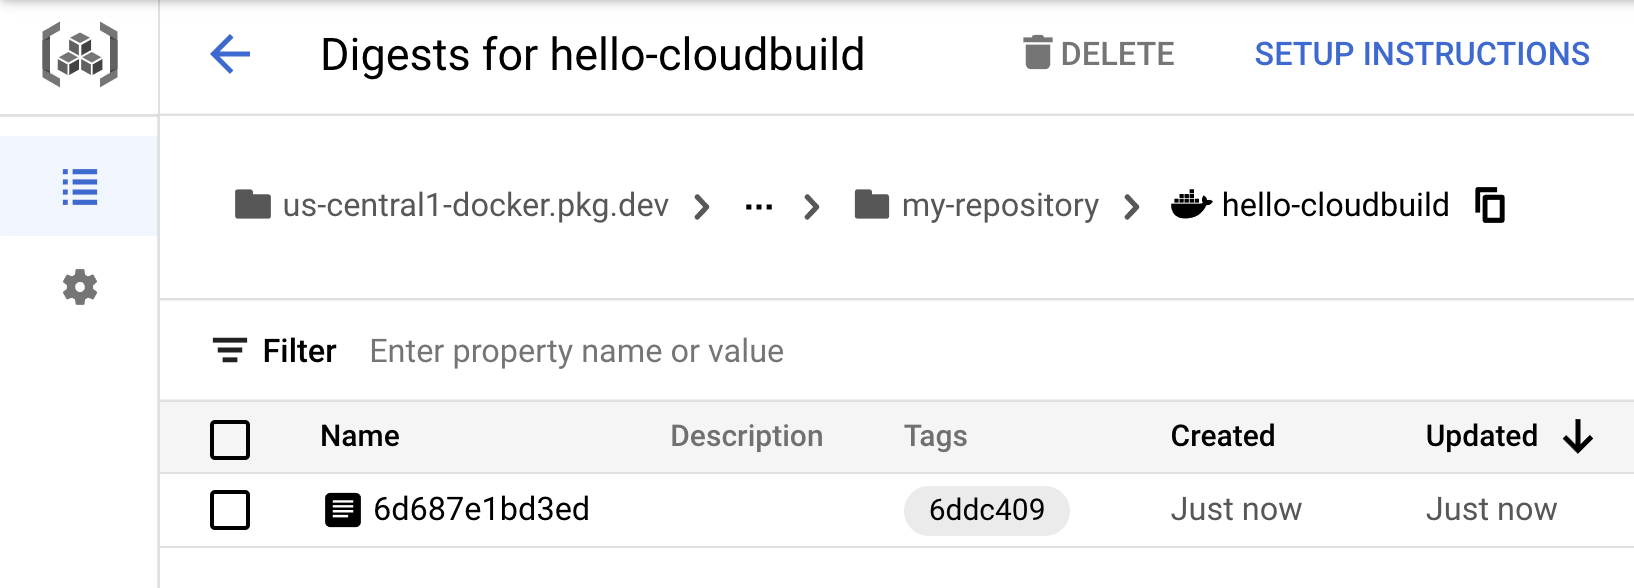
ビルドが完了したら、新しいコンテナ イメージが実際に Artifact Registry で利用できることを確認します。

継続的インテグレーション パイプラインを作成する
このセクションでは、小規模な単体テストを自動的に実施し、コンテナ イメージを構築して Artifact Registry に push するように Cloud Build を構成します。Cloud Source Repositories に新しい commit を push すると、このパイプラインが自動的にトリガーされます。コードに含まれる cloudbuild.yaml ファイルは、パイプラインの構成です。
Cloud Build の [トリガー] ページを開きます。
[トリガーを作成] をクリックします。
次のオプションを入力します。
- [名前] フィールドに
hello-cloudbuildと入力します。 - [イベント] で [ブランチに push する] を選択します。
- [ソース] で、[リポジトリ] として
hello-cloudbuild-appを選択し、[ブランチ] として^master$を選択します。 - [ビルド構成] で [Cloud Build 構成ファイル] を選択します。
- [Cloud Build 構成ファイルの場所] フィールドで、
/の後に「cloudbuild.yaml」と入力します。
- [名前] フィールドに
[作成] をクリックして、ビルドトリガーを保存します。
ヒント: 多数のプロジェクトにビルドトリガーを作成する必要がある場合は、Build Triggers API を使用できます。
Cloud Shell でアプリケーション コードを Cloud Source Repositories に push して、Cloud Build で CI パイプラインをトリガーします。
cd ~/kubernetes-engine-samples/management/gitops-style-delivery/
git push google master
Cloud Build コンソールを開きます。
最近実行し、終了したビルドが表示されます。ビルドをクリックすると、その実行を追跡してログを確認できます。
継続的デリバリー パイプラインを作成する
Cloud Build は継続的デリバリー パイプラインにも使用されます。commit が hello-cloudbuild-env リポジトリの candidate ブランチに push されるたびにパイプラインが実行されます。パイプラインは、新しいバージョンのマニフェストを Kubernetes クラスタに適用し、正常に終了した場合はマニフェストを production ブランチにコピーします。このプロセスには次のような特徴があります。
- candidate ブランチはデプロイの試行の履歴です。
- production ブランチは、成功したデプロイの履歴です。
- Cloud Build には、成功したデプロイと失敗したデプロイのビューがあります。
- Cloud Build では、対応するビルドを再実行して、以前のデプロイにロールバックできます。また、ロールバックによって、production ブランチが更新され、デプロイの履歴が正確に反映されます。
継続的インテグレーション パイプラインを変更して、hello-cloudbuild-env リポジトリの candidate ブランチを更新し、継続的デリバリー パイプラインをトリガーします。
Cloud Build に GKE へのアクセス権を付与する
Kubernetes クラスタにアプリケーションをデプロイするには、Cloud Build に Kubernetes Engine デベロッパーの Identity and Access Management ロールが必要です。
Shell
Cloud Shell で、次のコマンドを実行します。
PROJECT_NUMBER="$(gcloud projects describe ${PROJECT_ID} --format='get(projectNumber)')"
gcloud projects add-iam-policy-binding ${PROJECT_NUMBER} \
    --member=serviceAccount:${PROJECT_NUMBER}@cloudbuild.gserviceaccount.com \
    --role=roles/container.developer
コンソール
-
Google Cloud コンソールで、settings GKE の [権限] ページに移動します。
Kubernetes Engine デベロッパー ロールのステータスを [有効化] に設定します。
hello-cloudbuild-env リポジトリを初期化する
hello-cloudbuild-env リポジトリを 2 つのブランチ(production と candidate)と、デプロイ プロセスを記述した Cloud Build 構成ファイルで初期化する必要があります。
Cloud Shell で hello-cloudbuild-env リポジトリのクローンを作成し、production ブランチを作成します。
cd ~
gcloud source repos clone hello-cloudbuild-env
cd ~/kubernetes-engine-samples/management/gitops-style-delivery/
git checkout -b production
hello-cloudbuild-app リポジトリから入手できる
cloudbuild-delivery.yamlファイルをコピーして変更してから commit します。cd ~/kubernetes-engine-samples/management/gitops-style-delivery/ cp ~/hello-cloudbuild-app/cloudbuild-delivery.yaml ~/kubernetes-engine-samples/management/gitops-style-delivery/cloudbuild.yaml git add . git commit -m "Create cloudbuild.yaml for deployment"
cloudbuild-delivery.yamlファイルには、Cloud Build で実行されるデプロイ プロセスが記述されています。次の 2 つのステップがあります。Cloud Build が GKE クラスタにマニフェストを適用します。
正常に終了すると、Cloud Build はマニフェストを production ブランチにコピーします。
candidate ブランチを作成し、両方のブランチを Cloud Source Repositories で使用できるように push します。
git checkout -b candidate
git push origin production
git push origin candidate
hello-cloudbuild-env リポジトリの Cloud Build サービス アカウントに Source Repository 書き込みの IAM ロールを付与します。
PROJECT_NUMBER="$(gcloud projects describe ${PROJECT_ID} \
    --format='get(projectNumber)')"
cat >/tmp/hello-cloudbuild-env-policy.yaml <<EOF
bindings:
- members:
  - serviceAccount:${PROJECT_NUMBER}@cloudbuild.gserviceaccount.com
  role: roles/source.writer
EOF
gcloud source repos set-iam-policy \
    hello-cloudbuild-env /tmp/hello-cloudbuild-env-policy.yaml
継続的デリバリー パイプラインのトリガーを作成する
このセクションでは、hello-cloudbuild-env リポジトリの candidate ブランチへの push によってトリガーされるように、Cloud Build を構成します。
Cloud Build の [トリガー] ページを開きます。
[トリガーを作成] をクリックします。
次のオプションを入力します。
- [名前] フィールドに
hello-cloudbuild-deployと入力します。 - [イベント] で [ブランチに push する] を選択します。
- [ソース] で、[リポジトリ] として
hello-cloudbuild-envを選択し、[ブランチ] として^candidate$を選択します。 - [構成] で [Cloud Build 構成ファイル(YAML または JSON)] を選択します。
- [Cloud Build 構成ファイルの場所] フィールドで、
/の後に「cloudbuild.yaml」と入力します。
- [名前] フィールドに
[作成] をクリックします。
継続的デリバリー パイプラインをトリガーするように継続的インテグレーション パイプラインを変更する
このセクションでは、Kubernetes マニフェストの新しいバージョンを生成して hello-cloudbuild-env リポジトリに push し、継続的デリバリー パイプラインをトリガーする手順を継続的インテグレーション パイプラインに追加します。
cloudbuild.yamlファイルをcloudbuild-trigger-cd.yamlファイルの拡張した例に置き換えます。cd ~/kubernetes-engine-samples/management/gitops-style-delivery/ cp cloudbuild-trigger-cd.yaml cloudbuild.yaml
cloudbuild-trigger-cd.yamlは、cloudbuild.yamlファイルの拡張バージョンです。新しい Kubernetes マニフェストを生成し、継続的デリバリー パイプラインをトリガーする手順を追加します。変更を commit して Cloud Source Repositories に push します。
cd ~/kubernetes-engine-samples/management/gitops-style-delivery/
git add cloudbuild.yaml
git commit -m "Trigger CD pipeline"
git push google master
これにより、Cloud Build の継続的インテグレーション パイプラインがトリガーされます。
継続的インテグレーション ビルドを確認します。
最近実行し、終了した hello-cloudbuild-app リポジトリのビルドが表示されます。ビルドをクリックすると、その実行を追跡してログを確認できます。このパイプラインの最後の手順では、新しいマニフェストが hello-cloudbuild-env リポジトリに push され、これにより、継続的デリバリー パイプラインがトリガーされます。
継続的デリバリー ビルドを確認します。
最近実行し、終了した hello-cloudbuild-env リポジトリのビルドが表示されます。ビルドをクリックすると、その実行を追跡してログを確認できます。
パイプライン全体をテストする
CI / CD パイプライン全体が構成されました。このセクションでは、エンドツーエンドでテストを行います。
GKE の [サービス] ページに移動します。
Google Kubernetes Engine のサービスに移動
このリストには、最近完了した継続的デリバリー ビルドによって作成された hello-cloudbuild という単一のサービスが含まれています。
hello-cloudbuild サービスのエンドポイントをクリックします。「Hello World!」が表示されます。エンドポイントが存在しない場合、またはロードバランサのエラーが発生した場合は、ロードバランサが完全に初期化されるまで数分待つことが必要な場合があります。必要に応じて [更新] をクリックしてページを更新します。
Cloud Shell で、アプリケーションと単体テストの両方で、「Hello World」を「Hello Cloud Build」に置き換えます。
cd ~/kubernetes-engine-samples/management/gitops-style-delivery/
sed -i 's/Hello World/Hello Cloud Build/g' app.py
sed -i 's/Hello World/Hello Cloud Build/g' test_app.py
変更を commit して Cloud Source Repositories に push します。
git add app.py test_app.py
git commit -m "Hello Cloud Build"
git push google master
これにより、CI / CD パイプライン全体がトリガーされます。
数分後、ブラウザでアプリケーションを再読み込みします。「Hello Cloud Build!」が表示されます。
ロールバックをテストする
このセクションでは、「Hello World!」と表示するアプリケーションのバージョンにロールバックします。
hello-cloudbuild-env リポジトリの Cloud Build コンソールを開きます。
利用可能な 2 番目に新しいビルドをクリックします。
[再ビルド] をクリックします。
ビルドが完了したら、ブラウザでアプリケーションを再読み込みします。「Hello World!」が再表示されます。


