In diesem Dokument verwenden Sie die folgenden kostenpflichtigen Komponenten von Google Cloud:
- Dataproc
- Compute Engine
- Cloud Composer
Mit dem Preisrechner können Sie eine Kostenschätzung für Ihre voraussichtliche Nutzung vornehmen.
Hinweise
Projekt einrichten
- Sign in to your Google Cloud account. If you're new to Google Cloud, create an account to evaluate how our products perform in real-world scenarios. New customers also get $300 in free credits to run, test, and deploy workloads.
-
In the Google Cloud console, on the project selector page, select or create a Google Cloud project.
-
Verify that billing is enabled for your Google Cloud project.
-
Enable the Dataproc, Compute Engine, and Cloud Composer APIs.
-
Install the Google Cloud CLI.
-
Wenn Sie einen externen Identitätsanbieter (IdP) verwenden, müssen Sie sich zuerst mit Ihrer föderierten Identität in der gcloud CLI anmelden.
-
Führen Sie folgenden Befehl aus, um die gcloud CLI zu initialisieren:
gcloud init -
In the Google Cloud console, on the project selector page, select or create a Google Cloud project.
-
Verify that billing is enabled for your Google Cloud project.
-
Enable the Dataproc, Compute Engine, and Cloud Composer APIs.
-
Install the Google Cloud CLI.
-
Wenn Sie einen externen Identitätsanbieter (IdP) verwenden, müssen Sie sich zuerst mit Ihrer föderierten Identität in der gcloud CLI anmelden.
-
Führen Sie folgenden Befehl aus, um die gcloud CLI zu initialisieren:
gcloud init - Erstellen Sie die
sparkpi-Workflow-Vorlage.gcloud dataproc workflow-templates create sparkpi \ --region=us-central1 - Fügen Sie der Workflow-Vorlage
sparkpiden Spark-Job hinzu. Das „compute“-Flagstep-ididentifiziert den SparkPi-Job.gcloud dataproc workflow-templates add-job spark \ --workflow-template=sparkpi \ --step-id=compute \ --class=org.apache.spark.examples.SparkPi \ --jars=file:///usr/lib/spark/examples/jars/spark-examples.jar \ --region=us-central1 \ -- 1000 - Führen Sie den Workflow mit einem verwalteten Cluster mit einem einzelnen Knoten aus. Dataproc erstellt den Cluster, führt darauf den Workflow aus und löscht den Cluster, wenn der Workflow abgeschlossen ist.
gcloud dataproc workflow-templates set-managed-cluster sparkpi \ --cluster-name=sparkpi \ --single-node \ --region=us-central1 - Bestätigen Sie das Erstellen der Workflow-Vorlage.
Konsole
Klicken Sie in der Google Cloud Console auf der Dataproc-Seite Workflows auf den Namen
sparkpi, um die Seite Workflow-Vorlagendetails zu öffnen. Klicken Sie auf den Namen Ihrer Workflow-Vorlage, um diesparkpi-Vorlagenattribute zu bestätigen.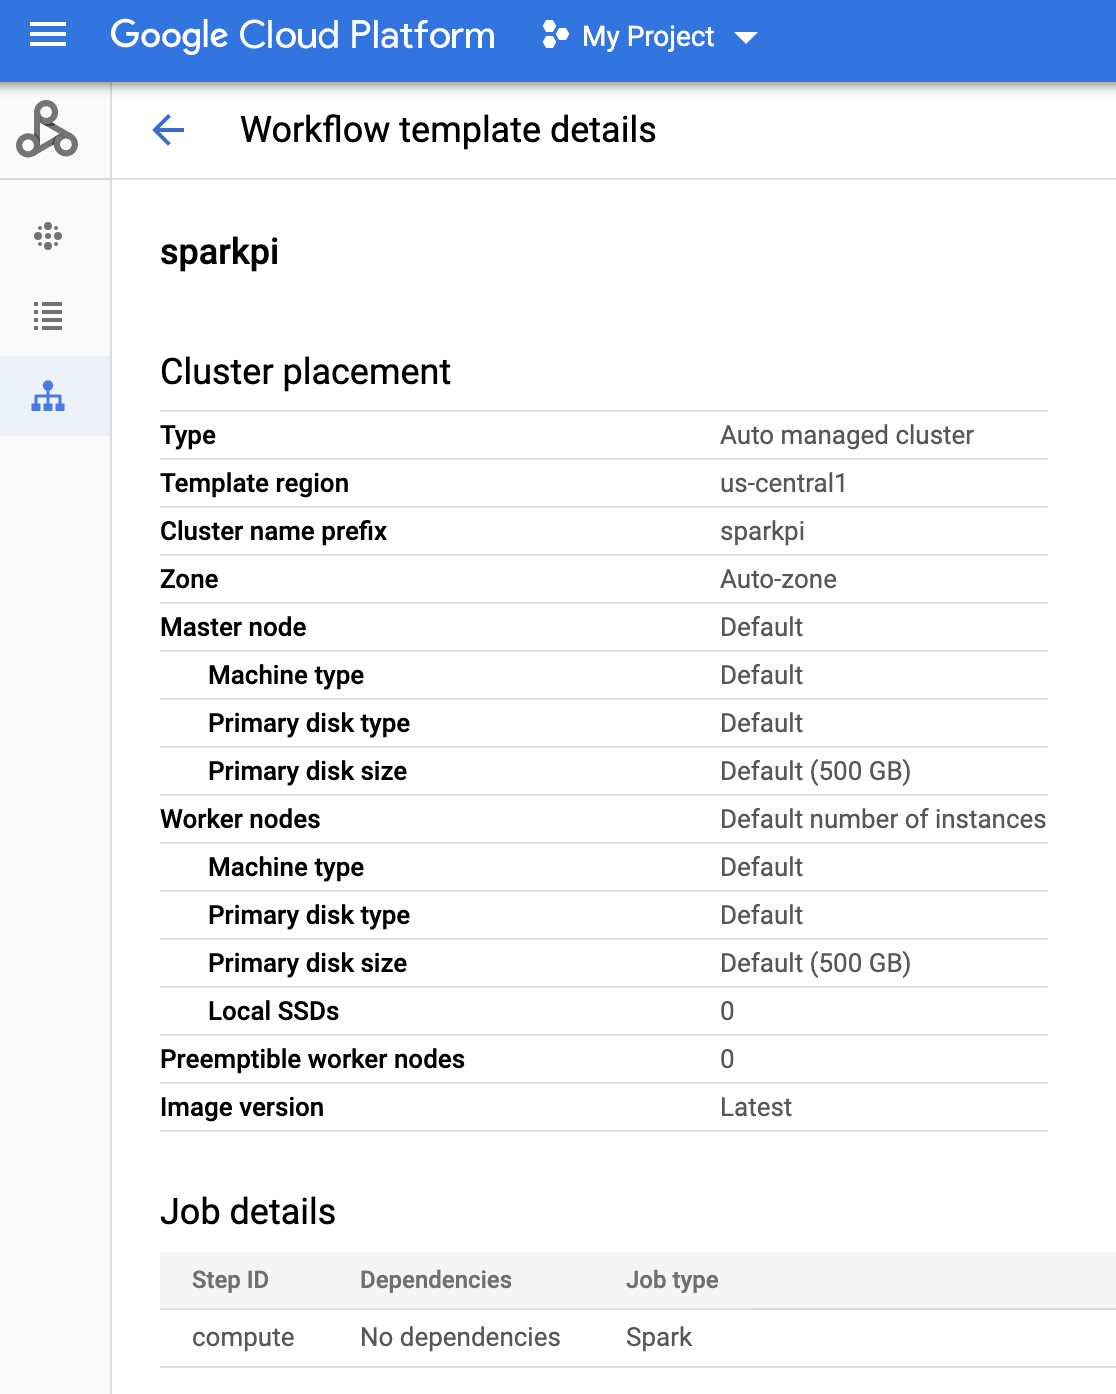
gcloud-Befehl
Führen Sie dazu diesen Befehl aus:
gcloud dataproc workflow-templates describe sparkpi --region=us-central1 - Eine Cloud Composer-Umgebung erstellen oder eine vorhandene verwenden
- Umgebungsvariablen festlegen
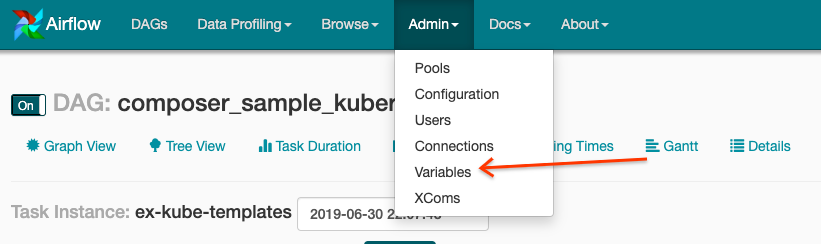
Airflow-UI
- Klicken Sie in der Symbolleiste auf Admin > Variables.
- Klicken Sie auf Erstellen.
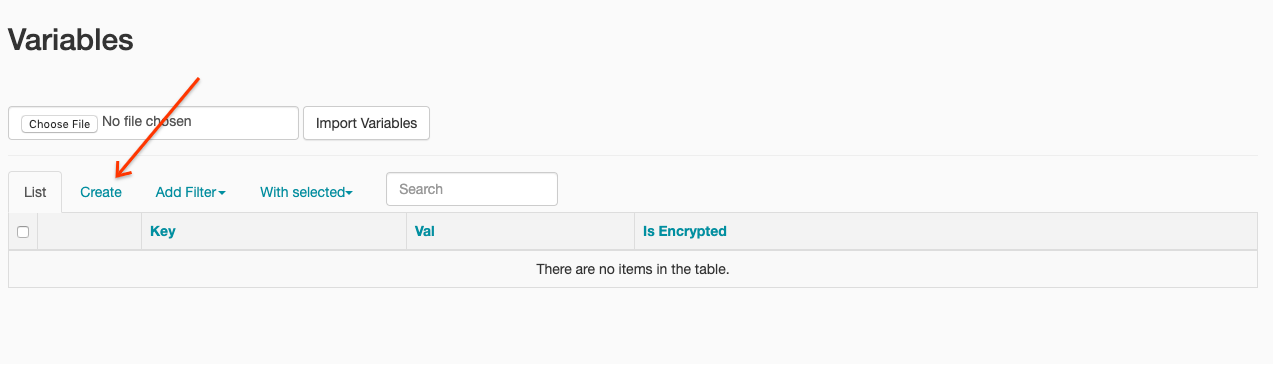
- Geben Sie die folgenden Informationen ein:
- Key:
project_id - Val: PROJECT_ID – Ihre Google Cloud -Projekt-ID
- Key:
- Klicken Sie auf Speichern.
gcloud-Befehl
Geben Sie die folgenden Befehle ein:
ENVIRONMENTist der Name der Cloud Composer-Umgebung.LOCATIONist die Region, in der sich die Cloud Composer-Umgebung befindet.PROJECT_IDist die Projekt-ID des Projekts, das die Cloud Composer-Umgebung enthält.
gcloud composer environments run ENVIRONMENT --location LOCATION variables set -- project_id PROJECT_ID - Klicken Sie in der Symbolleiste auf Admin > Variables.
- Kopieren Sie den folgenden DAG-Code lokal in eine Datei namens „composer-dataproc-dag.py“, die den DataprocInstantiateWorkflowTemplateOperator verwendet.
Airflow 2
Airflow 1
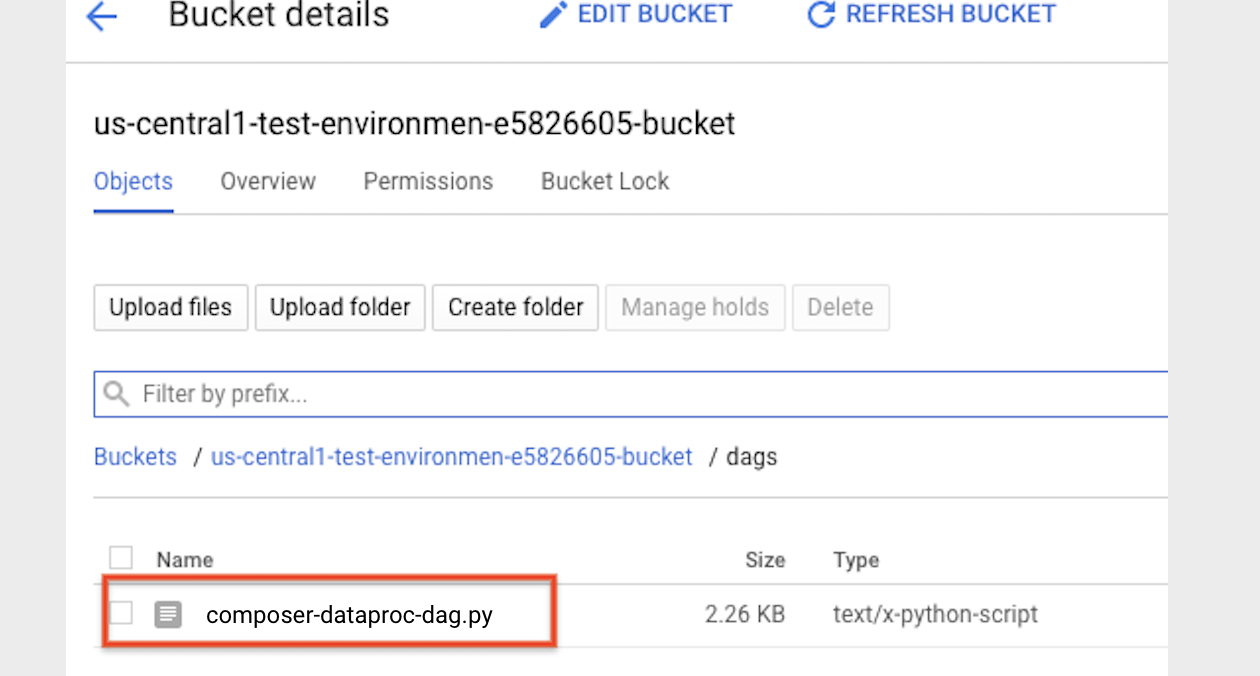
- Führen Sie ein Upload des DAG in Ihren Umgebungsordner in Cloud Storage aus. Wenn der Upload erfolgreich abgeschlossen wurde, klicken Sie auf der Seite der Cloud Composer-Umgebung auf den Link DAGs-Ordner.
- Öffnen Sie die Airflow-Weboberfläche.
- Klicken Sie auf der Seite "DAGs" auf den DAG-Namen, z. B.
dataproc_workflow_dag. - Klicken Sie auf der DAGs-Detailseite auf Grafikansicht.
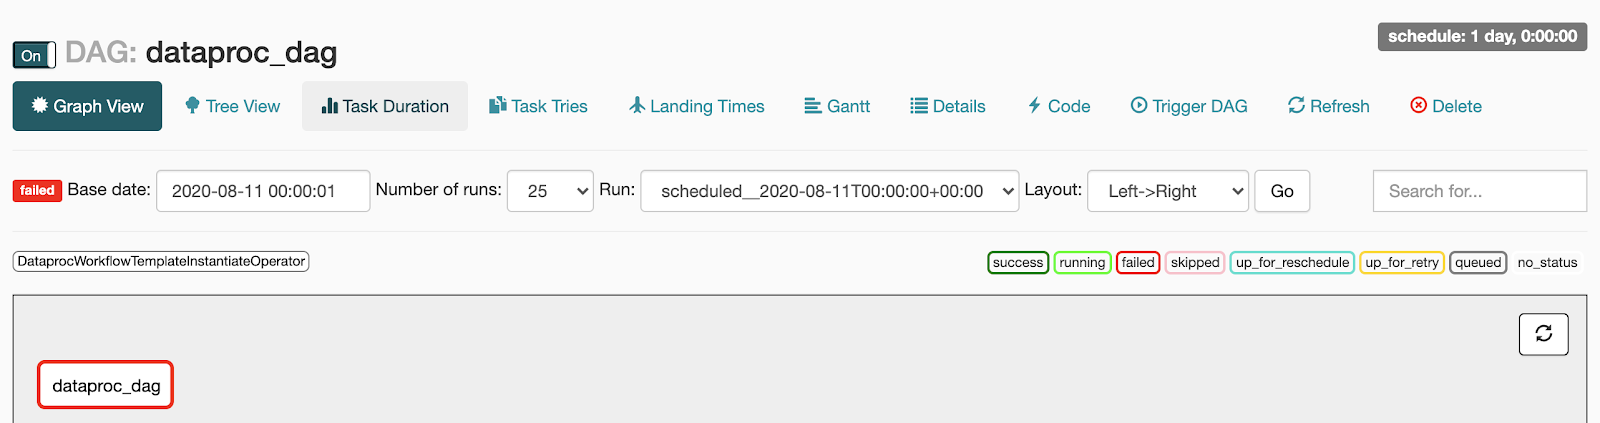
- Status prüfen:
- Fehlgeschlagen: Die Aufgabe ist rot umrandet.
Sie können auch den Mauszeiger über die Aufgabe halten und nach State: Failed suchen.
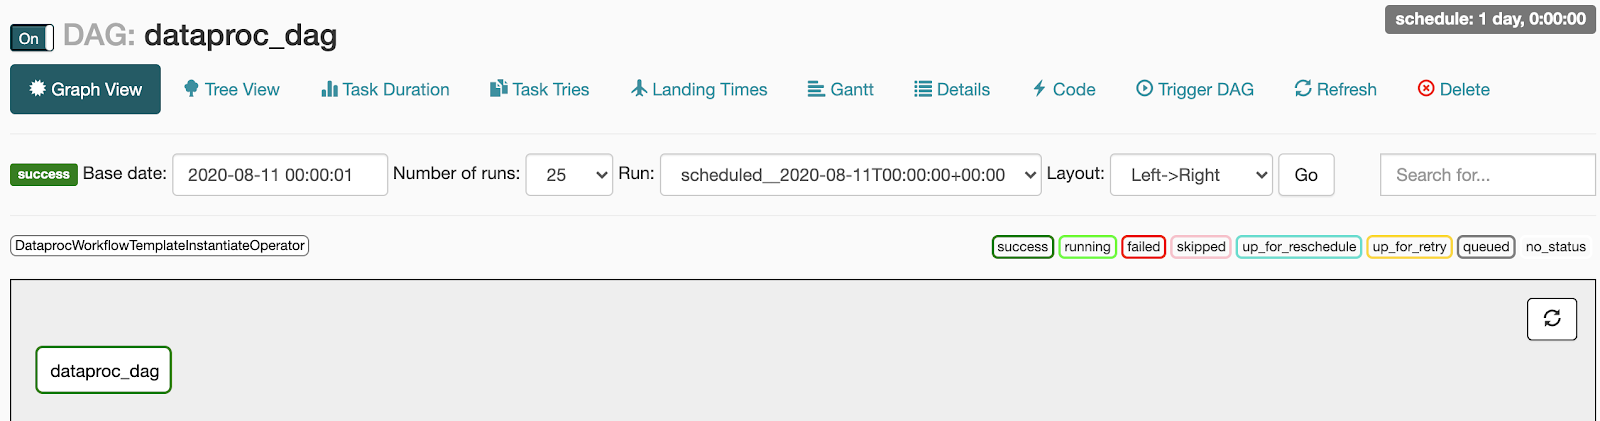
- Erfolgreich: Die Aufgabe ist grün umrandet.
Sie können auch den Mauszeiger über die Aufgabe halten und nach State: Success suchen.
- Fehlgeschlagen: Die Aufgabe ist rot umrandet.
Sie können auch den Mauszeiger über die Aufgabe halten und nach State: Failed suchen.
- Weitere Informationen finden Sie unter Übersicht über Dataproc-Workflow-Vorlagen.
- Weitere Informationen finden Sie unter Lösungen für die Workflow-Planung.
Dataproc-Workflow-Vorlage erstellen
Kopieren Sie die folgenden Befehle und führen Sie sie in einem lokalen Terminalfenster oder in Cloud Shell aus, um eine Workflow-Vorlage zu erstellen und zu definieren.
DAG erstellen und in Cloud Storage hochladen
Status einer Aufgabe ansehen
Airflow-UI
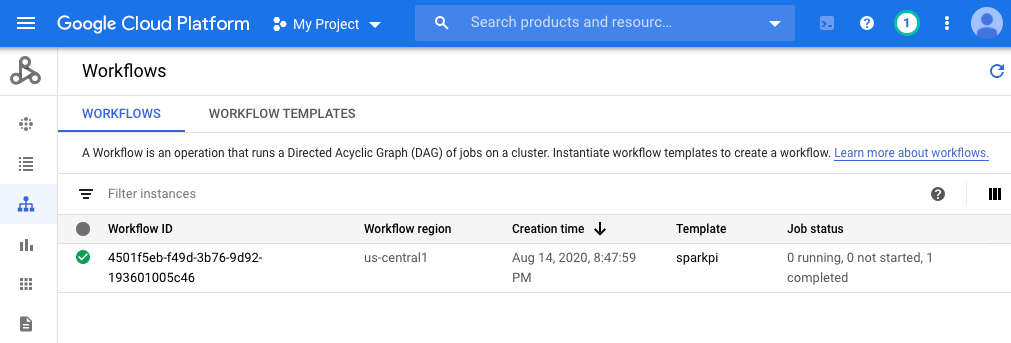
Console
Klicken Sie auf den Tab „Workflows“, um den Workflow-Status anzusehen.
gcloud-Befehl
gcloud dataproc operations list \
    --region=us-central1 \
    --filter="labels.goog-dataproc-workflow-template-id=sparkpi"
Bereinigen
Um zu vermeiden, dass Ihrem Google Cloud Konto Gebühren in Rechnung gestellt werden, können Sie die in dieser Anleitung verwendeten Ressourcen löschen: