This document describes how to deploy an App Engine application to the App Engine standard environment from within IntelliJ IDEA.
Before you begin
Follow the Create an App guide to install and set up Cloud Code as well as create an App Engine app for the standard environment. Be sure to add App Engine standard framework support.
If you have a Gradle-based project and are using IntelliJ IDEA Community Edition, configure your project with the App Engine Gradle plugin. Be sure to sync your project with Gradle.
If you don't have an application but still want to try these deployment procedures, download the sample app:
Clone the Hello World sample app to your local machine:
git clone https://github.com/GoogleCloudPlatform/java-docs-samplesIn IntelliJ, select File > Open to open the file selector.
Navigate to
/java-docs-samples/appengine-java8/.Select the
/helloworld/directory.Click OK.
Creating the deployment configuration
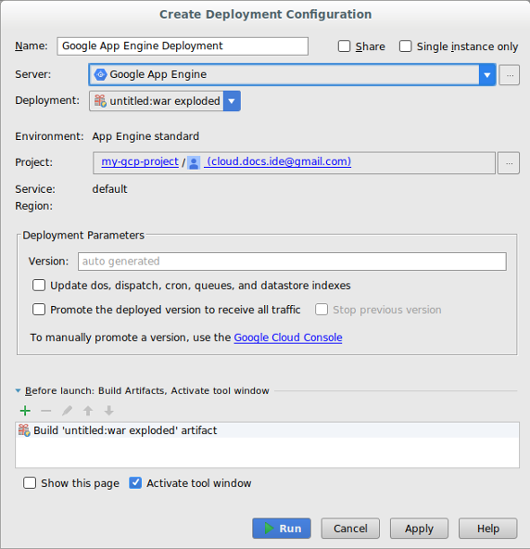
Choose Tools > Cloud Code > App Engine > Deploy to App Engine.

Confirm the server configuration:
Click the ellipsis (...) next to the Server field.
In the dialog, verify that the Name field displays Google App Engine.
Click OK.
Select the Deployment source.
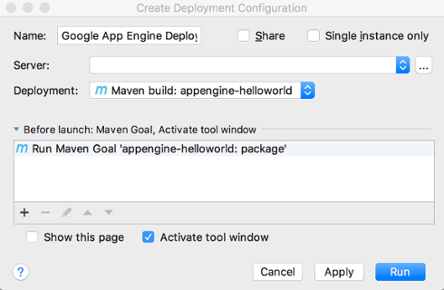
If you're using Community Edition, Cloud Code for IntelliJ only supports deploying from a Maven or a Gradle artifact.
Select a project in the Project field.
The first time you configure the deployment, you will be prompted to sign in to the account associated with the Google Cloud console project that you want to deploy.

Fill in other fields as needed to configure the deployment.
Click Run to build and deploy your app.
In the Application Servers window, click the name of your project to monitor its deployment progress. If the window is not displaying, click View > Tool Windows > Application Servers.
After deployment completes, you can view your app's URL in the console output.
Update the App Engine standard configurations
After creating the initial deployment configuration, you can make changes to those configurations as needed by your application.
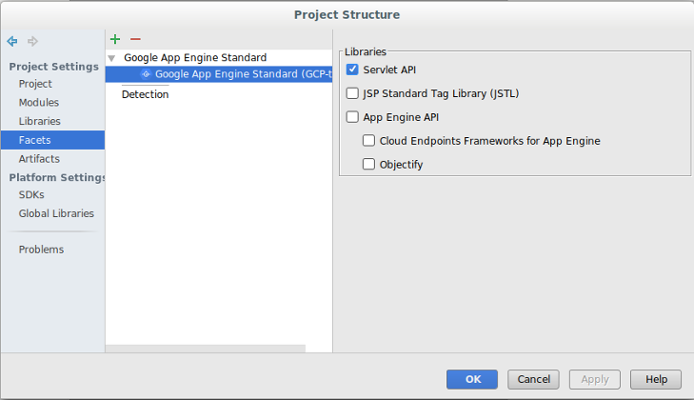
Select File > Project Structure.
The Project Structure dialog displays.
Under Project Settings, select Facets.
Select the App Engine standard facet.

Select the libraries you want to add to your project.
Click OK.
Deleting the server
If you ever want to delete the server you configured for your project, you can do so as follows:
Choose File > Settings > Build, Execution, Deployment > Clouds.
On macOS, this is IntelliJ IDEA > Preferences > Build, Execution, Deployment > Clouds.
Select your server (App Engine) and click the minus sign (-) at the top of the window to remove it.
Click OK.
What's next
- You can add your project to Cloud Source Repositories if you haven't done so already.
Get support
To submit feedback or report an issue in your IntelliJ IDE, go to Tools > Cloud Code > Help / About > Submit feedback or report an issue to report an issue on GitHub.
