Mentranskripsikan speech to text dengan menggunakan konsol Google Cloud
Panduan memulai ini memperkenalkan Konsol Cloud Speech-to-Text. Dalam panduan memulai ini, Anda akan membuat dan meningkatkan transkripsi serta mempelajari cara menggunakan konfigurasi ini dengan Speech-to-Text API untuk aplikasi Anda sendiri.
Untuk mempelajari cara mengirim permintaan dan menerima respons menggunakan REST API, bukan Konsol, lihat halaman sebelum memulai.
Sebelum memulai
Sebelum dapat mulai menggunakan Konsol Speech-to-Text, Anda harus mengaktifkan API di Google Cloud Platform Console. Langkah-langkah di bawah ini akan memandu Anda melakukan tindakan berikut:
- Mengaktifkan Speech-to-Text di sebuah project.
- Pastikan penagihan diaktifkan untuk Speech-to-Text.
Menyiapkan project Google Cloud
-
Anda dapat memilih project yang sudah ada atau membuat project baru. Untuk mengetahui detail selengkapnya tentang cara membuat project, lihat dokumentasi Google Cloud Platform.
Jika membuat project baru, Anda akan diminta untuk menautkan akun penagihan ke project ini. Jika menggunakan project yang sudah ada, pastikan Anda telah mengaktifkan penagihan.
Pelajari cara mengonfirmasi bahwa penagihan diaktifkan untuk project Anda
Setelah memilih project dan menautkannya ke akun penagihan, Anda dapat mengaktifkan Speech-to-Text API. Buka kotak Search products and resources di bagian atas halaman dan ketik "speech".
Pilih Cloud Speech-to-Text API dari daftar hasil.
Untuk mencoba Speech-to-Text tanpa menautkannya ke project Anda, pilih opsi TRY THIS API. Untuk mengaktifkan Speech-to-Text API agar dapat digunakan dengan project Anda, klik ENABLE.
Peran yang diperlukan
Untuk mendapatkan izin yang diperlukan guna membuat transkripsi, minta administrator untuk memberi Anda peran IAM Storage Admin (roles/storage.admin) di project Anda.
Untuk mengetahui informasi selengkapnya tentang cara memberikan peran, lihat Mengelola akses ke project, folder, dan organisasi.
Peran bawaan ini berisi izin yang diperlukan untuk membuat transkripsi. Untuk melihat izin yang benar-benar diperlukan, luaskan bagian Izin yang diperlukan:
Izin yang diperlukan
Izin berikut diperlukan untuk membuat transkripsi:
-
storage.buckets.get -
storage.buckets.list -
storage.buckets.update -
Di tingkat project atau bucket:
-
storage.objects.create -
storage.objects.delete -
storage.objects.get -
storage.objects.list -
storage.objects.update
-
Anda mungkin juga bisa mendapatkan izin ini dengan peran khusus atau peran bawaan lainnya.
Membuat transkripsi
Gunakan konsol Google Cloud untuk membuat transkripsi.
Konfigurasi audio
Buka ringkasan Speech-to-Text.
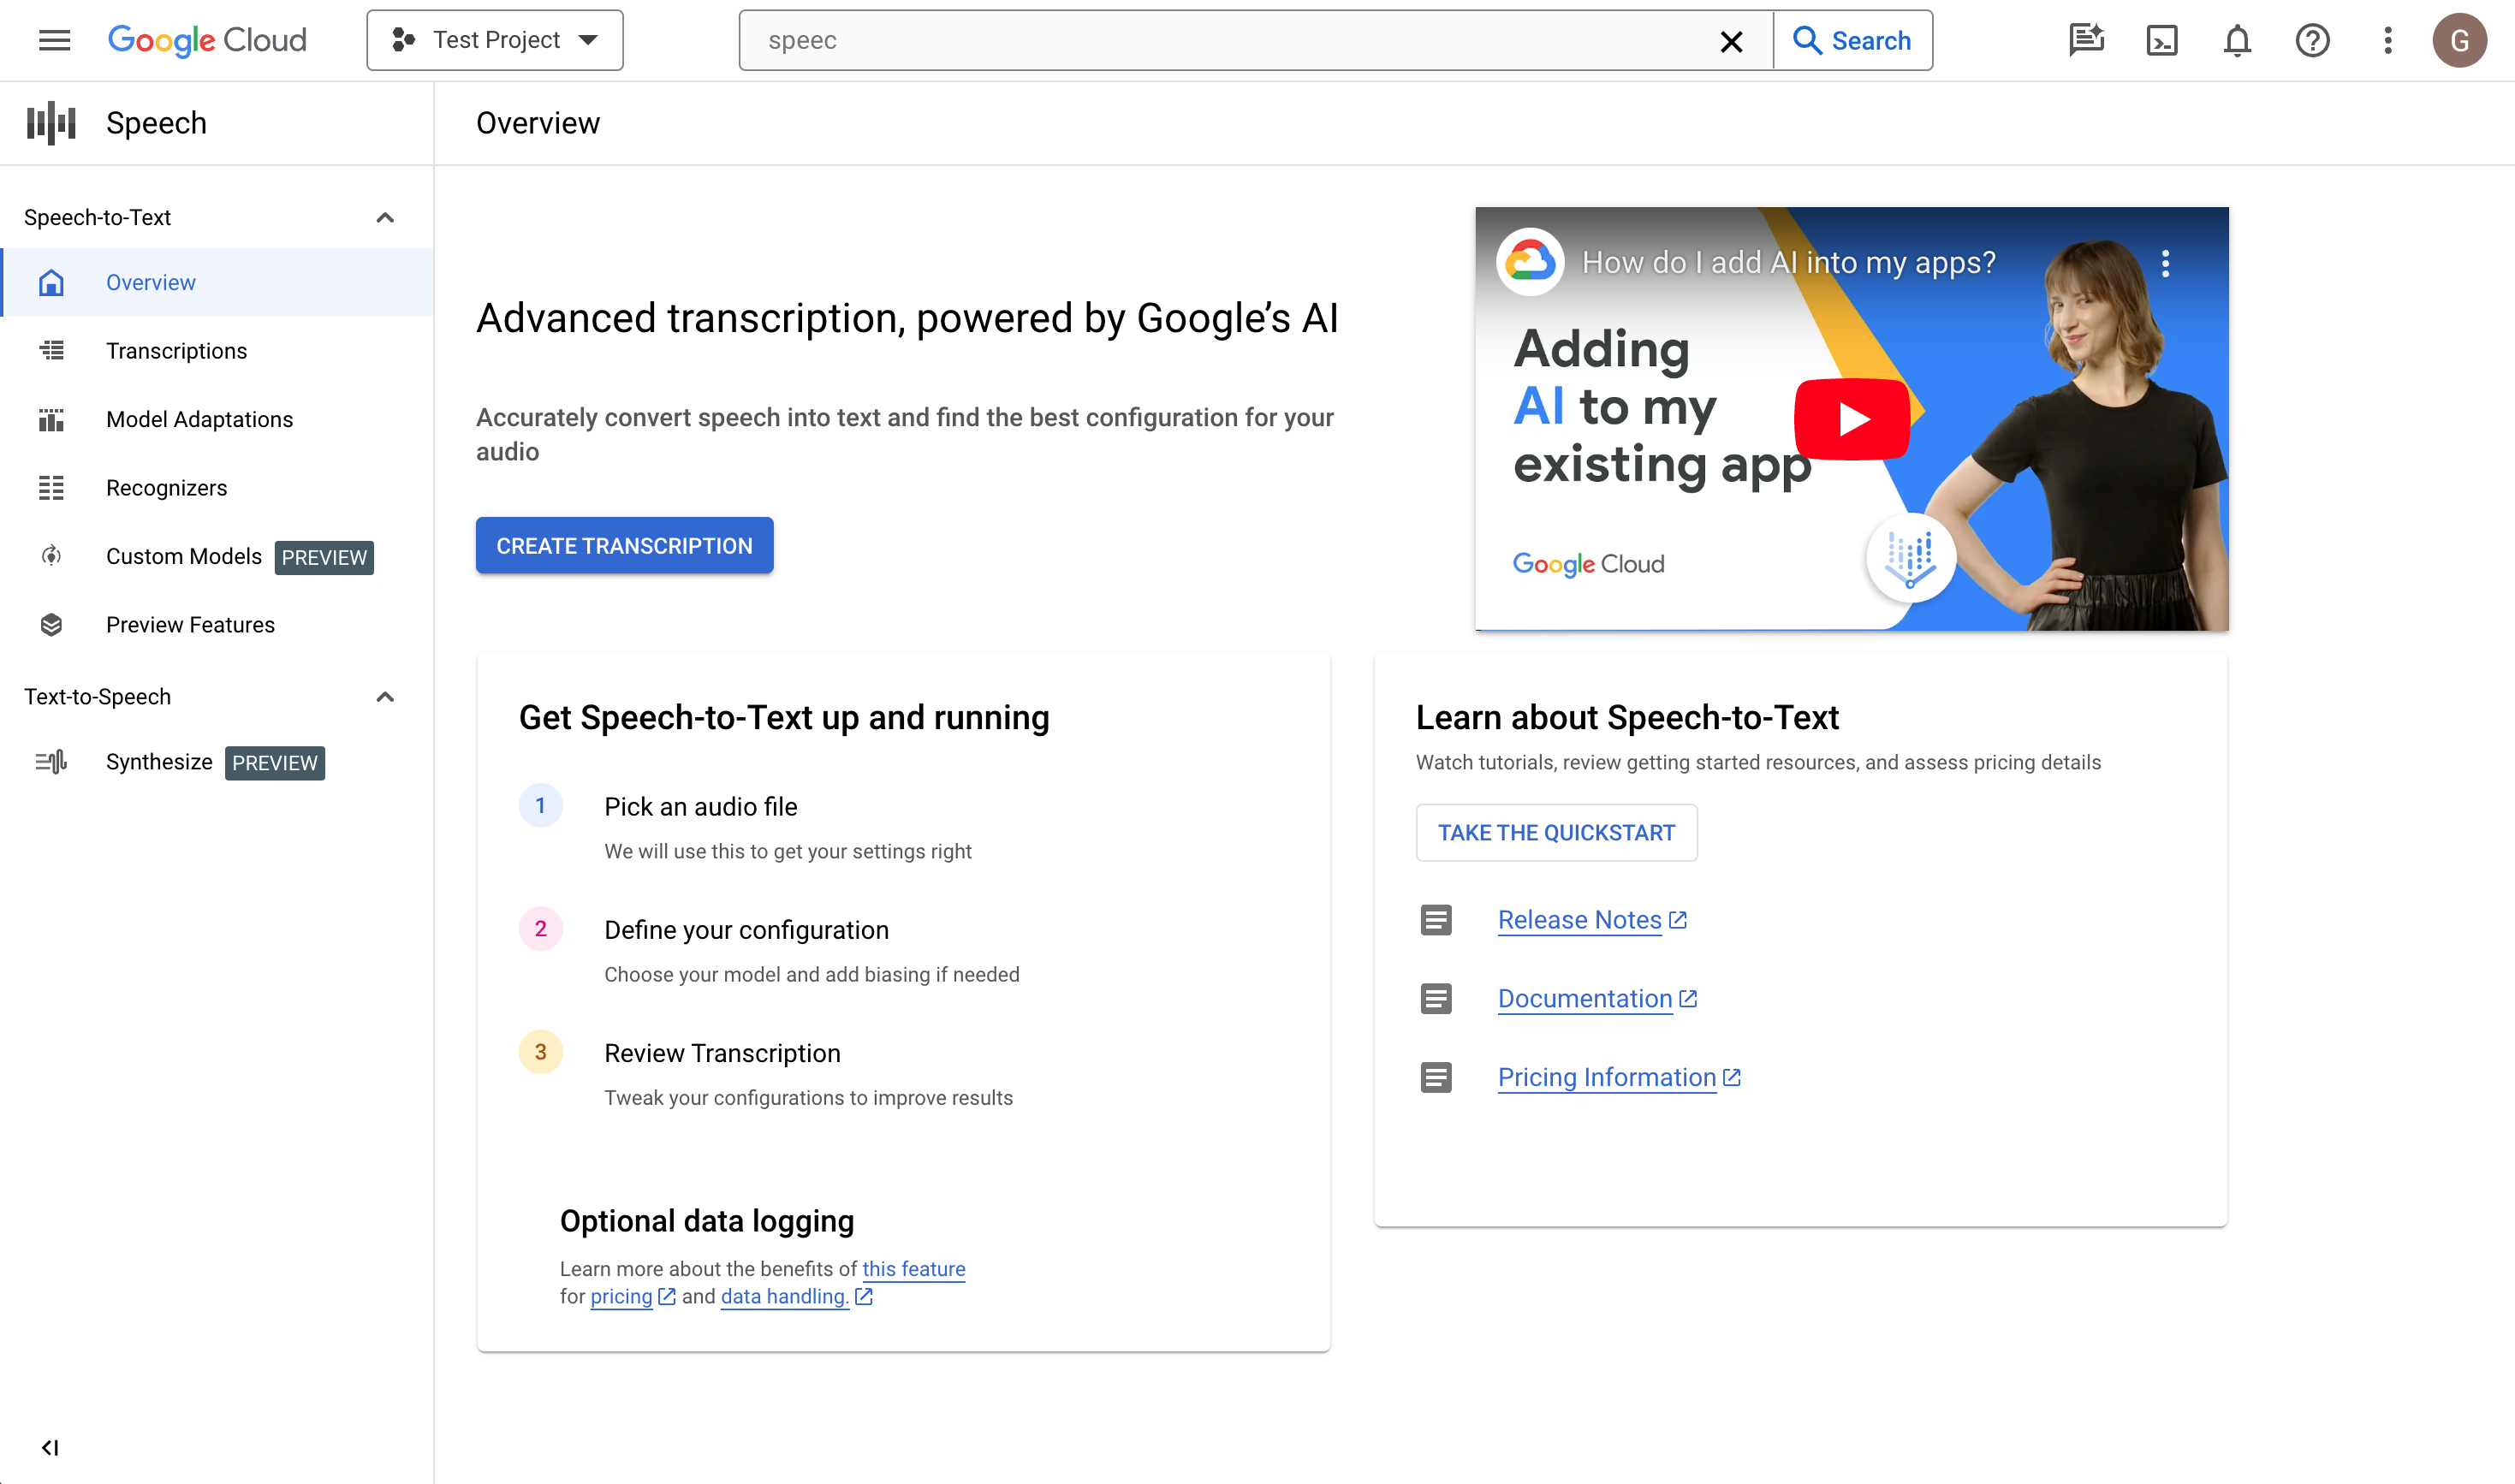
Klik Create transcription.
- Jika ini pertama kalinya Anda menggunakan konsol, Anda akan diminta untuk memilih lokasi penyimpanan konfigurasi dan transkripsi di Cloud Storage.
- Jika ini pertama kalinya Anda menggunakan konsol, Anda akan diminta untuk memilih lokasi penyimpanan konfigurasi dan transkripsi di Cloud Storage.
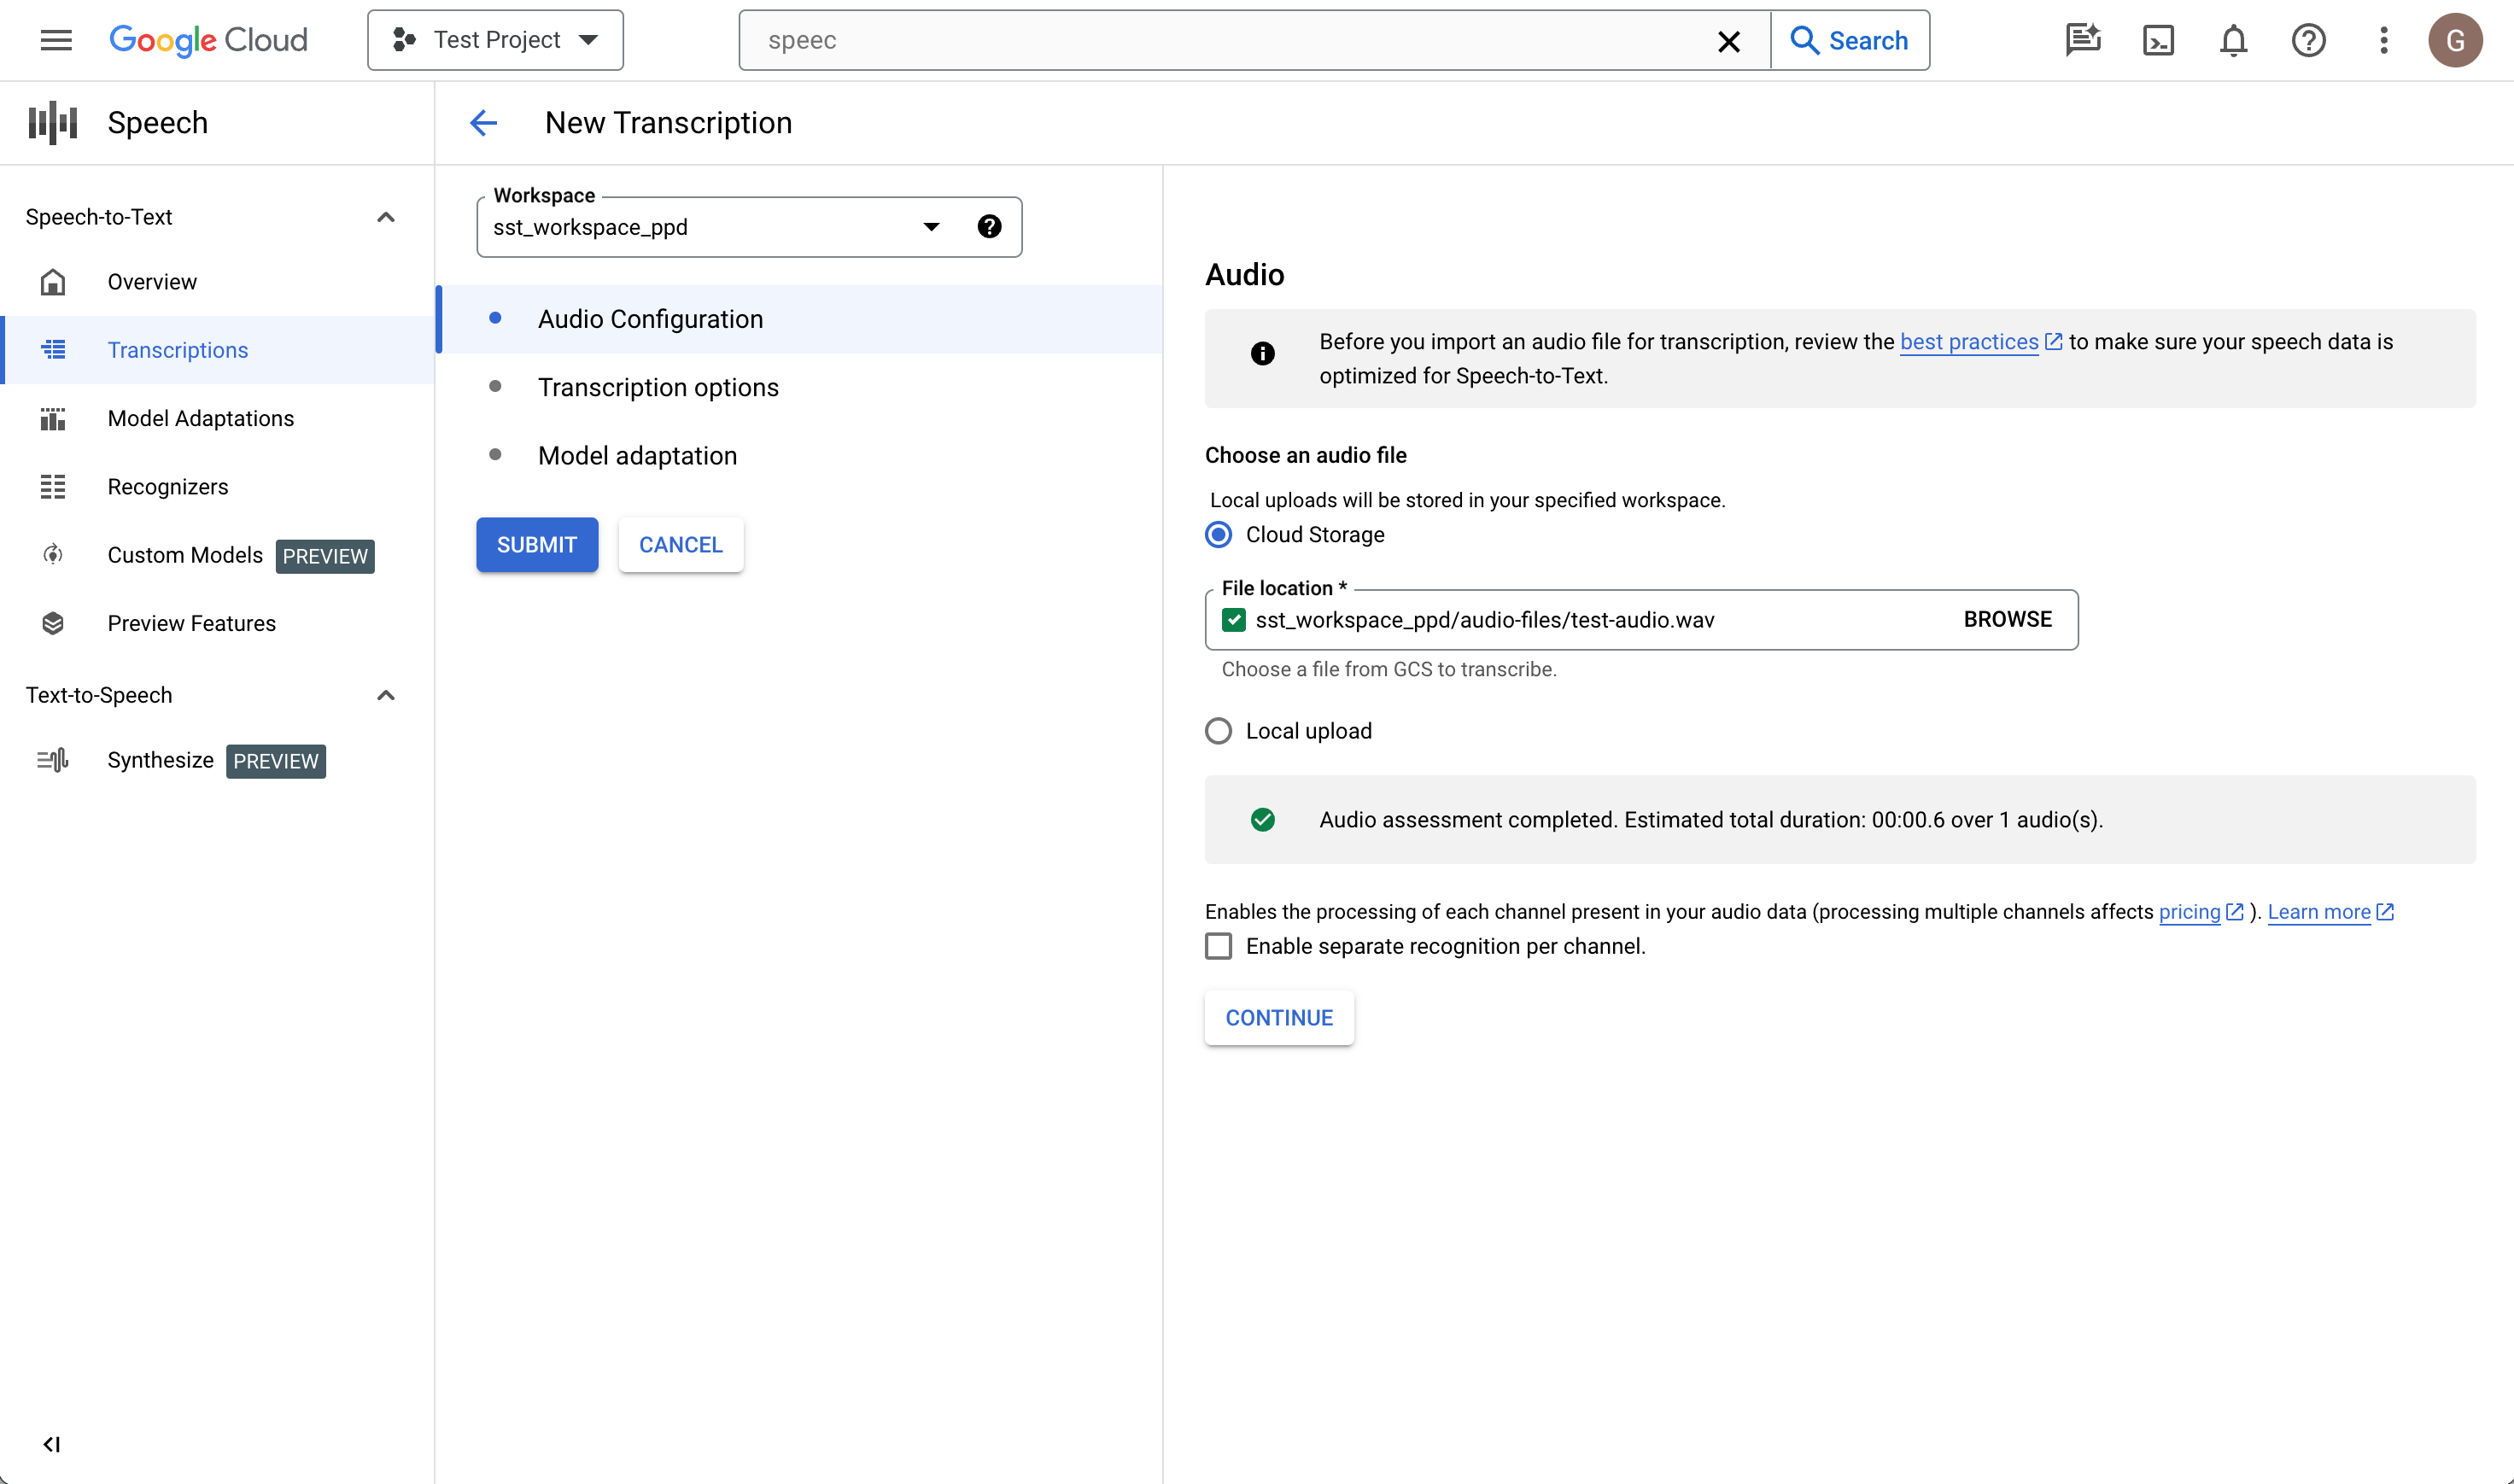
Di halaman Create transcription, Upload file audio sumber. Anda dapat memilih file yang telah disimpan di Cloud Storage atau mengupload file baru ke tujuan Cloud Storage yang ditentukan.
Pilih jenis encoding file audio yang diupload.
Tentukan frekuensi sampel.
Klik Lanjutkan. Anda akan diarahkan ke Transcription options.
Opsi transkripsi
Pilih kode bahasa audio sumber Anda. Ini adalah bahasa yang sedang diucapkan dalam rekaman.
Pilih model transkripsi yang ingin Anda gunakan pada file. Opsi Default telah dipilih sebelumnya dan, umumnya, tidak diperlukan perubahan, tetapi mencocokkan model dengan jenis audio dapat menghasilkan akurasi yang lebih tinggi. Perhatikan bahwa biaya model bervariasi.
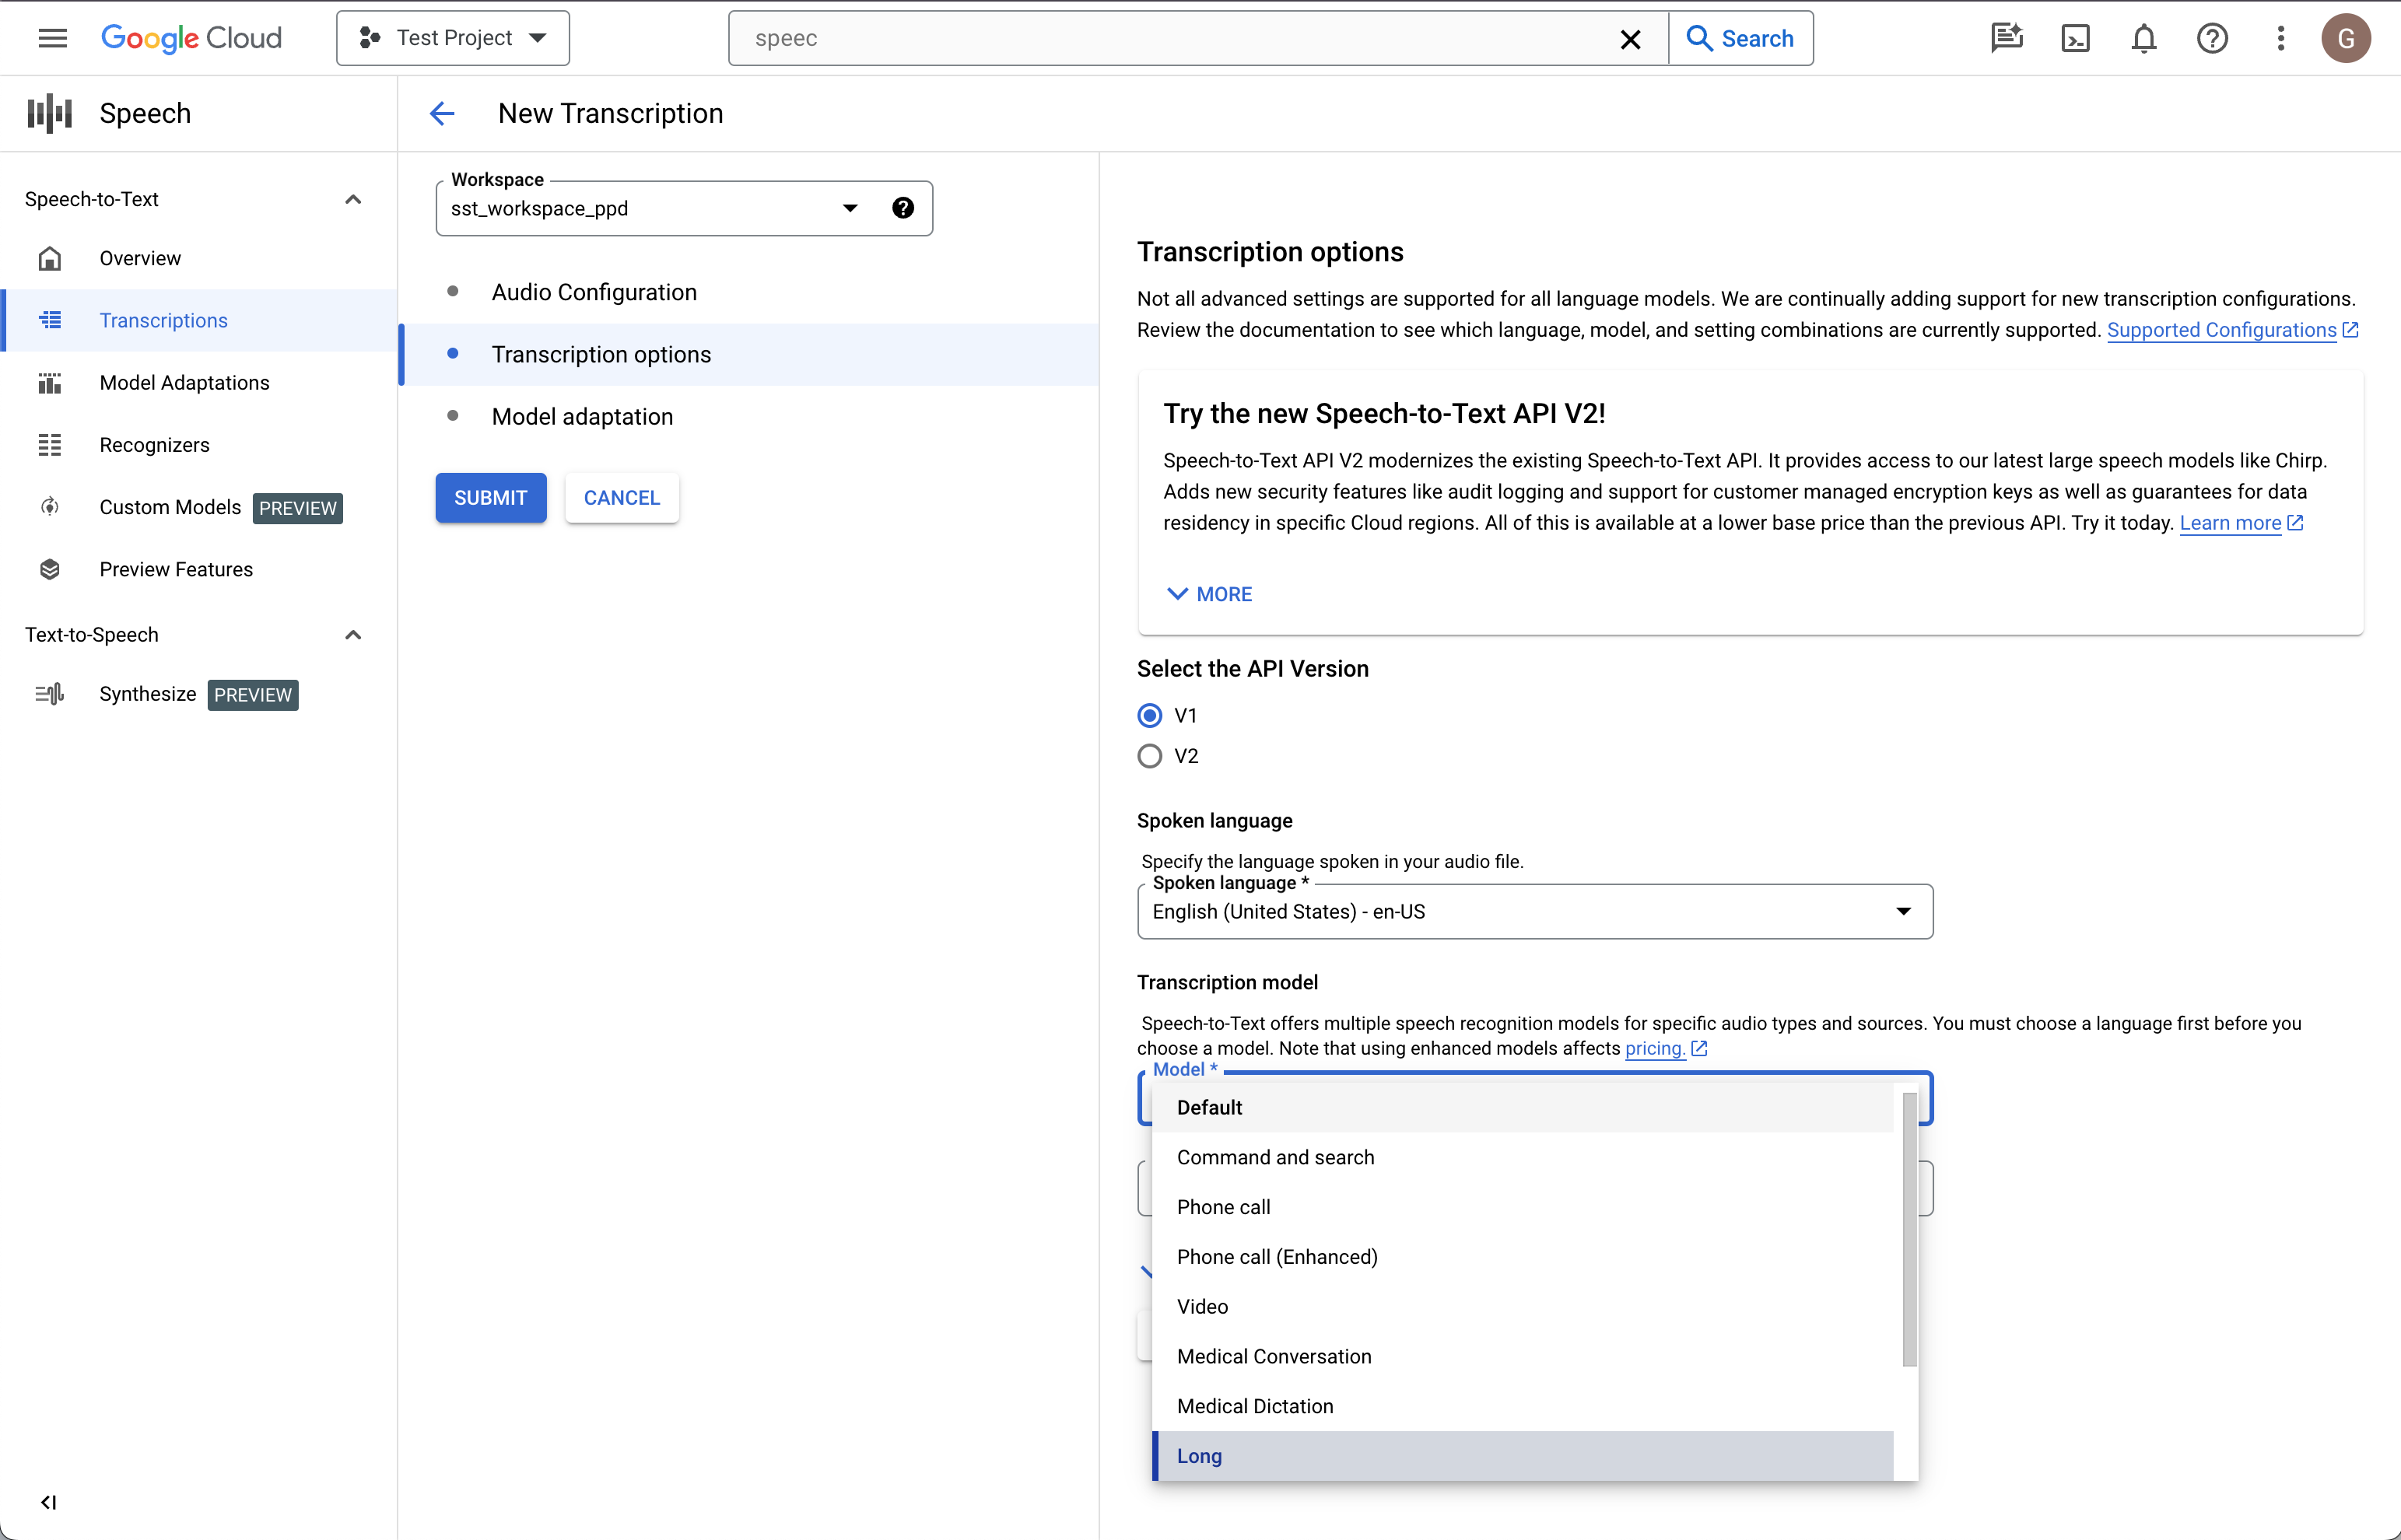
Klik Lanjutkan. Anda akan diarahkan ke Model adaptation.
Adaptasi model (opsional)
Jika audio sumber berisi hal-hal seperti kata-kata yang langka, nama diri, atau istilah kepemilikan eksklusif dan Anda mengalami masalah dengan pengenalan, adaptasi model dapat membantu.
Centang Aktifkan adaptasi model.
Pilih Resource adaptasi sekali pakai.
Tambahkan frasa yang relevan dan beri nilai peningkatan.
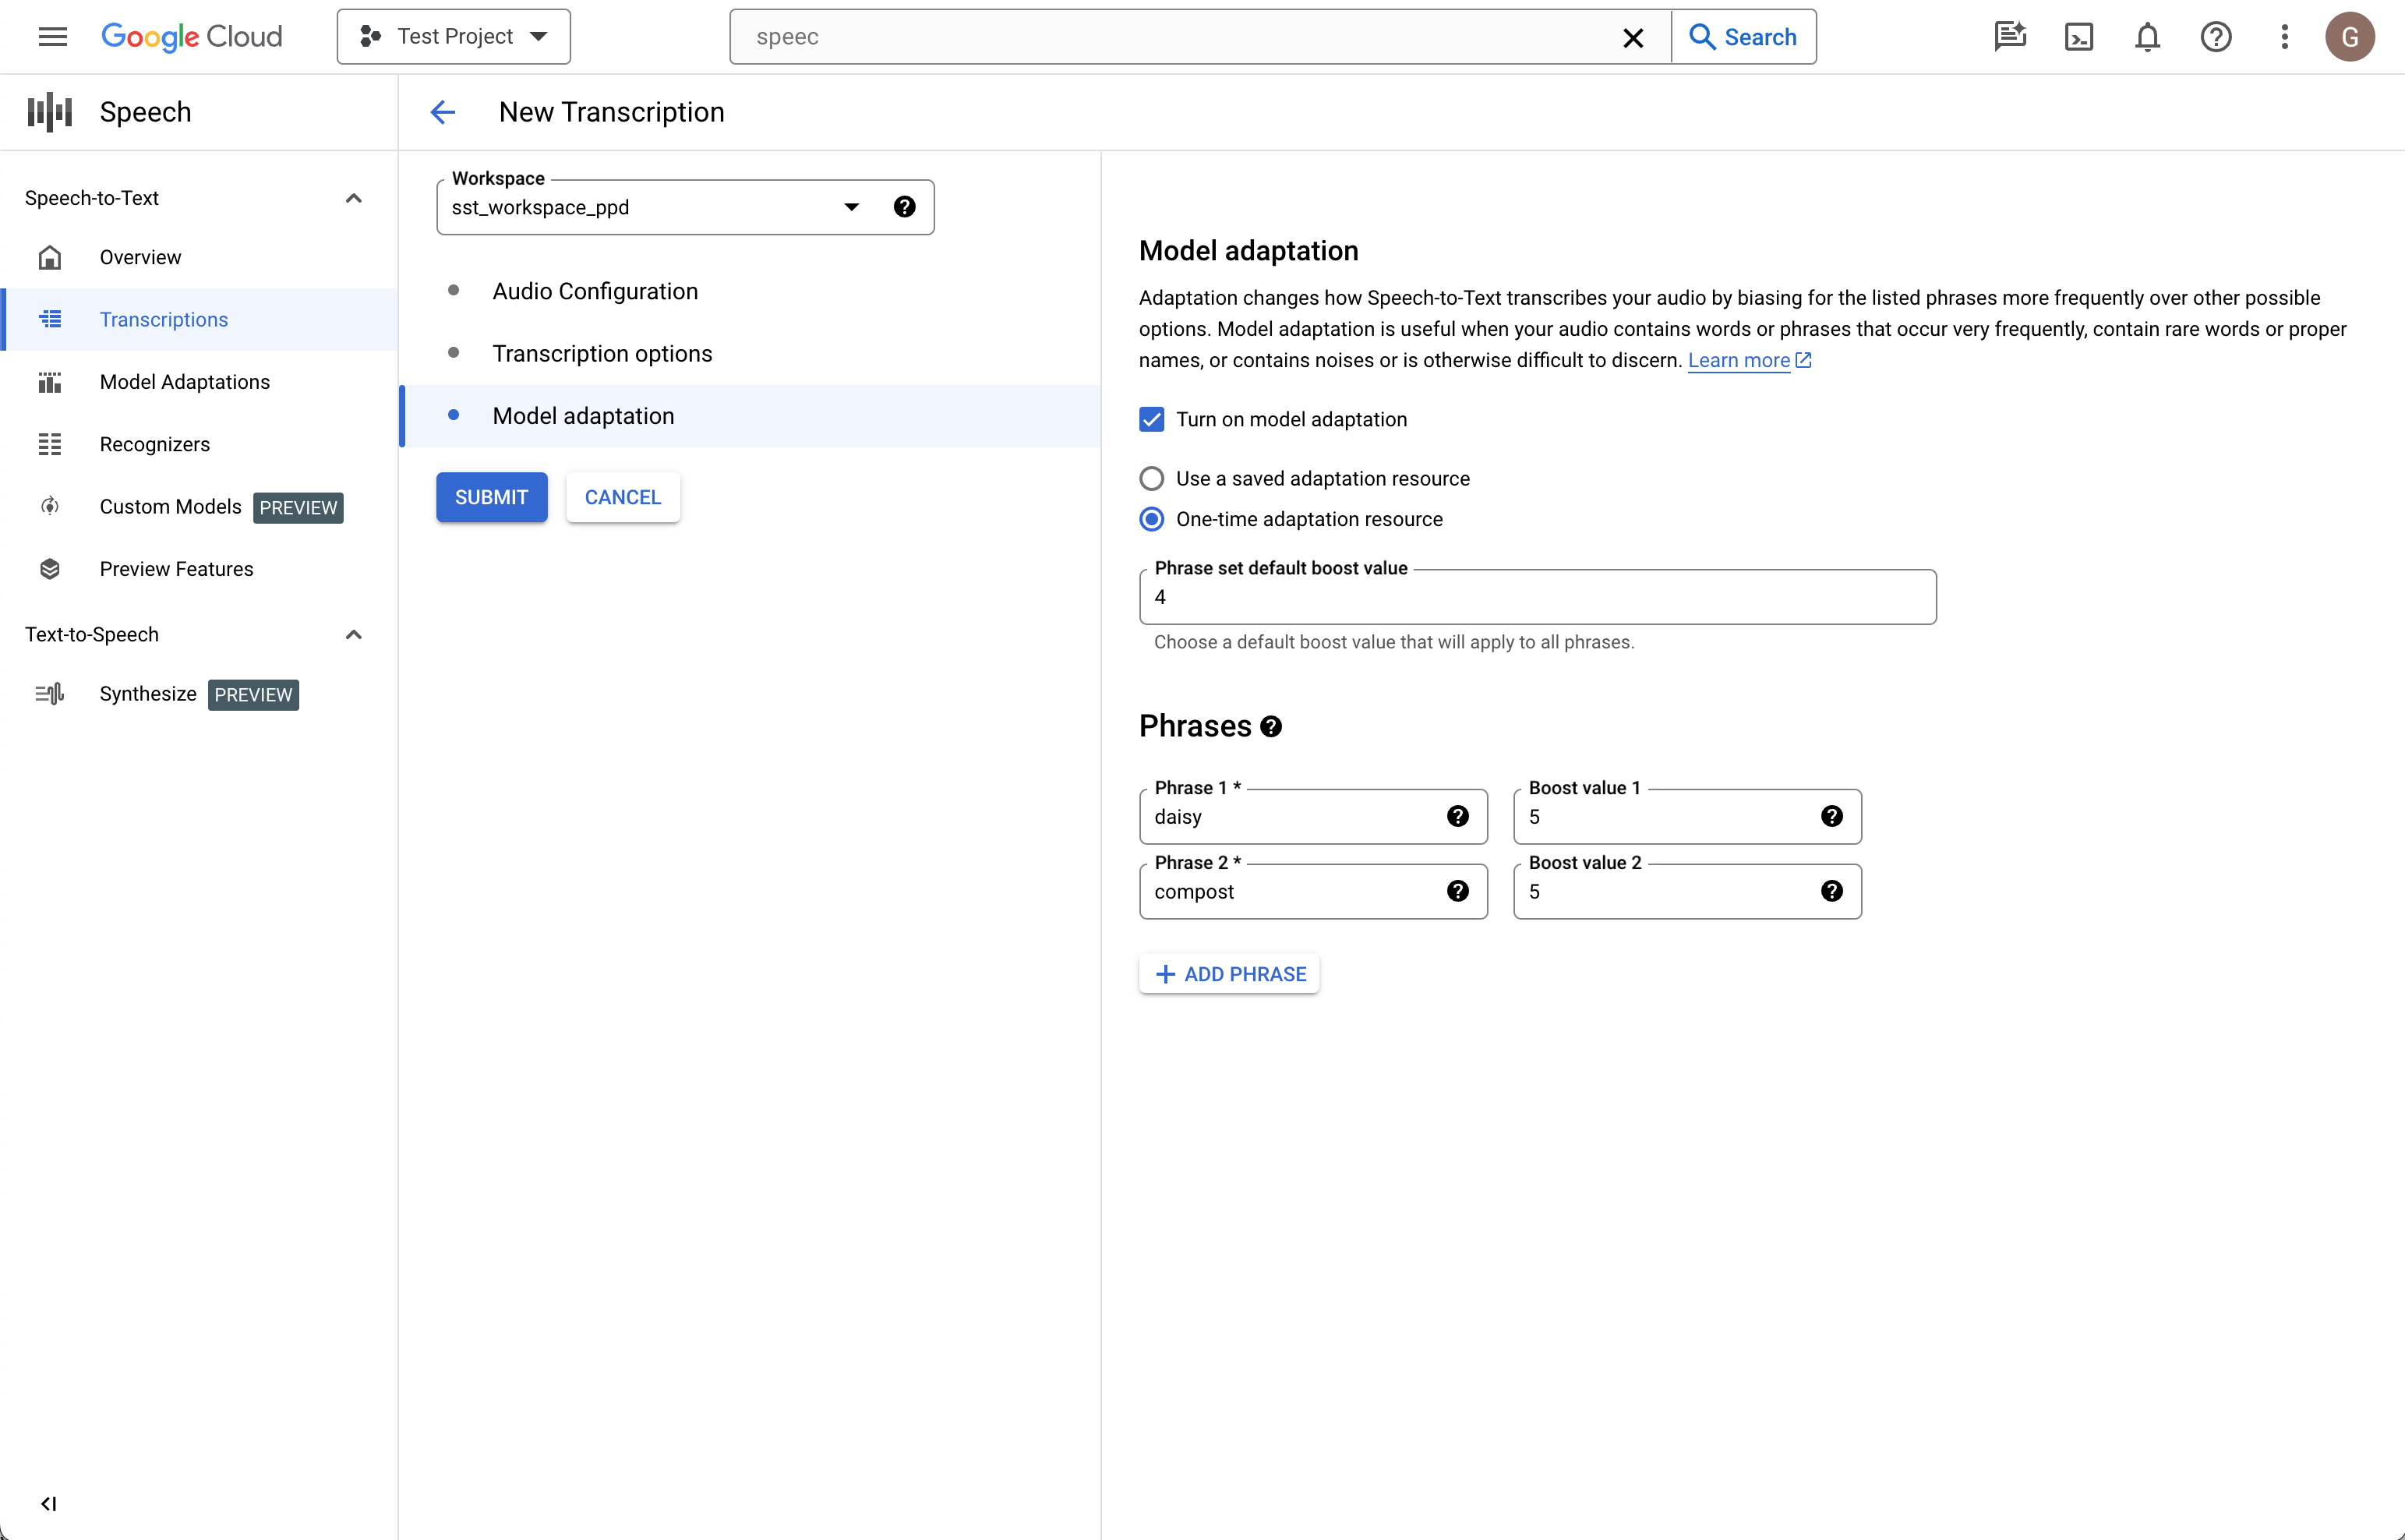
Di kolom sebelah kiri, klik Kirim untuk membuat transkripsi.
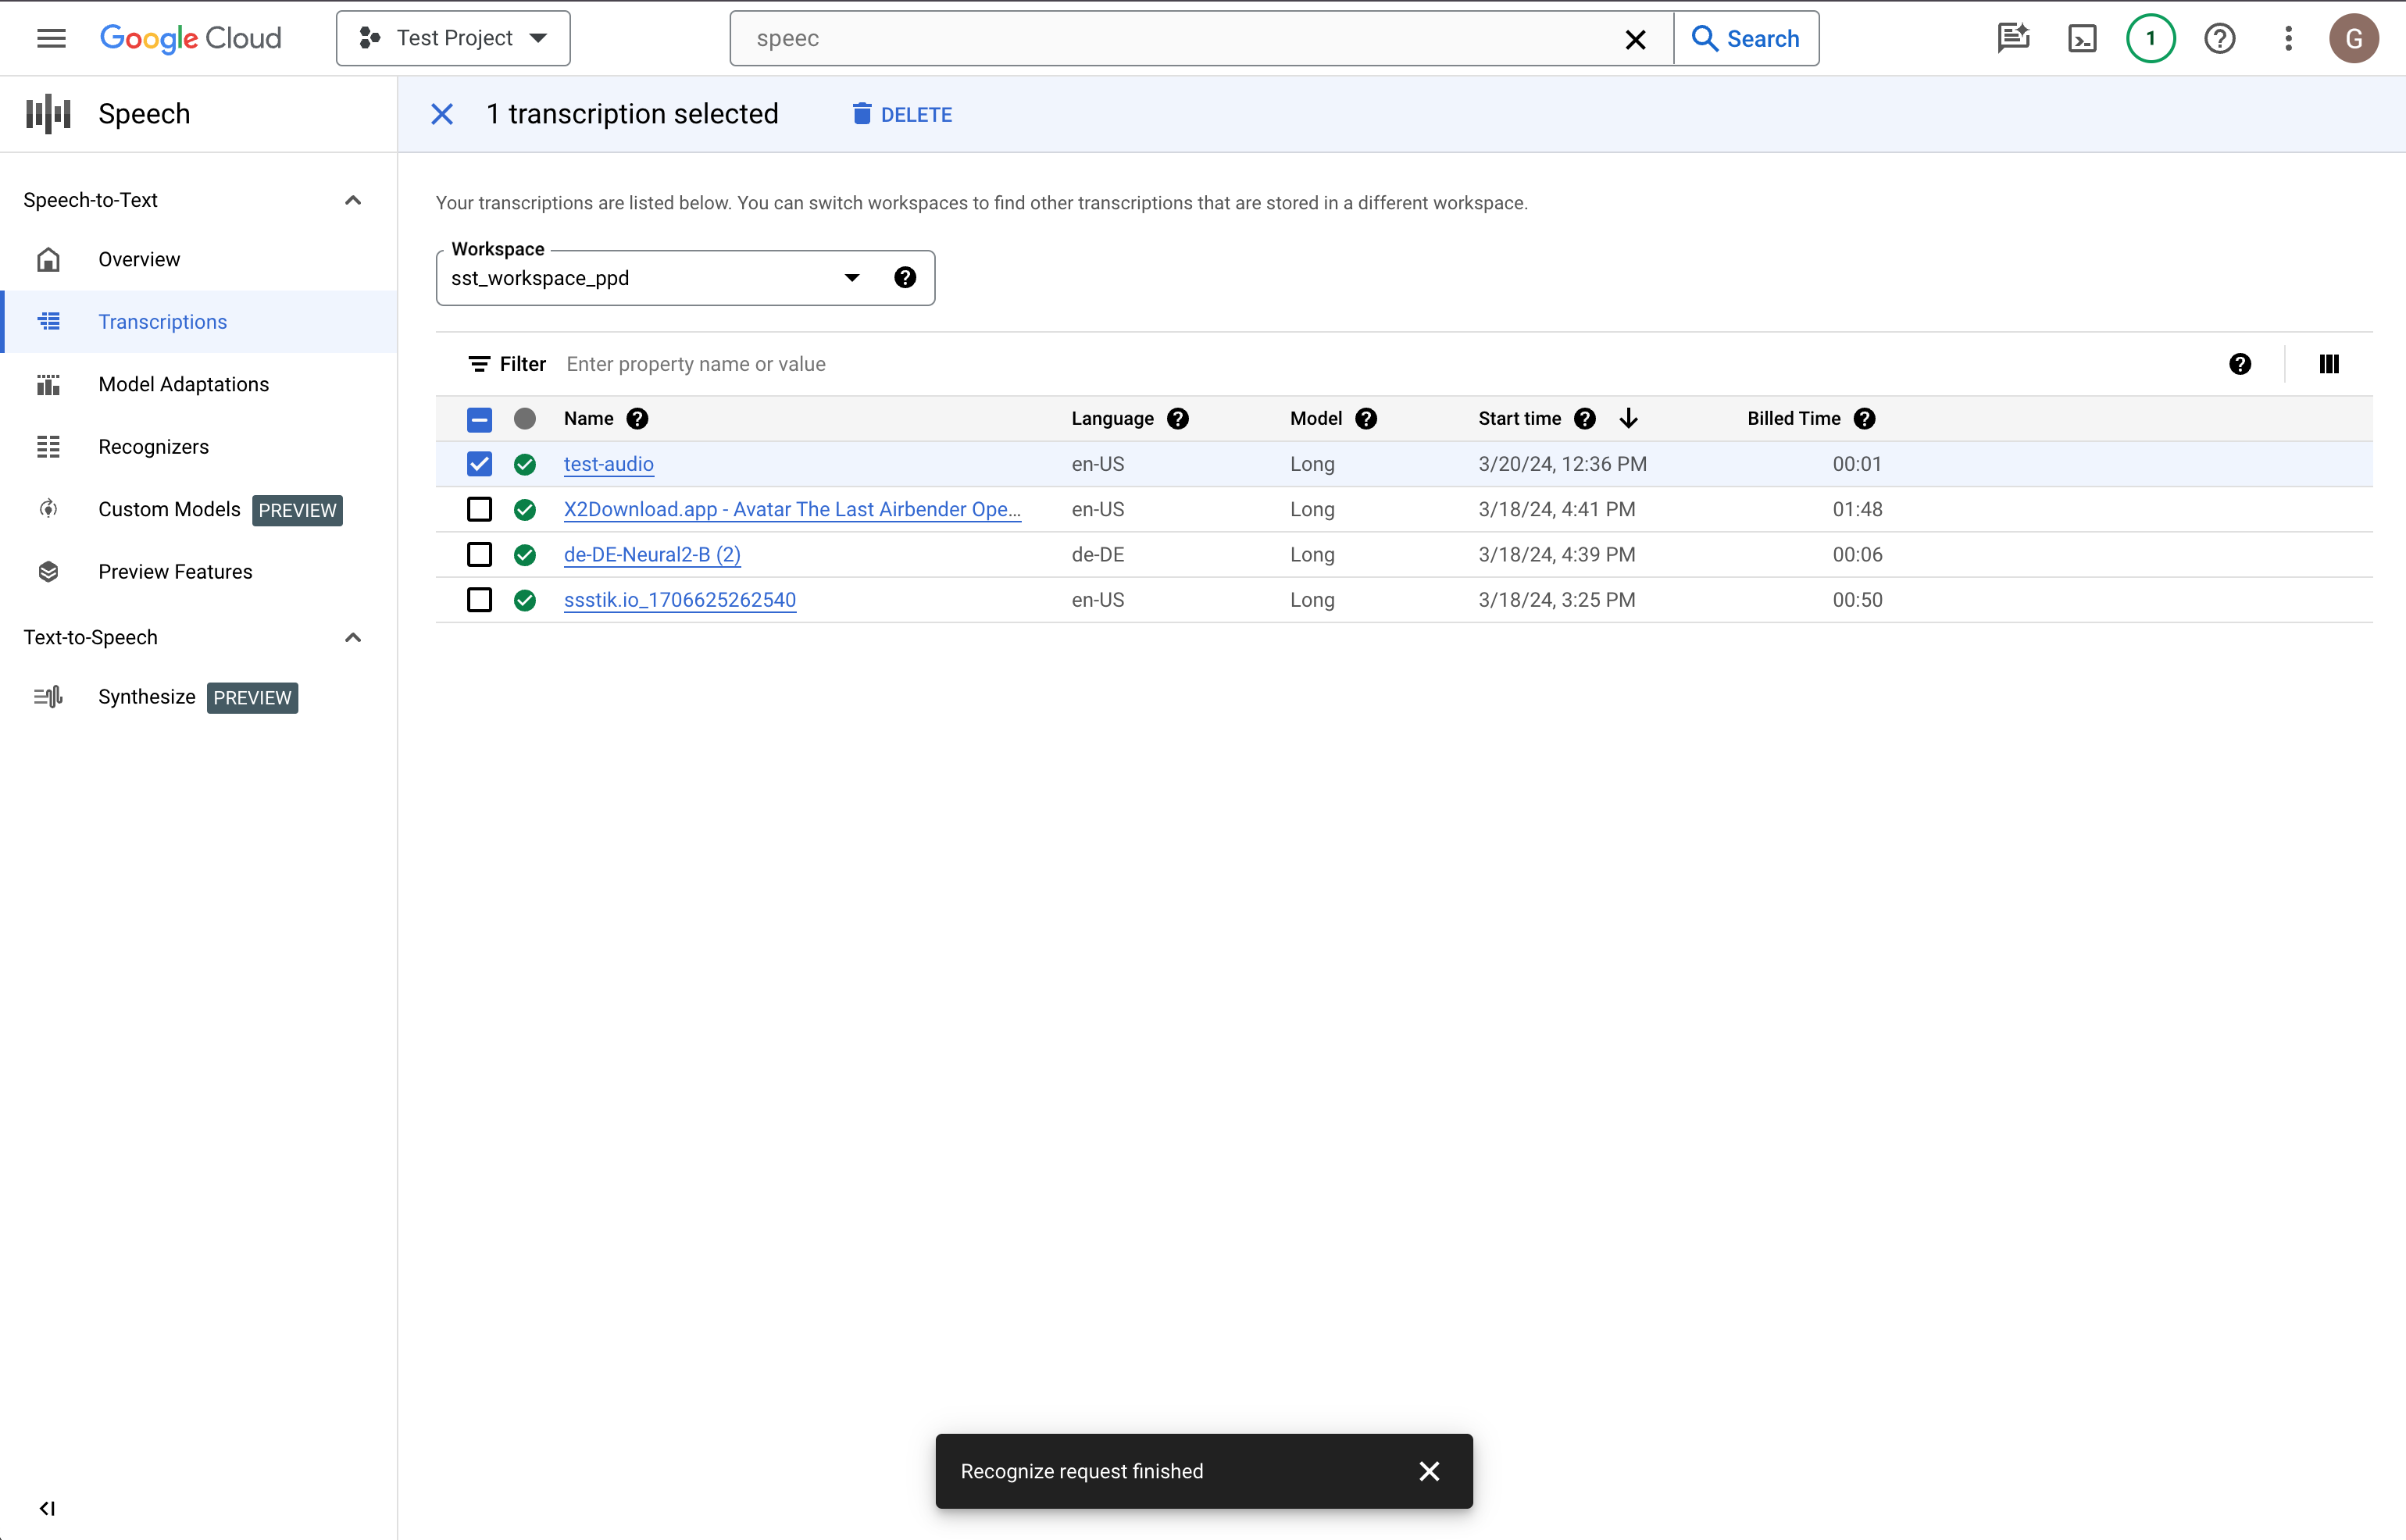
Tinjau transkripsi Anda
Bergantung pada ukuran file audio Anda, pembuatan transkripsi dapat memerlukan waktu beberapa menit hingga jam. Setelah dibuat, transkripsi Anda siap untuk ditinjau. Mengurutkan tabel berdasarkan stempel waktu dapat membantu Anda menemukan transkripsi terbaru dengan mudah.
Klik Nama transkripsi yang ingin ditinjau.
Bandingkan teks Transkripsi dengan file audio
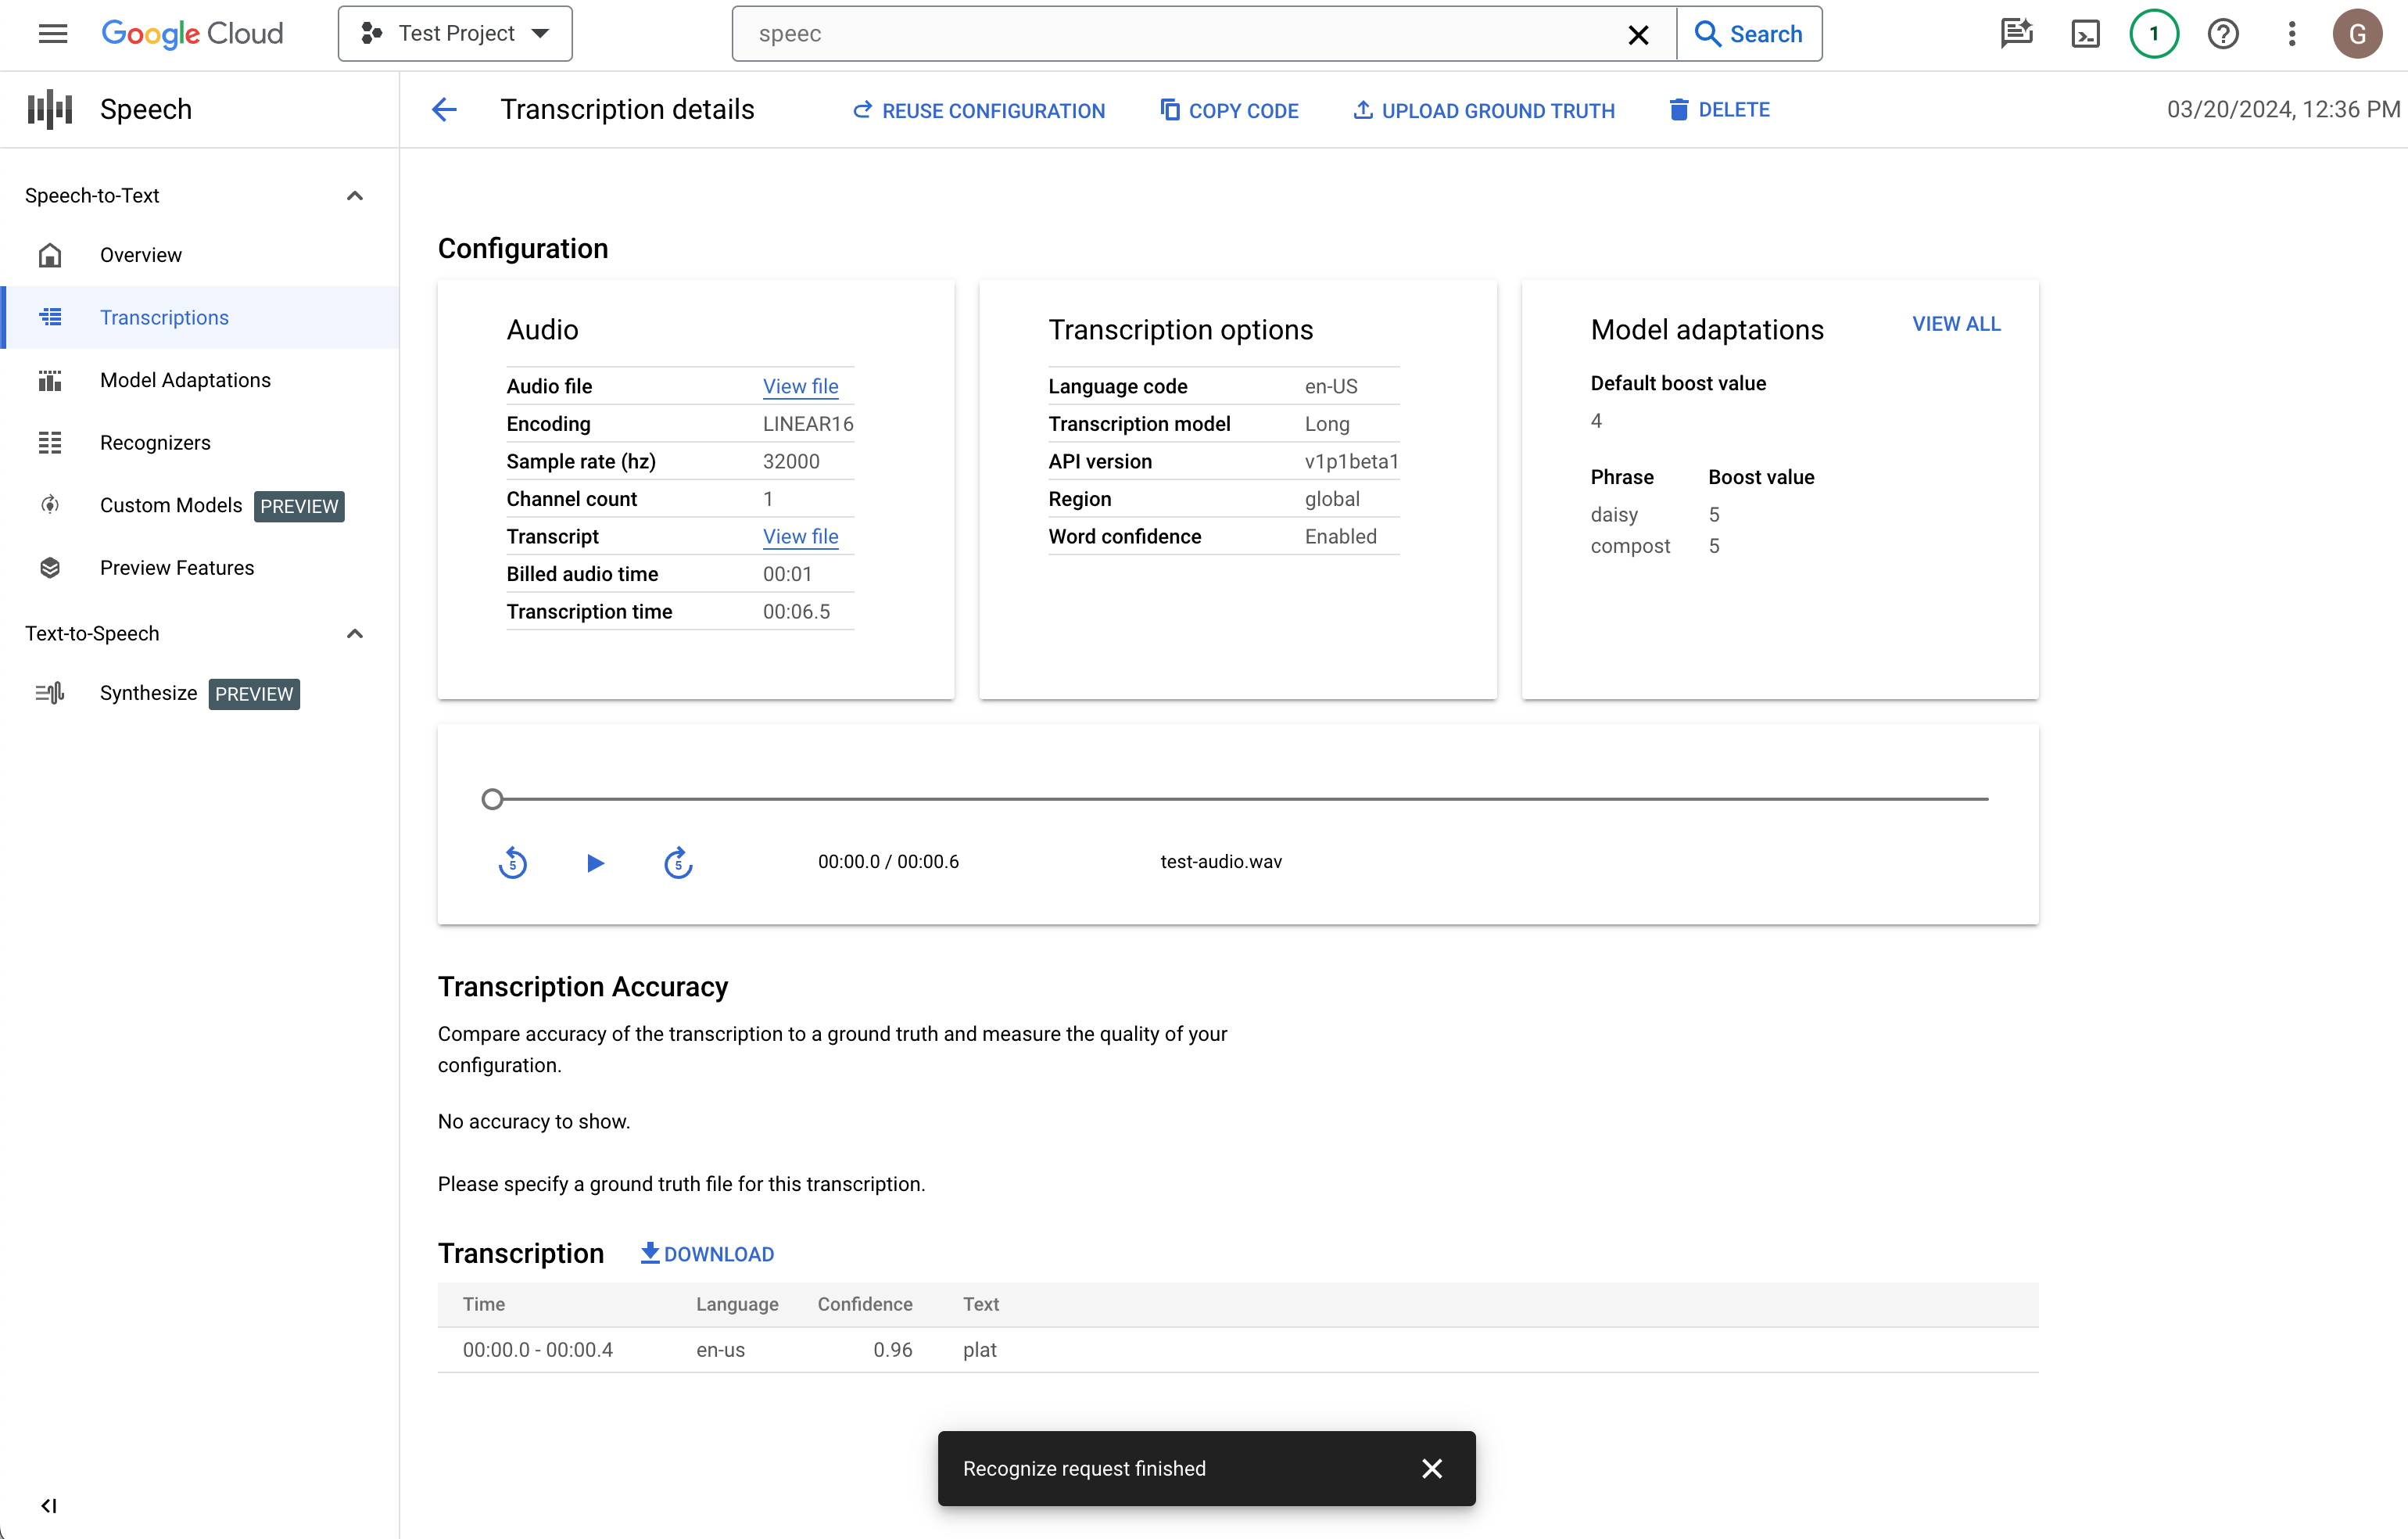
Jika Anda ingin melakukan perubahan, klik Gunakan kembali konfigurasi. Tindakan ini akan membawa Anda ke alur Buat transkripsi dengan opsi yang sama yang telah dipilih sebelumnya, sehingga Anda dapat mengubah beberapa hal, membuat transkripsi baru, dan membandingkan hasilnya.
Langkah berikutnya
- Berlatih mentranskripsikan file audio pendek.
- Pelajari cara membuat batch file audio panjang untuk pengenalan ucapan.
- Pelajari cara mentranskripsi audio streaming dari, misalnya, mikrofon.
- Mulai gunakan Speech-to-Text dalam bahasa pilihan Anda menggunakan library klien Speech-to-Text.
- Pelajari contoh aplikasi.
- Untuk performa terbaik, akurasi, dan tips lainnya, lihat dokumentasi praktik terbaik.